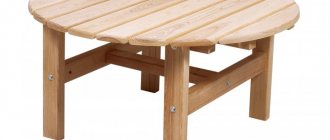
Doing crafts with your child is a great way to spend family leisure time. Handicrafts will help children develop aesthetic taste, neatness, perseverance, and creative thinking. It will be useful for parents of girls of preschool and primary school age to know how to make furniture for dolls on their own. Despite the fact that today you can purchase almost any miniature interior furniture for Barbie’s house, making such things yourself will bring pleasure to both adults and children, and most importantly, will save the budget.
What can you make a doll table from?
First you need to decide on the material.
Suitable for creativity:
- cardboard;
- matchboxes;
- pieces of plywood;
- unnecessary CDs;
- ice cream sticks;
- plastic bottles;
- paper rolls for toilet paper.
On the Internet you can find a lot of different master classes that tell and show how to make a table for dolls with your own hands. Let's look at some of them.
What available tools and materials may be useful?
To create doll furniture and decorate the interior of a toy house, the following will be useful:
- matchboxes - they will become drawers of chests of drawers, desks, dressing tables, cabinets, chests of drawers for linen;
- cigarette packs – suitable for equipping Barbie’s dressing room and storing her boots;
- shoe boxes - these will make beds, tables, cabinets for large dolls;
- boxes of baby cereal, perfume, and other cosmetics;
- colored plastic bottles, yogurt cups;
- soft foam sponges, viscose napkins;
- pieces of plywood, fiberboard, wood cuts, boards;
- scraps of fabric, leather, gauze;
- plastic “eggs” from Kinder surprises;
- remnants of wire, chains, foil;
- sewing, knitting threads, laces;
- metal tin cans;
- paper, cardboard, wallpaper, PVA glue;
- tape, colored self-adhesive film;
- polystyrene foam, plasticine, polymer clay;
- gouache, acrylic, nail polish;
- beads, buttons, LED lights.
With minimal skills in wood carving, sewing by hand or on a machine, embroidery, it is easy to create incredible doll crafts.
How to make a table for dolls
This stylish doll table is easy to make.
You just need a few things and you can put the table together in about half an hour. Here the author used popsicle sticks, they are easy to work with. What's more, they add a beautiful, stylish look to everything you do! If you want, you can use colored sticks to make the doll table more colorful.
All you need is 16 standard 15cm sticks and a hot glue gun.
Carefully arrange 8 popsicle sticks, one underneath the other, so that the shorter edges are in line. Apply hot glue along the line on both sides. Apply glue to two sticks and press. Your tabletop is ready. Let's move on to the legs. Take two sticks and connect them into the letter “X”. Repeat the same with the other two sticks. Apply a bead of hot glue to one end of the sticks and place the other over it. Flip over and glue another stick matching the first one and place the tip of the “X” between them. Repeat to make the second leg. Apply glue to both sides of the tabletop. Place the leg and press firmly. Repeat the same with the other leg. Your doll table is ready!
Photo source: sewcraftyme.com/diy-doll-table-american-girl-doll-table-diy.html
DIY doll table...from a photo frame
Do you need a fun and simple table for dolls that can be complemented with chairs? Here! Transform an inexpensive photo frame into the perfect doll table, complete with a versatile tabletop that you can customize to fit your chairs. You'll need a photo frame with a removable back made of cardboard or chipboard (Tip: Flat frames with a plastic rather than glass panel work best as they are child-safe). PVC pipes with fittings and fabric. All details are on the website.
Photo source: matildajo.com/frametable/
DIY furniture for dolls made of wood
We invite you to make a doll sofa from wood and fabric. To do this we need the following:
- flat wooden planks about 1 cm thick;
- wood cutting tool;
- glue;
- fabric for pasting.
Cute sofa for dolls made of wooden blocks. Upholstery - any to your taste
Cut out five elements of the future sofa: the base (H6 cm * D16.4 cm), the same back and bottom (H6 cm * D14 cm) and two armrests that gradually widen towards the top (H4 cm * D6 cm below * D7 cm above).
Glue them together (except for the bottom).
Cut out fabric elements of similar sizes and glue them onto a wooden piece.
Separately cover the bottom of the sofa with fabric and place it on the base.
How to make a doll sofa out of wood: a step-by-step guide
Advice!
We recommend using dense fabrics that resemble real upholstery of upholstered furniture (velvet, faux leather, cotton, linen, suede, velor, corduroy, and so on).
The upholstery of the sofa is more complex: sewn according to patterns with braid and decorative buttons (possibly with rivets - both can be covered with fabric, if the overall scale allows)
A simple wooden sofa made from scrap wood and scraps of plywood.
How to decide on sizes
The dolls, their houses and furnishings are smaller copies of us and our homes. And the most reliable way to make doll furniture with your own hands and not make a mistake is to measure real objects, reduce them several times, and then work with the obtained values.
Furniture for dolls - copies of our furniture
How much to reduce the actual dimensions depends on how small or large the doll is, because they range from 7 cm to 60 cm or even higher. Accordingly, they need furniture of different sizes. To determine the number by which the actual dimensions should be divided, divide the average human height in centimeters (170 cm) by the height of the doll. Let's get some number. This is how you will need to divide the dimensions of real furniture.
For example, the height of the doll is 15 cm. We calculate: 170 cm / 15 cm = 11.3. It is by this number that we divide all the parameters of “human” furniture. It is also worth saying that 14-15 cm is the most popular size among the doll population. Therefore, most of the finished furniture is made in a ratio of 1:12. We can also use the existing dimensions, at least so that we can navigate the scale of the required parts and the amount of materials.
Approximate dimensions of furniture for doll children
So, the most common doll sizes are:
- male doll 150 mm;
- female doll - 140 mm;
- child doll - 75-100 mm;
- toy baby - 65-75 mm.
If you need furniture for dolls of similar sizes, its parameters will be as follows:
- Bed: double – 160*130 mm;
- single - 160*75 mm;
The size of the setting depends on the height of the inhabitants
If the toys you have are slightly larger/smaller, you don’t have to adjust the sizes. If the difference is large, you will have to increase or decrease (or you can calculate it yourself).
Materials and tools
It is a mistake to say that making furniture for a Barbie doll with your own hands is time-consuming, difficult and troublesome. Once you try it at least once, it will be very difficult to give up this activity. Moreover, watching how happy my daughter is with the new product. There is no need to buy anything specific. In every home there is something unnecessary, but suitable for doll furniture.
For example: • plywood and its trimmings; • matchboxes; • boxes and jars for cosmetics; • shoe packaging boxes; • sponges; • fabric scraps; • plastic bottles; • threads, beads; • ice cream sticks; • toothpicks and clothespins; • foil, cables, wire.
It is these materials that can serve as the basis for homemade furniture for dolls. In addition to them, to make it you also need to prepare: • stationery scissors; • compass; • felt-tip pens and markers; • rulers; • glue; • watercolor paints; • stapler.
Perhaps you won’t need everything at once, but you may also need other tools - this depends on the degree of complexity of making furniture for dolls and the imagination of the craftsmen - mother and daughter.
Doll coffee table
A beginner can do it. You will need:
- A square or elongated box for cream and soap.
- Thick tape, scissors.
- Colored paper like foil.
- Glue.
Take a cardboard box. Cut out the front and back parts from it. Then cover it with large tape from the inside, then from the outside. It is important that it lies without folds - the attractiveness of the product will depend on this. Then start decorating.
Carefully cut the paper to the width of the box. Then stick it on a layer of tape. The most suitable paper is with a self-adhesive layer, onto which you need to carefully apply glue and level the layer before it dries. Remove any remaining glue and dry the paper.
This piece of furniture can be used as a coffee table for Barbie or a hanging cabinet that is glued to the wall of the house or to place several items in one row. And if you combine it with glamorous bedside tables, you will get a beautiful wardrobe for Barbie. You need to add a few more elements to it. Then the furniture for dolls will be stylish and glamorous. It can be used to furnish a room in the same style.
Step-by-step instruction
We’ll look at ideas and options on how to make furniture for dolls with your own hands from scrap materials a little later, now we’ll look at the stages of production: 1. Before starting work, you need to come up with a layout or find a suitable one on the Internet. 2. Transferred to paper or printed. 3. Trace the pattern with a marker and cut out the finished shape with scissors. 4. Then it’s as easy as shelling pears, you need to fasten all the parts together. 5. To make the furniture more beautiful and brighter, you can decorate it with scraps of fabric or simply paint it with paints.
Cardboard makes good houses. It is considered the most affordable and convenient material.
You can, if you know how to make furniture for dolls from matchboxes yourself. They make roomy and very comfortable chests of drawers, table drawers and other doll interior items.
Wire. The material contains a video on how to make furniture for dolls from scrap materials, including wire. There are many options and from them you can choose the most affordable and easiest.
Now let’s look at successful options for creating furniture for dolls with your own hands using examples.
Material options
Do-it-yourself toy doll furniture is made from a wide variety of materials. These are simple items that are found in any home. For example, powder packaging, yogurt jars, cocktail straws, candy wrappers, matchboxes, etc.
You can also make beautiful doll furniture from plywood with your own hands. This is a thin plate of wood. Its advantages are strength and naturalness. The disadvantages of the material include the difficult method of making a toy set. To create armchairs, a sofa, a cabinet, chairs or a table, you will need certain skills, as well as various tools and consumables:
- jigsaw;
- varnish paint;
- sandpaper;
- glue;
- screws;
- nails;
- self-tapping screws
The advantages of children's modular furniture and the criteria for choosing it correctly
Cardboard furniture, which is easy to make at home, is also popular. The advantages of this thick paper are accessibility, ease of use, and the ability to create stylish interior items to suit every taste. There are many ready-made templates for making furniture for dolls from cardboard with your own hands. For assembly you will need a minimum amount of available materials - decorative elements, paper, glue, paints, compasses, markers, scissors, pencils. However, cardboard also has disadvantages - low strength, too ordinary appearance of the finished product.
Other popular materials from which you can make furniture for dolls with your own hands are collected in the table.
| Material | Advantages | Flaws | Features of work | Difficulty level | General algorithm for making furniture |
| Matchbox | Possibility of constructing any piece of furniture. Easy and simple drawer formation | The box may become wet or break. Poorly withstands weight, in furniture structures, used mainly for the manufacture of containers | In addition to boxes, boxes are used to make various interior parts, such as a book, a suitcase, a box | Simple | Boxes are used to create cabinets and chests of drawers. They are glued together and decorated |
| Wire | It turns out beautiful antique wicker furniture | Soft material. The job requires certain skills and abilities | The wire is easy to work with. Using pliers you can use it to make wardrobe hangers | Average | Swings, beds, and decorative stands are woven from wire, following certain patterns. |
| Newspaper tubes | Miniature imitation furniture made from wicker | Pre-production of tubes. Material may become wet when in contact with water | Before use, the material must be prepared and rolled into tubes. | Difficult | Tubes are twisted from newspaper, put on a knitting needle and secured with glue. The resulting parts are used for weaving armchairs, chairs or sofas. |
| Plastic | Durability, cost-effectiveness, ability to create complex parts | The material may be of poor quality or toxic. Over time, plastic products develop scratches. | To work with plastic you will need various available tools (glue, cutting knife, pattern) | Difficult | Various parts are cut out of plastic, from which any interior items are subsequently constructed. |
| Paper | Lightness, practicality, safety. The material is easy to work with | Paper furniture is not sustainable. Other accessories cannot be placed on such interior items; the products will wear out quickly | The paper is well painted with gouache. But painting must be done when the glued parts are completely dry. | Simple | Various items of the headset are covered with paper |
| Various packaging | Excellent opportunity to use already used material | Boxes quickly deform and have a short service life | Before using yogurt and washing powder packaging, you must thoroughly clean them of any remaining substances. This will help preserve the material and eliminate odors. | Simple | The boxes are used untouched or holes are cut into them to make a chair, table, bed or refrigerator. Often the packaging is the frame of the furniture. |
| Traffic jams | The part does not need to be cut or made yourself | Only certain types of furniture can be made from corks | Corks must be decorated using paints or fabrics | Simple | The corks are decorated (pasted with paper, beads, painted), and then they are formed into chairs or tables |
How to make furniture for a dollhouse with your own hands, recommendations
Making doll furniture with your own hands from boxes requires minimal effort . Packaging is most often used to make tables or cabinets. Chests of drawers, benches, and various drawers are made from newspaper tubes. Matchboxes will become pull-out shelves for bedside tables, dressing tables, desks, and cabinets.
An excellent option for a dressing table and various decorative elements is a do-it-yourself miniature doll made from thick paper. Plastic is used to create frames, the main parts of any pieces of furniture, including cabinets, beds, and sofas. Corks make beautiful chairs, armchairs, and coffee tables.
Children's furniture in Provence style, interesting interior ideas
From paper
From newspaper tubes
From boxes
Made of plastic
Out of traffic jams
From wire
From matchboxes
Making a round table
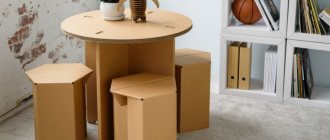
It’s not at all difficult to make such an interior item for a doll’s house as a round table. To make it, cut out a circle of suitable size from cardboard. A cardboard cylinder is ideal as a leg. You just need to glue the two elements together and decorate them as you wish - paste them with paper or cover them with paint. For such a craft, you can also use a round lid from a food can or other packaging as a tabletop. How to make a table for a doll from waste material? The leg for a round table can be a roll of toilet paper, paper towels or a cardboard roll of foil or cling film.
Decorating doll furniture
If you already know how to make a table and chair for dolls, then you should think about decorating it. It is better to make kitchen furniture monochromatic, but with the addition of pictures of food or drinks. You can use simple stickers that are attached to the tabletop and varnished on top. This way the child will always have goodies on the table for the doll.
It is better to decorate a computer desk with a keyboard. You can draw it yourself using a black pen. In addition, you can cut a computer mouse out of wood; your child will be delighted with this little device.
If you decide to make a desk for dolls, then make it as similar to the real one as possible. Use small leaves for decoration, make a pencil with handles, and place a small trash can at the bottom. This design is almost impossible to find in standard children's stores.
Tables and chairs for Monster High dolls should be made in the gloomy style of these toys. Add sparkles and bows to dark shades, then the product will sparkle with other colors. In general, the main thing is to know how to make a desktop for toys, and its design is left to the discretion of the creator. And you shouldn’t limit yourself in anything; you can even consult with your child and understand what he wants to see in his toy furniture.
Doll bookcase or shelf made of rulers
You can make furniture for dolls with your own hands from school wooden rulers. They are good because they are already processed and have the same width and thickness. In the stationery store you can find the right size - larger/smaller, wider/narrower - as desired. For example, to make a doll bookcase you need 6 rulers 15 cm long.
Making a toy bookshelf from wooden rulers is easy.
You will also need a jigsaw for the job. If you have an electric one, great; if not, a manual one will do, since there’s not too much work. You also need fine-grain sandpaper, glue (PVA or wood glue) and paints (acrylic or gouache).
We cut segments from the rulers: 4 pieces of 6 cm, one - 8 cm. Sand the edges until smooth, and also remove the markings and barcodes. Between the two rulers we place the shelves (which are 6 cm each), on top we leave approximately the same distance - under the lid (a segment of 8 cm). We coat the joints with PVA or carpentry glue, connect them and tighten them with masking tape, and leave them for a day. When the glue dries, glue on the very last part - the lid on top. Actually, the shelf itself is ready, all that remains is to paint it.
You can use rulers to make other pieces of furniture for dolls.
To obtain an even and bright color, it is better to cover the structure with white, and after drying, paint it with the desired shade. You can also decorate doll furniture made by yourself using the decoupage technique.
Step-by-step master classes
Experienced craftswomen offer freely available ideas, tips and advice on how to make furniture for dolls with your own hands. And creative parents share diagrams, drawings and templates for miniature sets. To make your own chest of drawers, armchairs, wardrobe, table or chairs, you will need a little free time and a little inspiration.
Table and chairs
A table and other furniture for dolls can be made from a rectangular or square box left over from soap or cream. You will also need glue, colored paper, adhesive tape, and scissors.
We make furniture as follows:
- Cut out the front and back strips of the box.
- Cover the package with tape outside and inside.
- Cut colored paper to the width of the box.
- Stick it on the layer where the tape was.
You can make stylish stools for Barbie's house using a tin can from a sweet drink. Step-by-step algorithm on how to make furniture for dolls:
- Cut the container into small thin strips. Direct one part of the strips (1/4) upwards, and the remaining pieces downwards.
- Separate the bottom strips so that the chair has legs.
- To make a seat, cut out a circle from foam rubber or a kitchen sponge corresponding to the diameter of the jar.
- Prepare a piece of fabric and apply glue to the reverse side.
- Cover the seat with material.
Finally, you will need to remove any remaining glue. Then repeat all the steps again so that the doll has two chairs in the set.
Cutting the can
Separating the strips
We prepare a seat from foam rubber and fabric. We get an ottoman
Bed
To make bedroom furniture for dolls with your own hands from cardboard, in addition to thick paper, you will need tape, a ruler, scissors, a pencil, and wire. Procedure:
- Make drawings of the future crib.
- Trace the main blanks and leave markings on paper for convenience.
- Cut out 2 backrests with rounded edges, sides of the bed, and parts for fastening. One of the back parts should be longer than the other.
- Mark the bed in the form of a rectangle on thick cardboard. Glue the wire along the frame of the crib, aligning the ends.
- Make holes in the back and thread wire through them.
- Apply glue to the back and footboard, pull their edges towards the bed, twisting the wire parts together.
- Carefully bite off excess pieces with pliers.
- Cover the bed with the remaining parts of the bed.
- Leave the furniture to dry for a day.
- If desired, decorate with patterns, beads or sequins.
Since bedding for doll furniture is not sold, you can sew it together with your daughter. You will need a piece of suitable fabric; blanks for sheets, pillowcases, and bedspreads corresponding to the size of the bed are cut out of it. Then the bedding set is sewn by hand or with a sewing machine.
Procurement of material
Determine the dimensions of the base of the future crib
Cut out the back elements, glue them together with “Moment”, cover them with crepe satin
Finished, fabric-covered bed legs Connect all structural parts
Cushioned furniture
Making a soft sofa for dolls is also very simple. It can be made from fabric and flat wooden planks with a diameter of 1 cm. Using a special tool, you will need to cut out 5 parts that will make up the sofa. Required items:
- base (H (height) 6 cm * D (length) 16.4 cm);
- back and bottom (H 6 cm * D 14 cm);
- 2 armrests (H 4 cm * D 6 cm at bottom * D 7 cm at top).
Glue all the parts except the bottom. Draw diagrams of doll furniture from cardboard, and then, using patterns, cut out basic elements from the material that correspond to the size of the sofa. Glue the fabric onto the wood pieces.
It is better to cover the sofa with dense material that will resemble real upholstery, for example, velvet, corduroy, suede, leather, velor.
Doll upholstered furniture can also be made from newspaper tubes. Required materials: 200 formed blanks, 30 cm long, clothespins, colored cardboard, knitting needle, side cutter.
The process of making tubes from newspaper:
- Cut the paper into equal parts.
- Coat each piece with glue.
- Wind the paper onto the knitting needle.
- Draw out the base.
- Wait until the tubes dry.
Assembly of the structure:
- Weave a base, for which you will need 5 tubes for the longitudinal direction and 15 for the transverse direction.
- Make a side of 5 rows.
- Weave 6 legs from tubes.
- Cut the workpieces.
- To strengthen the middle posts, add skewers to them.
- The first and then the second blanks need to be broken so that the distance is 5 cm.
- Secure the posts by attaching a clamp to them.
- Trim the legs, removing excess length.
- Insert the posts into the backrest area.
- Weave several full rows and 2 short ones.
- Form the height with cardboard strips.
- Weave three more rows and secure them.
- Fasten the crossbar and crossbars.
- Wrap all the legs.
- Decorate the sofa.
Crocheted furniture for dolls looks very beautiful. Manufacturing schemes are varied and original, you can choose any one to suit your taste.
You can also make upholstered doll furniture from foam rubber yourself. To make a chair you will need to prepare: 4 pieces of material, glue, scissors. Cut 2 rectangular fragments - approximate dimensions 10 x 5 cm. Prepare 2 more pieces, smaller in size. Glue all the parts together to make a chair. Make a second copy in the same way. If desired, sew fabric covers for foam chairs.
Blanks of sofa parts We sew covers
We put them on the sponges
Sew the back and bottom
The sofa is ready
Kitchen set
You can make kitchen furniture for dolls with your own hands from boxes of various sizes. To begin with, you will need materials such as foil, match packaging (up to 4 pieces), cardboard or colored paper, scissors, gouache, beads, and glue.
Detailed diagram for making a miniature cabinet with drawers:
- Paint the boxes in your chosen color.
- Stack them on top of each other and then glue or cover them with cardboard. The boxes can be decorated with foil in the form of rectangles.
- Make handles from beads and attach them to the drawers using wire.
To make a kitchen work surface from a box, you will need a sponge, a container of washing powder, and a straw for juice. You also need to stock up on self-adhesive (white), paraffin, and a plastic yogurt jar. Manufacturing procedure:
- Place the doll in the box, measure a line to the waist or above the hip.
- Cut the packaging according to the mark.
- Cover the remaining part with self-adhesive tape.
- Cut the countertop to the size of the yogurt jar.
- Insert the part there and secure everything.
The dishes can be sculpted from plasticine and painted with white acrylic paint - you will get an excellent imitation of porcelain cups, plates, teapots.
Gluing the boxes
Cover with paper
Cutting out the tabletop
Glue it
Sink blank
We insert it into the tabletop
Cutting a faucet from a tube
We install it, decorate the sink
Glue the stove and cardboard burners
Match pen blanks
Glue the handles
The kitchen is ready
Closet
Using furniture drawings for dolls, you can easily build a wardrobe for Barbie. You need to stock up on a cardboard box, a glue gun, a drinking straw, paper, and paper clips. The procedure for making doll furniture with your own hands:
- Cut off the top of the box to create doors.
- Divide the packaging into 2 parts to create a niche for shelves and crossbars with hangers.
- Make a handrail from thick cardboard and attach it to the cabinet with silicone.
- Cover the box with colored paper.
- Cut out the shelves from cardboard and glue them to the frame.
- Make a handrail from a cocktail tube and glue it to the sides of the furniture.
- Build hangers using paper clips.
- Glue foil or a small mirror to the door.
Afterwards, you can sew or knit clothes for the dolls and place them in the closet. By hanging Barbie dresses, skirts, and blouses on clips, the interior of the toy house can be made even more realistic.
Dresser
Do-it-yourself doll furniture made from matchboxes is a simple and affordable option for making any set. From the material you can build chairs, a table, an armchair and even a chest of drawers. To create the latter you will need the following set:
- stationery glue;
- matchboxes (3 pieces);
- double-sided tape;
- ruler;
- white acrylic;
- small half beads;
- scissors;
- double-sided cardboard;
- a simple pencil;
- synthetic brush.
To make your own chest of drawers for a Barbie doll, you must strictly follow the instructions. Prepare 3 match packs. Attach pieces of tape to hold the boxes together. Next you can start decorating the base:
- Prepare double-sided cardboard.
- Cut out two shapes in the form of a rectangle (5 x 3.5 cm).
- Apply double-sided tape to the top and bottom of the chest of drawers. Cover the sides of the cabinet in the same way (5 x 4 cm).
- Paint the drawers with white acrylic.
- Cut out three light rectangles measuring 3 x 1 cm from thick cardboard. You also need to prepare 3 rectangular parts with parameters 2 x 0.5 cm from paper of a brighter color.
- Using glue, attach the light-colored rectangles to the dresser drawers. Glue brighter sections on top.
- Make handles from white half-beads, gluing them to each cell.
Cut out 2 rectangles measuring 4 x 3.5 cm from bright cardboard. You also need to make 1 rectangular element of other sizes (4 x 2.5 cm). It will need to be attached to the top of the chest of drawers, and the two remaining pieces will need to be placed on the sides of the cabinet.
Gluing the boxes
Cut out colored paper Decorate the chest of drawers
Painting the boxes
Decorating drawer doors
Glue beads as handles
The chest of drawers is ready
Doll furniture made from matchboxes
There is a very simple, inexpensive and quick way to make furniture for a doll. If you have a few matchboxes on hand, you can quickly implement this idea. For fastening, use PVA glue, which is usually found in every home where there are children. The algorithm of your actions should be as follows:
- Prepare 5 matchboxes and PVA glue.
- Glue the boxes together as shown in the picture below.
- Cover the glued structure with colored paper.
- Leave to dry.
The manufacturing process is extremely simple, even a child can handle it.
NOTE. You can also make all other furniture from matchboxes, which you will use to furnish your new home in the future.
Microwave
Do-it-yourself household furniture for dolls can be made not only from cardboard, but from paper. Here is this microwave, made from an ordinary office pencil sharpener, with a removable lid. Covered with white paper, you can also use regular foil, then it will turn out to be metallic. We make handles, levers and toggle switches from plasticine. This miniature microwave oven will significantly decorate the kitchen furniture for Barbie dolls, as it looks realistic and functional.
Other furniture contents
A photo of do-it-yourself furniture for dolls will help you decide on those interior items that your daughter needs for her ideal house.
A sofa made from small kitchen sponges, a kitchen wall made from cardboard blocks, a sink made from the bottom of a plastic cup or miniature plate, a faucet made from a plastic straw, etc. can serve as a complement to the decor.
Household appliances:
- Microwave – sharpener, with a removable lid;
- Refrigerator – tea box;
- TV – a matchbox with a picture pasted on;
- A floor lamp or lamp - a tube and an old wooden spool of thread.
The variety of ideas is huge, the main thing is desire, and the materials will be found on your own. Encourage your little housewife to create furniture, then these items will be filled not only with new creative thoughts, but also with great love.
How to make chairs for the resulting table
To make the chairs, you will need the same materials that you used to create the dining table.
- Draw on cardboard and then cut out the shape of the seat.
- Carefully cover it with white paper on both sides.
- Make two cones that will be the legs.
- Cut four small strips of cardboard to attach to the underside of the seat.
- Draw and cut out a long rectangle from cardboard and cover it with white paper.
- Now connect all the components. Glue the legs to the front edge of the chair, fix a long rectangle at the back, which will also serve as the back and back legs.
- Decorate the back of the chair as you wish. You can make a pillow from colored paper or draw patterns.
Make as many chairs as you need. Now your dolls have a complete kitchen set: a table and chairs to sit at. You can also experiment with the design of the table and make it the way you want it. Be a doll kitchen designer and give free rein to your imagination. It's so fun and exciting! The children will be delighted!
How to make a doll bedside table with drawers
You will need:
- Several boxes of matches according to the number of boxes.
- Cardboard strip, the width of which can cover the required number of boxes.
- Shiny foil.
- Scissors, glue.
- Several golden plastic beads according to the number of boxes.
Take the boxes and stack them lengthwise. You should have a table of the planned height. A few pieces can be removed or added, depending on the final idea. Glue the parts of the boxes stacked in a row. Take the cardboard, bend it in the right places, completely wrap it around the side where there are no drawers. Then glue the cardboard. When finished, carefully trim its edges with scissors and begin decorating.
Decorating a glamorous bedside table can be different. If you cover it with shiny colored paper, similar to multi-colored foil, it will create a glamorous look, especially if it is crimson, silver, or gold. If you want the bedside table to look like a real one, then use imitation wood, colored wallpaper with small patterns, or paper similar to them. This is sold in children's art stores.
Gently straighten the paper and apply glue to the reverse side. Spread it so that the foil becomes even. Then cover the back and sides with paper, level it until it dries. This is done with the side of a ruler or a blunt turn of the knife. Boxes can be decorated completely or partially. You need to stick paper on the sliding part, and if you want it to become completely colored, you can pull it out and cover it with paper on the outside or inside. The paper also needs to be leveled.
When it's dry, start working on the handles. Take a bead and drop glue on its base. Place it in the middle of the drawer drawer. Do the same with the rest of the beads, which should form an even row. They can be replaced with voluminous self-adhesive rhinestones. When they dry, the bedside table is ready.
How to make furniture from clothespins
It is not necessary to use wooden ones; plastic clothespins are also used. They vary in size and color, but with wooden clothespins the furniture turns out more comfortable and beautiful.
To make a table or chair from clothespins, you need to separate them. Halves of clothespins are used, which are connected to each other. Connecting them in a circle to make a tabletop; legs can also be made from halves of clothespins.
The beauty of this material is that you can easily shape the clothespin into the desired shape or cut off as much as necessary. Some people make their own theater on clothespins. Templates can be found online.
Making furniture for dolls is quite a fun process that can involve the whole family. Dad can do the crafting, gluing, twisting, and preparing for framing. Mom and daughter will be happy to paint furniture, decorate it, sew tablecloths, pillows and bedspreads. This is a wonderful family activity that will delight your little princess.
Originally posted 2018-03-19 10:17:20.
We decorate non-standard furniture
After the furniture is assembled, you can move on to the decorating stage. There is no need to limit yourself here, and there can be a huge number of options. Starting from simple ones, among which we can highlight pasting with colored paper, to unusual decoration options, where we can mention painting with varnish and much more.
You can decorate assembled furniture using various techniques. Are you good at drawing? Don't deny yourself the pleasure of creating your own creation. Paint the surface some base color, and when this layer dries, apply a pattern or color image to it.
It can also be decoupage. Use multi-layer napkins with suitable patterns. A thin thread glued in several folds will look interesting.
NOTE. This process can be turned into a creative process and useful time spent with your child.
