Step-by-step photo lesson:
First, we will make a bed frame from an orange sheet of paper 20 x 20 cm. We bend the lower part in half.
We bend the upper and lower parts to the resulting vertical line.
To the same line, bend the sides in half again.
We open the bed blank, but not completely.
Turn it over. We bend it. Leave 1-2 cm.
Bend the upper side corners down without going beyond the line.
The ends of the bent corners will become the fold line for the first layer of the workpiece. Bend upward.
Then fold the first layer of paper towards the horizontal fold line.
Bend the lower side corners up.
We open the bottom part of the workpiece.
Using the side fold lines, we fold our workpiece, as shown in the photo.
To keep the craft in place, bend the top part into the middle.
We bend the upper corners on the sides.
Let's bend the top line of the workpiece down a little. The line width will be 0.5-1 cm.
We pull the two pockets with our fingers and turn the blank into a voluminous paper bed.
The origami paper bed is completely ready, but we will complement it with a sleeping set, which will be made from a square sheet of blue paper 10 x 10 cm.
Open it and bend the top and bottom sides to the resulting line.
Turn the square sheet over so that the fold lines are vertical.
Bend the bottom side of the sheet up 1 cm.
We bend it again.
We bend the sides down.
We put the bed linen into the pockets.
The origami bed is ready.
Corrugated cardboard
Corrugated cardboard consists of a corrugated layer and several layers of cardboard. Depending on the type of corrugated corrugated board, the number of corrugated layers also varies. As practice shows, the weight of shoes can withstand even the thinnest sheet of corrugated cardboard.
Tip : the structure can be strengthened by reducing the gaps and increasing the sheets of corrugated cardboard in the product.
In corrugated cardboard, we are interested in the corrugated part, which is the key to strength. It must be perpendicular to the floor, otherwise, at the first load, the entire structure will fall apart. It is important to remember this when drawing up your drawings.
What materials can it be made from?
Do-it-yourself beds for dolls are made from different materials. They can be either less durable or durable, reliable, and last a long time. If only a bed is made for a doll, preference is given to simple materials, but if a series of furniture is planned, reliable and strong elements are used. The same principle applies if, after the older child, younger children play with the doll and furniture.
What materials can such furniture be made from:
- paper;
- colored paper;
- cardboard;
- whatman;
- old boxes;
- shoe boxes;
- Styrofoam;
- expanded polystyrene;
- plywood;
- wood;
- plastic;
- foam rubber
What you will need when creating furniture:
For simple options, paper, whatman paper, and glue are used, and the finished product is decorated using colored pencils, markers, felt-tip pens, and oil pencils.
When making furniture with your own hands from plywood or wood, you use self-tapping screws, a stapler with staples, and a mattress is made from foam rubber. They also sew fabric bed linen for miniature doll beds.
Master class: cardboard rocking bed for a doll
We wanted to make the doll's crib special (at least among the cardboard samples), so we decided to decorate it with a carved pattern. We implemented this task together with Olya Kachurovskaya.
The pattern was specially chosen to be simple, so that it would be easier to cut holes in the cardboard. But in the end, the crib turned out just like a real one and, despite its dimensions ( 50x28x39.5 cm ), is quite durable.
At the same time, like all our cardboard toys, it is quite accessible for making at home and with any level of training.
To create a doll rocking bed you will need the following materials and tools :
— sheets of A4 size office paper (for printing templates);
- corrugated cardboard 3 mm thick (cardboard of greater thickness can be used, but in this case it will be necessary to adjust the sizes of the slots and protrusions to connect the parts);
— tool for creasing corrugated cardboard;
- a simple pencil (it is better to use an automatic pencil);
— glue “Moment Crystal”;
A set of templates for a doll's crib can be downloaded here:
1. Making composite templates for cutting out parts.
For such large-scale products as this doll rocking bed, we use composite templates that are assembled from fragments printed on regular A4 sheets. With the help of such templates you can make precise details, even without knowing how to draw and sketch.
We have used this method more than once to create various cardboard products, as well as paper window decorations.
Actually, there is nothing complicated about it. But for clarity, so that there are absolutely no questions left, I will demonstrate how we do it.
So, we print out fragments of the template (in this case, the crib back template).
The file contains an assembly diagram for each template, and the fragments are numbered. The task comes down only to carefully and accurately connecting the fragments together.
Manufacturing technology
This section will describe three options for making beds for dolls. The options made from cardboard and boxes are simple; they are made together with the child. A popsicle stick bed requires more time, perseverance and precision, but the appearance of the finished product will be beautiful and colorful.
From cardboard
The easiest way to make a doll bed from cardboard is a detachable one. You can involve a child in making such furniture, since the work is very simple and does not take much time. Another advantage of making such furniture is that if there is no necessary space for storing doll furniture, it can be disassembled. When folded, several sheets of cardboard take up little space.
To understand how to make a bed for a doll out of cardboard, you should understand what materials are needed to make this furniture:
- cardboard;
- decorative materials to choose from.
What tools are needed to make this furniture:
- scissors;
- stationery knife;
- a simple pencil;
- a sheet of white A4 paper for making a pattern - several pieces.
How to make a doll bed:
- The bed model described below has dimensions of 13*20 cm, and is more suitable for a baby doll than for a Barbie doll. But the sizes can be varied according to your wishes. The side walls each consist of two parts. This provides additional reliability for fastening parts;
- In total, seven parts will be required: headboard, footboard, 2 side parts on 2 sides, bed base. You need to make patterns on a white A4 sheet. Using a pencil and a ruler, draw a base of 13x20 cm. The dimensions of the footboard are 13x4.5 centimeters, the headboard - 13x7 cm. These parts are also cut out of paper. It is necessary to draw two side parts measuring 6x8 cm and 2 parts measuring 6x6 cm. If desired, the dimensions of the side sides can be made different;
- Each part is cut out of paper, applied to a sheet of cardboard, outlined with a simple pencil and cut out. After this, a cut for fastening is made on each part. 4 cuts are made on the base of the bed. All of them will be carried out along the long side, so the cuts are made from the side of the head and foot. On the side where you plan to install the headboard, you need to make an incision at a distance of 1 cm from the edge of the base. The depth of the cut should be 5.5 cm. Exactly the same cut is made on the other side. Exactly the same cuts should be made at the foot of the bed, but 3 cm deep. The base of the bed is ready;
- on the part that is attached to the side of the doll’s legs, it is also necessary to make two cuts on the side, the length of which is 13 cm. The cuts are made at a distance of 1 cm from the edge of the cardboard blank. The depth of the cut is 1.5 cm. Exactly the same cuts are made on the headboard;
- Next, the side parts are processed. The large side should be cut in two places. On the side measuring 8 cm, at a distance of 1 cm from the edge of the six-centimeter side, it is necessary to make cuts 1.5 cm deep. At the other end of this part, it is necessary to divide the six-centimeter side into two parts - 3 cm each. It is necessary to make a 3.5 cm cut along the division line. The same should be done on the second part of the same dimensions;
- the smaller side, 6x6 cm, is cut approximately the same way. One cut is made in the center of one of the sides, but with a shallower depth - 2 cm. On the adjacent side, located at an angle of 90°, it is necessary to make a cut 1 cm from the edge with a depth of 1.5 cm. The second side is also cut;
- For a beautiful and neat look of the bed, the protruding edges are trimmed with scissors. All parts are connected along the line of cuts. All together they will hold each other. All sides are first attached to the base of the bed: both large and small. Then the headboard and footboard are placed into the deep cuts. No bending is carried out. After this, the bed is decorated using any methods.
Design options
Cardboard makes good household items. With the help of this raw material it is easy to diversify the interior of your home; it is used to make your own dollhouse, tables and chairs for children. In addition, on the floor of the children's room you can place small shelves made of boxes, decorated in a fairy-tale style, in the form of animals or cartoon characters.
Properly selected material and technology make it possible to produce more functional items:
- kitchen sets;
- sofas, armchairs;
- chests of drawers, cabinets;
- coffee tables;
- cabinets;
- wall shelves.
Like any material, cardboard has its pros and cons. Among its advantages:
- Cost-effective - products can be constructed from cardboard boxes. They are taken free of charge at retail outlets or purchased at a wholesale base, which is much cheaper than new products made from expensive raw materials.
- Lightness - the furniture weighs almost nothing, it can be easily disassembled into its component elements, which greatly simplifies its transportation.
- Wear resistance - household items made of thick paper are characterized by sufficient strength and can last a long time. You just need to take a responsible approach to the drawing up of the drawing, the quality of the assembly, and the choice of fasteners.
- Safety - cardboard is an environmentally friendly product. It is made from natural raw materials, so it has no harmful effects on human health.
- Ease of processing - the cardboard sample is extremely malleable, allowing you to expand the boundaries of human imagination. By creating furniture products with an unusual design, you can dilute the interior with exclusive decor.
Stages of making a simple cabinet from plasterboard with your own hands
The disadvantages of a piece of furniture made from cardboard are that it is not resistant to moisture and is a fire hazard. The product must be kept in a dry room, at a safe distance from sources of fire. This type of furniture requires special care. Also, the assembly process requires a certain precision; mistakes made can lead to early breakdown of the structure.
Low cost
Lightweight furniture and ease of transportation
Safety of raw materials and absence of harmful effects on human health
Wear resistance of household items with proper assembly quality and fasteners used
Ease of processing the material and the ability to create pieces of furniture with an unusual design
How to make a bed for dolls and make bed linen with your own hands
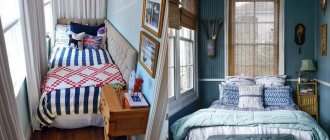
For most little girls, playing with dolls is quite a serious activity. This is their own world, in which everything should be as realistic as in life. The doll also wants to “eat” when the child eats, and “freezes” when it’s cold. She is dressed, bathed and fed. Naturally, in the evening, when the girl goes to bed, the doll should also go to “sleep”. Many parents buy their daughters entire doll houses with full furnishings: a kitchen, a bedroom and all the necessary household items.
We will need:
- thick cardboard, for example, from a large box like those in which parcels are received, is good for creating a headboard;
- You can use a cookie box or similar as the sleeping place itself. Firstly, it has sufficient density and high sides, which is important for safe sleep for toy babies. Secondly, the length is suitable for dolls like Barbie, who, as it turned out, are also not averse to rocking in such a crib;
- scissors (stationery knife);
- glue stick (or in a tube);
- instant glue (optional, but recommended).
What materials to make the bed from?
Here, boundless horizons open up for the flight of fantasy. You can make a bed from anything you can find in the house. From standard products made of cardboard or wood to the most seemingly unexpected materials, for example, toothpicks, egg cartons, matchboxes, etc.
- boxes;
- paper;
- newspapers;
- cardboard;
- plywood;
- Styrofoam;
- ice cream sticks;
- sponges for washing dishes and much more.
Products made from rigid wire look interesting: they look like real forged models. Even unnecessary wallpaper and remaining ceiling tiles are suitable for making a small bed - the choice of material is not limited to anything other than your own imagination.
DIY making
Before you start making a bed, you need to decide on its dimensions and, accordingly, choose the material for the frame. In addition, you will need decorations (various beads, ribbons, flowers, bows, etc.) and doll bedding (small fabric scraps will do). For the mattress, you can use foam rubber or padding polyester. When all the elements are collected, you can begin the creative process. Let's look at several of the most common options for making doll beds.
From cardboard
To construct this model, you can take any thick cardboard, but corrugated cardboard is best - it is thicker, but at the same time convenient to use.
Required tools and materials:
- cardboard;
- wire (for strengthening and fastening the structure);
- glue (PVA, “Moment”);
- tape (simple and double-sided);
- scissors;
- fabric or other finishing material.
You can first cut out the details of the future bed from a sheet of paper in accordance with the required dimensions and only then transfer the drawing to cardboard.
- Cut out the parts of the product from cardboard. It is better to duplicate each detail at least twice - the strength of the bed will depend on this. It is preferable to make 4 blanks for the base, and two for the backs.
- Glue the base using Moment glue so that there are two of four blanks.
- Cut four identical pieces of wire with a length exceeding the length of the base by 7-10 cm.
- Evenly position and attach the strips of wire with tape to one of the two glued base blanks.
- Glue both parts of the base with PVA glue so that the wire is between the layers of cardboard. Leave the product to dry under pressure.
- After drying, assemble all the elements of the crib together, mark on the two parts of the backs with dots where the wire coming out of the base will be inserted. Make holes at these points.
- Thread wire through them and glue the joints. Fasten (tie) the wire from the outside, cut off the excess ends of the wire.
- Glue the remaining two parts of the backs so that they hide the wire knots (this way the child will not hurt his hands).
- Carefully cover the resulting structure with any available material - fabric, paper, self-adhesive film, etc.
If there is no wire in the house or the product is small, it will be enough to just glue it.
If desired, you can make the legs of the bed: glue the posts from circles of cardboard and secure them to the base or a linen drawer.
From the box
You can take any box that matches the doll's height. It is most convenient to use shoes - some parts do not need to be glued additionally.
Tools and materials:
- box;
- thin foam;
- glue;
- scissors;
- pencil, ruler;
- material for decoration.
The design of this model can be anything - it is best to consult with your child and find out what exactly he wants.
Work order:
- Take the lid from the box - this will be the base of the bed.
- From the box itself, cut a strip equal in width to the height of the lid, and in length - two long sides and one short. Cut the same strip from the foam rubber and glue it to the cardboard.
- Similarly, cut out a high headboard from a box and foam rubber, connect it, and glue it together.
- Cover all the resulting parts separately with fabric.
- Glue the headboard. To the remaining three sides - a strip of foam rubber facing outwards. To make such a bed look even more realistic and attractive, you can make a decorative tie with beads before connecting the parts.
This model looks very much like an adult modern bedroom.
From the box you can make other stock options, for example, a prefabricated model that does not require gluing. After assembly, the bed can be decorated as desired.
From ice cream sticks
Leftover ice cream sticks are an excellent material for making doll furniture. The bed they make will be stronger than their cardboard counterparts and look more realistic.
- sticks (about twenty pieces);
- glue gun;
- acetone or solvent;
- knife;
- varnish
You can glue such a structure with Moment glue, but using a glue gun will make the crib more durable.
- Wash and degrease the sticks. Let dry.
- Cut one of the sticks in half (crosswise).
- Take a certain number of sticks (equal to the required width of the headboard), stack them in a row on the work table. Having retreated 2-3 cm from below, glue the transverse half of the stick to them. You should end up with a piece that resembles a fence.
- Do the same for the footboard. The number of sticks should be equal to those spent on the headboard.
- Take two more sticks and use them to connect the resulting parts - they are glued to the halves of the stick that were cut.
- Place the remaining sticks evenly on the base of the resulting frame and glue it.
- After complete drying, the product can be varnished and decorated.
Option No. 1
You will need: a cardboard box, a utility knife or scissors, white sheets of paper, a sheet of paper with a design, a pencil, clear varnish, a ruler and glue.
Master Class
- Measure the doll's height.
- Draw the details of the bed on cardboard - headboard, footboard, base.
- Cut out the sides from cardboard.
- Glue the base to the headboard, then glue the footboard.
- Glue the sides to the bed.
- Tear the white sheets into small pieces.
- Cover the bed with pieces of paper.
- Glue the patterned sheet to the bed with parts.
- Let dry and coat with varnish.
I recommend watching this interesting video!
Decor
If a homemade bed is made into an existing dollhouse, then it is better to decorate it in accordance with the general style; the same principles apply here as in a real room. Bed decor includes both the design of the product itself and everything necessary for it - pillows, blankets, bed linen.
The finished bed is decorated with a wide variety of materials: glued or sewn beads, bows from unnecessary hairpins, ribbons, braid, beads, rhinestones, lace. Applications in the shape of flowers look good on products made of cardboard or paper, and for wooden products, burning, engraving, and sawing are suitable. Any of the models can be coated with regular varnish or nail polish, paints (gouache, acrylic).
Making bedding is not at all difficult - you will need a small amount of fabric (you can use scraps) and a little filling. Foam rubber is suitable for a mattress, and synthetic winterizer or cotton wool is suitable for pillows. Any thick rag can be used as a blanket.
All these elements can be knitted or crocheted - for those who love and know how to knit.
The model with a canopy and lace trim looks charming - this bed resembles the bed of a fairy-tale princess. Bedside tables made from matchboxes or soft ottomans can be a great addition.
Which decor option to choose depends only on the girl’s imagination and desires. The main thing is not to forget that children require realism - the manufactured model should be as similar as possible to a real bed.