Choosing material for the shelf
Several materials are suitable for the manufacture of such a product, these are:
- plywood,
- laminated chipboard,
- furniture board.
Consider plywood
. The material is durable, consists of several layers of wood veneer, glued together with reversal of the direction of the fibers. Sheet thickness can be 4-32 mm. Thanks to this plywood, the plywood sheet has high strength. However, this material is not quite expensive and does not give the full effect of real wood.
Laminated chipboard
. This board is made from pressed chips covered with a laminate. There are many coating options in color and texture, which allows you to choose an option to match your interior or existing furniture. Thickness 16-24 millimeters.
The material is cheap, but requires processing on special format-cutting machines, which complicates working with it.
Furniture board
. This material is made from natural wood, which makes it very environmentally friendly. Thickness is 16-40 millimeters; a shield of the required thickness can be made to order.
It can be processed using carpentry tools, which allows you to make furniture with your own hands, so it is perfect for us for the following reasons:
- environmentally friendly material,
- beautiful aesthetic appearance,
- This shelf can withstand heavy loads,
- the product will be very durable,
- ease of processing at home,
- large selection of tints.
Assembling the lower and upper trim
- Prepare the following blanks: - upper and lower cross bars C, they will be the front ones - 18x120x980 - 2 pcs. - upper and lower cross bars D, they will be rear - 18x120x980 - 2 pcs. — upper side cross bars E — 18x120x300 — 2 pcs. — lower side cross bars F — 18x120x300 — 2 pcs. — top strips G — 18x80x300 — 3 pcs.
In order for a wooden rack or just a staircase cabinet to be made at a high level, during assembly it is necessary to use lamellas No. 20 (4x56x23 mm).
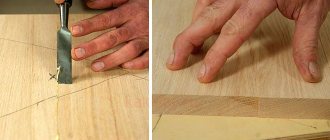
- Mark the cut lines for the lamella grooves on parts A, C, D, E, F and G. To cut these grooves, use a lamella router. Attention! On the front and rear legs (A) and on the outer surfaces of the upper and lower front (C) and rear cross bars (D), grooves should be made only after installing the blanks of the upper and lower trim assemblies.
- In order to later be able to secure the top O - 18x445x1120 - 1 pc., at the ends of the upper strips G it is necessary to mark 2 points at a distance of 10 mm from each other, as in the diagram below. Then drill holes d=4 mm at the points. And connect them to form a groove 14 mm long. On the inner sides of parts G, you need to make secret holes in the middle.
- We continue to study the article on the topic: how to make a wooden rack with your own hands. Let's move on to planks C and F. Using a template, graph paper or just checkered paper, draw the arches. Cut them out on a band saw or jigsaw and sand them down so they are symmetrical.
- Next, we assemble the upper trim: glue the E strips to the G strips, fixing the parts at right angles. Then glue the lamellas and connect parts E, G, D, and lastly do C (see picture).
- You can also do the fastening of the bottom frame of the shelving in the kitchen or another room yourself, without involving anyone to help. Pour in the slats. Assemble the frame and secure shelf H with glue. Carefully monitor the geometry of the structure, because then the entire frame will not be assembled and the remaining shelves of your staircase cabinet will not be installed.
- To cut grooves for the lamellas at a distance of 35 mm from the edge on legs A, you can use a 20 mm thick backing, which is placed under the lamella router. Cut the grooves on parts C and D in the same way.
- Glue the lamellas into the grooves and fasten the CDEG, CDFH, rear legs A and B with clamps. Check that all the upper planes are at the same level and the ends are aligned. Since the shelving is for home use, it must be made professionally. Don't forget to install the front legs.
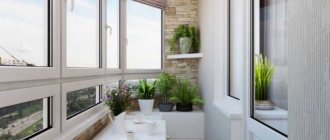
You can install a rack in the kitchen, bathroom, or bedroom so that dishes, towels, clothes, boxes or anything else can be stored on its shelves.
What is a furniture panel
Furniture panels are produced by woodworking enterprises. Wooden slats, 8-12 centimeters wide, are glued together to achieve a certain width of the shield. Next, they are planed and passed through a thicknesser to give them the same thickness, usually 18 mm, in some cases it can be thicker. Next, they are cut to the specified length and width of the shield.
The sizes of the shields may vary, depending on the manufacturer. The wood can be either coniferous, such as pine or spruce, or more noble: oak, ash, beech, etc.
The furniture board needs further processing and finishing. It must be driven to the size of the parts, sanded and varnished or tinted. Then you can assemble them into finished structures using connecting elements.
Wall mount
To securely attach the rack to the wall and prevent it from falling when jerked, several methods are used:
- Using a dowel and a long self-tapping screw: a hole is drilled in the back wall, a dowel of the appropriate type for the wall material is driven into the wall, and a long self-tapping screw is screwed into the dowel.
- Using a reinforced corner: bolts and self-tapping screws are used to screw the corners to the studs and the wall, respectively.
- With wire: a strong knitting wire is screwed to the two rear outer posts, after which its other ends attach the frame with shelves to the nails and anchors protruding from the wall.
- Long corner. A corner with holes pre-drilled in it is screwed to the edges of the lower and upper shelves adjacent to the wall. The structure is fixed by screwing self-tapping screws into the wall through the holes in the corners.
- Mounting plate: 2-3 perforated thick metal plates are attached to the two rear posts and secure the rack to the wall using self-tapping screws.
You must not forget about this operation, otherwise, if the floor vibrates or there are sudden jerks, the structure can easily fall, bringing a lot of troubles and injuries to those who were near it at that moment.
Making shelves from furniture board, 5 simple steps
To make a shelf we will need a set of tools: a tape measure, a square, a pencil, a hacksaw or a cross-cut saw and a screwdriver with attachments for the screws that we will use.
- First, we need to decide on the size of the shelves and their shapes. We take the dimensions based on your desires and possible locations for installing these products on the walls. The shape and design can be seen in the photo below.
- We buy material. To do this, take shields of the same width and thickness. We select the length so that there is a minimum of waste left. The width of the shelves will be 25-30 cm; such boards are available in stores. The thickness suits us is 18 mm. Find out how to choose the right shield here.
The material used can be either pine or more expensive wood, such as oak. But hard rocks are much more difficult to process on your own.
- We cut the blanks to the specified length. This can be done either with a hacksaw or with electric trimmers. For the second option, we need a machine with a saw broach, since the width of the workpiece is quite large.
- We process the workpiece with sandpaper. The grain size of the paper must be selected based on the quality of the board; for initial processing we take 60-80, for finishing 120. It will be faster to go over the surfaces with a grinding machine.
The ends can be passed by hand. Separately, it is worth chamfering to remove sharp corners.
- We cover the workpieces with varnish or tinting. Make it more convenient in disassembled form to better see the workpieces. They can be laid out on the table, spread with paper. You can apply the varnish either with a brush or with a spray gun, depending on the availability of equipment and your ability to work with it.
The varnish can be used on any base: nitro, oil or polyurethane, since the shelves will hang indoors and they do not really need weather protection.
Connection of furniture panels, options
Connection using format
Connecting boards using dowels and glue
Combining furniture panels, or rather our blanks, into a finished product. This is done using special furniture screws - comformat. They are designed specifically for such purposes, so they will provide maximum strength, but require a special cutter. How to use them and what you need for this, see here
.
To connect the panels you can also use ordinary wood screws. If everything is done correctly, namely, select a drill bit for pre-drilling that is 0.2 mm smaller than the self-tapping screw, the connection will be quite strong and reliable.
It is necessary to drill for screws, and on both workpieces being connected, otherwise the shield may burst from the screw being screwed in.
Our product is ready, now you can hang it in the planned place on the wall and be glad that you made it with your own hands.
DIY wooden book rack
First, it is advisable to select a drawing of the future design on the global network, special publications, or develop your own original version. Classic shelving with and without a base looks like this.
Required tools and materials:
- boards 2–4 cm thick;
- slats 4x4 and more;
- holders, wooden blocks, metal corners on which the shelves will rest;
- plywood for walls;
- self-tapping screws;
- wood glue;
- varnish, brush;
- jigsaw, grinder, electric drill;
- screwdriver, hammer;
- pencil and tape measure for marking.
Step-by-step instruction
After developing the drawing and purchasing everything necessary, they begin to manufacture the parts. The process must be approached responsibly.
Sequence of operations:
- The first stage is choosing a base, if the design provides for it. For it, take a board with a thickness of at least 3 cm. When selecting the length, take into account that it is necessary to install vertical walls on the sides of the base. At the bottom, longitudinal boards 50–70 mm wide should be nailed, and crossbars between them to make the rack strong.
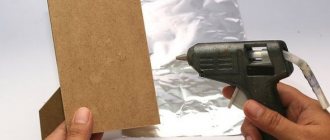
- The second stage is the manufacture of the back wall. This element is made of plywood or construction cardboard. Based on the drawing, the height and length of the rack are determined and the part is cut out according to these parameters. It is necessary to align the angles at 90°, otherwise the structure will warp.
- The next stage is making the sides. To reduce the cost, thick plywood is often used or walls are dispensed with by using beams. The height of the sidewalls is chosen arbitrarily. Having cut the plywood or beams of the required size, you need to mark out the spaces for the shelves on the inside, for example, cut grooves. It makes sense to strengthen corners, holders or pieces of beams there. If you screw them in after assembly, it will be somewhat difficult.
- Then install the sidewalls and tighten them with self-tapping screws.
- Strengthen the back wall, cut from plywood. Its presence will help save the structure from distortion.
- Only after this should the shelves be made and strengthened. Usually their dimensions are equal to the dimensions of the base. If the corners were strengthened at the third stage, then you do not need to screw the shelves to the sides.
Many people make the shelving unit open at the back. In this case, it is necessary to screw all the shelves to the sides, and strengthen special corners at the top and bottom that will prevent the structure from warping.
Calving a cow: main signs of calving, proper preparation and reception of the calf
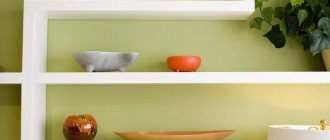
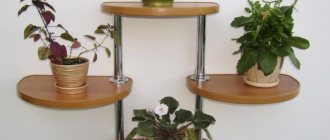
Photo of shelves made of furniture board
Doors or curtains
To give the finished product an attractive appearance, you need to decide how to close the rack .
Of the materials used for this purpose, the most convenient are the following:
- A regular curtain is the simplest and cheapest option.
- Bamboo roller blinds are more expensive, but still look stylish.
- Sliding doors like a wardrobe are a very beautiful, but at the same time very expensive device.
- Folding doors (screen) are cheaper, and at the same time no less attractive than sliding ones.
- Blinds are a little more expensive than curtains, but at the same time, much cheaper than sliding doors.
Diagonal option
This type of wine placement is practiced everywhere. Any person can do it. To do this, it is enough to have some kind of wooden box or knock it down yourself.
When making it yourself you need:
- Cut four identical pieces of wood that are equal in width to the height of the bottle (or slightly less). Ideally, when assembling them, you should get a square.
- Measure the diagonals and cut 2 more pieces according to the resulting dimensions. These are the main elements.
- In the middle of each of them (up to half) a groove is cut with a width equal to the thickness of the wood.
- Insert elements into each other. You should get a design that resembles the letter “X” or a cross. It is placed in a square and secured with self-tapping screws. The bottles are placed in the resulting compartments.
Drawing
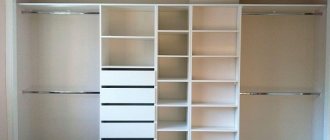
Any sliding wardrobe or other similar structure is assembled only after the preliminary creation of a special diagram presented in the form of a drawing. To do this, you should first decide on the main features of the future furniture, for which you decide:
- what height, width and depth the structure will have;
- what number of different doors, compartments, drawers and other compartments will it have;
- what height will the mezzanines have if they are planned in such a cabinet;
- what will be the filling of the cabinet, and it can be represented by numerous partitions, shelves, drawers, rods or other high-quality elements that increase the comfort of using this product.
After answering these questions, the procedure for creating a sketch of the future cabinet begins. To do this, you need to draw it. If you have experience in creating drawings, then the diagram can be made on a sheet of paper. If you do not have the necessary skills, then it is considered optimal to use special computer programs for design. All you need to do is enter predetermined data, after which the required drawing will be automatically obtained. It is on this basis that you can correctly assemble the cabinet yourself.
Thanks to a well-made drawing, you can get answers to many questions regarding the future cabinet:
- details are drawn up;
- the required amount of materials is calculated;
- it is determined what dimensions furniture panels intended to create an interior item should have;
- it is decided how they will be cut.
Often a new cabinet is created to replace an old design, and in this case it is possible to make exactly the same product. After creating the diagram, it is recommended to carefully consider it, since it will be possible to understand on its basis what appearance the future piece of furniture will have. It is advisable to make changes in advance, since during the actual creation of the structure this will no longer be possible.