Varieties
Before you start developing a project, you need to decide on the type of cabinet.
Such rational use of space will give you the opportunity to arrange literature on the shelves so that it is always at hand.
They differ in the following ways:
- according to the material of manufacture;
- by design;
- by style.
The material used to make the cabinet is the basis of the furniture. A library made from the right raw materials will last more than 10 years without a single breakdown and will look great.
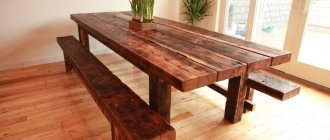
Natural wood has been used to create furniture for many centuries.
The cabinet can be made from:
- wood;
- drywall;
- glass;
- metal;
- MDF;
- Chipboard.
The most common option is the first item on the list. This is noble, beautiful-looking furniture that will please the eye for a very long time. Chipboard and MDF are also popular. These are inexpensive, practical materials based on compressed and glued wood shavings.
Chipboard is one of the most popular materials for furniture.
Less commonly used are plasterboard, metal and glass. The first building material is suitable for constructing a niche where books will be stored. Metal is more difficult to process and will not suit any style. It will look best in styles that lean towards a technical direction. It’s also not easy to make a cabinet out of glass. And it is even more difficult to maintain it, since it is a fragile structure. But externally, glass furniture looks quite beautiful.
You can also make a bookcase out of plasterboard.
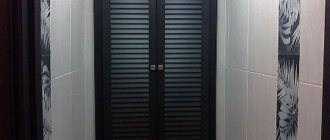
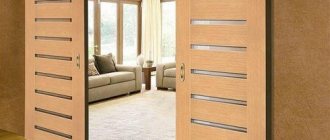
Structurally, libraries differ in overall dimensions and design. You can make a cabinet to place in the corner of the room or just against the wall, standing or hanging, with sliding or opening doors. The latter are made of transparent material, such as glass, plexiglass or polystyrene.
End milling
This procedure is not particularly long or complicated, but you will have to pay a lot of attention to it, since without this process the result may not be very attractive. For ideal operation, the following rules are taken into account:
- cutters designed to form a beautiful and optimal relief are selected correctly;
- the overhang is clearly and correctly set, having the necessary parameters;
- High-quality and modern milling equipment is used.
The main features of milling include:
- the router is securely fastened and prepared;
- when feeding a workpiece onto it, it is not allowed for it to deviate or move to the sides, as this guarantees a poor work result;
- when performing the process, you must ensure that all movements are smooth and careful;
- before work, it is recommended to make sure that the equipment is working properly, for which milling is performed on a small unnecessary element;
- processing of slats should be carried out only after setting the optimal size;
- after work, the place where the workpiece touched the working part of the tool is checked;
- if there are small irregularities, they are carefully smoothed out with sandpaper, since if this process is not completed, then after covering the elements with varnish, the irregularities will be clearly visible.
Thus, milling is easy to do if you follow the basic steps and rules, and also use high-quality and modern equipment.
End milling
Milling grooves
How to make a bookcase with your own hands
The full scope of work for manufacturing a cabinet consists of several stages. First you need to decide on the type of library, determine the location, and take appropriate measurements. After that, select a style and start drawing.
First make a sketch of the cabinet.
Produce individual parts according to the dimensions, and then assemble and install it using fasteners.
Design selection
Choosing the right style is very simple if the furniture is installed in a renovated room with other items. In this case, the cabinet is made according to the style of the room. If making a library is part of the renovation and furnishing, then it can be the main item, and the entire design will be built around the bookcase.
The cabinet design may vary.
Most often they prefer to choose from the following styles:
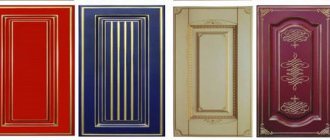
- classic - made from natural wood, with decorations made using carvings;
- Art Nouveau - an expensive style that requires the use of precious wood with handmade decorations;
- Provence - unpainted wooden cabinets with round shapes and milling on the facade;
- loft - a bulky dark structure, characterized by some chaos, for example, asymmetry, uneven steps from shelves for storing books;
The remaining styles are characterized by either great rarity or low cost. If you make a beautiful cabinet, it is better to choose one of the options from the list. Of course, you can combine different styles and come up with something unique.
Drawing and diagram
To make a bookcase with your own hands, drawings and diagrams are required. When building them, you need to plan the location of the library well and take measurements. It is necessary to take into account the floor level, the presence of decor on the wall, and the rest of the room area. The cabinet should look laconic and not occupy “half” of the room.
First, the floor level is measured using a laser or water level. If there are deviations, then you definitely need to make legs for the wardrobe. The length differing by a couple of millimeters should take into account differences.
Shelves connected together can serve as furniture for books.
Then, the height, length and width of the cabinet are measured. These are the main parameters for drawing up a drawing. It should be taken into account that the width of one shelf can be 21 cm or 42 cm. For one or two rows of rather large books, respectively.
You can make a corner bookcase.
The number of shelves is calculated based on the thickness of the shelf and the height of the books. In this case, it is better to leave a gap of 1-2 cm above the books. Now you can plan the facade and decorations of the future library.
Selection of material
As can be seen from the above, the choice of materials is very large. Wood is the best choice for making your own library.
Cabinet boards can be made from various types of wood.
It has the following positive aspects:
- relatively low cost;
- ease of processing;
- strength;
- durability;
- environmental friendliness.
Trust the experts when choosing a tree.
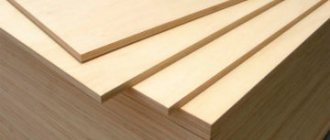
For a wooden cabinet you will need boards of suitable sizes and plywood for the back wall. For shelves, you can take a furniture panel or make them from boards and MDF.
Plywood is cheaper than wood, but less durable and strong.
Manufacturing from metal or glass increases the cost of work and requires special tools and skills. It is very easy to produce furniture from sheets of plywood, chipboard and fiberboard. The most popular materials.
One of the best options for solving the problem is to create a bookcase with your own hands.
This type of cabinet can be made from scratch in a few hours. But outwardly it will not look noble and will not last more than 5 years without breakdowns.
Selecting Tools
To work with wooden furniture you need:
- jigsaw;
- sandpaper;
- hammer;
- jigsaw;
- drill;
- screwdriver;
- milling machine;
- Sander.
In addition to the tools for the job, you will need hardware for fastening:
- wood screws;
- corners for shelves;
- nails;
- door awnings;
- magnetic locks.
The top of the cabinet must be hidden with varnish or stain.
List of required parts
In order to make a bookcase, we will need:
- Side stands 400*2000, chipboard 16 mm – 2 pcs.
- Shelves 400*768, chipboard 16 mm – 5 pcs.
- Top 400*800, chipboard 16 mm – 1 pc.
- Front vertical overlays 50*2000 chipboard 16 mm – 2 pcs.
- Front horizontal trim (top) 100*700 chipboard 16 mm – 1 pc.
- Front horizontal trim (bottom) 100*700 chipboard 16 mm – 1 pc.
- Drawer between shelves (for rigidity) 400*380 chipboard 16 mm – 1 pc.
- Rear wall 800*2000 fiberboard 3 mm – 1 pc.
Cabinet creation process
First, strictly according to the drawing or diagram, you need to prepare the parts to create the frame. After this, use metal corners and self-tapping screws to assemble the resulting parts. You should get a rectangular frame. The legs are attached to the bottom, taking into account the evenness of the floor.
Leave your cabinet creation to a professional.
Next, the internal system is cut out and assembled. According to the fashionable loft style, the frame is divided in width into several narrow compartments. It can also be divided by height. This will require making more shelves. But it will look great.
The bookcase must be made in exact accordance with the dimensions of the room.
Step-by-step instructions for making parts from MDF and chipboard sheets
When choosing a cabinet bookcase, proceed in this order:
- Step 1. Place the MDF sheets on a workbench or table.
- Step 2. Apply markings in accordance with the drawing with a marker or pencil.
- Step 3. Use a jigsaw to cut out the top and bottom plates, sides, middle partition and shelves.
- Step 4. In the edges of the shelves, we use a router to make two longitudinal grooves at the top and bottom.
- Step 5. Cut out sliding panels from glass.
- Step 6. Use a special drill to make holes for the handles.
- Step 7. Cut out the back wall from a sheet of fiberboard.
- Step 8. Cut out the hinged doors for the lower cabinet compartment.
To avoid mistakes when cutting materials, contact a specialized workshop. Glass and MDF sheets will be professionally cut there.
Decor features
To decorate a bookcase, you can use several methods:
- wood cutting using a milling machine;
- pasting with additional decor;
- painting work - painting;
- a combination of several methods.
In the first case, shaped indentations are made. Using a machine, the desired patterns are cut out. They can emphasize the body and run parallel to the walls. You can also cut roundings on the walls and doors.
Use your imagination when creating a bookcase.
For the second option, you need to prepare future pattern details from narrow boards. This is done using sandpaper. Then the parts are assembled into a pattern and attached to the furniture with nails or wood glue.
You can also additionally paint beautiful pictures and patterns on wood. In this case, everything can be combined into one whole along with milling and hanging decor. But you cannot overload the façade with patterns, because a large number of patterns does not always look good. Everything should be done concisely.
Back wall
In photos of different bookcases it is almost impossible to see the back wall, so it is usually well hidden. This allows you to use inexpensive and easy-to-process materials to create it. Typically a standard chipboard sheet is used for this.
Although the back wall cannot spoil the appearance of the cabinet, the reliability of the entire piece of furniture depends on its correct fixation, since it acts as a connecting element.
To form the back wall, a sheet of chipboard or plywood is most often used. These materials are considered easy to process, so cutting out parts of the required size from them will not be difficult. Cutting can be done with an electric or hand jigsaw, and a special sawing machine is often used. Before cutting, you need to apply markings to the sheet so that you get a perfectly smooth back wall with the required dimensions. The chamfer is removed using sandpaper.
If you want to get a fairly reliable back wall, it is recommended to use chipboard instead of plywood. This material has more weight, and it is also quite easy to attach. It can withstand different loads, so it is considered an ideal choice for a cabinet on which many heavy books will be placed.
Chipboard is most often used for the back wall of a bookcase.
Where can I put it?
The resulting wardrobe can be installed anywhere in the room. It can stand against a wall or divide a large room into areas for reading and other types of relaxation.
The corner library is installed in the corner of the room or can also be divided. One part is adjacent to the wall, and the other is a fence for a coffee table and a comfortable chair.
A standard wardrobe can be placed in any room.
Any furniture made with your own hands will always look beautiful and command respect in the eyes of guests. Manual work develops motor skills and mental abilities. This can be very interesting, so don't be afraid to learn and start new things. If you don't succeed the first time, don't give up. We need to continue making the bookcase. After all, a good result can please any mster more than once.
Decor
Decorative details can change the appearance of a cabinet in a positive way. They can be made from wood or plastic. These are wooden slats, planks, cornices, rosettes and baseboards, processed by figured milling. Plastic products are cast in molds to match the color of wood of different species. If you don’t want to make decorative elements yourself, buy ready-made ones at a hardware store.
Expert opinion
Alexander Didenko
Furniture assembler at Mabaks
Attach the shaped strips to the ends of the shelves so that their upper edges are flush with the area for books. When you take out the volume you need, you won’t get the book caught on the decor.
Options for bookcases in the photo
Preparatory stage
Bookcase dimensions.
The preliminary stage of cabinet installation involves drawing up a sketch of the future structure, working out the smallest details, and determining the location. Break the cabinet down into its component parts and draw each piece. If you do not have the necessary experience, you can use specialized computer programs. When calculating, it is necessary to take into account that in most rooms there is a baseboard that can “eat” about 5 cm of the cabinet. Also, the baseboard will not allow you to move the cabinet close to the wall; the situation can be solved by bevelling the vertical ribs on the side of the baseboard or removing it completely.
When determining the size of the cabinet, it is necessary to consider not only the height and width of the structure, but also the distance between the shelves and their number. The minimum shelf depth recommended by experts is about 20 cm. If your books are large, it should be increased to 30 cm. In order to avoid sagging of the shelves, their thickness should be at least 2.5 cm.
After preparing the drawings, you can begin the actual manufacture of the cabinet, namely the preparation of its parts. Sawing parts can be done by specialists or independently. The complexity of the process lies in the need to use an expensive machine for sawing chipboard, the purchase of which solely for the installation of a bookcase is not advisable. At home, the machine can be replaced with a jigsaw, but in this case the quality of the cut decreases and chips form.
Related article: Correct shower drain system
Return to contents