Having not encountered making furniture with their own hands at a professional level, most people find this process quite complicated.
The created appearance actually requires only a careful and conscientious attitude to the matter, since the manufacture and assembly of furniture must be approached thoroughly.
However, it is quite possible to make high-quality furniture relying on your own strength. To understand how to make furniture with your own hands , all you need is desire.
You will need to purchase the necessary set of tools. As for skills, this will come over time and will allow you to act somewhat faster and more confidently in this field.
The quality of these products now depends on the use of ready-made technologies and following the instructions for making furniture.
Tables
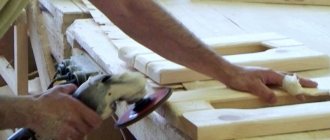
A homemade table looks no worse than one purchased for a round sum. It is very easy to assemble and even beginners can do the process.
You can implement interesting ideas yourself with a little effort.
What should be done:
- a drawing and diagram of future furniture is applied to paper;
- the legs and tabletop are cut out, and if you plan to make an original design with different shelves, all the details are prepared;
- the canvas - the base is thoroughly sanded and cleaned;
- the surface is treated with antiseptics and other liquids;
- cracks in wood are treated with wood putty;
- markings are applied to the base;
- the product is sawed out;
- cuts are made on previously prepared legs, and the structure is assembled with bolts, screws and other parts.
A table is the piece of furniture with which any novice furniture maker can begin their thorny path of knowledge.
Important! In order not to spoil the material and understand the intricacies of drinking and assembly, it is recommended to watch training videos - lessons.
You can strengthen elements that dangle after assembly with glue or special construction belts. The tabletop is smoothed, varnished or painted, and decorated.
Required materials and tools
Before you start learning the assembly process yourself, it is first important to prepare the necessary tools:
- Screwdriver. You will need it to tighten various parts: bolts, confirmations, screws. With their help, prepared parts of the fittings are necessarily attached. There is an alternative method of assembly - using ordinary screwdrivers, but in this case the whole process can take a long time, and not every person has such an opportunity.
- It is advisable to immediately purchase drills of various diameters. In many construction stores they are sold as a set (from 4.5 to 10mm). This will also save time on searching for all the necessary materials, especially since such a tool may be useful in the future;
- A drill for confirmation is purchased separately. In this case, you can drill a 5 mm hole in a very short time. For steps without special costs, the hole expands to 7mm;
- In order to tighten the confirmat efficiently and tightly, it is recommended to purchase a hexagon. As an alternative, some home craftsmen use a screwdriver equipped with special bits, but with this design it is impossible to get into hard-to-reach places;
- Anyone who wants to assemble cabinet furniture should have a Forsnel drill, since it is used to tighten hinges and other fittings;
- Marking supplies: ruler, pencil or bright felt-tip pen, metal square, tape measure, stationery knife;
- Circular saw;
- Electric jigsaw;
- A hammer, preferably with a nail puller (will be needed if you need to dismantle individual elements);
- Construction hair dryer.
If the furniture does not have any special features, when assembling it is recommended to use universal diagrams that are designed for a drilling angle of 90 degrees. Unfortunately, such a device cannot be called a budget option, so such a purchase is only advisable when the assembly becomes a professional craft.
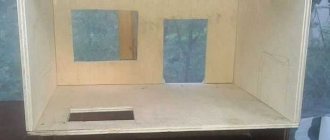
Closet
Even a novice craftsman can assemble the cabinet on his own. First of all, decide on the material and boards - these can be chipboard - slabs no thicker than 18 mm.
The cabinet can be made according to your own sketch from various materials
Step by step the work looks like this:
- decide on the door closing system: they can be sliding or hinged. The first ones can be purchased ready-made or made on your own;
- prepare all materials, tools, parts, sketch a sketch, cut out the parts;
- assemble the frame - side and rear walls;
- mount on top and bottom using self-tapping screws or base confirmations;
- take into account the dimensions of the already assembled cabinet and make shelves and drawers;
- secure the facades;
- attach fittings: handles and locks.
With a creative approach and the availability of tools and materials, you can make a pretty decent cabinet.
You can decorate a finished piece of furniture in any way, to your taste. If you wish, you can arrange lighting.
Today it is impossible to do without cabinets designed to store things.
Selection of furniture fittings
In addition to fastening elements, there are other furniture fittings, without which the product will lose its decorative and functional qualities.
Table 4. Types of furniture fittings
| Name | Description |
Pen | A necessary element that provides convenience when opening doors and drawers. Fixed with screws. Selected in accordance with the color scheme and style of the furniture facade. |
Legs | For the stability of the structure, especially when the floor surface is not too flat, choose products with height adjustment. The material must be practical and durable, moisture-resistant and resistant to mechanical stress. The appearance is also selected according to the design style. |
| Silicone damper | An inconspicuous but important detail that ensures silent closing of the doors. Fixed from below and from above on the door or end of the cabinet. |
Loops | An important element that ensures the opening of the sash. Equipped with a mechanism for adjusting the height and depth of the door. |
Wheels | Used for comfortable operation of roll-out drawers and cabinets. |
Stubs | Masking fasteners. Matched to match the body. |
Shelf supports | Used for fixing additional shelves in wardrobes and racks. |
Hooks | They are used inside wardrobes and on panels in hallways. |
Crossbars and bars | They may have different cross-sections and radii. Used in wardrobes. |
Lock | Used for doors and drawers in cabinets and office shelving. |
Video – Furniture fittings
Nightstand
Making your own bedside table will not take much time. You just need to sketch out a drawing of a product that suits your design, prepare the material and tools.
There are a large number of ideas for DIY bedside tables, the main thing is that it matches the design of your interior.
The list of further actions is as follows:
- drank all the elements;
- assembling the frame of wooden furniture: connecting the board and side panel with screws;
- cutting holes for future drawers;
- screwing the second side panel, forming a furniture support;
- installation of the panel from above, both with and without a canopy;
- installation of drawer guides;
- connecting all the parts of the boxes;
- installation of facade panels.
A bedside table is an indispensable bedroom furniture.
The drawers are put into place last. All fastenings are made with self-tapping screws or self-tapping screws. Decoration can be done upon request. Not only wood can be used to make furniture.
A bedside table can not only be a wonderful element that will complement the interior of the room, but also a good option for emphasizing the overall atmosphere.
Bed
A DIY bed is a master class that is popular. For manufacturing, it is better to select wood with a high moisture content.
The bed can be made by both a novice craftsman and an experienced furniture maker who has special woodworking equipment.
The process looks like this:
- a diagram is drawn, materials and accessories are purchased, the necessary tools are selected;
- the frame is assembled: the bars are fastened together with self-tapping screws;
- the edges are filed down and smoothed with a sanding machine;
- the frame is painted with a composition for wood;
- supports for the slatted bottom are made;
- holes are drilled in the frame, bars are mounted;
- wooden slats are attached to the supports, the distance between them should be the same;
- The legs are made from wooden blocks, their cross-section and length should be within 10 cm.
Having decided on the dimensions, you should think about the design of the bed and its design style, and draw up a drawing or sketch.
Important! The number of blocks should not be less than 6 pieces;
- the legs are mounted to the frame;
- The furniture is sanded and top coated with varnish.
The bed can be decorated with various types of decor, which will greatly decorate the bedroom where it will be installed.
Decoration can be different: painting, carving, original painting. To ensure that the furniture is level and not skewed, a building level is used at all stages.
Master classes for beginners on furniture making
Every beginner can make high-quality furniture at home with their own hands. The main condition is to decide on the material and arm yourself with all the necessary tools. To implement a home master class, experts recommend watching an example video on the Internet.
Creating a new, unusual object does not necessarily require the purchase of expensive materials.
Depending on the future loads on the piece of furniture, you can use the following types of wood:
- hard: apple, beech, elm - suitable for making solid frame furniture;
- soft: fir, pine - they have an attractive appearance and ease of processing.
After choosing wood, you need to stock up on the necessary tools:
- jigsaw with tilting shoe;
- grinding machine;
- milling cutter for wood processing;
- rotary miter box;
- glue, screws and other fasteners.
To complete the work you will need a set of tools.
When everything is ready, you can begin the work process: sketching drawings, cutting out parts and assembling.
So, the stages of creating interior items:
- choosing the specific type of furniture to be made;
- drawing diagrams and drawings - it is better to draw a non-standard type of project in detail, with examples and all elements;
- purchasing the necessary materials;
- drawing markings for further cutting out details;
- treatment with special antiseptics and protective compounds for wood;
- cutting holes for fasteners according to previously drawn diagrams;
- surface painting;
- assembly of the structure.
Ideas for making furniture with your own hands can be taken from the Internet or using your own imagination.
Note! It is necessary to process the material to prevent rotting and drying out of the wood.
The last, final stage: decoration. You can make furniture decoupage from appliqués or original wood carvings. For wooden surfaces, hot stamping looks beautiful: three-dimensional designs that are made using high temperatures. The wood is softened, different forms of press are used and a creative design is obtained. Unique furniture can be created using applied decor: overlays, rosettes, bas-reliefs, corners.
Making furniture with your own hands is a fascinating, creative process that brings stunning results.
You should start with the simplest designs: a bedside table or a table. A good option is to watch an online master class and ask an exciting question in the comments or personally to a specialist.
Bonus: 3D program for arranging furniture in an apartment
Do you want to plan the arrangement of furniture in the room? 3D Interior Design will help you see how the new furnishings will look in a real apartment, as well as come up with the right layout depending on the size of the room. This is a great assistant for both professional visualization designers and amateurs. A simple and intuitive interface, a ready-made collection of household items and a built-in estimate calculator will help with repairs, redevelopment and simply changing the design of your apartment.
Think about your furniture arrangement now! Download the Interior Design 3D program:
Works great on Windows 10, 8, 7, Vista, XP