4278 0 0
Michel March 27, 2018Specialization: plumber with 10 years of experience, computer repair specialist, powerlifting coach. I have extensive experience in construction, interior decoration, and making homemade furniture. Hobbies: sports
Is it difficult to make a bookcase, linen cabinet or tool cabinet out of plywood? How to choose the material for its creation? How to cut and process plywood when building a cabinet? Today I will try to answer these and some other questions.
Stylish plywood kitchen
Required tools and materials
An unchangeable and indisputable fact is that all work begins with the preparatory stage. In the case of a closet, you need to choose a place to work and a part of the room for the room. You need to take care of all the components of the future cabinet:
- Fasteners. Select different screws and minifixes to make it look aesthetically pleasing. It would be a good idea to use more than one type of glue.
- Sheets of plywood.
- Accessories. These are closers or hinges.
- Decor. What will give the cabinet a good appearance: adhesive film, putty or stain.
Tools for working with the above parts:
- a set of screwdrivers or a screwdriver;
- drill with a set of drills;
- chisels and hammer;
- roulette;
- electric jigsaw;
- hacksaw with plane.
Having collected the entire set of accessories for work, proceed to the next stage.
Working with ends and cutting material important points
The most important step in the work is cutting the multilayer material. Professional furniture makers prefer to do this using a laser. The appearance of the product largely depends on the processing of the edges.
Sawing on a laser machine can only be done in professional carpentry workshops. If this is not possible, the ends are processed independently.
Working with the ends involves gluing the edges with special PVC furniture tape. Sealing the edges with edging is quite quick and easy.
When working, it is important to consider which parts in the structure will most often be subject to mechanical stress. These ends are covered with a shockproof edge, the thickness of which is 2 mm.
How to choose the right plywood for the job
Plywood is a natural material, made up of several layers of wood and impregnated with glue, used to create furniture items. Some manufacturers suggest considering sheets that are resistant to moisture and water. Any tree is deformed by these two factors; for those types of plywood that are resistant to them, a special type of glue is used.
Plywood consists of sheets of natural wood impregnated with glue.
Slightly soluble glue can be of different brands and this becomes a determining factor in the types of plywood. There are 3 of them: FC, FBS and FSF. The first type is best suited for working with furniture and creating interior parts. The remaining two cannot be used in these cases; they are used in automobile, aircraft and shipbuilding, as well as in construction.
The parameters used in working on the cabinet, sheets are selected with different thicknesses depending on the location and purpose. The case will be durable if you use a plywood sheet equal to 18 mm. A small width of up to 12 mm is used for the facade.
If a wall cabinet is provided, then it is better to use 6 mm plywood, no more. It is important to consider different timber widths to balance the size and weight of the structure.
For wall cabinets, thinner sheets are used.
Algorithm for making a cabinet
To obtain the expected result, you must follow all stages of making a plywood cabinet.
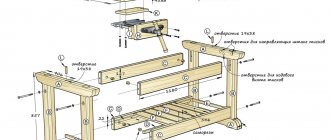
Table. The main stages of the cabinet manufacturing process
| Stage | Brief description of actions |
Taking measurements | This means that you need to decide on the location of the cabinet and find out the dimensions of the free space; depending on it, the furniture parameters are adjusted. You can go another way - first set the dimensions of the furniture, taking into account its purpose, and then plan where in the room it can be placed. But in all cases you must act very carefully; if the dimensions are determined incorrectly, all the work may be in vain. It is recommended to check the dimensions at least 5–6 points; this will eliminate errors associated with uneven walls. |
Project development | Check out the maximum number of proposals, today information is available and finding various projects is not a problem. Consider the specifics of the objects and things for which the cabinet is intended. If existing projects do not completely satisfy you, then make your changes to them and draw a sketch taking into account your comments. On the sketch, put all the dimensions, not just the overall dimensions. It is advisable to make detailed drawings and draw installation locations for hardware and accessories. Calculate the total footage of plywood, the number of fasteners and fittings, and decide on specific types and names. |
Preparing parts | If you have your own high-quality equipment and tools, minimal experience in carpentry, a workshop and free time, then you can do the cutting of parts yourself. If at least one condition is not met, it is better to order such work to special companies. They will not only cut out the parts, but also use a special computer program to first calculate the optimal map - the amount of unproductive waste will be significantly reduced and the cost of the cabinet will be reduced. In addition, defects are completely eliminated, assembly time is reduced and the quality of furniture is improved. |
Cabinet assembly | The final stage of furniture manufacturing. Before starting work, you need to check the number of parts, find out their purpose, think over the order of fixation and select hardware for each cabinet assembly. Remember that not all errors during assembly can be easily corrected or ignored; some can have a negative impact on the functionality of the cabinet, and require a lot of effort and time to eliminate. |
If you prepare properly and take a responsible approach to each stage, even a novice craftsman can assemble a cabinet made of plywood. True, you shouldn’t hope that it will be of the highest quality; even professionals can make mistakes, but for beginners this is a pattern, not an exception. The frequency of errors and the ability to make optimal decisions is the difference between masters and amateurs.
If you have no experience, it’s better to start by making small bedside tables or cabinets
Drawing up drawings
You don't need to be an engineer to create furniture drawings. Every person can do this. First, decide what type of cabinet you need. Perhaps it’s a classic one, or maybe a wardrobe? Absolutely all the details of the future object are drawn on paper, and the parameters are written above them.
First you need to decide what type of cabinet you will make.
An example is the list of necessary measurements for one door furniture:
- Back wall and side panels.
- Bottom and shelves.
- Door and lid.
- Mounting strips.
- Door stand.
- Edge overlay.
You will need to make certain measurements.
Based on this list, you can find out what needs to be added in the case of 2 or more doors. In addition, at this stage, take into account convenient zoning inside the furniture. And the location. If this is a hallway, it is worth considering the fact that it is convenient to place accessories, umbrellas and shoes there. If this is a bedroom, it is convenient to place dresses, shirts and bed linen in it.
A closet for a hallway will differ from furniture in a bedroom or other rooms.
Work technology
So, how to assemble a cabinet from plywood? Let's look at the main stages of work.
Marking
It is performed using traditional tools - a sharp pencil, a long metal ruler and a tape measure.
Sheet layout
Semicircular edges (they may be needed, for example, when making a corner cabinet) in the absence of a compass of sufficient size can be marked using a set of pencil, rope and screw:
- We screw the screw into the expected center of the circle, the arc of which forms a curved edge;
- We tie a pencil to the screw;
- Holding the pencil vertically, draw an arc.
Pattern
What and how to cut cabinet parts?
It is more convenient to cut plywood along straight lines using a stationary or hand-held circular saw. The smaller the saw teeth and the slower it moves relative to the sheet, the smoother the edges will be and the less time you will have to spend sanding them.
Curvilinear parts are cut with an electric jigsaw. An unpleasant feature of this tool is that the cutting line constantly tries to move away from the markings, so when cutting, align not with the marks on the sole of the tool, but with the file itself.
A jigsaw will help you make curved parts
Warning: You will need goggles or a clear mask to protect your eyes from sawdust.
Parts processing
After cutting, the parts need to be polished. You will have to sand both the edges (they will retain cutting marks) and the surface of the veneer. In both cases, it is most convenient to use an orbital sander.
Sanding with an orbital sander
However: if you have a router with an edge cutter at your disposal, it will give a slightly better quality to the surface of the edges and, more importantly, make them perfectly smooth. When sanding with an orbital sander, there is always the risk of leaving indentations on the edge.
Processing edges with a milling cutter
For rough sanding of edges, start with 80-grit sandpaper. The surface of the veneer is sanded with paper or mesh No. 120 in the first pass. Reducing the abrasive grain, gradually bring it to No. 400.
Wall mount
How to build a plywood cabinet into a niche or secure a stationary plywood cabinet to the floor and main wall?
I used ordinary construction angles to connect the load-bearing structural elements to the floor and walls. They are attached to brick, stone and concrete walls with dowel nails, and to wooden walls with phosphated or, better yet, galvanized screws.
Galvanized corner
Butt connection of parts
To connect two cabinet parts at right angles (for example, the top and side walls), follow the following procedure:
- Drill 4mm holes in one of the parts at right angles to its plane. The distance from the edge is equal to half the thickness of the plywood sheet;
- Align the parts and, holding them together, drill the edge of the second part through the previously drilled holes with a 3 mm drill to a depth of at least 45-50 mm;
- Countersink holes in the plane of the first part. I used a 10mm drill bit for this purpose. The depth of the countersink should allow the head of the screw to be recessed at least 1 mm below the surface of the plywood;
- Fix the parts and connect them with 45x4 mm self-tapping screws.
Parts made of sufficiently thick plywood can be joined without corners
Attention: shelves that will experience significant operational loads are attached to the side walls in the traditional way - on furniture corners. Connecting to the walls with self-tapping screws screwed into the ends of the shelves can lead to delamination of the plywood.
putty
How to repair screw heads, gaps between adjacent parts, and surface and edge defects?
It all depends on what method of finishing the cabinet you plan to use. You can safely use acrylic wood putty under paint or texture film.
Wood putty with acrylic binder
But under a transparent coating (impregnation or varnish), it is better to prepare the puttying material yourself.
Homemade putty, exactly matching the color of the plywood, is obtained by mixing the sawdust left over from cutting it with PVA glue. The thicker the putty, the less it shrinks when drying. A nuance: sawdust must be collected at the cutting stage into a clean container; if you sweep them off the floor, dust will inevitably get into the putty, which will affect its color.
After the glue dries, the homemade putty will match the color of the veneer
Finishing
The paint is applied to the surface of the plywood in 3-4 layers with intermediate drying. After applying and drying the first layer, intermediate sanding with zero paper is necessary: it will remove the lint that has risen from the surface when moistened.
Painting plywood blanks
Please note: it is better to paint not with a brush (it leaves streaks even with the most careful application of paint), but with a narrow roller.
To coat plywood furniture with varnish, you can use two fundamentally different methods:
- Multi-layer application by brush or roller with intermediate sanding of each layer. The last layer is polished with a felt disc. The method gives excellent surface quality, but requires a lot of effort and time;
Applying varnish with a brush will require multiple intermediate sandings.
- Filling a horizontal surface and then spreading the varnish with a wide spatula. Filling allows you to get a smooth glassy surface in one step. Polishing is required in those rare cases when small bubbles remain on the varnish layer.
Varnished plywood blank
To decorate plywood furniture and give it a certain style, two simple decorating techniques are often used before varnishing:
- Drawing patterns through a stencil. The paint must have a base that is different from the varnish base. I used gouache with an organic solvent-based alkyd urethane varnish as the final coat;
Vinyl stencil for applying patterns
- Decoupage. This is the name for sticking pictures or napkins onto the surface of furniture and then varnishing them. Decoupage will help you revive a cabinet in a children's room or add a special charm to kitchen furniture.
Decoupage on sliding plywood doors of a linen closet
Step-by-step instructions for making a do-it-yourself plywood cabinet
When you are fully prepared, proceed to the main work. For a beginner, it is difficult to decide what to do next and how. The best way is to follow the pre-prepared step-by-step instructions.
Cutting parts
Let's return to the drawing stage. After applying the parameters to the sheets, they are cut out. The resulting parts are cleaned and polished. In the future, they will serve to form furniture.
The parts for the cabinet need to be cut and sanded.
Professionals recommend starting cutting parts for the sides. It is important to know that the process is not carried out across the fibers.
First you need to cut out the parts for the sides.
Pay attention to practical tips from the pros:
- If you plan to have 2 doors, you do not need to cut them out one by one, but cut out one large sheet. In this case, you will spend less time making technical parts, and they will be smoother. Because they are measured and created for two doors at once in 1 measurement.
- If cutting is done with a household saw, place masking tape on the lines along which you will cut. An alternative is screwed thin plywood. Actions are necessary to ensure that the cut line is not “torn”, and is achieved by pressing the fibers.
- Thin lines were made so that when cut they would remain on the finished part.
- If possible, it is better to cut the plywood on a sawing machine. Such a gesture allows you to avoid an unpleasant shortage of material and its further purchase.
- When connecting “into a tenon” it would be appropriate to use a special numerical machine.
- Wooden plugs or anchor compounds are made on thick parts at fasteners. At the end you need to create a place and hammer a dowel into it, which will be pre-lubricated with soft glue. Please note that the space on the plywood is equal to one third of the thickness of the material. This allows you to increase the strength at the perpendicular joint. And such a shelf can withstand a lot of weight.
Recommendations for correct cutting of parts must be followed.
An important point is that the ends of each workpiece must be sanded using sanding paper.
Description of the manufacturing process
In addition, after these steps, putty is applied in several layers. The optimal number is two.
The main process begins after all the parts have been manufactured. And then markings are applied where subsequent holes with screws or confirmations will be made. After which you can start creating them. It is better to use a step drill here. With it, the holes can be made either with or without threads. An ordinary screw requires countersinking to work on it. It is better to decorate the front side with minifixes, otherwise decorative plugs will be needed.
Before drilling holes in the parts, you need to make markings.
Please note that a tight connection of all parts is allowed using silicone sealant.
Assembly is carried out by hanging the doors. Use suitable hinges to achieve the required opening angle. If these are doors of a different type, pay attention to the correct and reliable fastening for them. Next, internal functionality is created. It includes: shelves, bedside tables and other elements.
When assembling, you must follow the correct sequence.
Make sure that nothing interferes with you during assembly. Maintain consistency.
Additional elements to improve functionality
In order to improve the functionality of the cabinet, you need to take into account the ease of use. For example, arrange the shelves so that the one that will be used most often is at arm's length. For closed shelves, you can add small handles to make opening them easier.
The cabinet should be comfortable to use.
Consider the area for which the cabinet is being built. And what you need for your ease of use. Perhaps you need tubes for things in your furniture or special closed shelves? These can also include pull-out shelves, but they should also be provided with a special fastening for ease of pull-out.
Additional details may be required.
Another important example of adding a closet would be a mirror on the door; a similar closet can be placed in the bedroom or bathroom.
The door can be supplemented with a mirror.
Finishing
For this stage of work, all parts must be separate. Therefore, the cabinet will have to be disassembled and assembled at the end. All of them (parts) will be grindable. This can be done:
- Sanding paper.
- Grinding machine.
Manual actions are carried out along the fibers. But if you have a machine, the process will be much simpler and easier. Pay attention to the grain of the paper. As you work, the grain size should decrease.
At the end of the grinding stage, the surface becomes smooth and can be processed further. Any tree requires quality care. In the case of plywood, you can use:
- Opaque enamels for wood. Enamel creates a protective film on the surface.
- Oil with wax. Easy to apply, without a specific smell. This combination of products cannot protect against mechanical impacts on the tree and is susceptible to damage. But the oil protects against other unpleasant factors. In addition, oil does not affect the color of the wood.
- Tinted varnish. The appearance does not change, but a beautiful “glossy” shine is created on the surface.
- Combined options. All of the listed finishing methods can be combined here.
Finally, the product must be coated with a finishing finish.
In addition, there is external influence on wood in almost every room. This is especially important if the cabinet will be located on the balcony, in the bathroom or in the kitchen. In these rooms, furniture is subject to increased exposure to detergents, dirt, dust and humidity.
On the balcony, furniture is exposed to additional environmental influences.
Material selection
The best choice for homemade plywood furniture would be grade E (“elite”) material, characterized by the complete absence of defects on the edges and front surface of the veneer. It can be used without puttying or any additional processing (except for sanding for varnish or impregnation).
Furniture plywood. Top layer - oak veneer
Unfortunately, this grade of material is not sold in my city, so I had to use 3/4 grade construction plywood. Lower quality of the surface automatically means the need to putty defects and paint or paste with a textured film as a final finish.
On sale you can find FC and FSF plywood. The first is made mainly from birch veneer and glued together with completely harmless urea resin. The second is characterized by increased moisture resistance due to the use of resinous coniferous wood and phenol-formaldehyde resin.
Captain Obviousness suggests: FSF will make an excellent cabinet for a balcony, but in a residential area it is better to be careful when using material with a fairly high formaldehyde emission.
When purchasing, you should pay attention to several external signs:
- No delamination on the edges;
- Absence of falling knots on at least one (front) surface of the sheet;
Typical defects in grade 3-4 plywood
- Appearance of veneer texture. The more effectively it is drawn, the better your closet will look. Of course, provided that a transparent coating is used.
How to make a wardrobe from plywood
This type of product is much easier to manufacture, since there are different types of compartments. In some of them, the expenditure of effort, time and materials will be spent on creating only the insides of shelves and bedside tables. This is also typical for frameless type sliding wardrobes built from plywood with your own hands; you can also make them yourself. To work on this type and others, you also cannot skip all the preparatory steps, including the creation of drawings.
It is easier to make a sliding wardrobe if it is a built-in option.
In addition, there are also frame products that will later be built into the niche. The preparation is similar. High-quality and accurate preparation before starting work is the key to success. Work starts from the bottom, these are the cutouts for the plinth. The racks on the sides must be secured to the wall with dowels or metal corners. Use small nails to cover the front edges of the vertical supports.
Sliding wardrobes have their own production technology.
Upon completion of work with the vertical parts, a wooden shield is placed on top. As a rule, it protrudes slightly beyond the dimensions of the racks. The door system is attached to the top, and it will be installed from the bottom after the doors are aligned in parallel.
Decorating the product
Decoration in this case is possible on the facade, that is, on the doors. Plywood can be made with a photo print, this decor can be used on all types of canvases. It could be film. And also, mirror inserts, or painting. This is all done before installation in the desired location.
You can decorate the door with mirror or other inserts.
Often, in the case of plywood furniture, the appearance can be spoiled by multi-layered ends. In order to seal them and save the appearance of the product, use the following materials:
- Adhesive tape in wood color.
- U-shaped profiles made of aluminum or plastic.
- Paint.
You can mask the ends in different ways.
Beautiful examples made by yourself
Until recently, plywood was not used to create many things. But, its simplicity and elegance, combined with practicality, won the hearts and hands of the craftsmen. Today there are a lot of beautiful plywood cabinets. They are distinguished by their lightness, which does not burden the design of the room.
Plywood furniture adds lightness to the room.
In each of the selected designs you can see plywood furniture, and it will be appropriate. The lightness of the material contributes to the creation of various shapes. Therefore, it is easy to work with her.
Plywood is an easy-to-work material, so you can create any furniture from it.
Based on the text described above, the conclusion suggests itself that working on a plywood cabinet with your own hands is quite possible even for a beginner. All work happens step by step. From preparatory work to final touches and design. It wouldn’t hurt to order some of the elements from the craftsmen; we include doors for sliding wardrobes in this order.
Decoration
After painting, the furniture is assembled and installed in place. The use of decors - patina, overlay elements, panels, metal corners - will help to give a complete appearance.
Most often, the appearance is spoiled by multilayer ends ; they can be sealed using U-shaped profiles made of plastic or aluminum, self-adhesive melamine tape with a wood pattern, or paint.
If you are considering making cabinets from other materials, we recommend considering furniture board, chipboard, plasterboard and cardboard.
Why plywood
But in fact, why did we choose plywood as the material for the cabinet?
Here are the motives that made me choose this material:
- With a thickness of 15 mm or more, it has mechanical strength that is superior to wood of the same thickness and leaves no chance for the more popular laminated chipboard and MDF;
- Parts made of plywood with a thickness of 15 mm or more can be joined end-to-end with self-tapping screws, without furniture corners. In this case, holes for self-tapping screws are drilled in the plane of one part and in the edge of the other. Both MDF and laminated chipboard are connected only with the help of fittings, and the strength of the connection is noticeably inferior to that of plywood;
- The material is moderately hygroscopic. The appearance and strength of plywood only suffers with prolonged contact with water, and this problem is easily solved by using waterproof finishing coatings. Coatings (waterproofing paints, waterproof varnishes) adhere exceptionally securely to the top layer of veneer and, unlike laminated chipboard and MDF films, do not peel off;
- By the way, about coatings: plywood is fully compatible with modern varnishes and paints, both organic and water-based;
- Finally, the price of the material played an important role in my choice. A square meter of FC plywood 15 mm thick costs about 400 rubles. Only laminated chipboard is noticeably cheaper (from 300 rubles/m2), which is completely inferior to FC in terms of strength and moisture resistance.
A caveat: plywood, even with significant thickness, can deform under bending load. When spanning over 60 centimeters, plywood shelves require intermediate posts or stiffeners.
How and where to order material
You can buy plywood in the PlywoodMonolit online store from the manufacturer by reading the online product catalog, which contains photos of the boards, a description of their characteristics and dimensions, as well as the cost of the sheet material. The price of plywood sheets indicated on the website does not include markups from intermediary firms, therefore it is the most attractive. In addition, there is a flexible discount system for regular and wholesale customers, offering additional discounts.
Improving the closet
To make a plywood cabinet even more convenient and functional, you can add sliding doors on casters and wheeled legs.
The doors will be convenient if the closet is in the living room, on public display, but there are clothes or other things that you would not want to put on display. The essence of sliding doors is simple: a metal profile is attached to the bottom and top, along which rollers run. It will be most convenient to make two doors, which can be made from the same plywood. However, it should be noted that sliding doors are convenient only in wide cabinets, plus when preparing shelves, it is necessary to include doors in their depth.
Wheels on metal brackets make it easy to move the cabinet while cleaning. It is not difficult to secure such legs.
Return to content