Where to start
The first stage of any work is careful planning, since making and installing wardrobe doors with your own hands is not the easiest task and you can only cope with it if you are well prepared.
The first thing you need is to know exactly the dimensions of the opening, because the quantity and type of profile you will need to buy depends on this.
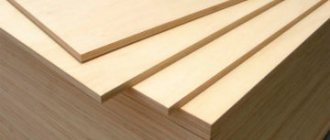
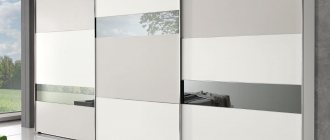
Secondly, you need to decide on the material from which the sliding doors will be made, it can be almost any durable sheet material, such as glass, mirror, chipboard, chipboard, you can even use wood or plywood when working.
You should also decide on the opening system. Do not be afraid that you will have to make the elements yourself, since furniture manufacturers do not use special equipment. A set of rollers and profiles can be easily purchased at a furniture fittings store. This set allows you to make doors that will not differ from the options that you purchase from a furniture manufacturer.
You also need to prepare all the tools necessary for the job, so that when you start making cabinet doors, you don’t experience any delays. Only after you have purchased all the materials and prepared the tools can you start making cabinet doors.
An interesting option for making guides for sliding wardrobe doors - watch the video:
Installation of guides
The dimensions of the slides must correspond to the width of the cabinet. The difference of plus or minus 3 mm is not significant, so a small dimensional error is acceptable. Install the top rail first.
Top guide
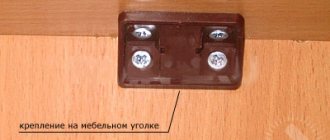
Secure the guides with 4.2×16 self-tapping screws or 3.5×16 countersunk screws. Drill a hole in the top rail with a 4mm drill bit. The distance between the holes is approximately 300 mm.
If you need to secure the rail with a countersunk screw, then the holes need to be secured with a 6-8 mm countersunk head. This is to make sure the screw is fully seated, so to speak. So the instructions for installing the top rail are quite simple. Once you've drilled the holes in the rail, you need to insert it, line it up flush, and secure it.
Bottom guide profile
In this case, it is also necessary to drill holes in the profile. But don't rush to attach the bottom rail to the cabinet. The reason for this is that it must be offset within the cabinet by 20mm. In order to achieve an accurate notch, you must first install the bottom rail profile into the cabinet. Next, install the doors to the closet. It is impossible to do without an assistant in this task. The door must be installed strictly vertically. This can be achieved by moving the lower guide profile, checking verticality using a spirit level.
Install the locking device before screwing the bottom rail. The next section describes how to do this correctly.
Sources
- https://remboo.ru/dizajn/mebel/dveri-dlya-shkafa-kupe.html
- https://made-box.ru/samostoyatelno/sborka-dverej-shkafa-kupe-svoimi-rukami.html
- https://stroychik.ru/mebel/dveri-dlya-shkafa-kupe-svoimi-rukami
- https://dom-i-remont.info/posts/mebel/dveri-dlya-shkafa-kupe-svoimi-rukami-sborka-i-montazh-udobnoj-sistemy/
- https://kakpravilnosdelat.ru/ustanovka-dverey-shkafa-kupe-svoimi-rukami/
Door dimensions and surface leveling
If you are just making doors in a niche, then you should carefully check its walls. Most importantly, they must be vertical and level, since the side guide profile will be attached to the walls. The bottom and top parts must also be level, because this is the basis for the profiles along which the rollers will ride. And of course, do not forget that all corners must be right, otherwise the doors will not adjoin the side profile and a gap will form at the top or bottom.
If the opening does not meet these requirements, then you can simply put a box in it. You just need to install the frame before you start measuring the doors or making them, because the frame will reduce the size of the opening, and, accordingly, the size of the doors. Of course, there are cases when you have already bought a profile, and only after that you have installed the box, but do not worry, since cutting them is not difficult, it is just a small additional cost (the profile is sold by the meter).
Installation of frame and door profiles
To make the cabinet door fastening as secure as possible, prepare connectors for the pins. We align the door façade so that no problems arise during use. To avoid damage to the profiles, use supports when creating holes. Tables and chairs are suitable for this. When they are ready, sand them with sanding paper. It is important to leave a step of 5 centimeters. We do the same for the screws to ensure reliable fixation.
Next, we select a place to install the guide. It is optimal to move it 1-2 centimeters deep so that the door is not too far inside and does not stick out from the outside. This fact does not interfere with use, but the aesthetics of the furniture are spoiled. Don't forget about the stoppers in the bottom grooves to secure the doors tightly without creating gaps.
Installation of system elements
The door opening system mainly consists of the following elements:
- Profiles for frame
- Top and bottom rollers
- Top and bottom guides
- Side guides
- Seals and decorative elements
- Handles and other accessories
At the first stage of installation, your sliding doors will simply look like a pile of spare parts from which you will need to put together a door system. But do not be afraid, since each set of materials for sliding doors comes with an installation diagram. Therefore, assembling them will be no more difficult than Lego.
There is no strict recommendation on where to start making wardrobe doors with your own hands. Some start by assembling the frame, others by installing the guides. A more practical option is to start by installing a top guide, especially if you don't have a laser level or a full-fledged alternative to it.
With this technique, the lower guide is simply cut to size and is not attached to the surface, since it will need to be adjusted at a later stage of work. But it must be carried out immediately before installing the doors.
Next, the door frame itself is assembled; its assembly process may differ depending on what type of profiles you have chosen and what material you are going to use for the door leaf. When assembling, be sure to use a corner to prevent the door from being warped. Even if you just want to make a wooden cabinet on the balcony, the doors should be level to avoid problems during future use.
Once the frame is ready and the rollers are installed on it, you can begin adjusting the bottom guide. The adjustment is as follows: a frame is placed on the installed lower profile and fixed in the upper one; in simple words, you just need to put the frame in place. Then, using a regular building level, you simply need to level the doors, while adjusting the lower profile. What is important is that if you have more than two sashes, it is not necessary to install all of them. It is enough to hang two side flaps and align the guide with them. When the guide is in place, simply draw a line, which will be the mark for its fastening.
At this stage of work, it is important to maintain maximum accuracy, since how you adjust the profile determines how the sashes will work in the future.
Once the top and bottom rails are installed and adjusted, you can install the side rails.
Rules for assembling furniture
It is already clear that the most difficult part of assembling a wardrobe will remain the process of assembling its doors itself. Everything else is done simply and clearly. However, before we talk about working with doors, it is worth remembering the general rules of work during the assembly of cabinet furniture.
- If the furniture was purchased in a store, it usually comes in several boxes. Each of them will have parts for a specific part of the same cabinet. First, you should always read the instructions, and then unpack. You need to unpack the boxes in stages - you don’t need to do everything at once, otherwise you can get confused in the details.
Self-assembly of a wardrobe
- You should immediately see that all the necessary fittings are in place. It also happens that the manufacturer miscalculated and something is missing. Likewise, you need to make sure of the amount of fittings when creating a cabinet yourself - it’s inconvenient to run to the store in the middle of the assembly process if something is missing.
- You need to assemble the cabinets section by section - first one part, then the other. Moreover, if the cabinet is a cabinet, then it is worth assembling the cabinet itself first, and only after that move directly to the doors.
Fastening the sliding system for doors
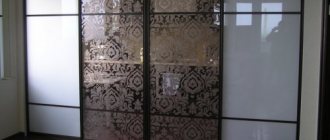
- If the cabinet has a mirror, then it should be fixed to the wall or door last, in order to reduce the risk of damage to the mirror surface.
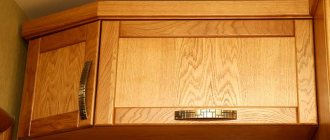
Door leaf material
If you are making a cabinet with your own hands, then you should remember that the main element on which its appearance will depend is the door leaf. You can even make it from clapboard, since any material that has sufficient strength can be used in the frame. Therefore, before making wardrobe doors with your own hands, it is recommended to think carefully about this aspect, since by making the canvas from ugly materials, you risk simply ruining the appearance of the apartment.
Of course, if you don’t like the result, the compartment mechanism allows you to replace the canvas in the future, but this is naturally an extra expense. In addition, it is worth remembering that when making a canvas from lining, you need to protect it well with impregnations. After all, even at room temperature and humidity, wood can warp, and accordingly it will lose its beautiful, original appearance.
But it is also worth remembering that frequent removal and hanging, and even more so replacement of the canvas, do not benefit sliding systems. After all, with such work, you can simply damage the door or its mechanisms.
How to start making homemade wardrobes
Most novice carpenters do not start with a cabinet with their own hands in the apartment, but make a rough version of the furniture. After all, even making a simple built-in wardrobe for a loggia yourself is quite difficult. Therefore, if you start with a simple cabinet on a loggia, balcony or cottage, you have an excellent opportunity to gain experience. In addition, such a piece of furniture will be very useful as an additional place to store things that are not afraid of the cold, and if the loggia is insulated, then you can easily store items.
It is much more difficult to make a cabinet on a balcony or loggia, since its design is different. But if you succeed, then after that you can safely begin improving your apartment. After all, making a cabinet with your own hands will be a simple task for you. Therefore, all beginners are advised to start by making cabinets for the balcony, as they may have some flaws, but they will not be noticeable.
In addition, you can build a door in the country if you do not want to spoil the interior of your balcony, since a small storage room with sliding doors will always be of minimal use to you to store garden tools.
Don't expect to do everything perfectly the first time. Making even a simple stool so that it looks beautiful is not as easy as it seems at first glance. Firstly, you need to have experience in carpentry, and secondly, you need to try so that everything works out for you. And for a do-it-yourself cabinet, you will also have to show a lot of ingenuity, since the door mechanism is quite unique, and installing it is a rather labor-intensive task.
What beginners should remember
The most important principle of work in carpentry is care and accurate calculations. Therefore, if you doubt whether you will do the work correctly, just draw drawings for yourself and calculate all the dimensions several times. Don’t forget about such nuances as profile thickness, because when installing the frame it should be taken into account.
If you do not have a corner, or you are not sure of its correctness, the door corners can be checked in a simple but nevertheless reliable way. Firstly, you can simply measure the diagonals; if they are the same length, then the angles are even. Secondly, you can use the Pythagorean theorem, but do not be afraid that you will have to calculate distances and angles. It’s enough just to measure 30 centimeters from the corner on one side and 40 centimeters from the other, and put marks. The distance between these points should be exactly 50 centimeters if the angle is even.
Carefully consider how to make a cabinet on the balcony with your own hands, so as not to make mistakes during the process. And if you make a mistake, you may simply ruin the material, resulting in additional costs or other problems in your work. Therefore, the planning stage is very important, especially for beginners who are just starting to work in this direction.
The door leaf, regardless of whether you make it from lining or from sheet material, it is important that the material completely fills the frame and is cut exactly to size. Otherwise, it may simply begin to wobble over time. The frame itself, also as a result of mechanical loads, may simply warp, and this will entail such negative consequences as increased wear of mechanisms and jamming of doors. That is why the filler must completely and tightly fill the door frame. In addition, to avoid distortion, you can use middle crossbars; they will strengthen the frame and resist its deformation.
Closet doors with louvered type
Regardless of which mechanism you choose, bottom roller or hinged, try to follow the installation instructions in everything. If the instructions seem complicated to you, then try to understand them thoroughly, since both the quality and durability of your work directly depend on this.
Of course, making sliding doors yourself is quite difficult, but don’t be afraid. All masters started out at some point, and most of them learned everything along the way. After all, if you ask most craftsmen for documents on the education of a carpenter, they will not be able to show them to you, since they simply learned through practice. Therefore, you also have a chance to become a master if you try a little and be patient.