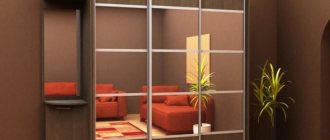
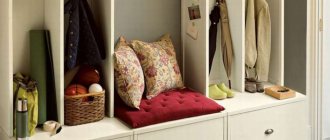
- Take any sidewall and mark the location of the shelves;
- Drill at least two holes to attach each shelf;
- Drill out the top of the holes so that the caps can be hidden with plugs;
- Place the part with the holes on the counter side and fix it, then drill holes in it. The first wall serves as a template, so that all shelves will be located on the same level;
- Drill matching holes in the ends of all shelves. Thus, prepare all parts for assembly, including the top cover.
To prevent the drill from slipping when starting the drill, first make the indentations with a core.
After preparing the parts, stick strips made of self-adhesive film on all their ends.
Assembly of the structure and installation of fittings
In fact, the cabinet is already ready, all that remains is to assemble it. The work is performed in the following sequence:
Frame assembly:
|
Fastening the shelves:
|
Installation of a clothes rail:
|
| Installation of door guides. If you are making a coupe, secure the guide profiles along the lid and bottom with self-tapping screws. Please note that they must be located in the same vertical plane. If the doors are hinged, install adjustable hinges. |
| Installation of rollers on the door. Attach rollers to sliding doors. The process of attaching them depends on the type of fittings. If the doors are hinged, secure the hinges. But, first apply markings so that they coincide with the loops on the sidewalls. |
| Door installation. Place the doors in their working position and secure them with the fittings screws. If necessary, adjust the position with the adjusting bolts. |
Now all that remains is to secure the handles and insert the plugs into the holes. The great advantage of laminated chipboard is that the material is covered with a decorative film. Therefore, the product does not need any finishing.
Wardrobe manufacturing technology
Visiting the customer, taking measurements and selecting a cabinet model.
You immediately need to decide on the following parameters:
- manufacturing material. Please note to the customer that for any design, the top and bottom inserts can only be made of chipboard with a thickness of at least 16 mm (chipboard, MDF, etc., but not fibreboard, glass and other materials of insufficient strength);
- appearance and design;
- facade finishing and decor (mirror, glass panels, bamboo, rattan, furniture plastic, etc.);
- the presence of lighting for shelves and the top panel of the cabinet;
- internal “filling” - dimensions and placement of shelves, number of compartments, drawers, etc.
At the initial stage, you cannot do without a laptop. Quite often, the customer himself does not know what he wants, so it would not be superfluous to select several dozen different models of cabinets of various configurations and install a simple designer program (for example, “Basis-Furniture Maker”, “PRO 100” or “Woody”) to design and show “on site” rough sketch of the future project. With the help of these programs, they also create a sheet cutting map, indicating the location and size of holes for drilling and fastening fittings.
Sawing materials
After agreeing on the sketch, it is necessary to cut the laminated chipboard and fiberboard materials according to the sheet cutting map
End grinding
The end edges are sanded to avoid peeling chipboard from getting under the melamine edge.
Pasting the edge film
Contact adhesive for chipboard is applied to the ends and edge film and left for 5 minutes until absorbed. After which the edge should be pressed to the end, fixing along the entire length using an iron (the second method is to iron it with a hot iron through felt fabric). Having glued all the ends, set the element aside for 2 hours until the glue dries completely.
Overhang processing
After the glue has dried, you should remove the overhangs - the excess edge protruding beyond the chipboard;
Marafet
Using a hand router or sandpaper, sand the edges until they are smooth.
Wipe all finished parts with solvent to remove any glue residue.
Fasteners
Mark and drill holes for fasteners. Install fastening ties and fittings on all parts.
Installation of a frame from profiles
Install a frame of profiles on the front surface of the door. Pack and go to the assembly site.
Frame installation
When installing the bottom, be sure to check the level. Erect the frame structure onto the leveled bottom, connecting the parts with fasteners.
Internal filling of the wardrobe
After securing the back wall and top panel, check the vertical level again, install the internal filling with the appropriate fittings (mounting angles, rods, rod holders, guides for drawers).
Installation of the front surface.
The profiles of the upper and lower guides are attached to self-tapping screws.
Guide roller
Install a guide roller on the top of the front door.
Rollers below
Attach the rollers to the bottom of the front panels using the adjusting screw.
Cabinet assembly and adjustment
When assembling the “coupe” itself, first insert the rear door, checking its parallelism with the walls of the frame. If a gap appears, the door position is adjusted using adjusting screws on the rollers.
Installing a second door
Then a second door is installed, the parallelism of which is checked by the same manipulations.
How to make a cabinet from chipboard step by step with your own hands
Practice shows that modern furniture stores are increasingly using such material as chipboard in their assortment. It is worth saying that particle board has always been popular. This is pretty good quality and also a low price. As you understand, such slabs are perfect for making cabinets and other furniture for the home. The current dimensions are considered to be 2750 × 1830 mm, 2440 × 1830 mm. As for the thickness, it varies from 16 to 25 mm.
Having the necessary tools for the job makes it possible to make a cabinet from chipboard with your own hands. This is exactly what we’ll talk about.
Do-it-yourself large cabinet made of laminated chipboard
People who are looking for laminated chipboard in Smolensk quite often turn to Empire Plit in order to make a wardrobe on their own. This is comfortable, roomy and functional furniture that is quite easy to assemble. However, there are many different nuances that you should familiarize yourself with before getting to work.
Modern furniture is made from a wide range of materials: MDF, chipboard, solid wood, etc. The latter is a reliable and durable material, which, however, cannot boast of availability, so other materials come first. We will look at how to assemble a cabinet from laminated chipboard - chipboard.
The material is available in a wide range of textures and colors, and also has several thicknesses. In the vast majority of cases, cabinet furniture is assembled from 16 mm thick laminated chipboard , with the exception of facade elements.
Material selection
First of all, you should decide not only the size, but also the type of material used. To be precise, cabinet furniture is made from chipboard, 16 mm thick. Kitchen utensils such as countertops and kitchen dies require a thickness of at least 25 mm.
Don't forget about finishing the surface of the sheet itself. There are two options:
- Laminated board. Professionals call it laminated chipboard.
- Naked sample. As you understand, no finishing is done. It is used quite often, as it has smooth and polished surfaces. As a result, painting and other work is quite simple.
As for the manufacturer, it is recommended to buy German sheets, since their quality characteristics are much higher than those of their Chinese counterparts. Accordingly, the slabs are perfect for updating old furniture and giving it a more modern look.
The best covering option is veneer. Yes, such a proposal will increase the cost by forty percent.
Tools for work
You should know that hand tools alone will not be enough to make furniture. You should also stock up on electric ones. There is nothing surprising about this, since it significantly speeds up and facilitates the process.
- First of all, you will need a circular saw. With its help we will cut the chipboard. A hacksaw is not suitable for processing large sheets, if only because the cut itself will be uneven.
- A jigsaw is also questionable equipment, as it leads to chipping and damage to our prepared material.
- But the electric circular is perfect in all respects. Please note that it leaves only even transverse and longitudinal cuts.
- In order to give the corners a rounded shape, you should use automatic equipment.
- Don't forget to get a screwdriver. It will be needed in order to connect all the elements together as efficiently as possible.
- Seven times measure cut once. We don’t even start work without a ruler. A metal meter and corner will be even more useful.
Assembling the cabinet: instructions
Please note that the price of laminated chipboard, although affordable, should be handled with the utmost care so as not to damage it. Therefore, all holes for nails or screws should be drilled first with a drill. Next, furniture glue is poured into the resulting hole, and only then the parts are attached to each other. Pay special attention to avoid damaging the chipboard structure!
- The entire cabinet structure is divided into separate blocks, which are assembled using finishing nails and glue. When working with any fasteners (it can be nails or screws), additionally reinforce the hole with glue. All joints of parts are checked for a “right angle”, that is, the angle between them must be exactly 90 degrees. If the part is damaged during the installation process, you will have to additionally buy laminated chipboard in Smolensk and order re-cutting of the material and edging. So be careful.
- Individual shelves can be mounted on pins - this will make them adjustable in height, but the middle shelf is almost always fixed, since it acts as a stiffener.
- Assemble the blocks similarly to the first and second points, keeping the corners even.
- Next is the installation of a wooden rod for hangers. When placing the blocks relative to each other, keep in mind that there should be enough space inside the closet to freely place all the hangers with clothes on the rod. Cut the rod according to the drawing.
- To mount the rod, niches are drilled in the walls of the blocks, then glue is applied to them. After this, the rod is fastened with screws into the niches prepared for this.
We advise you not to paint hanger rods, since during use any such coating will simply be erased!
- We create special pocket recesses for installing shelves, maintaining the perpendicularity of the parts and an even angle. Then install the intermediate shelves into the grooves. They are attached with pocket screws and wood glue. If in the process you need to make more shelves, then you can buy laminated chipboard in Smolensk at.
Excess glue must be removed immediately with a rag soaked in water. Otherwise, unsightly marks will remain on the walls.
- Again, make sure that there is enough space between the shelves and compartments for the entire volume of your items.
- Assemble a strip that will allow you to raise the cabinet above the floor level. Its height, as a rule, does not exceed 3-4 centimeters. The length of each of the 4 planks should be 3-4 centimeters less than the length of the cabinet. You will get a kind of “stand”.
Now the closet is ready. All that remains is to divide the sections into sections, install the drawers on the guides, etc.
How will your closet close? This could be a decorative curtain, sliding structures, swing doors. For the last two options, you will need to order laminated chipboard in Smolensk. At "Empire Plit" the material will be cut to your size, and they will also cut laminated chipboard and edge it. The main thing is to choose a material with a thickness of 10 mm so that the doors are lighter. The best option for a beginner is to order the entire system, providing specialists with the dimensions of the cabinet and its opening.
Accessories
Furniture assembly is carried out using special self-tapping screws or furniture screws. Make a few holes before screwing. Thus, the fittings will fit as easily as possible and hold all the elements securely.
This is where a screwdriver comes in handy. Strap on your Phillips bat and get to work. In extreme cases, a screwdriver will do, but it will take much more time. Furniture screws are screwed in only using hexagons. You can purchase them at any hardware store.
The ends of the sawn parts should be decorated or edge tape applied for furniture purposes. We can say that it is universal, since it is made of plastic. This way all irregularities or curved ends are hidden. The tape itself has several specifications:
- T-shaped. It is intended for professional production only. The fact is that it is necessary to make several grooves to effectively secure such material to the furniture.
- U-shaped. This is a very simple option, as it is simply put on the ends.
The melamine edge will not be superfluous. It is a special laminated surface, the back side of which has a thin layer of polyethylene. It is installed quite simply, so it is suitable for every user.
Additional materials that will definitely come in handy:
- handles for drawers;
- legs to support furniture;
- special furniture hinges;
- metal guides for doors or cabinets; These are in-demand elements, without which it is not possible to use special niches.
Wardrobes for clothes made of laminated chipboard: the basics of proper design
If you are making a built-in wardrobe from solid wood, there should be no problems. Its external dimensions should be approximately 0.5 cm smaller than the niche.
But if you decide to make a cabinet from laminated chipboard yourself, you need to be more careful with the calculations. The fact is that all cabinet products are assembled “lying down”. Therefore, it is important to correctly calculate the width of the side wall and the height of the entire structure.
With a standard depth of 55 cm, it is necessary that the height of your cabinet be at least 15 cm below the ceilings. Otherwise, you simply will not be able to install the assembled “lying” structure. You'll have to disassemble it and play tricks with assembling it "on the fly." Please note that laminated chipboard does not like assembly/disassembly. There is a high probability that a self-tapping screw or tie that has been unscrewed once will hold worse in the future.
Otherwise, everything is standard when designing - the main thing is to know exactly what you want, carefully measure and draw everything.
Finish stage
Is it advisable to make furniture at home? It’s worth figuring out when this is relevant:
- It makes sense when you are a master with golden hands. The manufactured furniture will become a real decoration of your apartment.
- If you are a beginner who wants to learn something new.
It is better to assemble furniture at home on the balcony. You can make some noise there, and it’s easier to collect trash. In any case, such knowledge will come in handy if you are planning to renovate old furniture. It is not at all necessary to restore it. In some cases, just repainting is enough.
Preparation
Schemes and drawings
The first priority is to decide where the cabinet will be located. Take into account the width, height, depth of the product, the location of the shelves and other design features. It is necessary to think about the purpose of the piece of furniture.
There are different types of cabinets :
- swing;
- sliding;
- coupe.
For small rooms, the last two options are ideal. A free-standing cabinet cabinet is suitable for different rooms. It can be disassembled and transported to any place. Built-in wardrobes have a significant disadvantage: they are tied to one place.
Before drawing up the drawing, they plan the structure and calculate the dimensions of the product based on the parameters of the room. The drawing is made according to pre-thought-out plans and diagrams. You can use special computer programs.
The layout shows:
- parameters, number and location of shelves;
- dimensions of retractable elements;
- the depth and height of the shelves, the order of their placement;
- dimensions of the cabinet bottom.
Materials and accessories
When choosing chipboard, it is advisable to pay attention not only to the markings, but also to the manufacturer. Raw materials from German and Austrian manufacturers are considered to be of high quality. There are two types of chipboards on sale: E1 and E2. The first option is the most environmentally friendly . Particleboards come with laminated or non-sanded surfaces.
Before sawing, you need to purchase accessories. It should be in the same style as the future product.
To perform work on making a cabinet from chipboard you will need:
- wood screws;
- plastic plugs to match the color of the material;
- guides;
- handles, hooks and other accessories.
To hide roughness on open elements of the product, you will need end furniture decorative tape .
Tools
Before installation, you need to once again check the correctness of the drawings and the availability of materials. To make a cabinet from chipboard at home you will need a whole set of tools :
- circular saw or electric jigsaw;
- wood drill bits and drill;
- screwdriver;
- Phillips and flat screwdriver;
- roulette;
- screws and dowels;
- hammer;
- level;
- perforator;
- Ruler and pencil;
- hacksaw for wood and metal.
Before assembling the product, chipboard sheets are cut: parts are cut out according to the designed drawings. The workpieces are laid out so that longitudinal cuts are along the entire length.
The edges are glued to the ends of the prepared parts using an iron. It is turned on at ¾ of the maximum power , applied to the tape and passed along it several times.
To press the edge more tightly, iron it with a dry cloth.
Stages of manufacturing different types of structures
A novice craftsman should familiarize himself with the information on how to make a cabinet from laminated chipboard with your own hands. This is the most convenient, simplest manufacturing option that can give a completely professional result. It is important to decide which cabinet to make - cabinet or built-in. These are structures designed to perform the same tasks, but have different assembly methods.
Methods for painting furniture, necessary materials, tools
The advantage of a cabinet cabinet is that it can be moved to another wall if necessary. Built-in structures fill niches or the entire part of the room, from one wall to another. They are stationary and cannot be moved to another location.
Hull
The procedure for creating a cabinet from scrap materials:
- Carry out preparatory work. According to the assembly drawing, blanks are cut for the side walls, top and bottom covers, shelves, and doors. No deviations from the dimensions indicated on the diagram are allowed.
- The ends are glued with an edge using an iron. Set the heat to about 2/3 of the maximum, then carefully smooth the edge to the surface. After cooling, the protruding overhangs are trimmed with a sharp knife, and the corners are delicately sanded with fine sandpaper.
- According to the assembly diagram, the surface of the parts is marked, holes are made for handles, hinges, shelf supports, couplers, and other accessories. It is recommended to make a template that gives the exact position of the center of the hole. It must first be checked on some piece of chipboard so as not to spoil the workpiece.
- Assemble the external walls, shelves and other elements of the cabinet (without doors). Then it is placed on the floor with the frontal plane down, supports are installed, and the back wall is made of fiberboard. This is a critical stage that requires high precision. It is necessary to carefully check the diagonals so as not to distort the body.
- They put the cabinet in place and hang the doors.
- Install cabinet handles, add decorative elements and other auxiliary details.
The process of assembling a cabinet with your own hands from plywood or MDF is almost the same as described above. Only finishing or lining of the planes with decorative material is added.
Carry out preparatory work: make the necessary measurements and drawings
Cut workpieces according to available sizes
Using an iron, cover the ends with an edge
Make the necessary markings and assemble the external walls and shelves
Install the back wall
Put the cabinet in place and hang the doors
Install handles and add decorative elements
Built-in
Assembling a built-in wardrobe begins with careful measurements of a niche, room or section of wall. It is important to determine the distance between walls at several levels, since the planes are not always parallel or vertical. If there are deviations, you need to record the distance at the lowest and highest points.
After this, a diagram of the wardrobe is drawn up. The peculiarity of such furniture is the absence of side walls, which act as the walls of the room. Step-by-step manufacturing instructions:
- Mark the walls for shelves. Using a hammer drill, they make sockets for dowels and attach supports or shelf holders.
- The vertical inner panel is connected to the shelves, then fixed to the wall with corners. It is important to constantly monitor the vertical, perpendicularity of the panel to the plane of the wall.
- Install the upper horizontal shelves. They are attached to the wall with corners and connected to the vertical panel with self-tapping screws. It is imperative to control the horizontal using a building level.
- All other parts are attached in a similar way. It is necessary to constantly check the diagram so as not to confuse the design elements.
- Guides for sliding doors are installed on the surface of the floor and ceiling. If the planes are not parallel, support platforms are made first. Their position is adjusted to achieve complete parallelism.
- I install doors, handles, mirrors, and other fittings.
The designs of sliding wardrobes are very diverse, but the assembly principle is subject to a general logic.
Mark the walls for the shelves and secure the shelf holders
Install the shelves, controlling the horizontal position using a building level
Install sliding door guides
Install doors, mirrors and other fittings
How to do it?
Work begins with assembling the frame of the product. Assemble the frame under the bottom. No legs are needed for a wardrobe . In other cases, plastic devices are used for adjustment. Assembly is carried out in a certain order:
- Using a drill, prepare holes for the connecting joints, maintaining their accuracy and symmetry. Holes for shelves, partitions, and hangers are also taken into account.
- Connect the bottom, sides and top of the product using screws and a screwdriver. First, lay the bottom of the cabinet and attach the side walls in order. The upper partition is placed on the U-shaped structure.
- Installation of supports for shelves, hooks, furniture drawers and other elements is carried out at the base of the cabinet. To check the correct installation, use a level. The opposite fasteners must be horizontal.
At the final stage, the door mechanism is fixed. For sliding model cabinets, guides are fixed at the bottom and top. For swing systems, door hinges are screwed into the sides. Upon completion of the work, the installation of fittings is carried out: hooks, crossbars, handles.
Sliding wardrobes and their advantages
The main advantage of such a cabinet is that it will fit into any room and will be equipped specifically for your interior, lifestyle and household needs. The number and dimensions of shelves, height, width, depth, decorative finishes - everything is adjusted according to the customer’s requirements. Sliding wardrobes are appropriate in the living room, bedroom, hallway, and children's room. If desired, they can be turned into a full-fledged dressing room, because the design is adjusted to the parameters of a particular room (even with obvious flaws in the form of sloping ceilings or not strictly vertical walls).
And the main difference between “compartments” and ordinary wardrobes is sliding doors, which do not require separate space, like standard hinged doors. That is why sliding wardrobes are in ever-increasing demand. And considering that such cabinet furniture consists mainly of rectilinear structures, it is quite possible for a non-professional to make it, after a short course of training and preparation.
Design features of the wardrobe
Sliding wardrobes can be:
1) Built-in
The building structures of the room (ceiling, side and rear walls, floor) are used as some surfaces of the cabinet. The furniture body provides rigid fastening, forming a non-movable cabinet that allows you to hide or practically use the layout features (niches, arches, sloping attic ceilings, uneven corners), etc.
2) Fully assembled
They have all the elements of cabinet furniture, that is, they differ from a regular wardrobe only in the presence of sliding doors. They can be moved, transported, assembled according to a modular principle.
The main design feature of any wardrobe is front sliding/folding doors equipped with a sliding system. The service life of this type of wooden furniture depends on the quality of the fittings and the correct installation of this element.
The sliding system is a combination of roller mechanisms and metal profiles.
The following can serve as a reference track:
- only upper systems,
- only lower systems,
- top and bottom at the same time.
Profiles come in steel and aluminum, closed and open types. A high-quality roller mechanism contains a bearing and a special silent coating, which extends the service life of the structure. The rollers themselves can be made of plastic or steel (the former are cheaper, the latter are more reliable).
The internal “filling” of the cabinet is equipped with hangers, shelves, baskets, and stands of various modifications, sizes and purposes. The standard option is shelves and drawers made of plywood, HDF or chipboard. But there are also original “honeycomb” structures made of steel mesh coated with vinyl.
Such components are in increasing demand because:
- can be easily removed, if necessary, freeing up space for large items;
- in transparent cells you can clearly see what is where;
- things don’t “stay” thanks to constant air circulation;
- The drawers can be combined with traditional chipboard shelves.
The front panels of sliding wardrobes can become an indispensable decor for the interior. To fill them, they use glass (matte and transparent, with colored films, sandblasting, photo printing), mirror, plastic, metal panels, wood trim with imitation of expensive wood, carvings, etc.
Raw materials and materials required for the manufacture of wardrobes:
- laminated chipboard (MDF),
- Fiberboard (LDVP),
- aluminum profiles, rollers, stoppers, holders or ready-made sets of sliding door systems from recognized ones, “Rolla”, “ARISTO”, etc.);
- accessories (handles, hooks, brackets, hangers, holders, tie holders, etc.),
- contact glue,
- solvent 646,
- edge material (PVC film, melamine edge, etc.),
- nails, self-tapping screws, screws,
- decorative finishing (mirror, glass, wood, bamboo).
Decoration
Before implementing a plan for decorative finishing, you need to clearly decide on the style of the new piece of furniture and determine the method of covering it. There are several techniques for decorating chipboard cabinets. Let's consider painting and filming.
Paint
The most reliable and capital finishing method is painting. It is very easy to do and inexpensive. Particleboards are treated with acrylic, alkyd, aerosol or ordinary wood paint.
Reference. Acrylic spray paint adheres to the surface better than regular paint. The treated surfaces are uniformly painted and smooth.
Chipboard painting is carried out in stages:
- Level and dust the work surface.
- Degrease and apply primer.
- Existing chips are filled with putty and rubbed.
- Apply one or two more layers of primer.
- Paint the surfaces with the chosen paint.
You can decorate the cabinet using a stencil with fancy multi-colored or plain patterns and symbols.
Cover with film
Self-adhesive film will give the cabinet originality and the desired style. The film should fit harmoniously into the interior design. But such a coating will not last long.
To complete the work you will need:
- primer;
- solvent;
- soft fabric;
- knife and scissors;
- roller;
- sanding paper.
Pasting with chipboard film is carried out according to a given algorithm:
- Taking measurements.
- Cutting the material in the required quantity to decorate the surface.
- Removing the protective layer from the film.
- Pasting a furniture panel with a prepared cut.
To prevent wrinkles from forming, the plane is smoothed with a roller . Start from the edge on which the material is applied.
To treat large areas, you can use a different method of covering with film. The base is a solution of water and soap. Remove the protective layer from the material and place it on the floor. Using a spray bottle , apply a soap solution to the adhesive layer of the film and apply it to the surface. If desired, you can apply film gluing together with painting.
Upon completion of the work, the final design of the cabinet is carried out - mirrors are installed, lighting and other functional elements are arranged.
Types and advantages of chipboard cabinets
There are models with hinged, folding doors or sliding wardrobes. The last two options are suitable for small spaces as they save space in front of the cabinet.
Each product differs in design and content, shape and purpose. A wardrobe made of chipboard is often equipped with shelves, drawers and compartments for storing outerwear.
This type of furniture performs the function of a dressing room and at the same time takes up much less space. Chipboard is also used for small wardrobes, which are used for storing children's wardrobes.
Cabinets are often made from this material for organizing and storing tools and household appliances. The products have a simple appearance and most often have a laconic rectangular shape without decorative elements. Cabinets for kitchen utensils can be made in any style.
Chipboard is a universal material, which means that furniture made from it has a number of advantages:
| Affordable price. | The raw material for chipboard is not solid wood, but shavings, which are mixed with special resins and pressed. The material is cheaper than solid wood, but its characteristics are not inferior to natural boards. |
| Strength. | Rigidity and resistance to deformation - this makes particle boards a universal raw material for making furniture. |
| Durability. | Furniture made from chipboard has a long service life. With proper care, it can last more than 10 years. This is due to the material’s resistance to temperature changes. With appropriate treatment, the slabs become moisture resistant. |
| Variety of textures and colors. | Chipboards of homogeneous structure. Their surface has no knots or roughness. The material can be treated with veneer - laminated in any color. For cabinets, a wood-patterned finish is used. |
How to make a large wardrobe with your own hands from chipboard (chipboard)
Built-in wardrobes, designs that make maximum use of wall niches, are at the peak of popularity today. You can make such a cabinet from chipboard with your own hands, it will definitely turn out no worse than a purchased product. Modern materials, good carpentry tools, as well as detailed instructions for performing the work will help with this.
Which design you choose: a built-in straight or corner wardrobe depends on the shape of the room and the design features of the room. One of the main advantages of such structures is ergonomics. Parts of the room are used as supporting walls, floors or ceilings. This allows:
- save materials and space;
- place the maximum number of things in a minimum area;
- make the structure sustainable, because it becomes part of the room itself.
This is the most versatile type of furniture that can be installed in an apartment or house of any size by adjusting the dimensions.
How to assemble a cabinet from furniture board with your own hands?
A furniture panel or wood slab is a durable plane made of natural wood, which is glued together from separate boards (lamellas) along the length and width. The history of the invention of furniture panels goes back more than a hundred years. Imperfect equipment and low quality of adhesive compositions hampered their practical use.
The introduction of new technologies has caused mass production of panel panels. Now any craftsman can assemble a cabinet with his own hands from furniture panels at home. From the article you will learn about the types of slabs and methods for making cabinet furniture yourself.
Work order
Before making a cabinet with your own hands, you need to clearly plan your actions so as not to miss anything:
- Select the location where you are going to install the cabinet. Take his measurements.
- Prepare a general diagram of the product and more detailed drawings of the cabinet compartments. Don't forget to indicate the dimensions of the parts. Consider the parameters of the niche where the structure will be mounted, plan the placement of shelves for storing things, hanging rods, drawers, and other necessary compartments.
- Calculate the required amount of construction and finishing materials, fastenings, and fittings.
- Purchase materials, prepare tools for work.
- Cut out the design details according to the diagrams and the list prepared in advance. Since the sheets of material are of impressive size, this work can be done at the place of purchase of laminated chipboard, entrusting it to professionals who are familiar with the peculiarities of working with this raw material.
- Assemble the closet. First, connect the parts of the product frame and strengthen it in the niche. Then proceed to install the shelves and drawers.
- Perform final finishing if necessary.
Cabinet assembly
If the addition of parts was done correctly, the cabinet will be assembled simply and quickly, like a construction set.
- The process begins with preparing parts for assembly. The thrust bearings are screwed in, the shelf supports are driven in, and the guides are attached. The boxes are assembled separately.
- The cabinet assembly itself begins with attaching the bottom and roof of the cabinet to the sides.
- Next, the base, bearings to the base or legs are screwed.
- Stiffening ribs and non-removable shelves are installed.
- The back wall is attached.
- The cabinet rises and moves to the desired location.
- Drawers, clothes rails and other internal elements are installed.
- The final stage is installing the doors and adjusting them.
The larger the cabinet, the harder it is to assemble it alone. Therefore, it is better to involve a partner - he will support the parts and components so that you can screw them on smoothly.
left section, assembly
center, assembly
right section, assembly
Here, in general terms, is the entire description of the process of making a cabinet with your own hands, step by step. We recommend that you familiarize yourself with other materials on our website - they will help you in developing a furniture design project, calculating parts and final assembly with on-site installation.
Universal storage system - wardrobe
Agree, purchasing a large built-in wardrobe is a serious blow to the budget. At the same time, you cannot save on the quality of materials, fastenings, and fittings, because such large furnishings are chosen only once for many years. Having completed the creation of this project, you will be pleasantly surprised by the scale and quality of the resulting product against the background of the relatively small amount that will be spent. It just takes a little effort.
Diagrams with dimensions and a description of the work will help you assemble the cabinet correctly and quickly, in just one week. Get started.
Preparatory stage
Before making a cabinet, buy the necessary building materials, prepare the tools according to the list provided below:
- Laminated chipboard sheets 2 cm thick will need to be cut into strips 40 cm wide and 2.5 m long.
- Wooden dowel for rods with a diameter of 2.5-3 cm.
- Edge tape for chipboard.
- 4 holders for wooden rods.
- Sets of guides, 40 cm long, for drawers. The quantity depends on the desired number of boxes.
- Screws for pocket joints, 5 cm long.
- Nails 5 cm long.
- Wood glue.
- Automatic device for hammering nails.
- Pocket hole jig.
- Circular saw for cutting cabinet blanks yourself.
- Drill.
- Drill.
- Building level.
- Square.
- Screwdriver.
- Roulette.
- Pencil.
The cabinet design is based on three ready-made sections. We will assemble each of them from 2 parts with parameters 40x183 cm and 5 shelves 40x37 cm. The sections are connected to each other by rods, a base, and also an upper part.
Prepare your work area. Make sure it is clean and even. Use devices for your own safety: protective gloves, glasses, headphones.
Description of cabinet frame assembly
- To assemble a section frame from 2 pieces 40x183 cm and 5 shelves 40x37 cm, use 5 cm pocket hole screws and glue. Using a tape measure and a pencil, mark the installation locations for the shelves inside the section. Prepare the holes and complete the installation. After completing each step, check that the angle of connection of the parts is straight.
Most modern materials: chipboard, fiberboard, and MDF consist of pressed raw materials with a coating. To ensure that the inside of the particle board does not crumble when drilling, and the parts are tightly connected, you need to prepare the hole in advance. Then, before tightening the workpieces with screws, additionally apply glue into the cavity of the holes and onto the surfaces to be joined.
- Exactly repeating the steps done, assemble 2 more similar sections. Use screws and glue.
- Divide the 3 cm wooden dowel into 4 completely identical parts, which should be equal to the distance between the sections of the finished cabinet.
- Mark the points on the outside of the sections where the wooden rods should be attached. Install rod holders.
- Place the rods in the prepared holders. If the cabinet will not rest on the side walls, we recommend changing the method of installing the rods. Instead of holders, use regular 5 cm screws. First, use a special drill attachment to make a small indentation. Use glue when installing.
- Measure the distance at which the sections are located from each other. Cut 6 blanks of intermediate shelves of this length.
- Make holes in advance for installing shelves along the upper and lower edges of the structure, as well as 100-150 mm above the lower rod.
- Install the shelves with screws and glue. Use 4-6 screws per shelf.
- Based on the measurements of the length and depth of the cabinet, prepare the parts for the podium base. Install the strips with pocket screws and wood glue.
Features of door installation
The method of installing doors depends on their material and design. Before making a cabinet, you need to think about the structure and appearance of the facade. This is the only constantly visible element that determines the appearance of all furniture. Some craftsmen use a combined method - the internal filling is made of chipboard, and the doors are made of natural wood. For installation on the cabinet, 2 door designs are used:
- Swing. They move around a vertical axis and are attached to 2-3 hinges. You can use standard furniture fittings or use more traditional varieties. The choice depends on the style and appearance of the item.
- Sliding (compartment doors). They move along rails in the frontal plane of the cabinet. For this purpose, special guides are used, and rollers are attached to the top and bottom of the back side.
What is modern furniture made of, an overview of the main materials
Swing
Sliding
To install sliding doors, first install the upper guides using self-tapping screws and a drill, then install the lower ones. After this, the doors are secured; it is advisable to do this together, as it will be difficult for one person to handle it. To prevent the door leaf from sliding, install a lock and make adjustments.
Installing the Top Rails
Installing the Bottom Rails
Installation and adjustment of sashes
When installing swing doors, adhere to the following sequence of actions:
- attach the hinge to the sash;
- place the door against the cabinet body, make marks in the place where the strike plate will be installed;
- drill holes;
- install the counter plate with screws;
- connect both parts of the hinges, adjust the correct position of the door.
Both options have their advantages and disadvantages. Hinged doors allow you to better view the contents of the cabinet. At the same time, they require space for movement and cannot be too heavy. Sliding doors can support massive mirrors, but provide fewer opportunities to find the things you need in the closet. Choosing the best option is the prerogative of the owner.
Apply marks
Drill holes
Install the strike plate with screws
Connect both parts of the hinges, adjusting the correct position of the door
Shoe divider shelf
Install a shelf divider at the bottom of the central section. It will serve for separate storage of shoes or small items of clothing. The structure that we will make and install will divide the compartment into 10 small cells. To make a shelf, you will need 8 more blanks from a prepared sheet of laminated chipboard 40x18 cm and one 40x82 cm, 3 cm pocket screws, wood glue.
- Start by marking both sides of the center board as shown below. Then use a pocket hole jig to prepare 3 holes for installation along each small shelf.
- Use glue and 3cm screws to attach the shelves to the center divider. The structure should be strong and stable. It can be removable, that is, not attached directly to the cabinet, but inserted inside the cavity.
- Simply place the finished shelf divider in its place in the closet.
How to make drawers
To make and install drawers, you need to prepare sheets of chipboard, pieces of plywood for bottom parts, guide rails, handles, 3 and 5 cm screws, nails, glue. Perform on-site calculations of details.
First of all, decide on the height of the drawers. We recommend choosing about 20 cm. To determine the remaining dimensions of the parts, measure the width of the section opening. Subtract 2-2.5 cm from the resulting figure. The structure should move freely, and the guide rails will take up some space. The result obtained is the length of the end wall (37-2=35). To find out the length of the drawer, subtract 4 cm from the cabinet depth (40-4=36). The side parts of the front part should protrude slightly beyond the side parts. But if you plan to install doors on the cabinet, this is not necessary. Then the front part should coincide with the end part.
- Assemble 3 drawers from pieces 20x35 cm and 20x36 cm. Use screws and glue.
- From pieces of plywood, cut out parts for the bottom measuring 35x36 cm. Install the bottom using glue and nails.
- Make markings inside the section and on the boxes for installing slats.
- Attach the slats with 3 cm screws.
- Install handles on drawer fronts. Again, if the cabinet will be closed, prepare fittings that do not interfere with the tight fit of the door panels.
- Put the boxes back in place.
The last step is to carefully examine the already made cabinet. Where possible and necessary, use edge tape to trim the visible areas where the chipboard will be cut.
Self-created design
For novice carpenters, you can make a cabinet out of wood with your own hands. This material is malleable, strong, durable and aesthetic. Furniture can be made from solid boards, hard and soft wood. Then you can think about how to make a cabinet from lining or a cabinet from laminated chipboard.
If you have confidence in your abilities, then you can complement your work of art with plywood inserts or make a cabinet entirely out of plywood. Wood chips are often used in their production.
Measurements and drawing
First, take correct measurements of the place where you will place the cabinet. You need to accurately measure the height, width and length.
Draw a sketch of it, drawings and diagrams will help you make the necessary components for the cabinet. Immediately think about what the closet will contain:
- how many shelves, how they will be located, what shape;
- will there be a mirror - make an exact drawing with dimensions for ordering;
- will there be hooks, and in what quantity;
- drawers, their shape, quantity;
- how many doors and their size.
Depending on where the cabinet will be placed and what will be in it, draw a layout. You can do it yourself in the living room, on the balcony, in the bedroom, in the kitchen or in the closet in your hallway without any problems.
Preparation of material and accessories
The material is selected in advance and the dimensions are calculated. It doesn’t matter whether the cabinet is made from lining with your own hands, from OSB or other materials, the task of the master is to cut the sheets according to the required measurements.
If you use laminated chipboard, then their edges need to be edged. To do this, take PVC tapes. They must be the right color and texture. They are ironed and any excess is cut off. You can do this yourself, but it is better to find help, since some parts will need to be held by someone.
We prepare the accessories right there. This is not left to the last minute. Select handles, hangers, mirrors, nails, and bolts according to color and shape.
After the work has been done, check everything again and take control measurements.
