Since ancient times, man has sought to decorate the space around him, remodeling it in accordance with his needs and artistic taste. Today this quality is embodied in the decoration of various household items, in particular, boxes. An ordinary thing becomes unique, original, and acquires individual appeal. It is pleasing to the eye and can be a good gift for a person who will appreciate its beauty and the efforts of the master who created it.
History of the box
The first boxes appeared a long time ago. Almost every lady of the 18th and 19th centuries had a box in which she kept things dear to her heart. Many boxes had a secret, and they could only be opened after certain manipulations.
The material of the thing was created from wood, leather, porcelain, precious stones, and metal. And now in museums you can see examples of ancient boxes richly decorated with expensive stones and gold.
Purpose of the boxes
Today the box contains: Cosmetics, Jewelry, Accessories
For cosmetics, multi-tiered boxes with several floors with compartments are made. They can comfortably fit eye shadow, lipstick, cream, and perfume. Some cosmetics boxes have no compartments at all, but they are spacious and deep, so you can put everything in them.
Jewelry boxes are made small and compact. But they can also have compartments so that chains and rings do not fall apart or get lost. Slightly larger accessory boxes.
Finish coating
The box is sent to the final stage of work - varnishing. There are many options for what exactly to cover the casket with. The most convenient for a beginner would be acrylic varnish in an aerosol can. It applies a protective layer evenly and quickly. The varnish will perfectly preserve the natural color of the wood, hide traces of superglue, and add shine. Finally, it will protect the box from the possible destructive effects of sunlight and oxygen, from water, dirt and dust.
If you are going to apply the varnish with a brush, be prepared for the fact that the process will be long and multi-step. It is necessary to cover the casket in several layers, each time waiting for the previous one to dry. Aerosol varnish is much more convenient.
Types of boxes
There is a huge variety of boxes available on the modern market. These are boxes with many compartments inside, with a lock, boxes with a mirror, boxes that resemble small chests, leather boxes, multi-tier boxes, glass boxes and so on.
They can be of different shapes, from standard rectangular to triangular, elongated cone-shaped or original, for example, heart-shaped. The color of the box can also be any.
Women prefer light and bright colors - white, beige, pink, blue, while brown, gray and black colors are suitable for men. You can also make the box yourself. And then it will be unique.
Step by step lesson #5
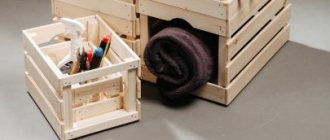
In this tutorial we will show you how to make two different hanging jewelry boxes from the same materials. You will need:
- wooden tray (pull-out shelf);
- wall mounts;
- wooden boxes;
- primer, paint and protective wood varnish/translucent glaze;
- wooden thread spools/hooks;
- fabric, foam rubber / wrapping paper.
We used pull-out shelves from an old cabinet as the basis of the design:
You can put them together yourself or use ready-made ones. And plastic containers were used as boxes:
Brown box
First, coat the drawers with a primer, wait until it dries, then paint it dark brown and coat it with a protective varnish.
Cut a piece of foam rubber that matches the size of the box, cover it with fabric and glue it to the bottom. Cut out labels from colored cardboard or beautiful thick packaging paper, label them and attach them to the boxes. Glue a piece of soft fabric to the bottom so that the surface of the tray does not get scratched when you take out the jewelry.
Paint the tray with white paint, cover the bottom with fabric and screw hooks on top for decorations. If desired, you can further decorate the tray by gluing a white-painted foam decorative cornice to the bottom (you can buy it at any hardware store).
Blue box
Paint the tray with blue paint, wait until it dries, then lightly sand with fine-grit sandpaper. Cover the top with protective varnish.
Glue burlap-covered foam rubber to the bottom of the tray.
Insert a plastic dowel into the hole in the reel and attach a hook to it. Screw the coil itself to a wooden tray using a screw or cog.
Coat wooden (or cardboard) jewelry boxes with translucent decoupage glaze. Glue wrapping paper to the bottom, and insert labels into special holders.
How to choose a box
To choose the right box, you need to consider:
- The number of decorations and things that you will store in it. You don’t need to buy a large chest for one or several rings. Conversely, the more jewelry and accessories you have, the larger the box should be. It is desirable that it has several compartments where you can put all your things separately.
- If there are children in the house, it is better to buy a chest with a lock.
- The box should match the style of the room. Choose a chest in accordance with the style of the interior. Shabby chic, Provence, loft, vintage... Each design direction has its own box.
And, of course, when purchasing this elegant item, you need to be guided by your own preferences.
What boxes can be used
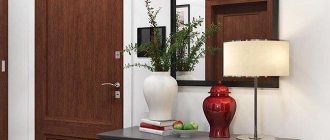
In addition to the fact that decorative boxes designed in-house are an interior decoration, they also help organize free space in the house.
This especially applies to apartments whose area is small. If you put extra things in boxes, then they will be easy to find later. In order to remember what purpose the box is intended for, it can be marked with a specific color scheme. This method will help both adults and children get used to order. This indicates that decorating the box will not only help decorate the interior, but will also instill neatness.
It is important to note that the box cannot be left in its original form, because it will spoil the appearance of the interior. Initially, a style is selected, and then applied to a specific box. There are many options for using the item in question. Depending on the size of the box, they can be aimed at different purposes. For example, storing rings and other jewelry.
If there are kids in the apartment, then the box can act as a place where pencils and other office supplies will be located. The box can also be used to store a phone charger. For each room you can choose your own box design style.
To prepare the product in question, you first need to prepare a work area. Several criteria will need to be taken into account. Initially, they think about what the future box will look like, select materials and remove everything unnecessary from the table.
To fill a box with something, you need to take into account multiple factors, including the person’s lifestyle and hobbies, who the item is intended for, and design elements.
Lay out on the work surface:
- scissors;
- adhesive;
- pins;
- textile;
- pencil;
- scotch;
- paper;
- decorative elements, for example, rhinestones, beads, etc.
Depending on the external design, you can immediately find out what is inside the box. To give visual effects, you need to use fabric, and it can be new or be scraps of clothing, wallpaper or jute, burlap.
Decor ideas
Each type of box, depending on the material from which it is made, can be decorated differently. A wooden box is usually decorated with a carved pattern; you can burn some design on it, or decorate it using the decoupage technique.
Decor of a leather box - patterns, additional weaves of leather or the inclusion of fabric elements, rhinestones, embroidery. A metal box is often decorated with stones or combined with glass.
The imagination for decorating boxes is limitless. Artists and designers offer more and more new options.
Let's start creating
Let's consider what kind of painting and how you can do it on a wooden box.
You can paint a box in different ways, using various techniques: from free painting to folk traditional styles. Painting and painting can be complemented by “aging”, decoupage or all kinds of accessories.
Before you start directly painting and decorating the box, you should process the blank or wooden box and prepare it for painting. To do this, follow these steps:
- Sand the surface of the future box so that it is completely smooth, without roughness or burrs;
- Prime the product with acrylic primer outside and inside (several layers are possible) and dry.
Article on the topic: Knitted shirt shirt for a boy: diagram with description and video
A primer is needed for a more even and bright application of paint. If the workpiece is fairly even, smooth and white, then you can skip this point. You can also skip priming if you initially plan to make a dark general background.
Perhaps one of the simplest, but at the same time labor-intensive techniques is dot painting. It is done using contour paints. The essence of the technique is to fill the picture with multi-colored dots. The most suitable images for this painting are complex patterns and ornaments that are applied using a stencil or template.
Artistic painting is done by hand on a free theme and can contain any subjects and elements. If we are talking about a box, then most often it depicts flowers, leaves, berries, birds (you can use stencils and templates). However, experienced craftsmen can give free rein to their imagination and depict whatever their heart desires on a small box format.
We should also not forget that there are different styles of folk painting. Caskets and dowry chests were painted with simple ornaments back in the Middle Ages. Each locality had its own tradition of painting wooden dishes and utensils. Many types of painting that have survived to this day can be considered cultural heritage.
Decor of the box using decoupage technique
You can decorate the box yourself. The easiest and most affordable way to transform a purchased or gifted item is decoupage. A ready-made box can be purchased at any hobby market.
This technique is suitable for wooden and metal boxes, as well as plastic boxes. Tools needed: decoupage napkins, decoupage glue, acrylic paints, adhesive tape, brushes.
Master class on decorating a box
First you need to prime the surface of the box. Then, when the chest is dry, glue the decoupage napkin using special glue. After complete drying, you need to apply varnish on top. And now, our box is ready!
Here you can add dried rose buds, rhinestones, ribbons, newspaper clippings and postcards, lace and so on. Napkins for decoupage in Provence and shabby chic style can be with images of flowers, birds, plants, angels.
You can decorate a New Year's box in the same way. Only napkins need to be chosen in accordance with the theme of the holiday - snowflakes, Christmas trees, snowmen, New Year's toys and so on.
Traditions from the people
What kind of folk painting can you decorate a box with?
The painting from the area of Palekh (Vladimir province) is perhaps the most recognizable. Not only boxes, but also brooches, trays, dishes, etc. were decorated with such painting. The main feature is careful detailing and drawing, while the format for painting is usually small. Frequent subjects are illustrations of everyday life and fairy tales.
Palekh painting is usually done with tempera paints on a black background. The predominant colors are green, yellow, red. On the sides, as a rule, the box is decorated with gilded ornaments.
Gorodets painting decorates the boxes with birds, flowers and entire scenes. The painting can be recognized by its bright colors, rounded flowers and frequent images of horses and people.
Article on the topic: Do-it-yourself Smeshariki made from natural materials with photos
Making such a painting is easy even for a beginner. Just use the templates:
It is best to decorate round and large boxes with Khokhloma painting, since Khokhloma means lush flowers, berries and birds, as well as fancy curled patterns and ornaments.
Making such a painting is quite simple. Using Khokhloma as an example, let’s look at how to paint a box.
First you need to prepare:
- wooden blank;
- multi-colored acrylic (red, black, green, yellow, white);
- a jar of gold or bronze paint for the background;
- brushes (wide, thin);
- masking tape;
- ready-made template or sketch;
- tracing paper and pencil;
- varnish and brush.
Progress:
- Cover the prepared workpiece with golden paint and allow to dry;
- Transfer the main elements (large details) of the Khokhloma pattern onto tracing paper;
- Attach the tracing paper to the lid of the box and trace the drawing with slight pressure (there should be a mark left as in the photo);
- Outline the drawing with black paint using a thin brush;
- Cover the edges of the lid with masking tape, marking an equilateral frame, and paint the background of the picture black;
- After drying, peel off the tape and start painting the elements - berries, leaves, flowers;
- Draw small elements (grass, flowers, seeds) and shadows;
- Using the same principle, paint the sides of the box;
- After complete drying, coat the craft with varnish (2-3 times).
Hand painting can breathe new life into old objects and turn an unnecessary box into a beautiful box for storing jewelry and small items. Boxes painted with love and inspiration will be an excellent gift and will create warmth and comfort.
Photo decor of the box
Kitchen decor - a review of the best ideas and 130 photo examples of current kitchen decoration options- Fireplace decor - 145 photos of modern ideas and methods of decoration in a house and apartment
- Bathroom decor: 125 photos of the best ideas and original design options from professionals
Did you like the article?