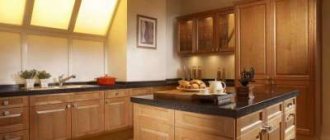
DIY kitchen made from furniture board
It was time to change the kitchen. The doors are already completely dirty, the drawers are stuck to the floor. And it doesn't look very fresh.
I scoured the internet and walked around salons. It turned out that the most defective modular kitchen of 2.4 meters will cost me about 40 thousand.
I really didn’t want to pay for glued laminated panels, despite the fact that this miracle doesn’t look much more presentable than an old kitchen, of which there are millions all over Russia. For the tree they asked about 100 per meter.
It all started with a drawing on a piece of paper. Someone will say you can draw 3D.
Well, I drew it. Essentially it was just for visualization.
I mostly used the sheet. Again, changes are made quickly.
Later I realized that I would hardly have seen a Christmas tree anywhere in a finished kitchen. I chose grade B with knots, but lamellas for the entire length.
There are no complete photos. Length 2400*600*18 I don’t remember how much.
Here's the start of the process.
I did all the work in the summer and all the workshops were busy with their own business. I cut it right in the kitchen with a circular saw.
It's very noisy. I strongly do not recommend doing this.
This is probably 2/3 of all the buildings; later I had to finish it several times. I sawed for a couple of hours a day.
I managed it in 3 days. Meticulously measured the simple.
It won't be redundant. I did this for about 4 days along with the facades.
Back and forth along the fibers. Next is to cover.
I chose a white urethane based oil. I didn't want yellowness.
I did this: I coated the dowels with glue and quickly assembled the body. At the level of each shelf, I tied it together with studs and bars so that the walls were pressed more tightly against each other.
Most likely there is an easier way, but I had studs, and this is quite a working design.
Everything you need to know about growing cucumbers in open ground: planting seeds and seedlings, proper care
I was incredibly happy when I assembled the first box.
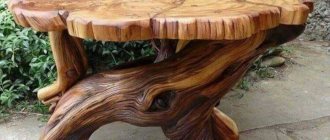
Next is the table top. I chose ash.
I ordered it on the Internet. I couldn’t fit into the elevator, but it was a terrible nightmare.
The openings for the hob and sink cannot be cut with a jigsaw, the wood is very hard, and the wood began to smoke. There were no circular machines at that time, but there was a manual milling cutter.
Next comes magic. Responsible moment. I decided to use oil as the main coating. I had never heard of this before, but decided to try it anyway. Of course, after studying many, many forums.
Facades. It turned out to be cheaper and faster to buy standard ones from Moscow with delivery than to order at home. The difference is almost three times. It was easy to do with a forstner drill for the hinges.
I hung everything up, set everything up.
I did everything alone. It took 2 months.
In terms of money, purely for the set (in addition to repairs) with a sink and fittings, it took about 50k in the summer of 2021. Wooden furniture behaves perfectly.
DIY kitchen made from furniture panels
The kitchen is the most intimate, family-friendly and functional place in the apartment. The overall feeling of home comfort depends on how it is landscaped and aesthetically designed. Therefore, at all times, kitchen furnishings have received special and close attention.
Currently, the “handmade” style is considered ultra-fashionable and mega-popular in various types of activities, including furniture design. In this article we will look at the process of constructing a kitchen with your own hands from furniture panels.
Gray rot on strawberries - control methods that will help save the crop
Tips for choosing furniture panels
This information will be useful during the selection of manufacturing technology; the master must know how the operational and physical parameters of furniture elements change under different conditions. He makes individual decisions in each individual case, replacing some more expensive materials with cheaper ones, but maintaining the required strength and durability indicators. Thanks to this approach, a furniture maker can produce cabinets with excellent performance parameters at a reduced cost.
In developed countries, the process of making shields is almost completely mechanized, which completely eliminates the negative impact on the quality of the human factor. Special sensors constantly monitor the condition of the raw materials, rotten knots, rot and other wood defects are cut off. Shields are made from oak and beech, pine and ash and other types of wood.
Furniture panel pine
Depending on this factor, the cost varies widely. Oak is recommended to be used for those furniture parts that must withstand heavy loads. Or a prestigious exclusive cabinet is made to order. Cheaper and lighter-loaded furniture can be made from lower quality species.
Solid oak furniture panel
Prices for furniture panels
How to connect furniture panels
To fix individual elements from furniture panels together, several types of hardware are used, each of them has its own purpose. Fasteners cannot always be interchangeable; the specifics of use must be taken into account during the manufacture of the cabinet.
| Type of hardware | Brief description of technology of use and technical characteristics |
Nails | The most common, traditional and fairly reliable hardware. For many centuries, nails were the only way to secure wooden parts in furniture making. They can be long and short, thick and thin, smooth and screw-shaped or notched. The head of the nails is also different; in some types it is completely absent, which makes it possible to make hidden connections. There are nails with enlarged heads for fixing fragile materials. |
Wood screws | They appeared relatively recently, but have now gained wide popularity due to their excellent performance characteristics. They are made of ferrous or non-ferrous metals, the heads are countersunk or ordinary. Compared to nails, they have increased pulling performance. |
Confirmations | The so-called Euroscrews. If nails and self-tapping screws are considered universal-purpose hardware, then confirmats are intended only for assembling furniture. They are made of durable steel and, due to their special design, ensure a strong connection between furniture parts. During installation, a special confirmatory drill must be used. |
| Fixes and minifixes | Special fittings that allow you to assemble/disassemble furniture without losing the original parameters of fixation strength. The most complex hardware for furniture consists of two elements: an eccentric and a rod. Some models additionally have plastic inserts to minimize wear and friction. Installing a fix requires some experience and special tools. |
Now, having minimal theoretical training, you can start making a cabinet from furniture board with your own hands.
Why are furniture panels popular?
Wooden sheets are used to make DIY kitchens; they are also used to create staircase structures or as decorative elements. The furniture panel is made of natural wood, there are two varieties - solid or pressed. To make the first option, a whole piece of wood is used, while the second is obtained by gluing together several thin layers under pressure. Pressed furniture panels are more durable and less prone to deformation from moisture over time.
Furniture panels are durable and easy to process; they are easy to fasten with nails, screws and other types of fasteners. This material is used to make a DIY kitchen for the following reasons:
- Long service life. Wooden sheets serve for years without warping or deforming.
- Environmental friendliness. Wood is a natural material, it does not emit harmful substances. Even glued furniture panels are not dangerous to the health of others, since PVA is used for gluing, and not alkyd resins.
- Appearance. A kitchen made from furniture panels is practically indistinguishable in appearance from sets made from solid wood.
- Economical. Wooden sheets are cheaper than solid wood, despite the fact that they are classified as economy class, the quality of the material is very high.
- Wide choose. Since the sheets are made in different sizes, you can easily find ones that fit your kitchen plans.
Furniture panels are easy to process, so it will not be difficult to apply carvings, ornaments to the surface of the facades, paint them in any color, etc. There are many decor options, including stucco molding, various applications, and glass inserts.
Advantages of panel cabinets
The appearance of laminated chipboard and MDF has significantly displaced furniture panels on the country's market. Despite this, panel furniture has retained its demand segment because it has undeniable advantages:
- Furniture boards are assembled from bars held together with glue. The sheets consist of 98% natural material - wood.
- The composition used for gluing the planks is hypoallergenic and harmless to children.
- The slabs are easy to saw, drill and plan. From them you can cut out parts for furniture of any shape.
- Unlike composite sheets (chipboard), here the ends do not need to be covered with polymer tapes, since wood does not emit harmful fumes.
- Cabinets assembled from stacked slabs can withstand high levels of humidity. They are often installed on balconies and in bathhouses.
- The external surfaces of the cabinets look beautiful due to the varnish accenting the natural wood grain.
- Wardrobes assembled from laminated panels can decorate the most sophisticated interiors of apartments and mansions.
- To assemble the furniture, you do not need special fastening hardware. The parts are connected using simple self-tapping screws.
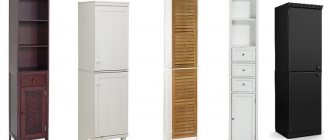
Types of furniture panels
According to the manufacturing method, furniture panels are either solid-lamella or spliced panels. The first ones are assembled from planks that are whole along the length, which are glued together only along the width. Joint slabs consist of boards of various lengths, which are fastened lengthwise with dowels using a tongue-and-groove system. Then the planks are glued along the width of the plane.
Different types of wood are used for manufacturing: pine, spruce, oak, beech, birch and larch.
There is a large selection of typesetting sheets at Leroy Merlin. The chain of building materials stores consists of more than 80 supermarkets in 40 cities of Russia.
Products are assigned two classes:
- Extra – grade refers to the highest level of quality. The slabs do not have spliced or separate knots. The lamellas are selected with front surfaces of the same color.
- AB - this grade allows for the presence of knotty inclusions, small cracks and color differences between the constituent elements of the slab.
Laminated boards represent a separate category. The surface of the slabs is covered with an artificial film - laminate. Panels of white and beige shades are mainly used to make cabinets for bedroom and kitchen sets.
The slabs are mainly manufactured in thicknesses of 16, 18, 20, 28 and 40 mm. Standard furniture panels are produced in lengths: 80, 100, 120, 150, 180, 200, 250 and 300 cm, widths: 20, 25, 30, 40, 50, 60 and 80 cm.
The advantages of furniture made with your own hands
Designs made at home with your own hands from furniture boards have a number of advantages over factory-made samples. There is no need for expensive equipment; an ordinary tool that any owner can find will suffice. You just need to show a little ingenuity, patience and a creative approach to the issue - and now you are the happy owner of a modern and spacious wardrobe or a beautiful dining table for the kitchen. So, let's look at the positive aspects of furniture made from this material.
- Aesthetically attractive appearance. Furniture made of wood compares favorably with other materials and will decorate any room.
- Safety. As mentioned earlier, it is made from various types of wood, an environmentally friendly material without harmful impurities and harmful components.
- High maintainability. Is the door broken, the shelf lopsided, the countertop damaged? No problem. There is no need to go to a workshop to repair your favorite cabinet. This can be done with your own hands with minimal financial investment in repairs. Working with furniture board is much easier than with the same chipboard, due to the fact that wood forgives some chips and inaccuracies.
- Low cost. In all respects, furniture panels are not inferior to furniture made from cut wood. At the same time, cabinets, kitchen tables and shelves look no worse and are durable and easy to use.
Furniture board is a material based on natural wood.
You just need to arm yourself with patience, inspiration, and the necessary number of necessary tools.
Stage 1: preparation of materials
Shields
The most important stage of assembling a cabinet with your own hands from furniture panels. What is a “furniture panel?” This is a material based on natural wood, which is pressed. As a result, all the bars are glued together almost perfectly.
You can purchase furniture panels in a wide variety of variations. They differ in size, thickness, wood type, etc. The most popular and practical are pine, spruce, birch or oak panels. They are easy to process, strong, and durable.
Advantages of furniture panels when creating a homemade cabinet:
- The materials contain absolutely no impurities that could pose a danger to human health.
- Furniture panels are easy to work with, which allows you to create a very bright, non-standard design.
- The price of the shields is extremely low, along with durability and naturalness.
- From such material you can really create an attractive and unique piece of furniture.
To implement the planned cabinet project, it is necessary to prepare the following consumables:
- furniture board. It is better to take options with a thickness of 20 mm, since it can be used not only to create a base, but also as a body;
- plywood. Various shelves and internal partitions are made from it. The optimal material thickness is 12 mm. The remaining sheets of plywood should be 6 mm. thickness. They will be used to form boxes (if there are any in the plan);
- furniture rod and accessory holders. They will allow you to distribute the space in the furniture as freely as possible. Clothes will be hung on them, any accessories will be attached, etc.;
- accessories. This includes all kinds of hinges, handles, guides, and other parts for convenient operation of the cabinet.
To make the lid and bottom, you can also use furniture panels. If necessary, cutouts for lighting are pre-designed in them.
Now let's move on to the tools that we will need to create a cabinet from a furniture panel with our own hands.
How to choose a shield? Varieties and prices
What does category mean? It reflects the manufacturing technology. Knowing the characteristics of each variety allows you to make the right choice in favor of the highest quality material.
Furniture panels of the following categories are sold in hypermarkets:
Variety "Extra"
It means that the product has no knots, chips, or resin stains. The surface of such a sheet is ideally flat, smooth, uniform, and polished. The risk of cracking is minimal. The most moisture-resistant and heat-resistant option in comparison with other analogues. This type of shield is the easiest to work with, because... no additional processing or defect removal is required. No wonder they come with a lifetime warranty.
Due to its quality, it is more expensive than other varieties. For boards in the “Extra” category, the price starts from 212 rubles per sheet measuring 80x20 cm. A large wide sheet measuring 240x60 cm will cost 1,910 rubles.
A surface that is ideally uniform in color and texture even allows the use of transparent varnish or stain in the finishing of facades to preserve the natural wood shade.
Grade "A/B"
In this category of panels, the presence of “live” knots of no more than 5 mm in size is allowed (no more than three pieces per sq.m.). Those. Only the top layer of the product (layer “B”) has minor defects. The lamellas or bars, as in the “Extra” category, are ideally matched in color and texture, which makes the surface uniform and allows the use of transparent varnishes that highlight the natural shade of the product.
This option is the most popular among buyers, because... It costs a little less than “Extra”, but the quality is much higher than grade “B”.
Grade "B"
Among all the shields presented, this one is the cheapest option. In production, not solid lamellas are used (as in the “A/B” or “Extra” grades), but spliced ones. Consequently, such a sheet is less resistant to damage, less durable, and susceptible to cracking. The material has a uniform shade over the entire surface, but the wood grain may not match.
How to saw furniture board
The technology for processing furniture panels is a little simpler in comparison with simple natural boards. In the second case, the master must examine in which direction the fibers of a separate board are located, where exactly there are knots and other defects, and only then begin processing the material. The fact is that some curls must be passed only towards the movement of the cutting tools, otherwise there is a high risk of the formation of deep burrs and roughnesses. Furniture panels do not need to be oriented in relation to the cutting direction; individual boards are laid in a chaotic manner. But an additional very important requirement arises - the cutting knives must be perfectly sharp, and the woodworking machines must be in full working order and correctly adjusted.
Video - Attachment for a hand-held circular saw for cutting furniture panels
Cabinet assembly technology
A simple cabinet made from furniture board with your own hands is practical and easy to assemble. More experienced craftsmen will like the idea of building a coupe. This is a convenient choice for both small and spacious apartments. You can design and assemble the product yourself in 2 weeks. This is much faster than waiting 2 months for an order.
To ensure that all the parts are smooth and correct, it is best to use an electric jigsaw. It is necessary to cut out the sides, bottom, cover (preferably wider than the length of the module), base, doors, back wall and shelves.
The first application of varnish is carried out before sanding. The second can be done after final assembly. It is important that the workpieces are dry and even.
Assembly
At the beginning of assembly, it is necessary to mark the places where the holes for the fittings will be. Then, using self-tapping screws, you need to secure the bottom between the side walls. The lid is installed smoothly and neatly at the top. For reliability, the back wall is secured with nails. After this, the hinges are fixed with self-tapping screws and the doors are hung.
When assembling, it is important to be careful and meticulous to avoid deviation or misalignment. It is best to use a level and immediately correct any inaccuracies or imperfections.
If you follow all the instructions, assembling the cabinet will be quite simple. Also, to assemble the wardrobe you will need Euroscrews and plugs for them.
Many people advise taking the length of the workpieces a little longer than planned at the beginning, anticipating various force majeure circumstances.
Filling
The module is filled with drawers and a rod for hanging clothes. The boxes are easy to make from a sheet of plywood and a narrow board. They are assembled according to the same principle as the body.
The bar must be secured with heavy-duty fasteners, because it needs to withstand a lot of clothing weight.
You need to decide what clothes will fit in the closet. The width and number of shelves will depend on this.
Facade
Step-by-step instructions for making a cabinet from furniture panels
After you have prepared the tools and materials, you can begin cutting the parts and assembling the cabinet. If you don’t have enough experience with power tools, practice first on some unnecessary pieces of wood.
- Prepare a place to install the cabinet.
- On the bottom and top plates, mark with a marker (or pencil) the attachment points for the side walls and the middle partition, if it is present in the drawing.
- Place the sidewalls and horizontal panels on edge.
- Fasten 4 plates into a single structure with self-tapping screws.
- To make the frame more rigid, before installing the panels, drill out seats for dowels (wooden dowels). Fix them with PVA glue.
- Screw the support legs to the outer surface of the bottom plate with screws.
- Using a jigsaw, cut out shelves and drawer bottoms from a sheet of plywood, plastic or other durable sheet material.
- Install the frame in the designed position.
- Using a tape measure, check the equality of the diagonals at the corners of the body.
- Secure the back wall from a sheet of fiberboard.
- Before assembling the frame on the inner surfaces of the sidewalls and the partition, secure the support rails under the shelves with screws. Check out the options for installing shelves in your closet.
- Attach the trampoline bar to your outerwear.
- Screw handles to doors and drawer fronts.
- For drawers, attach telescopic guides to the walls of the frame.
- Install a built-in shoe cabinet.
- For a wardrobe, sliding doors are the “face” of the furniture. Canvases can be made from the same furniture panels. For swing doors, cut hinges into the door panels and cabinet walls. Hang the doors. Don't forget to read how to calculate, manufacture and install a sliding door system.
- It is better to apply furniture varnish with a brush to the façade surfaces of the wardrobe parts before starting assembly. After the final installation of the furniture, you can apply an additional layer, smoothing out minor flaws.
- Decor for doors and drawer fronts can be purchased ready-made in the store. Decorations come in the form of intricate flat wooden figures, as well as plastic ones to match the color of various types of wood. They can be secured with small nails or glue.
Drawing
It is recommended to immediately think about the number of drawers and doors and not forget about the filling of the product, which will add comfort and ease of use.
You can draw up a drawing of the cabinet either with a pencil on paper or on a computer. If you already have experience in drawing up drawings, then it is not difficult to make an accurate sketch on an A4 sheet. For beginners, the second option is suitable - working in a design program.
When the drawing has been drawn up, you can proceed to the following stages: calculating the amount of material required, drawing up the details and directly working with furniture panels.
It is important to approach the drawing up responsibly and think everything through carefully, since during the work it will be impossible to make any changes.
Preparing for work
Preparation for making a cabinet with your own hands consists of several stages.
Step 1: Selecting a Product Design
If you wish, you can assemble a wardrobe of absolutely any complexity from furniture panels at home - from a compact wardrobe for the bedroom to a large-scale wardrobe for the hallway. It is worth considering that the furniture should not overload the room, so for a small room it is worth choosing a cabinet of the appropriate size. It is important to immediately decide whether the product will be built-in or independent, what kind of doors it will have, how many drawers and shelves you would like to make, how the cabinet will close. When a unanimous decision is made by the household, you can move on to the next stage.
Step 2: Drawing Preparation
If you have drawing skills, they will come in handy now. However, an approximate diagram of the cabinet can be drawn without them. The main thing is to display the exact dimensions of the product and all its parts. If it’s difficult to come up with, take a ready-made drawing from the Internet and adapt its dimensions to your room.
Step 3: Selecting Materials
Having calculated the area of all the necessary parts from the drawing, it is easy to calculate the required volume of building material. To assemble the frame, you will need furniture panels with a thickness of 18-20 mm, for drawers - 16 mm. You will also need 10mm thick plywood for the bottom of the drawers. The back wall of the cabinet, if there is one, can be made from a sheet of fiberboard. And for finishing furniture surfaces, standard varnish, paint or water-based coating is suitable.
Step 4: Buying accessories
The minimum set for a closet is short and long screws, piano hinges (if the doors are hinged), a clothes rail, pull-out mechanisms for drawers, handles for doors and drawers, special legs, and for a sliding wardrobe - guides.
Step 5: Preparing Tools
To assemble a cabinet from a furniture panel, you will need a minimum set of tools: a tape measure, a building level, a ruler, a pencil or marker, a jigsaw, a saw, a drill, a set of bits, a screwdriver, screwdrivers, a chisel, a hammer and a brush.
Main wood species
Dozens of different species are used to make furniture sets for the kitchen. Both soft wood species (poplar, pine, cherry) and hard wood (oak, beech, yew) are used. Parts that do not bear a large load are made from soft wood - facades, decor, top cabinet covers. Frames are made from hard wood.
Features of the most popular types of wood for making kitchen furniture with your own hands:
- Pine. Not the strongest rock, but easily processed with tools. Suitable for creating miniature cabinets, light wall shelves, as well as furniture fronts.
- Beech. Good durable material, attractive in appearance. Any parts of the set are made from it, but it is worth considering that beech absorbs water well. Before assembling furniture for the kitchen with your own hands, it must be treated with special water-repellent solutions.
- Oak. One of the hardest and densest tree species, which is why oak furniture is heavy. Oak is not afraid of moisture, does not rot, it is a very strong and durable tree. Despite their high hardness, oak sheets are easy to process and take any shape.
The choice of breed for assembling a kitchen set with your own hands depends on the expected properties, as well as price and household features.
Assembling a cabinet from purchased parts
To make furniture on the balcony, in addition to the factory parts and fittings themselves, you will need the following tools:
- screwdriver and European screws;
- jigsaw;
- metal corners;
- wood screws;
- clamps;
- Phillips screwdriver;
- construction stapler;
- hammer.
Advice. If you bought blanks made from regular chipboard, before work, cover the material with a special transparent film to protect the cabinet from scratches and moisture.
Assembly order:
Assemble the frame by connecting the sides with the bottom and top: place the elements on the end, connect them at an angle of 90 degrees and securely fasten with a clamp.
Drill holes in the sides, bottom and top for future fastenings. Also prepare holes for countersunk screws - they should be 2-3 mm wider than the main holes.
- Secure the frame with screws and cover them with plastic plugs. Install metal corners at the corners of the structure.
- Attach the legs to the base of the cabinet.
- Place the resulting frame in the place where you plan to install the finished cabinet, and check its shape and dimensions.
- Lay the structure with the facade down and fix the back wall. It does not have to be made from the same chipboard - a plywood sheet is quite suitable here. But whatever material you choose, it is best to secure it with construction staples.
- Place the cabinet back upright and prepare holes for shelves and doors. Next, perform a number of final works: secure shelves, hinged doors, closers and other fittings.
Required materials and tools
Furniture board is a sheet of glued parts of natural wood or its compressed waste, intended for the manufacture of furniture. Both coniferous and deciduous trees are used as the main material: pine, aspen, birch, spruce, larch, oak, cedar, beech.
Such panels are easy to process, environmentally friendly, lightweight, durable and, importantly, quite inexpensive.
In addition, exclusive wooden furniture has always been and will be “in trend”.
Before making a kitchen you should prepare:
- furniture panels;
- plywood sheets;
- doors and fittings;
- boards;
- Sander;
- hacksaw;
- drill;
- screwdriver;
- self-tapping screws;
- paint, stain, varnish, impregnation.
Preparation stage
We have already found out that furniture panels are actually boards of natural wood glued together, connected by using glue and a press. Milling, lamination and other methods of decorating and improving protective properties can be used on surfaces.
Using such raw materials, you can create a new kitchen from scratch. By following certain rules and consistently performing all actions, you will achieve excellent results.
At the initial stage, you need to carefully think through the project. To do this you need:
- make a sketch of the future kitchen;
- create a project;
- determine the exact number of all elements;
- detail every detail;
- decide what the countertop will be made of and its dimensions;
- make calculations on the number of shelves and drawers;
- calculate the required number of fittings;
- take into account the installation of the hob, sink, oven;
- select places for outputting and connecting communications;
- provide a dishwasher or washing machine in the kitchen;
- decide on shapes and dimensions;
- purchase materials;
- cut out the panels.
Making purchases in stores like Leroy Merlin, or simply at construction markets, is a personal choice for everyone.
This stage is rightly called the most difficult and responsible.
If you correctly complete all the assigned tasks at the preparatory stage, then you will only have to do simple mechanical work. Namely, assemble the prepared puzzle into a single structure, which will become your kitchen furniture.
Advantages
The advantages of creating such a structure yourself using furniture panels include:
- there is no need to spend a large amount of money on this process;
- there is an opportunity to realize your own unique ideas regarding obtaining an unusual cabinet;
- it may have a non-standard shape and design, but for this, before assembling a cabinet from a furniture panel, competent calculations should be made;
- the resulting cabinet will fit perfectly into the existing interior style, so it will become a real decoration of any room;
- you can choose any suitable fittings for it, as well as make the optimal number of shelves and drawers.
Thus, creating a cabinet yourself using furniture panels is the optimal solution for every residential property owner who prefers to do a lot of housework with his own hands.
Stage 3: finding or preparing a drawing
To assemble a cabinet (and indeed any structure made of wood), we need to find drawings on the website or develop them ourselves. But first you need to understand the main features of the furniture, that is:
- height, width and depth;
- number of doors, drawers, compartments, etc.;
- the height of the mezzanine, if provided;
- filling the closet. Here it is important to take into account exactly how many shelves, partitions, rods, holders, etc. there will be inside the structure.
As soon as you understand this point, you can start sketching a sketch of the interior element - that is, creating its drawing. The easiest way to do this is on paper (if you have experience), or seek help from special programs that are freely available.
1
2
The second option has a lot of advantages, since all you have to do is enter the required numbers, then correct and print the resulting drawings. It is on them that we will rely when assembling the cabinet.
Why is drawing so important? Here are just a few arguments in its favor:
- All elements are as detailed as possible.
- You will clearly see how much material is required.
- There will be an understanding of how thick it is worth buying furniture panels.
- You will see a simple cutting of all materials.
Often new cabinets are made to “replace” old designs. If this is your case, implement a similar cabinet by taking measurements of the old one. As soon as the diagram is ready, study it again, and as carefully as possible, and then think about what you can add/remove.
Let's look at examples of drawings of cabinets made from furniture panels, and move on to furniture assembly technology.
1
2
These photo drawings are approximate. That is, if you, for example, decide to assemble a wardrobe or a chic wardrobe, then you should go either to our website or to professionals for drawings.
Imagination is stronger than experience
Before you start planing, sawing and hammering kitchen furniture (usually cabinets, shelves, tables, chairs, benches, etc.), you need to clearly understand the final result of both all individual elements and the entire project of the future kitchen. Therefore, it is advisable to carefully study various layouts and ideas for creating furniture, select options that are harmoniously combined with each other and with the overall kitchen interior, transfer to paper or print ready-made drawings.
Afterwards you need to calculate the quadrature of the future furniture. To do this, we add up the areas of all elements and get the total area.
We need the data to purchase the required amount of building materials. Don’t forget about the back wall of the kitchen unit, for which a fiberboard sheet can serve perfectly. We add the required number of handles, hinges and other fittings, decide on the external paint and varnish coating and purchase all the material according to the list.
One of the main elements of kitchen furniture is, of course, the table. It can be square, rectangular, round, corner, sliding or folding.
A typical rectangular table has dimensions of 2700 by 600 mm. A square tabletop (due to its equilaterality) will also not create certain problems.
A pencil or marker is tied to the end of the thread. To mark an even circle, you need to draw a circle around the nail, pulling the thread to the maximum.
You can use the same method to round the corners of a square or rectangular table.
Layout
Before purchasing the necessary materials, you need to draw up drawings of the future kitchen set. To create a detailed plan indicating the smallest details, it is better to use a special program on a computer or smartphone. If you have nothing else at hand except a piece of paper and a pen, then you can draw a schematic drawing of the future kitchen on paper. If we take standard values as a basis, we get the calculations shown in the table.
| Apron or distance between floor and wall cabinets | 57–60 cm |
| Tabletop height from floor | Standard - 85–88 cm For tall people - 90–96 cm |
| Base cabinet frame | 80 cm |
| Depth of base cabinets | 60 cm |
| Upper cabinet depth | 30 cm |
| Base | 15 cm |
Before you start making a set with your own hands from furniture panels, you need to think through the layout (straight, corner, with a bar counter) and the shape of each module, and calculate the distance between the cabinets. It is also worth determining in advance the locations for sockets (it is advisable to install them before installing the kitchen) and the location of the sink, built-in appliances, and hood. After calculating the dimensions of all cabinets, the room itself and drawing up a drawing, you can purchase components.
Computer desk made of shield
In this case, the principle of making the table is slightly different from the previous one. It is necessary to use 3 sheets, the size of which will be 2000x200x18 mm. This is the most optimal size due to its strength, and therefore durability. When making a table you will need:
- edged board (size can be selected as desired);
- plywood parts.
Based on the finished plan, detailing and calculation of the amount of required material are carried out.
The best option for this would be a narrow furniture board, the holes in which should be made in increments of 100 mm.
As in the case of a desk, before assembly begins, work must begin with the preparation of the tabletop, which is cut out of the panel in accordance with the previously taken measurements and the prepared drawing. It is recommended to make two small recesses on the side surfaces in order to place the table strictly against the wall, avoiding unnecessary gaps along the edges of the tabletop. On a vertical wall, the best option would be to install a transverse panel. Installation is carried out using self-tapping screws on the frame. The cross panel and the presence of plywood will help give the table rigidity and strength. After this, a frame is made for shelves and drawers, parts of which are attached to the finished structure. It is preferable to make as many drawers as possible on this type of furniture for greater capacity. To build the upper shelves with the required number of drawers, the shield must be cut, attaching it to the tabletop with self-tapping screws. For drawers and shelves, it is better to use roller mechanisms. As for the part under the keyboard, it is made of a shield whose size is 40 mm. Next, it makes sense to start installing the doors. After preparing all the components, varnishing should be done, after which final assembly is carried out.
Today, the construction market offers a variety of varnishes, not only in a variety of colors, but also in textures.
Holes for the hinges are made in the doors, and the doors themselves are fixed with self-tapping screws to the side walls.
Furniture panel - the optimal material for a hand made cabinet
Furniture façade made from stacked wooden panels
Let's try to understand what a furniture panel is and why it is good when you need to make a cabinet yourself.
Cutting a wooden panel on a circular saw table
A furniture panel is a slab made from waste from the sawmill industry - wooden blocks with a thickness of 1 to 10 cm. Longitudinal or transversely located bars are compressed with a press and glued together.
In appearance and strength, the shield is not inferior to solid wood. The use of furniture board for the manufacture of wooden furniture is due to the greater width of the slab than the maximum width of a solid board.
Assortment of solid wood furniture for interiors in country style
Reasons for using a shield when assembling furniture:
- Affordable price . The board is made from waste from the sawmill industry, and therefore costs less than solid wood.
- Variety of sizes . There are boards on sale with sizes ranging from 800×200 mm to 3000×800 mm. This is enough to assemble furniture of any configuration and dimensions.
- Ease of machining . Despite its strength, the shield is easy to cut, drill, grind, etc.
- Environmental friendliness of the material . An environmentally friendly composition based on natural wood resins is used as glue in the manufacture of the shield.
- Durability . In terms of reliability and durability, the shield is not inferior to solid wood.
- Wide range of finishing options . Unlike particle boards, furniture panels can be treated with stain, painted, varnished, etc.
- The furniture panel forgives the mistakes of an unprofessional assembler . Mistakes made when working with particle boards will lead to the need to buy a new board. Defects on a wooden panel are easy to hide, since the material is puttied, sanded, primed and painted.
Selection of design and construction of drawings
Classic wooden cabinet with elements of modern furniture fittings
Before buying materials, let's decide what we will collect. Wooden panel is a durable material from which you can assemble almost any cabinet furniture. The range of options includes a sliding wardrobe or easier-to-manufacture models with hinged doors.
Let's look at a few simple drawings from which you can choose the most interesting solution.
A simple diagram of a small wardrobe that will take its rightful place when arranging a dressing room or hallway
The drawing shows cabinet furniture designed for the installation of sliding doors. It is more expedient to assemble such a cabinet using less expensive chipboard, however, if you set out to make something from real wood, then why not
A small cabinet with a complex stacked plinth, walls and facade
Scheme of an antique kitchen sideboard. In addition to the main body structure, the drawing shows many decorative overlay elements, which are made using milling equipment with complex controls
Preparation of material
| Illustrations | Materials and their description |
| Furniture board . We select the dimensions of the material in accordance with the drawing used. The preferred material thickness is 28 mm for the facade and 20 mm for the body. | |
| Plywood . Multilayer plywood 9 mm thick will be required to make shelves. To install internal partitions we use 15 mm thick plywood. | |
| Fiberboard . Fiberboard is the traditional backsplash material. We use material with a thickness of 8 mm. | |
| Accessories . Furniture fittings are selected in accordance with the selected drawing. | |
| Fastening elements . You will need dowels for hidden adhesive connections and threaded hardware (confirmations and self-tapping screws). To install the internal contents of the furniture, you will need corner shelf holders and other fasteners, which are selected in accordance with the drawing. | |
| Paints and varnishes . We treat finished wooden furniture with stain and varnish or paint it with a continuous layer of paint. |
Tools
| Illustrations | Tool type and description |
| Sawing equipment . To cut wood you will need a circular saw and a jigsaw. To assemble furniture with a complex configuration, you will need a miter saw with a variable cutting blade angle. | |
| Drill with screwdriver function . To drill holes in wood and screw in self-tapping screws, you will need a drill, drill bits, bits for the heads of the screws, and countersinks for countersinks. | |
| 5 mm hexagon . The key is needed to tighten confirmations. | |
| Measuring tool . To make the furniture the same as shown in the drawing, you will need a tape measure, a ruler and a square for marking the parts. | |
| Clamps . The tool is used to tighten the parts to be glued and obtain the strongest possible connection. | |
| Painting tool . To finish finished furniture, you will need a putty spatula, sandpaper, a primer brush, stain swabs, a varnish sprayer, etc. |
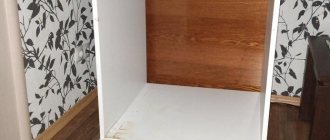
Housing assembly
After the cabinet parts have been cut, all that remains is to put them together
The housing is assembled on a flat floor. To begin with, all parts are connected dry. To do this, holes for dowels are drilled or milled at the junction of the upper and lower side walls.
The shape of the hole depends on the shape of the dowel and what kind of tool is available
Dowels with a rectangular cross-section, as shown in the photo, provide higher joint strength. However, round dowels are easier to use as it is easier to drill a hole than to select a rectangular notch in the wood. The dowels are driven into the holes with a wooden mallet and all the parts are connected into a single body.
Connecting furniture frame elements
We check the corners of the assembled body; they should be straight. If the structure is assembled correctly, we strengthen the assembled body with confirmations. To do this, we drill holes with a special drill for Euro screws. If there is no special drill with a cutter, we drill holes with a diameter of 3 mm and additionally make a countersunk hole for the screw head with an 8 mm drill to a depth of 5 mm.
When assembling the body, we set the right angle using furniture clamps
When drilling holes for confirmations and screwing in screws, it is advisable to tighten the body with corner clamps so that the structure is level. We screw in the confirmations so that they fit flush with the surface. Subsequently, the hole for the confirmations can be closed with a plug or putty.
Filling
A furniture clamp will be needed to install shelving shelves - it is important to maintain a right angle
The filling is installed in accordance with the selected drawing. The first step is to install the filling, which provides additional rigidity to the entire structure - we are talking about shelves that are attached to the cabinet walls with their edges.
To fasten the shelves, you can use self-tapping screws that are screwed through the side walls, but with this method of fastening you will have to hide the marks from the screws on the outside of the cabinet. There is another option - the shelves are mounted on corners, which are installed on the inside of the case.
We make drawers and doors
Assembling the box body with connection on confirmation mats
Boxes, if provided for by the cabinet design, are assembled from boards and plywood. The frame of the box is assembled from boards 20 mm thick - front, back and side walls. The bottom of the box is lined with plywood. Roller or ball guides are used to install drawers.
Marking the door leaf for installation of adjustable hinges
Door installation begins with marking and installing hinges. The preferred option is to install adjustable hinged hinges with a closer. For such fittings, recesses are milled in the door leaf into which the hinges are recessed. The counter part of the hinge is attached to the wall on the inside of the cabinet.
After the door is mounted on the hinges, handles and locking devices are attached to it, selected in accordance with the nature of the use of the cabinet.
Through holes - an interesting idea for door handles
If the furniture is made for home use, instead of installing locking fittings, you can make do with holes, as shown in the photo. This option is good for its simplicity, ease of use and at the same time stylish design.
Varnish application and decoration
Properly selected and high-quality applied stain literally transforms wooden furniture
At the final stage of assembly, the finished furniture is treated with paints and varnishes.
If the assembly was done carefully and there are no visible gaps, chips or other defects on the surface of the wood, the entire surface is covered with stain and then varnish. If there are defects in the wood, they are eliminated using putty. But in this case, the furniture is not treated with stain, but is painted with a continuous layer of enamel.
Facade
After we have become familiar with the main aspects of making wooden cabinets, we will consider interesting design options for wooden facades.
The simplest and at the same time very stylish option is a minimalist door, the surface of which is decorated with a chrome handle. Due to its modest design, such a facade will be appropriate in most modern minimalist interiors
The so-called paneled façade is a stacked design that, despite the complexity of its manufacture, looks great and is guaranteed to fit into the interior of an ordinary room or hallway.
Solid fronts are an excellent solution for equipping a sliding wardrobe. The absence of relief decor on the one hand is due to the sliding door installation scheme, and on the other hand due to the attractive minimalist design
Organization of the kitchen space
As a result, you ended up with a certain number of cabinets. All this needs to be assembled in the kitchen to create a single structure.
Here, take into account the following recommendations:
- The installation of lower cabinets must begin with the outermost element. They are checked with a level and leveled if necessary. It is advisable to use an intersectional screed, especially for upper cabinets;
- Next comes the top tier. Calculate the weight of the cabinets under load to select suitable fastenings;
- Maintain distance between tiers. Usually it is about 65 cm;
- At the final stage, they install the exhaust system, hob, connect communications, etc.
Making a homemade kitchen from furniture panels is not the most difficult task. But without certain skills, knowledge and experience it is not worth taking on such work.
You can review many photos and videos and understand how this is done in theory. But if there is no practical experience, it is better to start with something simpler.
Thank you all for your attention! Leave reviews, ask questions on the topic, tell your friends about us!
Installation
Installation of a kitchen from furniture panels in stages. First, assemble the lower cabinets. All elements of the cabinets are pre-cut to size and processed. The bottom, back wall, sides, doors and parts for drawer cabinets are sanded.
The elements are connected using dowels or confirmations. To avoid mistakes, holes are cut out at the ends. The process is quite complex; accurate calculations and measurements are important. Then dowels are inserted into the prepared holes, and the parts are connected.
The back walls can be made of plywood or fiberboard. They are attached to the finished box with staples or small nails. When the cabinets are completely ready, you need to check the accuracy of installation. Next, install the fittings - hinges and runners for pull-out shelves and drawers. This task is performed using self-tapping screws and a screwdriver.
When installing a countertop from a panel, you need to double-check that the parameters of the slots for the sink, hob and other built-in appliances are correct. When placing hanging cabinets at the preparatory stage, you need to make markings for future fasteners and drill holes for anchor bolts. During the installation of facades and built-in appliances, doors and shelves are mounted on fasteners.
Prepare facades
Install the countertop
Assemble first the lower, then the upper cabinets step by step
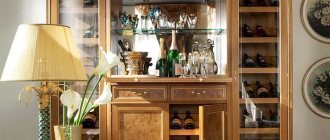
Finished kitchen
Finish options
To protect wood from the negative effects of high humidity in the kitchen, furniture panels are varnished. Before applying the product, the facades are sanded and then dried indoors. Lacquered cabinets and cabinets look stylish and elegant. The same technology is used for painting, but before application you need to coat the surface with primer. Other methods of decorating a set of furniture panels include:
- use of photo wallpaper on part of the facade (the free surface is covered with paint);
- creating an antique effect using foam baguettes with curls.
In order for a kitchen created with your own hands from furniture panels to retain its attractive appearance longer, it is necessary to carry out repair work on time and change fittings. You can restore the lost shine to products using polish.
When choosing suitable furniture panels for the kitchen, you need to pay attention to the following criteria: room area, surface type, humidity, future interior design. Using this material you can create unusual textures, decorative elements, and various bas-reliefs. Panel products and products made from them are the best choice for creating a stylish kitchen set.
Sanding furniture panels Varnishing
A foam baguette glued to the facades will create the effect of antiquity
Work order
Let's look at making a cabinet with your own hands from furniture panels using the example of a simple model - a double-door cabinet without a vertical internal partition. First, all the parts are cut out using a wood hacksaw or jigsaw:
- 2 side walls;
- bottom;
- lid;
- a base that covers the gap between the bottom, side walls and floor;
- 2 doors;
- back wall;
- shelves in the required quantity.
So that the cabinet can be moved close to the wall, rectangular or rounded grooves for the baseboard are cut out in the lower rear part of the sides, and the back wall is made shorter than the side walls, it should end just above the baseboard.
All parts from the furniture panel must be varnished in 2 steps; after the first varnishing, it is advisable to sand the workpieces, and the second time to varnish the already assembled body and doors with hinges in place. To prevent drops of varnish from collecting on the edges, it is better to chamfer the boards by 1 mm along the edges. After the first layer of varnish has dried, you can begin assembly. First, holes for fasteners and fittings are marked and drilled. From the inside of the doors, using a drill and cutter, holes with a diameter of 35 mm and a depth of 12 mm are selected for the hinge bowls. Hinges are usually attached at a distance of 7-12 cm from the top and bottom, and if the doors are massive, you can install a third hinge in the middle. The optimal distance from the vertical edge of the door to the edge of the hole is 5 mm. Thrust bearings can be attached to the bottom of the side walls.
Assembly is carried out in the following sequence:
- the base and bottom are fastened between the side walls with self-tapping screws;
- a cover is installed on top, the diagonals are measured to check the correct assembly;
- if there are no distortions, the rear wall is attached;
- shelves are installed;
- if the design provides for a rod, rod holders are mounted and the rod is installed in place;
- the doors are prepared for installation - the hinge bowls are inserted into the prepared recesses, the hinges are fastened with self-tapping screws, and the door handles are fastened with screws;
- the doors are hung, the hinges are attached to the side walls and adjusted as necessary.