A bookcase, as you know, is a cabinet without walls. It is also shelves height from the floor, sometimes on wheels, or a rack for a relatively small operational load, not attached to the floor, walls or ceiling. In general, the bookcase is just like a bookcase. A multifunctional piece of cabinet furniture that can effectively zone a room and be aesthetically significant in the interior. This article describes why it is needed and how to make a bookcase with your own hands. The issue is not only economic: the openwork design of the shelf, on the one hand, requires increased care about the strength of the product. Some knowledge about measures to ensure it is useful not only for designing furniture. On the other hand, the same openwork will allow you to express yourself in an object and get a unique thing with minimal consumption of material.
How to make a wooden shelf with your own hands - a detailed master class for beginners
Shelving is very popular due to its functionality. They are widely used in industrial warehouses, households and residential areas. This type of furniture is ideal for storing many items.
These products are presented quite widely in furniture stores, but they do not always meet the buyer’s requirements. Unsuitable sizes, design and other compelling reasons are a reason to start making this piece of furniture yourself.
A DIY rack has a number of advantages:
- fits organically into the interior;
- rationally uses the space of the room;
- shelves are designed for the required load;
- The sizes of the cells are planned according to the objects and things for which they are intended.
It’s quite easy to make, but the result will satisfy all requests.
Design and sketch of the future product
The design features and appearance of the future product directly depend on its location in the house. If earlier shelving was more often used in utility or secondary rooms, now they have begun to fit widely into the interior of living rooms and children's rooms, offices and even bedrooms. The original, thoughtful design of the product can give the interior of the room a completely different style.
Racks vary in type: frame, beam, modular, cantilever and rope. Models with cantilever and bridge circuits are less common. Any of the selected options can be made at home. Having decided on the shape, we draw a sketch or use a photo of the rack taken from the Internet.
To design the product, you will need to measure the height of the room (the rack is most often made from floor to ceiling), and also determine the size of the shelves. The drawing will allow you to avoid mistakes and save material in the process of preparing product elements.
We select the depth of the rack and the width between the racks based on the size of the items for which it is intended. The maximum length of the shelves is 150cm, otherwise sagging is possible. If large loads are expected, then the pitch of the racks must be reduced to 50 cm. The sketch can be made directly on the wall near which our structure will stand. This will make it easier to determine the dimensions of the racks and shelves of the product.
Before starting work
Despite the fact that the rack is not some kind of complex furniture, due attention should be paid to the preliminary stage. It is important to prepare all the materials in advance, develop a project, and only after that bring your plans to life.
Necessary equipment
To make a kitchen wooden rack with your own hands you will need:
- screwdriver;
- screws, dowels or other fasteners;
- shelves (their role will be perfectly fulfilled by edged boards, MDF or chipboard, plywood, etc.);
- jigsaw;
- roulette;
- building level;
- pencil;
- wooden beam;
- slats for planks and partitions;
- wheels (if provided by your project).
The kitchen and bathroom are rooms characterized by temperature changes, so you should make sure that a special coating is applied to the wood to prevent rotting and premature drying.
Rack design
When making such furniture, you need to be aware that it is part of the interior.
Not only the aesthetic, but also the practical side is important here, so before starting work you should carefully weigh everything. The first thing to do is decide on the dimensions. To do this, use a tape measure and a pencil, take measurements and record them on paper. The work is carried out with special care, since in case of an error you risk wasting time.
Very often they make a shelf for vegetables in the kitchen. In this case, an ascetic design without frills is most appropriate. The height depends not only on the size of the room, but also on your personal preferences. The rack in the interior should be comfortable. If you don’t like using a stepladder, make a smaller structure. The width of the shelves depends on the items that will be placed on them. If vegetables are meant, 25-40 cm is enough. The length depends on the weight of the stored items. When it comes to fairly massive objects, it is better to use relatively short boards to avoid sagging.
Fastening elements are selected taking into account the design. If the rack is decorative, self-tapping screws will do. If it is attached to a brick wall, their length should be about 52 mm, if to a concrete wall - from 89 mm.
For small rooms, a corner shelving unit with open shelves is ideal. This will save a lot of space, but will not affect the capacity. When you have decided on the style and design, you can take on the drawing.
Making a rack
Having decided on the sketch, we select the material for the shelving.
For living rooms, structures made of wood or laminated chipboard are preferable. In a utility room, basement, or garage, shelving can be made from metal, oriented strand board or non-laminated strand board, and thick plywood. Requirements for aesthetic appearance will be lower; you just need to take into account the humidity of the product’s location and temperature changes when choosing a material.
The instructions for the process of making a rack are practically the same in all cases and contain only a few operations.
The set of tools required for work is minimal:
- Electric circular saw or jigsaw. If you don't have them, just use a hacksaw for wood.
- Screwdriver or electric drill. Their analogues: a set of screwdrivers and a brace.
- Hammer.
To connect all the parts of the product, you need to stock up on screws and pins for the shelves. You can also use nails, but keep in mind that they do not provide the proper strength of the connection.
So, everything is ready, let's get to work.
- We cut off the number of racks specified in the diagram according to the height of the future rack. We strictly ensure that the sizes are the same. Important! If wood is chosen for work, the boards must first be sanded.
- The next stage is the preparation of two crossbars along the width of the structure. They will connect all the rack posts at the top and bottom into one whole.
- If the racks are at the same distance from each other, cut the required number of shelves of the same length. If, according to the design concept, the distance between them is different, then we cut the shelves according to the dimensions between pairs of racks.
- Having prepared everything necessary, we connect all the racks above and below with prepared crossbars. We attach the resulting frame to the wall using corners or hinges, which are previously screwed to the top crossbar or to the racks, but also at the top. If the rack is built between walls, then the outer racks can be attached to the side walls using long screws. One on each side will be enough and stability is guaranteed. Corner structures do not need to be fixed, since the wings of the product will be located in different planes, which will give it stability.
- The distribution of shelves according to the sketch is possible in two ways. Option one - the adjustable shelves simply lie on pins inserted into pre-drilled holes of the appropriate diameter. The second method is that non-adjustable shelves are rigidly attached to the frame using self-tapping screws.
It should be taken into account that if the shelves in each vertical span are located at the same level as the neighboring ones, you will have to insert pins inside on one side and fasten them with self-tapping screws on the other.
Preparing the side and back slats
14. On one of the side strips, measure 60 mm from the bottom. Set aside another 400 mm from this mark to determine the position of other shelves. Draw a center line along the strip to provide drilling points. Using an electric drill with a 6.5 mm drill, make holes in them.
15. Use the first picket as a template for drilling the remaining pickets. Stack two or three planks with the template on top. Secure with a clamp and drill everything together in the appropriate places.
16. Apply finishing material to all planks and frames (these areas will be difficult to access later). We used teak oil and wax to give it a rustic, simple look as it brings out the texture. Rub the wax in thoroughly using a rotating motion of the polishing sponge. This will also remove any small splinters left behind after sanding, so wear protective gloves. Use a dry, clean cloth to remove excess wax. The bolt heads were painted matte black. The bolts were stuck into corrugated cardboard so that only the heads were visible, which were painted with an aerosol can.
Alternative finishing materials for bookcases
- Natural wax. Very popular, but requires increased rubbing and high consumption.
- Teak oil. For good results, apply multiple layers.
- Matt lacquer. Make a couple of layers of aerosol.
Final decor of the rack
The finished structure must be painted. Of the various options, the simplest are coating with water-based acrylic paint or varnishing the product.
The advantage of acrylic paint is that it dries quickly and has virtually no odor. It can even be used indoors, although the room will still need to be ventilated. Varnishing is preferable if you want to preserve the structure or slightly tint the surface of the wood. Clear or tinted varnish to resemble oak, walnut, ash and other wood species should be applied two to three times. Each new layer is applied after the previous one has dried.
Before painting the rack, it is necessary to prime the surfaces to be painted, unless two-in-one paint is used. Priming the surface will ensure a good result and will ensure that the paint does not peel or crack over time. If you intend to paint with oil paints, it is recommended to do this in advance outside the living space. We bring all painted parts into the house for subsequent assembly only after complete drying.
Frame assembly
6. Clamp the frame jumper in a vice with one of the ends facing up. Apply some PVA glue to the end and rub it into the wood with your finger. Then apply glue to the end of the piece. This will strengthen the connection. Take the crossbar and drive a 60mm nail into the face of the material near the end of the piece. Place the crossbar on the header so that the ends are flush and the planed edges are neatly aligned. Hammer the nail and adjust the fit. Hammer a second nail into the joint and repeat the process at the other end. Check the squareness of the frame by measuring the diagonals. If they are equal, then the corners of the frame are right.
7. Add middle crosspieces to the frame. They should be evenly spaced, but the accuracy of the position is not very important, as long as the surfaces are flush with the top of the frame.
8. Make two more shelf frames and a plinth frame with shorter lintels.
Do-it-yourself bookcase (for flowers, shoes and others): designs, applications, production
A bookcase, as you know, is a cabinet without walls. It is also shelves height from the floor, sometimes on wheels, or a rack for a relatively small operational load, not attached to the floor, walls or ceiling. In general, the bookcase is just like a bookcase. A multifunctional piece of cabinet furniture that can effectively zone a room and be aesthetically significant in the interior. This article describes why it is needed and how to make a bookcase with your own hands. The issue is not only economic: the openwork design of the shelf, on the one hand, requires increased care about the strength of the product. Some knowledge about measures to ensure it is useful not only for designing furniture. On the other hand, the same openwork will allow you to express yourself in an object and get a unique thing with minimal consumption of material.
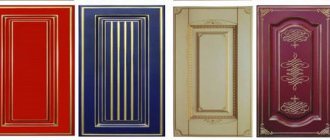
What to make from
You can make a bookcase from any more or less durable and workable material, but novice furniture makers should not get carried away with their variety. A forged (item 1 in the figure) or cast bookcase can be a work of art, but is functionally very reliable and durable. But to manufacture it you will need a production facility, special equipment, thorough skill and significant labor costs. The possibility of making wicker bookcases at home without experience (item 2), in addition to great technological complexity and labor intensity, rests on the material: the bookcase is not a basket, it must not lose stability and ability to bear the load for many years. Therefore, vines that dry out strongly and unevenly are not suitable; rattan is needed.
Plastic shelves, contrary to popular belief, are quite reliable and stable. Modern plastics technologies make it possible to obtain things that are indistinguishable from artistic forging/casting or wooden products (items 3 and 4). But to make parts for them, you no longer need a corner in a garage or barn with a homemade bending machine, or even a forge with a forge, but a workshop with equipment for plastic casting. As for assembly from ready-made parts, there is no need for any special publications; the instructions for the kit are enough. For a kitchen shelf made of bin trays (item 5), this is not required either: the sections are simply placed one on top of the other, pressing until they snap into place. Therefore, the optimal choice for a home craftsman to begin with is a wooden bookcase. Wood is a traditional, environmentally friendly and noble material, pleasant to both the eye and the touch. In heated rooms, wood is quite durable without impregnation with chemicals; You don’t need much material for a bookcase, so using valuable types of wood for it won’t be too expensive.
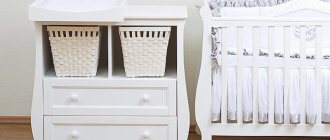
Note: there are, however, exceptions when plastic, due to its hygiene and moisture resistance, is preferable as a material; These are shelves for utility rooms - kitchen, bathroom, hallway. A plastic shoe rack for the hallway can be made with your own hands without complex production equipment; see one example below.
Necessary materials
| Detail | Material | Length | Quantity |
| Side/back bar | old picket fence* | 1500 mm | 16 |
| Shelf plank | old picket fence* | 768 mm | 16 |
| Frame crossbar | hardwood 50x25 mm | 767 mm | 8 |
| Frame jumper | hardwood 50x25 mm | 320 mm | 12 |
| Base jumper | hardwood 50x25 mm | 298 mm | 4 |
| Bumper board | old picket fence* | 768 mm | 1 |
Additionally:
- Sandpaper: ten sheets of each grit 25 and 12 according to GOST (60 and 120 according to ISO);
- PVA glue;
- finishing nails 60 mm;
- nails 30 mm with a flat head;
- four synthetic polishing sponges;
- clean rags;
- teak oil with wax or finishing material of your choice;
- eighty-four bolts 3x50 mm with a mushroom head and washers.
* The old picket fence is well dried and should not deform. However, you will have to adjust the width and depth of your shelving to match your picket fence. If desired, you can use 95 mm wide hardwood boards.
The final height of the structure is 1500 mm; width 795 mm; shelf depth 378 mm. Lumber is indicated with nominal dimensions.
Structures and connections
Shelves assembled on hidden mortise carpentry joints (item 1 in the figure) are rarely made independently, and are expensive to sell. There are no panels connecting the frame ribs into a rigid box, and the whatnot is prone to loosening when the wood dries out. As a result, it is necessary to use expensive imported types of wood, but even in this case, if the bookcase is high, the side frames must be made massive (item 2), which seriously limits the design possibilities of the product.
Wooden shelving designs
The most durable is a wooden shelf assembled with an overlay; The diagram for assembling wooden products with an overlay is given in pos. 3. Shelves made of overlay planks can be quite elegant (items 4 and 5), but, firstly, their appearance is quite monotonous. Secondly, if the height of the shelves exceeds 40-45 cm, the wood for the sides must again be durable, not easily drying, and therefore expensive.
A type of shelving made from planks with an overlay is household frameless (with sidewalls made of one board each) shelving-ladders, item 6. For the strength of the attached ladder shelf, its shelves must be box-shaped without extension, as in pos. 6. If the shelves are flat, then the side supporting frames need to be A-shaped, like a stepladder. In this case, the shelves can be taken out.
Note: shelves for heavy weight loads, the appearance of which does not have serious requirements, are often assembled using a combined method - the supporting frames are inserted halfway into the tree, and the shelves are placed on an overlay, see fig. on right. But this will no longer be a bookcase, but a rack, in terms of the requirements placed on it and structurally noticeably different from a bookcase.
Biplane box
Rack-mount shelves have the highest ratio of strength to the amount of material required for manufacturing (items 7-9 in the figure above). It’s not for nothing that the wings of the first biplanes were made in a similar way, and the planes of that time were called whatnots. In the interior, this means that the furniture shelf will be especially openwork and elegant. Functionally, the shelves of rack-mount shelves can be of any required height (item and with extension to almost the entire width, item 9. Drying of the structural material has virtually no effect on the strength and stability of the rack-mount shelf.
Note: the removal of bookcase shelves under significant load, assembled from planks on an overlay, is possible beyond their width, but in this case there is no need to talk about the aesthetics of the product, and the ratio of the usable area of the bookcase shelves to the area occupied by it turns out to be low, see fig. lower right.
Shelving unit with cantilever design with full removal of shelves
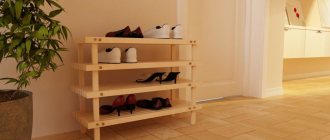
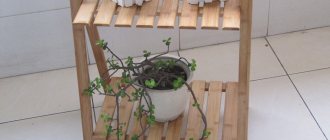
Flower shelves
Long gone are the days when the whatnot was the “highlight” of the living room and the hostesses of secular salons vying with each other to see whose was cooler. Nowadays, most of the shelves in everyday life are used to place indoor plants. Here the openwork of the whatnot works for functionality: using the whatnot, plants can be placed on a minimal floor area so that they do not shade each other and it is convenient for the owner to care for them. For the same purpose, special shelves for flowers are built, but they are, as a rule, stationary, attached to some kind of base, and the shelf is adjustable. However, the difference is very relative.
What kind of shelf for flowers should be depends on the role and significance of the latter in the interior. Most often, a few indoor plants are kept in the house, small and not very picky - to liven up the interior. But many amateur plant growers also collect large collections of sometimes rare exotic plants at home.
Shelves for indoor flowers
Shelves for purely decorative flowers are usually made cantilever, i.e. with a large offset of shelves rotated relative to each other around a vertical axis. The design is either onlay (pos. 1 in the figure), or rack-mounted, pos. 2. The first ones are simpler and cheaper; the latter are more openwork and less distracting from the plants.
Shelves for collections of indoor plants are already made as ladders, pos. 3-5. The shelf is especially multifunctional - an extension ladder, pos. 3:
- In winter, it is stored without taking up much space in a pantry or closet, where you can put all sorts of little things in boxes.
- In spring – used as a rack or shelves for seedlings.
- In summer - installed in a suitable place for summer maintenance of indoor flowers in the open air.
- In autumn - suitable for drying crops from the garden before sorting and preparing for winter storage.
Note: a shelf made from a construction pallet is also good for keeping indoor flowers in the summer. If such an unsightly internal corner of the building is blocked, pos. 6, then in the nook behind it a microclimate will be created that is favorable for the health and development of plants.
A drawing of an extension shelf-ladder for flowers is given on the left side of the next page. Fig., and on the right there are drawings of a greenhouse bookcase for the most whimsical people from the depths of tropical rainforests: orchids, gesneriaceae, etc. The substrate on which these plants grow is always slightly warmer than the surrounding air due to the abundance of rotting organic residues in it. It is impossible to lay a layer of red soil of more than 1 m at home for such sissies and populate it with tropical soil microflora/microfauna, but in the “basement” of this shelf an infrared heater of 20-50 W can be easily placed, heating the soil in the trays to the required degree. A pair of 15-25 W incandescent lamps are perfect for this purpose.
Drawings of shelves for flowers
To the hallway
In a modern hallway, after installing a hanger, wardrobe, key holder and shelves for small items, there is often no space left for a large bookcase. But there is an area of application where a mini-shelf for the hallway is extremely necessary: a shelving unit for everyday, common shoes. Out-of-season shoes are stored in a special shoe rack, but before placing them there, the shoes need to be dried thoroughly.
Improper and correct storage of shoes
There is no need to dry shoes and maintain them as shown on the left in the figure: for shoes to last for a long time, they must dry evenly on all sides; especially from below, from the sole. For this purpose, use special shoe shelves with lattice shelves, on the right in Fig.
Drawings of a shoe rack in the hallway for everyday shoes are given below. rice. Material - scraps of cellular polycarbonate and PVC or metal-plastic pipes in a PVC shell. Both can be purchased cheaply from plumbers and awning, gazebo, and greenhouse specialists. You can also use propylene pipes, but then you will need to drive hardwood bosses into their ends and assemble a shelf with self-tapping screws, because Polypropylene does not stick to anything firmly enough. Holes for pipes are drilled with a Forstner drill or cut with a mounting knife.
Drawings of a shelf for the hallway
If the materials are polycarbonate and PVC, then the shoe rack is assembled using dichloroethane glue: polycarbonate sawdust is dissolved in dichloroethane until the consistency of low-fat kefir or yogurt is obtained. Remember: dichloroethane is a volatile, toxic, flammable liquid and must be handled with the necessary precautions!
Preparation of material
1. Remove nails from the picket fences, if any. Carefully select the best planks, that is, the smoothest, with the same thickness. In total you will need approximately thirty-five pickets.
2. Take the material for the frames, mark it and cut the parts. Make markings using a square across the face and on the edges to ensure the squareness of the ends when sawing. Saw close to the pencil line on the waste side. Place a combination square on the material to act as a guide for the circular saw. If you are not very handy with a circular saw, use a miter saw or a back saw and a cutlass.
3.
The pickets usually rot from below, but from above they are in fairly good condition. Stack two or three planks and saw off the perpendicular ends evenly. When you have sawed off the ends of all the pickets at one end, mark them and cut them to a length of 1500 mm. Trim the corners of the top ends as shown in the picture on the side. Do not try to make the cuts absolutely identical - small irregularities will emphasize the rustic style of the product.
4. Cut the shelf strips as described in step 2.
5. Using sandpaper with a grain size of 25 according to GOST (60 according to ISO), sand all parts. Sew the top edges only of the frame material to make them even. Make a small 2 mm chamfer on the frame parts.
Shelves for order
Modular shelves, consisting not of shelves, but of cells, are also quite widely used, see next. rice. They are usually made from scrap materials: boxes (items 1-3), boards from disassembled construction pallets - pallets, waste lumber, but the point in this case is not only the availability of raw materials. For example, a shelf-rack for toys (item 4) teaches the child good order. Little ones have not yet matured into the subtleties of aesthetics and design, but they understand functionality from birth.
Modular openwork lattice shelves, or partitions, pos. 5 is one of the best means of zoning a room: they clearly divide the space without visually reducing the volume of the room, and are sufficiently light-transparent. How to make a partition bookcase from ordinary pine boards, see next. video.
Video: do-it-yourself bookcase with cells
For books
Bookcase
Books, especially valuable publications, should be stored for a long time in a special bookcase or on a rack in a room with suitable conditions. A small number of books and magazines for current reading are placed on the shelf of a regular bookcase or in a nightstand. If, due to your occupation or hobby, you have to have a lot of books, folders with papers, plus, possibly, a file cabinet at hand, then you need to take into account their considerable weight. In this case, it is better to assemble the bookcase with an overlay, and to make its shelves, so as not to sag over time, make them box-shaped (see the figure on the right) from a fairly rigid material: laminated chipboard, moisture-resistant plywood.
Wooden shelving for the kitchen: choose or make it yourself
Wooden shelving for the kitchen is comfortable, practical and convenient furniture. Shelving in the kitchen will help you place kitchen utensils as efficiently and conveniently as possible. Let's look at the main ways to achieve such order in the kitchen using shelving.
Racks for household appliances in the kitchen
The main idea of racks for kitchen appliances is space saving and functionality.
Very often there is not enough space for household appliances and kitchen utensils; wooden shelving is an ideal way to solve this problem
Important:
- All things should have their own place so that you don’t have to remember what is where.
- Racks can be horizontal with movable shelves, which are installed on shaped brackets.
- Possibility to install shelves with different distances depending on the size of household appliances.
- The racks can have built-in lighting.
- It is advisable that all equipment be in a visible place and stored in its own boxes or bags. In this case, dust will not accumulate on them, and the equipment will be less prone to breakdowns and will serve you for a long time.
- In order for the kitchen to be in perfect order, it is necessary to assign each household item its place; what is used most often should be at hand. And things that are rarely used are best placed near the kitchen, but within walking distance.
- baskets for storing vegetables and fruits;
- food and drink supplies;
- various kitchen items: napkins, oven mitts and towels;
- kitchen utensils: spatulas, ladle, etc.;
- spare dishes and various utensils;
- various gadgets: scales, blenders, food processors, etc.;
- recipe books;
- various kitchen decor and plants.
Making a wooden kitchen rack with your own hands (video)
Wooden kitchen shelving
In order to solve the problem of lack of storage space in the kitchen, you can add open shelves to the kitchen unit, but the best option would be a regular shelving unit. What can you store in it? Yes, anything, and in particular:
Wooden kitchen racks are useful and irreplaceable furniture; they will not take up much space, with their help you can increase the storage space for kitchen utensils
DIY kitchen shelving cabinet
In addition, a kitchen rack can be made from a cabinet with your own hands and it will be located in the place you need, according to your size and the color you choose. And all this will significantly save your budget.
There are different configurations of kitchen shelving:
- mobile bookcase
- stepladder-rack
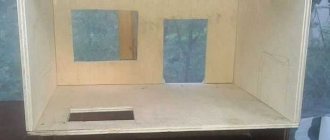
- vegetable cabinet
- partition-rack
You can make a wooden kitchen rack with your own hands, the main thing is to decide what shape and size it will be
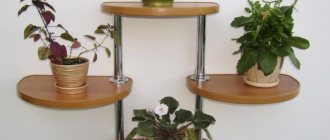
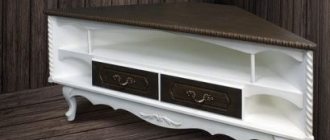
Corner wooden shelving
Wooden corner structures for the kitchen have many positive aspects:
Corner shelving will fit perfectly into the interior of the kitchen; they will become a rational and simple place to store your accessories.
Design tips
We recommend that you adhere to the following:
- It is better to place a shelf for spices and seasonings in the active work area - close to the food preparation area.
- Dishes and other kitchen items should also be at hand, but excessively bulky items should be arranged in such a way as not to load the passage and not interfere with kitchen work.
- Racks with decor should be located on the opposite side of the kitchen - away from the food preparation area and the inevitable kitchen contamination - this will make cleaning easier and will provide an opportunity to balance the room.
Many housewives prefer to place small wooden shelving in the kitchen so as not to clutter up the free space
Kitchen shelving cabinet (video)
Examples of wooden shelving for the kitchen (photo)
Photo gallery (16 photos)
Author: admin
no comments