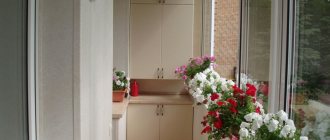
Making a wardrobe with your own hands - step-by-step instructions
Every man knows firsthand: when a woman appears in the house, the amount of clothes in the closets increases several times.
Probably everyone is surprised how these cute creatures wear so many things almost at the same time, but the fact remains a fact. To accommodate their wardrobe, you can build a special room, but not everyone can afford such a solution. The apartment needs comfortable, large-capacity closets. For this reason, this article will discuss how to assemble a wardrobe on your own.
The main advantages of such a piece of furniture in our time are sliding doors, thanks to which it can be placed even in narrow corridors, and also, of course, spaciousness, which allows you to make a model “ceiling height”, using free space with the highest efficiency.
In most cases, sliding wardrobes are made to order for specific sizes and type of room. The extensive selection of fittings offered provides the opportunity to expand functionality to the limit. The most common types of cabinets are:
- built-in wardrobes;
- corner;
- separate “pass-through” cabinets.
If you decide to make such furniture, and even on your own, you should decide from the very beginning and choose one of the named key modifications, since they are completely different in their design.
Built-in wardrobes, in fact, can be called separate rooms in which clothes “live”. But this topic is not for our story, just like corner wardrobes, the varieties of which are simply countless. Therefore, it is better to start with the standard “pass-through” option. Namely, this is what they call it for its unchangeable dimensions, which is very important in narrow rooms or corridors.
In most old apartments, the hallway is not designed to contain furniture at all. Most likely, the planners of that time cited a shortage of building materials and made the passages so narrow for this reason. Swinging doors in corridors of this type are like a barrier at a railway crossing: you can’t get through it, you can’t get over it. “Kupeshki” in this regard are simply a salvation for owners of small-sized apartments.
Women will rejoice at a decent mirror, and the stronger sex will enjoy the absence of various irritating sounds when opening heavy doors and further repair work on furniture. The roller sliding system, for example, “commander”, which is manufactured nowadays by a variety of companies, has proven itself to be 5 points.
What is needed to make a wardrobe
Nowadays, it is easiest and least expensive to make such furniture yourself from laminated chipboard. The palette of colors presented by manufacturers can please even a meticulous esthete, and the most precise calibration of the material will significantly facilitate the work of the master. The back panel is made of hardboard and simple fittings - everything except the door system can be made at home on your own.
A regular laminated chipboard sheet 16 millimeters thick has a length of either 2,450 millimeters or 2,750 millimeters, and a height of 1,830 millimeters, so it’s more convenient to start with it so as not to “split” the entire structure. For example, consider a wardrobe with dimensions (H × W × D) 2,450 × 2,400 × 650 millimeters. Its depth is slightly increased compared to the swing type, but one should not forget about the tolerances for the sliding structure, as well as the large space for hangers.
Door installation
The door to the dressing room from the pantry is selected in accordance with the dimensions of the future room and the capabilities of the surrounding environment. We now offer a large selection of doors in a variety of configurations. The choice in favor of a door is justified when the dressing room is a separate room. If you need to separate part of the room, then a partition may be enough.
When choosing a traditional swing door, make sure there is enough space in front of the dressing room to open it. In addition, when installing the door, you need to remember that it must swing outward, otherwise part of the usable area of the dressing room will be “eaten up”:
- installation of a door system begins with markings;
- if installation of guides is necessary, they are fixed to the ceiling or in the opening. If there is a lower guide, it is not attached immediately. First, they simply try it on in order to finally secure it after leveling the canvas;
- the door mechanism is installed;
- the canvas is leveled in the opening using a building level;
- if necessary, a lower guide is installed;
- the door leaf is installed and adjusted;
- the rest of the fittings are attached - brushes, dust covers for the coupe, clamps, etc.
When installing a door, blind door options are preferred so that strangers cannot observe the presence of things inside the former storage room. Some people prefer to decorate the door to match the wall to make the dressing room inconspicuous against the general background of the room.
Wardrobe details
The thickness of the slab has already been discussed; it remains to be reminded that we will use a self-adhesive melamine edge half a millimeter thick. Next you will need:
- sidewalls 2,433 × 650 millimeters – 2 pieces;
- top cover 2,400 × 650;
- bottom 2,367 × 650;
- front and rear plinth 2 367 × 100 – 2 pieces;
- partitions 1,917 × 550 – 2 pieces;
- top shelf 2,367 × 550;
- shelves 778 × 550 – 7 pieces;
- sides of the plinth box 550 × 100 – 3 pieces;
- ribs of the base box 1 159 × 100 – 2 pieces.
It is impossible to find solid hardboard of the required size, and it is not easy to drag it into the apartment, for this reason we assemble it from 3 parts:
- 2,395 × 410 millimeters. Positioned horizontally, covering the space between the shelf and the top cover;
- 1,940 × 800 millimeters. Installed vertically on 1 leaf;
- 1,940 × 1,595 millimeters. It is located vertically on 2 doors.
It must be emphasized that, most likely, you should not saw a whole sheet of chipboard in an apartment and hope for the correct dimensions and good cuts. Building materials supermarkets have long had cutting specialists who should be given the details.
Cabinet front system
Here we should say simply: don’t fill your brains with unnecessary things!
If you decide to cut and install the sliding door system yourself, there are special instructions for masochists on the Internet. The assembly of wardrobes put into production, of course, involves the purchase of a solid profile (4,500 or 6,000 millimeters long) and a specially equipped vehicle for transporting frameless mirrors of the required size, but a single production will definitely be too expensive.
Most of the serious companies that produce and supply systems offer installation of sliding facades as a gift if you order the entire design kit from them. There they calculate the required sections of the profile, thin “plug-in” chipboard, the sizes of the mirror, rattan, glass or wicker, the prices of the rollers and install the doors themselves.
And transporting mirrors, the size of which is 2,300 × 800 × 5 millimeters, packed in durable aluminum frames, is much easier and safer than the same ones, but “without anything.”
In this case, you just need to give the receiver an order with approximately the following text: “Clean doorway - 2,317 millimeters in height and 2,367 millimeters in width. 3 doors, one of which is mirrored, and 2 more - wow, in that color. Complete system with stops, guides and seal.”
Accessories required for assembling a sliding wardrobe
All components, except for the sliding system, can be purchased at any furniture fittings store.
To assemble the wardrobe you will need:
- confirmations 5 × 70 millimeters;
- self-tapping screws 4 × 16 millimeters;
- rods for hangers (cut right in the store, 775 millimeters in length, 2 pieces);
- rod holders;
- floor holders. Each shelf in the middle part must be installed on shelf supports. Thanks to this, it will be possible to adjust them in height;
- nails for hardboard (if you do not fasten it with self-tapping screws).
Make a slate surface
Chalkboards are all the rage right now, so why not make one out of cabinet doors? The slate effect can be easily achieved in two ways: buy a film or paint the chest of drawers with chalkboard effect paint.
Preparing for assembly
As has already been described, cutting parts with your own hands in an apartment is not the best option, but it is quite possible to glue the edges yourself. It should be applied with the decorative side up to the end and pressed along its entire length with an iron heated to three-quarters of the power. The steam mode on the iron should be turned off.
The heated glue will “set”, then the heated edge should be pressed and ironed with a dry and clean cloth. Excess glue must be collected or cut with a blunt knife (so as not to scratch the laminate), and the edges must be treated with fine-grained sandpaper.
The sliding wardrobe needs to be assembled to confirm, for this reason it is worth arming yourself with knowledge and special tools. All planes are drilled through with a drill with a diameter of 8 millimeters, all ends with a 5-mm drill, to a depth of approximately 60 millimeters.
Source: delajmebel.ru
Stages of creating a dressing room
The process of creating a dressing room from a closet consists of a number of important steps. Before starting work, you should carefully study each of them.
Tools
When starting work, prepare in advance all the necessary tools that you may need:
- drill, drill bits;
- hammer (preferably rubberized for wood);
- sandpaper;
- screwdrivers;
- plane;
- roulette;
- screws, dowels;
- chisel;
- square, pencil, marker;
- construction level;
- jigsaw for cutting workpieces.
To paint the surfaces inside the dressing room you will need a painting tray, a roller, flat brushes, and gloves.
Tools
Preparing the space
Before the dressing room is brought to perfection with your own hands, serious preparatory work remains. You need to empty the pantry of its contents. At the same time, they recommend immediately getting rid of old junk and what is no longer useful:
- the old pantry door is removed from its hinges;
- If the walls have a strong curvature or unevenness, then they need to be leveled and plastered. This is important, since distortions can lead to deformation of the box structure or incorrect reading of parameters;
- if size allows, then the shape of the future dressing room is changed using plasterboard structures - it can be a linear option or a U-shaped one;
- plaster the ceiling, paint it, bring it into a suitable condition;
- level the floor, lay the proposed covering - parquet, laminate, linoleum.
If, according to your plan, you have cabinet furniture installed inside the dressing room, then you should not spend money on expensive finishing, because it will not be visible behind the furniture.
Measurements
How to make a dressing room from a dressing room truly functional and convenient? First, you need to take correct measurements in order to calculate the parameters and quantity of materials required. This part of the work is carried out using a tape measure and a marker. Marks must be applied carefully so that they are not visible after completion of work.
Before you begin, draw a plan for the future structure. Parameters that need to be taken into account for the height of the planned elements:
- underwear – 20-40 cm;
- blouses, shirts – 100 cm;
- outerwear – 150 or more.
The depth of the compartment is calculated based on the size of the hanger, plus 10 cm. The width is set based on the number of things available.
Blanks
Having made all the measurements and drawn up a drawing, proceed to preparing the blanks for the manufacture of shelving. Cut the material strictly in accordance with the technology and according to measurements. Drywall is used for zoning space, but it is not recommended for the direct manufacture of shelves, since the slabs tend to deform under their own weight.
Wood, chipboard, chipboard are more resistant to moisture and damage. When cutting workpieces, remember that these materials require additional edge processing.
When cutting, do not try to make the shelves too wide. Arranging things in 2 rows is inconvenient for daily use and will sooner or later lead to chaos. The optimal depth is up to 60 cm. Drawers and shelves with telescopic mechanisms have proven themselves to be excellent in small spaces. It is better to give preference to this solution.
Zoning
In the dressing rooms from the pantry, photos of which are collected in a selection, the zoning of space for the further distribution and storage of things is clearly visible. From an ergonomic point of view, there are 2 options for how to equip the space: horizontal and vertical zoning.
The horizontal type is characterized by the separation of active and passive sections. The distribution is carried out according to the principle of the frequency of demand for things:
- everything that is rarely used is assigned to the passive zone - shelves that are located at a height above 2 meters, or below 0.5 meters. This is a place to store household supplies, seasonal items and suitcases;
- the active zone is a distance of 50-130 centimeters above the floor surface. Here is a place for linen boxes and baskets.
Clothes rods are fixed at a level from 130 to 190 cm from the floor. If the wardrobe has long, floor-length clothes, they are placed on special rods.
Surface finishing
A walk-in closet means the remodeled space will need surface finishing. No whitewashing, otherwise the clothes will constantly get dirty. The easiest option is painting. An obvious advantage of this choice will be the ease of color change and further care. Modern paints are easy to clean, adhere well to surfaces, and can be tinted in any shade. There is no need to repaint the dressing room in original colors. It is recommended to give preference to shades that differ from the color scheme of the main room by 1-2 tones. Give preference to light colors, so a small pantry space in a panel house will be visually larger and lighter. Dark color is undesirable, no matter what they say about its practicality. An already small space can easily turn into a gloomy closet. Another advantage of this choice is that in the future the walls can be refreshed without dismantling the shelves. It will be enough to simply cover them with film and paint everything again.
Wallpaper is also an affordable option that is often used when you want to convert a closet into a dressing room. Use the washing option. It should be noted that due to the special microclimate and the abundance of clothing, wallpaper can deteriorate and change color. Therefore, you need to choose those options of which you are confident, otherwise cosmetic repairs will have to be done in the near future.
Photos of do-it-yourself dressing rooms from the pantry sometimes show very original finishing options using this type of material. MDF panels are easy to clean and aesthetically pleasing. You just need to remember that their installation requires the manufacture of a frame from a metal profile or bars. This design will take up a certain amount of space that a small pantry simply won’t allow.
When making a dressing room from a pantry with your own hands, take care of the flooring. If possible, then let the floor in the dressing room be made of the same material as in the main room. It is preferable that it be parquet, laminate or linoleum. Carpet or other carpeting is not the best option in this case, as it may be difficult to clean.
To install a ceiling in a dressing room instead of a storage room, you can get by with regular painting in light colors, if we are talking about a budget option. You can also install a small suspended ceiling, which will perfectly accommodate the much-needed spot lighting.
How to make a wardrobe from an old wardrobe - ideas in the photo
Furniture created many years ago is often of very high quality and durable, and you don’t want to throw it in the trash, so some people remodel it. For example, you can make a wardrobe out of an old wardrobe.
A sliding wardrobe made of solid wood looks expensive and high quality. The decor for it and the door must be matched to the tone of the main product.
Decorative design can be complemented by more modern furniture models. If you are going to use doors from an old cabinet that have handles on them, then you need to position them in such a way that the doors are easy to operate and do not scratch against each other.
A converted wardrobe can be attached to another wardrobe to create a more modern furniture option (corner wardrobe with mirror and open side shelves).
If one of the old cabinet doors is damaged, it can be replaced with a mirror.
To increase the comfort of use, complement your modern wardrobe with built-in LED lamps or the same strip.
If the closet you plan to remodel has large doors, then you may need to install not two, but three sliding doors.
If your closet has upper or lower shelves with separate doors, you can replace them all with solid sliding ones.
If desired, part of the wardrobe (for example, with drawers) can be left without an external sliding door. But there must be space for the movement of external doors.
If the cabinet is deep, then the doors can be “recessed” inside.
On a varnished wardrobe, when installing sliding doors, you need to install doors made of the same or similar material. Or play with contrasts and choose glass or mirror surfaces.
If you plan to completely restore the furniture, you can immediately replace the doors with more comfortable ones. If the cabinet is monochromatic, then stripes of a contrasting color can be added as a decorative element.
In some cases, sliding doors may be different sizes.
Installing mirror panels as part of a wardrobe with sliding doors is a smart idea.
Redesigned and restored wardrobes will fit perfectly into a children's room and make it more cozy and comfortable.
Part of the restored wardrobe with compartment doors can be left free. It is good to install mirror panels in these places and make a variation of a trellis out of them.
A quality old wardrobe can last a long time if it is properly cared for and updated periodically.
Source: vannadecor.ru
What can you make from an old wardrobe?
| brownie [24.5K] 3 years ago An old cabinet is, first of all, building materials, several even chipboards with possibly preserved decorative coating, and possibly wooden or even solid wood, this is what we need to proceed from. This material can be used (of course, provided that there is a craftsman in the house!) as a raw material for the manufacture of tabletops, shelves, stools, possibly replacing or remaking other furniture and utensils, you can make or repair doors, strengthen the bottom of beds, sofas and armchairs. If the cabinet is in good condition, then use it as a cabinet, put it on a balcony, loggia, put it in a vestibule or entrance, take it to a garage or shed - there will definitely be a place for it and a use for it. As a last resort, you can sell it; I have seen more than once an advertisement about buying furniture for the material. the author of the question chose this answer as the best To favorites link thank AngelAnna [31.5K] more than a year ago Very often we throw away an old wardrobe, but before throwing away an old wardrobe, you need to think carefully, because you can give it a second life. For example, an old wardrobe can be restored by using varnish, paint, film, then it can be beautifully decorated or painted, varnished and placed in the living room, kitchen, hallway or nursery. It all depends on which room needs additional cabinets, as well as on the interior. If you don’t want to bring life back to an old closet, then you can remake it, for example, you can make a table out of it for a child. An excellent option would be to make beautiful shelves for the kitchen to place dishes. If the closet is large, you can divide it into parts and make small cabinets for different rooms. From an old wardrobe you can make a beautiful chest of drawers or a coffee table, or you can make a TV stand. If there is no work space, then the closet can easily turn into a computer desk. The cabinet can be taken to the pantry and arranged. The cabinet will serve as shelves for different cereals. You can make shelves for shoes from a closet, or make a greenhouse for flowers. There are many options for creating something new and interesting from a closet, the main thing is to figure out what you want to make from it. To favorites link thank Irischka [9.7K] more than a year ago The easiest way to update and restore an old cabinet is to cover it with wallpaper.
Restoration of a cabinet using photos . The closet can be covered using one large canvas of a photograph, or you can make a collage of several small ones. The work is carried out like this:
To favorites link thank Kim Jong-un [289K] 2 years ago It is extremely important to know whether you want to completely remodel the closet into something else, or whether you want to make a new one out of an old one. The cabinet can be painted or cover it with self-adhesive tape, change the fittings and make it completely new (visually). If the alteration is radical, then you can do anything: Dresser. Desk, including a computer desk. Various shelves, including shoe shelves, or book shelves. You can take it out onto the balcony and make a cabinet for storing tools; minor alterations will be required. You can make floor and wall kitchen cabinets from an old cabinet. You can make a countertop for the kitchen from individual elements of the cabinet (here you already need to know what material the cabinet is made of; if it is chipboard, then the option is out of the question; wood, MDF, will do). You can make children's furniture, for example, a children's kitchen is not a bad option. You can even make window sills from it if the cabinet is made of solid wood (solid wood). To favorites link thank Brush [10.7K] 3 years ago You can make a new cabinet from an old cabinet using a jigsaw, paint, varnish, and screws. Here, for example, is how you can restore your grandmother’s old wardrobe: You can also use a stencil and apply a pattern that will decorate your entire closet, an example of such a solution: Or put it on boards, and use the boards for their intended purpose - for shelves, for example. To favorites link thank MaiAsim [30.6K] 3 years ago Let's start with the fact that an old cabinet can be restored, and during restoration it can be slightly modified, for example, making a niche for a TV or, conversely, adding several shelves or tiers. You can also decorate it with stucco molding made of polyurethane or polystyrene foam (a more budget-friendly, but no less beautiful option), and you can stick a self-adhesive film on the glass (if you have any) and thus make something like a stained glass window. Alternatively, the cabinet can be disassembled and shelves can be made from boards, after which they can either be painted, varnished, or covered with self-adhesive film. And the leftovers can be used on stools of any shape and, if desired, covered with material or leather You can make a chest, and this chest can be decorated in any way you like, for example, covered with bamboo or covered with leather, glued on leather straps, aged a little. In general, it can be done very effectively To favorites link thank Shlep Doska [1.8K] more than a year ago From old good furniture, including from a closet, you can make new, different furniture. You can make a beautiful hallway. It includes a wardrobe, a mezzanine, a bench under which there is a shelf for shoes. You can also make cool bedside tables for shoes from an old closet, with hooks and hangers on top of them on a beautiful board. But modern furniture is made of wood slabs; it will easily crumble if sawed or planed. To favorites link thank ksenko111191 [158] 4 years ago Since I am a creative person, I have more than enough imagination, I offer the following options:
To favorites link thank Valentina50 [134] 4 years ago Oh, what an interesting question! Yes, a lot! I made a lot of new furniture from old cabinets (what a turn of phrase!) I made narrow cabinets behind the doors in the rooms, a folding table in the kitchen, a kitchen corner, shelves all over the wall... The list could take a long time))) I’ll attach a photo as an example table for my 5 year old granddaughter. The bottom drawer is on wheels and moves out easily. To favorites link thank Dear Sir [84] 4 years ago From an old cabinet you can make:
To favorites link thank Do you know the answer? | See also: |
www.remotvet.ru
Which wardrobe is suitable for a dressing room?
A new dressing room can be converted from an old wardrobe. Before you start disassembling old furniture, you need to decide on the size of the future dressing room.
It is necessary to decide where the clothing department will be located. You can free up space by combining several cabinets into one. We consider a neat wardrobe, sideboards, and bookshelves as additional materials for landscaping. All fasteners and accessories can be purchased in the store. Also suitable for furniture sets: gypsum board, chipboard, wood.
Dressing room plan
Your own imagination and specialized websites will help you think through the layout of the sections. If you have experience in assembling furniture and the necessary tools, then this is a huge plus, if not, then the Internet and friends can help.
The plan of the future closet directly depends on the free space. First you need to take measurements and only then start drawing. Many people have closets or a nook in their apartment that is not used in any way; this could serve as a place for a new closet.
You can also order a wardrobe plan from professionals. The craftsmen will take measurements and offer several options to choose from.
Methods for attaching shelves
A DIY dressing room from the pantry is unthinkable without reliable shelves that can support boxes of clothes, shoes, and hats.
There are 3 options for mounting shelves:
- making a wooden frame from timber;
- metal corners;
- fastening with dowels.
You can choose any option, but dowels are considered less preferable. A shelf installed on the protruding part of the dowel can easily tip over. A structure made of timber or corners is a more durable and reliable option for a dressing room.
When making a frame, the finished structure is fixed on the wall in places where marks were previously made with a marker. Use special glue or screws and a screwdriver. It is necessary to constantly monitor the installation process and the location of the structure using a building level. The second step is to install the shelves, not forgetting to process the edges at the cut points in order to further prevent damage to the clothes.
If you prefer self-tapping screws, you need to pre-drill holes in the marked places. If the shelves are attached to a wooden base, then everything is mounted directly to the wall. If not, then dowels are inserted into the holes. To secure the metal corners, use short self-tapping screws. If pull-out shelves are planned for the dressing room, then guides for the roller mechanism are attached to the corners. So that the fasteners do not stand out, they can be covered with putty or hidden under by gluing decorative overlays.
In stores you can also choose the so-called mensolo and shelf holders:
- the corner is the leader in terms of installation speed and maximum load;
- FIX fasteners - for a neat, aesthetic appearance and ease of dismantling if necessary;
- Pelican fasteners will also provide aesthetic appeal and are suitable if material of different thicknesses was used for the shelves.
Give preference to options that best suit your needs and skills.
Fixing the rod
A small dressing room is unlikely to allow you to install a large number of rods. However, dressing rooms will not allow you to completely abandon this accessory, because raincoats, coats, and floor-length dresses cannot be placed on shelves. The men's version of the wardrobe allows you to use less space due to shortened types of clothing. Here, a dressing room from the pantry will allow the placement of at least two rods in tiers.
The installation of the clothes rail is carried out after the shelves have been installed inside the dressing room. Purchase fasteners in stores specializing in furniture fittings, where it is easy to choose the most suitable option.
The optimal distance between the shelf and the rod is no more than 5 cm. This is enough to hang clothes without leaving an unused gap. In order for the required number of tramples (hangers) to be placed on the bar, the width of the installed shelves must be at least 58 cm.
If closet space allows, place several rods at different heights. Low rods are suitable for shirts and skirts. High – for dresses, raincoats.
Keep in mind that the rod tubes are a standard length and will need to be adjusted to suit your measurements. To cut the required section, use an angle grinder, or angle grinder.
Fixing brackets are purchased separately. You need 2 of them for 1 rod. Make preliminary markings of the places where you will attach them using a tape measure and a marker. You will need a screwdriver and wood screws for installation. After securing the brackets, a rod is installed in them.
Transforming an old wardrobe into a dressing room
To transform an old furniture set into a new storage area, you will need tools and skillful hands.
- Initially, we remove all shelves, doors, rods, and clothes hangers. All that remains is the frame for the future dressing room.
- Next, we follow the previously prepared drawing and install partitions to create the interior space of the furniture set. Partitions can be made of gypsum board or chipboard.
- In each section, we mark with a marker the places for future shelves, hangers, and rods.
- An important stage is the installation of doors. Doors can be made sliding, mirrored, or done without them at all. It is best to hire a professional for installation.
- The final stage is filling the closet with things and accessories.
You can do without drastic changes; with a little ingenuity and available materials, you can change the appearance of an old wardrobe.
Tips on how to decorate your dressing room:
- Cover with self-adhesive film, fortunately in construction stores, you can choose any color and pattern that suits your interior. And the old closet will take on a new life.
- Wallpaper. This option allows your imagination to run wild. A huge selection of matte, glossy, embossed, photo wallpapers for every taste. Before gluing it is necessary to treat the surface.
- Cover with fabric. This option is ideal for a child's room. The fabric is attached using a construction stapler or glue.
- The old “old fashioned” way is to paint it. You can simply paint it in several colors or use stencils and your own imagination to create a picture.
Cover with film
Self-adhesive film will help hide all the imperfections of cabinet doors or dresser drawers in a couple of simple steps. The range of films is huge, you can choose one color or with an interesting pattern, golden or imitating wood. Do not forget to degrease the surface before application, or even better, sand it and cover it with a layer of primer.
How to make a wardrobe with your own hands step by step, from choosing the material to installation
Today, sliding wardrobes are becoming increasingly popular. They are not only a convenient component of every home, but also very functional and spacious for storing clothes and shoes.
Wardrobe doors do not open towards you, like conventional wardrobes. They have a sliding system that does not require additional space to open. When opening the doors, nearby furniture or carpet will not be touched. Sliding doors are easy to open, plus they can be placed in the narrowest and tightest spaces.
Many people prefer to buy a ready-made cabinet in a furniture store, some order cabinets online (the parameters can be any: you can choose your decor, width, size, and so on). But there is also a small percentage of people who are ready to spend their free time and build a wardrobe themselves.
To do this you will need to buy building materials. Don’t worry, you will need a minimum of expenses, and in the end the cabinet will turn out cheaper than in stores.
Wallpaper
Wallpaper provides more options than film, since it comes in matte, textured, and generally suits every taste. If you wish, you can choose photo wallpaper that will visually expand the space. Wallpaper is applied using PVA; the surface must be prepared in advance for better adhesion. You can decorate not only the front doors with wallpaper, but also the interior shelves or the back wall of a cabinet or rack.
DIY cabinet making plan
First of all, you need to clearly understand the step-by-step action plan in order to devote enough time to working through each step. This way you won't miss a single detail.
- Choice of material . Its design also depends on what material is chosen for the manufacture of the wardrobe.
- Shelf placement design . The desired internal content should completely solve the problem of storing things.
- Selecting a sliding system for sliding doors and designing the door structure/filling. The latter can be entrusted to professionals and ordered ready-made compartment doors with top and bottom guides to size, which simply need to be installed in the opening.
- Preparing space for a built-in or free-standing wardrobe. With a built-in design, time is given to prepare the niche. Walls, floors and ceilings should be as aligned as possible with the horizon and finished.
- Drawings and preliminary measurements of the location . Correctly taken measurements are the key to successful installation of the wardrobe on site. They should be carried out level, taking into account the geometry of the walls and their curvature, making the necessary adjustments in size according to the drawings.
- Calculations and purchase of components and materials. After a working drawing has been drawn up with all the dimensions of the niches, drawers and shelves, you can calculate the detailing and determine the amount of material needed. Also, based on the drawing, an estimate is drawn up for the purchase of all fittings and fasteners.
- Sawing workpieces (cabinet frames, sliding doors, etc.). Depends on the choice of material. The frame of the sliding wardrobe made of plasterboard or timber is sawn and installed immediately on site. You can order chipboard cutting to size in the workshop and bring already prepared parts for installation.
- Assembling the wardrobe body . During the installation process, the internal equipment of the cabinet is attached to the walls and brought into proper shape.
- Ordering or assembling sliding doors, installing them in the opening . In this case, the opening should be as level as possible, the side walls are strictly perpendicular to the floor and ceiling. Small errors of up to 10 mm can be leveled out by adjusting the rollers. But there may also be unpleasant surprises in the form of blocked doors, rough ride, and rolling to one side if there is a slope.
How to remake an old built-in wardrobe
We are often asked various questions about old wardrobes and we notice that we begin to repeat ourselves in the answers.
It’s probably time to write an article on this topic to help you. Is it possible to move the built-in wardrobe?
It is possible if the dimensions of the new place match the dimensions of your closet. If the ceiling is smaller, it is better to abandon the idea of moving the cabinet. You will have to reduce the compartment doors, and this is very troublesome than reducing the vertical racks of the closet.
Is the ceiling height the same? Then remember one important thing. Treat every detail, every screw, every self-tapping screw very carefully. If the cabinet will have to go to another house or lie there for some time until the renovation is completed, pack each part in stretch film and sign the name of the part with a marker. It is very important.
If you are careless and approach the move of a wardrobe from the position - it’s not new anyway... The wardrobe in the new place will look as if it has survived 10 moves. Any lost screw or hardware plug will give the cabinet a sloppy look.
Is it possible to replace the floor under the built-in wardrobe?
For example, you are making repairs, changing laminate or parquet boards. Why would you need to change the flooring inside the closet? If your closet is new, good, and you are not going to change it in the next 10 years, why do you need to change the floors inside the closet?
Make it simpler. Remove the compartment doors and the lower track; if there is a substrate under the track in the form of chipboard, this also needs to be removed. Using a grinder, cut through the laminate exactly in the middle of the bottom track and change the covering in the room. Then reinstall the lower track and compartment doors. All. It turns out that you have a new floor on the façade, but the old one remains inside the cabinet.
It will not be possible to partially disassemble the cabinet to change the laminate inside the cabinet. You will have to remove all the vertical posts and the shelves are attached to them. You need to completely disassemble the entire cabinet, then you doom yourself to a bunch of problems that we described above.
Perhaps the cabinet is built-in, but has one side panel made of chipboard. Then you will need to dismantle it, make a cut inside the cabinet so that it is invisible from the outside, and decorate the joint with an aluminum threshold.
Can I wallpaper the inside of the closet or paint the wall?
You can, but it will cost you a lot of effort, and in the case of wallpaper, also nerves. It's easier to paint it, of course. Stock up on masking tape, glue the edges of the chipboard that are adjacent to the walls and paint. When the paint dries, tear off the tape, it will look neat, and the cabinet will not be dirty.
Is it possible to make a ceiling inside a wardrobe?
It depends on how you imagine it. For example, you can use 16mm chipboard. or HDF 3mm, but cutting and inserting rectangles inside the cabinet is extremely problematic. Be prepared for gaps and visible mounting brackets around the perimeter of the inserts. We recommend simply painting the ceiling with water-based paint.
Is it possible to add lighting inside the wardrobe?
The main problem is the presence of an electrical wire inside the structure.
If you have a junction box inside the cabinet (which is rare these days) or an outlet, you can connect to it. Think about where you can mount the transformer. Usually it is located in the upper part so that it does not catch the eye when opening the door.
Light sources are now mainly LED strips or recessed spots. Calculate which sections and shelves you will highlight and how you will route the wires.
Remember that if you run an LED strip inside the cabinet, along the entire top, then all the light will be blocked by the upper shelves. You will not get the desired result; the closet will still be dark.
It is better to highlight the sections with hanging clothes on hangers. Light up the drawers.
Don't forget to think about the way you turn on the lights. The easiest way is a push-button switch. You can install a touch or door open sensor.
There is a battery-powered backlight, with a motion sensor or with a vibration sensor. They provide little light, but are a great help in the dark. We have already written about this method of lighting, you can read it in the article - “Why is lighting needed in cabinet furniture?” And also, perhaps you will find the story about Ikea lighting in a wardrobe useful, read it.
What materials are used to make a wardrobe with your own hands?
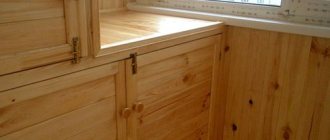
Often, among all the materials when choosing, the first thing that is considered is timber faced with thin plywood or lining. The choice of one material or another depends on the buyer’s budget. The lining will cost less, but the quality of the cabinet (in terms of appearance and practicality) will be slightly worse. But still, natural wood is not an ideal material for a cabinet. The wood will warp, since the humidity in the niche is always higher than in the house itself.
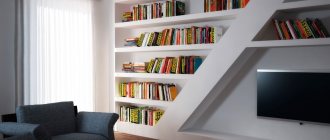
Not least in the selection is the universal construction and finishing material – plasterboard. This is an excellent option for making built-in furniture such as a wardrobe. It is lightweight and lends itself well to modeling. Many designers make real masterpieces from drywall. You should take a closer look at this option.
However, plasterboard is not very suitable as a base for shelves, because a more durable material is needed. Plasterboard structures are good for preparing a niche that acts as a frame.
For the manufacture of the wardrobe itself, the best materials are fibreboard (chipboard) with a laminated surface and fine particle board (MDF), which can also be purchased with lamination or painted with enamel. Both materials are quite durable and resistant to high humidity. In addition, they lend themselves well to finishing and have an attractive aesthetic appearance.
Make the doors mirror
Mirrors not only expand the space and add light to the room, but also hide surface imperfections. Any closet can be turned into a mirrored one by attaching one full-height or several small mirrors to its doors. This technique will help you create an Art Deco style cabinet.
An alternative option is a mirror mosaic, which will create wonderful highlights.
How to make a wardrobe from laminated chipboard with your own hands
To assemble furniture from chipboard, you must have: a jigsaw, an electric drill (screwdriver), a special adjustable drill for confirmation, 5, 6 and 8 mm drills, a set of Phillips screwdrivers, a 3 mm hex key, a utility knife, fine sandpaper, and an iron.
So, to make furniture you will need a working drawing with the required overall dimensions of all elements made of chipboard and fiberboard (for the back walls).
Next, with the finished drawing, you go to a furniture workshop that produces cabinet furniture. There you choose the color of the laminated chipboard, order a detailing calculation (if you doubt that you can calculate the details correctly yourself), and cut the parts to size, with edging of the visible ends.
Believe me, you will not incur large expenses, but you will receive clearly sawn elements without chips and with the specified geometric parameters (radii, angles, etc.), especially if you do not have the opportunity to cut it yourself.
While cutting is being carried out, you purchase all the necessary accessories: confirmations (Euroscrews), decorative plugs for them, melamine edges, handles and guides with rollers for drawers, a 25-diameter pipe with flanges and other rod holders, screws for fastening guides, canopies, rods and corners , nails for fastening the back walls and bottoms of fiberboard.
Types of structures
A special feature of such structures is the presence of doors that slide parallel to the plane of the façade of the product. Sliding wardrobes can be built into a niche and placed closely with interior elements. There are several types of construction:
- installed in an alcove or across the entire width of the wall;
- made as a room partition, this option allows for two-way access.
The disadvantage of the first design is the impossibility of moving the product to another place. There are no special canons for installing sliding wardrobes - it all depends on your imagination. You can make a corner wardrobe with your own hands, or create designs with radius facades.
Preparatory work
Before making such a wardrobe, you need to choose a material. Not only the cost, but also the durability of the product depends on this. Solid wood is considered the best material in furniture production. The main disadvantage is its high cost and difficulty in finding boards of large width. If you are planning a built-in model, you should take into account that there is often high humidity in niches, and the wood may warp because of this.
Plywood is also used. These are sheets of special veneer, glued under pressure, with a number of layers that is a multiple of 3. It is 4 times stronger than solid wood and is also susceptible to moisture. When using natural materials, the sheets must be treated with drying oil.
Chipboard panels are compressed wood chips using phenol-formaldehyde resins. They use chemical compounds, so it is better to purchase laminated sheets. Their disadvantage is that they do not hold fasteners well.
The fine fraction (MDF) has the properties of natural wood and is made using modern technologies. The shavings from the processing of the array are processed into dust, compressed at high temperatures, and natural lignin is released, which is a binder. This creates a very durable material that can hold fittings well.
Taking measurements
Often sliding wardrobes with dimensions not exceeding standard ones are planned to be placed in a niche. This allows you to save on materials and make advantageous use of room space. This option is the easiest to manufacture. Knowing the basic principle, you can build any wardrobe with your own hands; drawings will be needed to assemble the necessary elements.
When making cabinets, the correct geometry is not always observed. Sometimes you get not quite right angles. An inexperienced person can say that these are trifles and a couple of millimeters will not make a difference, but when the structure does not fall into the planned place, it is already too late to fix something, so the width of the opening is measured in several places in increments of 30 cm. A similar method is used to determine the height from the floor to ceiling. Particular attention should be paid to sockets, switches and door openings so that the product does not block any of the above.
Lighting
A walk-in closet does not require natural light. How to arrange a dressing room so that it is easy to find everything you need? A lighting system is being created for a small enclosed space.
This means that compact ceiling lights or lamps are installed that allow a rotating base in the design. Lighting elements in the dressing room closet should be located as conveniently as possible so that they are not touched when choosing or trying on clothes.
It turns out very cool when they equip linear automatic lighting based on LED lamps. The backlight works only in your presence, and there is no need to reach for the switch every time. In the photo of wardrobes from the pantry you can see examples of local lighting for rods with clothes and linen drawers. Tapes made inside the drawers will facilitate the search process even without overhead lighting.
It is better to abandon the idea of using hanging chandeliers and sconces, because they are quite bulky for such a limited space and will constantly get touched. It may happen that sooner or later either the device or your clothing will be damaged.