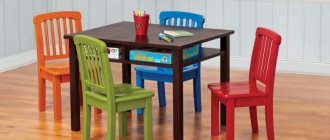
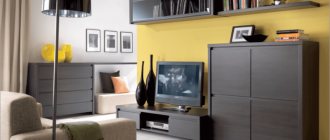
Frame facades made of MDF profiles
MDF frame facades are a structure made from a special MDF profile with glass inserted inside (including mirrors), MDF board, laminated chipboard or plastic.
The profile can be straight or with decorative milling, usually lined with PVC film (less often melamine paper) with a textured pattern to resemble wood, metal, etc. A special advantage of framed facades is the ability to combine various contrasting colors of the MDF profile and internal filling. Even a small furniture enterprise can purchase inexpensive equipment and master the production of frame facades. In addition, it becomes possible to move away from standard sizes of furniture fronts and work with individual orders.
The disadvantages of MDF frame facades are, first of all, open seam joints, which can allow water to pass through during wet cleaning. The PVC film-coated profile does not withstand high temperatures. The prefabricated structure may become loose and sag over time.
Decoupage technique
The technique itself was invented in Ancient China, where decorating furniture or interiors with paper is a tradition. The basic principle of decoupage is the application of paper elements with drawings to the surface and their further securing. The method is very easy and original. For work we will need:
- special paper for decoupage or ordinary paper napkins with a pattern;
- glue (colorless stationery glue is best;
- scissors and a brush of medium hardness;
- acrylic paints and art brushes (if you want to apply additional drawings or emphasize the contours of the composition);
- transparent furniture varnish and sandpaper.
After this, you need to prepare the surface. Using sandpaper, all roughness and unevenness should be removed. Additionally, you can use acrylic paints as a primer or to create the desired background.
Then we cut out the necessary drawings from paper
It is worth noting that photographs can also be used for the decoupage technique, however, they must be well soaked in water to separate the paper base
We apply the desired design to the prepared surface and begin to carefully apply glue on top of it. As a result, it is necessary to ensure that the paper is completely saturated with office glue and securely fixed to the surface.
When applying glue, you should carefully monitor the paper so that no bubbles or irregularities form on it. If wrinkles appear, they can be smoothed out with a brush, but not with your hands to avoid damage or damage to the design.
After the glue has hardened, you can apply additional decorative elements using acrylic paints. The finally dried surface is treated with a protective varnish.
Stamp
Another decor option is stamps. Essentially, the stamp is the negative twin brother of the stencil. There are ready-made ones on sale that convey a pattern of texture (for example, wood), or imprint an element of an ornament. The stamp can be single (contain one element of the design) or repeat (to create a repeating pattern, like on wallpaper). The rapport stamp is a roller with a pattern.
Stamp in the shape of a heart. Photo from aliexpress.com You can make a stamp yourself by cutting out the design you like on a piece of porous rubber, linoleum, extruded polystyrene foam, wine cork, even on an ordinary potato. And yes, a stamp with an individual design can be ordered in the same place where companies and institutions order their stamps.
To obtain prints, you can avoid cutting anything at all, choosing a suitable object as a signet: a patterned leaf with thick veins, an interestingly shaped peppercorn, the trimmed base of a Chinese cabbage, a fabric with a coarse texture, a ball of thread - everything that comes to hand has an interesting texture and inspire creativity.
Styling of paneled facades
Paneled facades have been used since the Middle Ages and have not lost their former popularity.
Modern designers are guided by the experience of centuries-old traditions and offer panels suitable for different styles:
- Gothic (peak popularity from the 11th - 12th to 15th - 16th centuries) - furniture in this extravagant design is characterized by pointed arches, multi-color stained glass windows, wood carvings and ornate forged elements;
- Baroque is a pompous style brought to Russia by Peter I. It is characterized by rich decoration of facades with stucco and carvings. The use of panels of unusual shapes is encouraged - with curls and spirals;
- classicism (XVIII-IXX centuries) - a balanced and harmonious style. Frame facades are made in two contrasting colors and are moderately decorated with forged elements and marquetry.
Cabinet fronts made in modern styles, for example, minimalism or hi-tech, are distinguished by clear lines and minimal decor.
Preparatory work
Before you start updating old furniture, you need to decide on the decor idea and choose the material. The choice of furniture design technique is determined by the availability of suitable materials and skills.
Then all that remains is to prepare the furniture; for this you need to remove the old layer of varnish, treat the product with sandpaper, and tighten the loose parts.
Film
This update option is ideal for kitchen furniture and household appliances. In addition, working with self-adhesive is easy.
Before starting work, you need to acquire a roll of self-adhesive of the required width, a rubber spatula for leveling, detergent and a soft cloth.
Before you start gluing, you need to prepare the product. To do this, the item is wiped with alcohol to degrease it.
Then the film is cut according to the dimensions of the product. After this, the protective layer is removed from the film, and it is applied with the adhesive side to the prepared surface.
Next, you need to align the film so that there are no air bubbles under it. This work is carried out with a rubber spatula.
Next, the edges of the film are aligned, all excess is cut off. After this, you can screw on the previously removed parts.
Stencils
One of the simplest, but no less interesting methods is the design technique using a stencil pattern.
Moreover, such work is accessible to everyone and does not require artistic skills. Ready-made stencils, like spray paint, can be bought at any hardware store.
First you need to choose a place for the drawing, after that you need to attach a stencil to it and spray the coloring composition. That's all, now your furniture has become brighter and more interesting.
Decoupage
Using the decoupage technique, it is possible to decorate not only furniture, but also batteries. For work you will need furniture varnish, special napkins, brushes, acrylic-based paints and PVA glue.
Before starting work, the furniture is cleaned of old varnish. Next, you need to cut out the necessary parts from the napkins and apply them to the surface of the furniture, after which they can be removed, and coat the places where the napkins were with PVA glue.
Next, the cut parts are applied to the glue. Once the glue has dried, all defects can be eliminated with a brush and acrylic paint. Finally, the surface is varnished.
This renovation method is good because it allows you not only to restore outdated furniture, but also to make it more elegant and the interior original.
Finishing with decoupage technique perfectly solves the problem of old cast iron batteries.
Mezen wood painting technique
Modern furniture can be decorated using traditional paintings of folk arts and crafts. These paintings - Gorodets, Mezen, Petrikov, Khokhloma, Zhostovo, etc. - are rich in decorative possibilities and can decorate any furniture.
Mezen painting is one of the most beautiful and most ancient examples of artistic crafts. We invite you to master the technique of Mezen wood painting by decorating a chest of drawers.
You'll need:
- dresser;
- acrylic paints:
- synthetic round brush (No. 2 and No. 3) for painting;
- PVA glue;
- alcohol or vodka;
- cotton fabric;
- chalk, ruler, pencil, disposable plate, A4 sheet of paper;
- tracing paper, color carbon copy;
- sample of Mezen painting;
- water container.
- Before you start painting this wooden chest of drawers, wipe its surface with a cotton cloth soaked in vodka or alcohol.
- Choose a sample of Mezen painting with the ornaments and motifs you like. It can be redrawn on tracing paper, having previously enlarged it.
- Using a ruler and chalk, draw lines on the surface that determine the location of the designs and ornaments.
- In order to draw straight lines on the drawers, and later paint the surface without any problems, remove the handles from the drawers.
- Place copy paper on the surface of the chest of drawers with the ink side down, place the design on top and trace it along the outline.
- The contours of a fragment of the painting are clearly visible on the surface. For better adhesion of the paint to the surface of the chest of drawers, the design can be coated with IVA glue, that is, primed.
- Using paint, using brush No. 2, outline the contours of the design. Add a little water to the paint. Trace the outline of the drawing two or three times.
- Paint the drawing in two or three layers with the resulting color adding a small amount of water. Use brush number 3.
Other types of furniture facades
Glass furniture facades - glass processed (polished) along the edges (including curved glass) with a variety of coatings, are most often used as a decorative element of furniture.
Facades made of artificial stone based on acrylic resin are characterized by high reliability, durability and... cost.
Louvered furniture facades are made of solid natural wood. Promote excellent ventilation of the interior space of the furniture.
Roller blinds are a modern version of vertically opening furniture facades, the so-called furniture blinds. They are made of plastic profiles with different coating colors, including those imitating valuable wood species.
Facades covered with leather (natural or artificial) look impressive, practical, functional and easy to maintain.
3D facades - made of MDF boards with surface milling imitating waves, sand dunes, flames, natural wood bark and other ornaments. They are covered with PVC film, or painted in a color that emphasizes the desired special effect.
Facades with photo printing - an image is applied to the surface of the MDF facade using a special technology, which is covered with a protective layer of glossy or matte acrylic varnish.
Acryline facades are a new direction, it is an MDF board coated with high-gloss acrylic plastic, which has a variety of colors, is easy to maintain and is an environmentally friendly material.
Furniture facades made of specific materials (plywood, OSB panels, stainless steel) are suitable both for arranging utility rooms and for creating a unique interior style.
In conclusion, I would like to say that when choosing a furniture façade, it is not so important to know which façade is better in terms of technical quality characteristics, but rather to have an idea of its appearance, its ability to harmoniously create a comfortable environment or blend into the existing interior, in the end simply to please the eye and cheer up
Milling on kitchen facades: beauty and elegance
An example of timeless classics are the drawings on the facades of kitchen furniture, which are made by milling. This method is suitable for materials such as natural wood or MDF.
Kitchen furniture doors decorated using milling look very beautiful and rich. The choice of patterns is surprisingly wide and varied, so you can find the perfect option for any kitchen.
Beautiful milling of the kitchen facade pattern can be done independently if desired. To do this you will need a router and a jigsaw. If you are going to use wood, its surface should be smooth and even, without the slightest error. In the case of milling from MDF, after the drawing is completely ready, a special film should be applied to the surface of this material. If you do not have the talent of a milling machine, you can purchase ready-made milling for the facades of kitchen furniture, made by professionals. The painted milled wooden facade of the kitchen will give this room a special coziness.
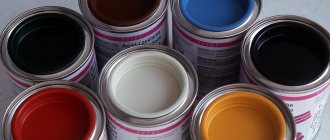
Using acrylic paints
The use of acrylic paints is not much different from standard oil paints. The advantage of such paints will be durability and a huge color palette. Most often, the side surfaces of cabinets, cabinets or chests of drawers are painted in a single color, and a pattern is applied to the facades. It can be either a simple geometric ornament or a full-fledged artistic composition. As tools and materials we will need:
- acrylic-based paints in the desired colors;
- art brushes with different numbers;
- roller (if you plan to paint a large area in one color).
The technique of applying paint is similar to the work of an artist. There are several recommendations for obtaining an original effect:
- you need to start with the background. If the texture is sufficiently smooth, you should use a roller. For an uneven texture, after one coat with a roller, use large brushes so that the strokes are wide and varied. After the surface has dried, use a smaller brush to apply another layer of paint so that a semblance of strokes and irregularities is formed. Then you should begin to directly create an artistic composition;
- First of all, when drawing a picture, you should depict the largest elements, gradually moving on to small details and strokes;
- At the end of the process, you should wait for the paint to dry and fix the design with colorless furniture varnish. It is worth considering that even transparent varnish after drying will give a slightly yellowish tint to the depicted composition.
Painting a cutting board: master class step by step
Let's start painting from the simplest level. Let's first try to paint a wooden cutting board. Painting in the Provence style is this year’s trend, so we will choose this particular style for painting.
You will need:
- drawing on tracing paper or paper;
- a simple pencil;
- artistic acrylic - set of paints;
- synthetic round brush No. 2;
- wooden cutting board;
- stable container with water;
- palette (you can use a disposable plate);
- cotton fabric.
Paint the cutting board step by step, as indicated in the detailed master class, which is presented below:
- Let's make a carbon copy ourselves by shading the surface of the drawing on the back side of the sheet with a simple pencil.
- After this, place the sheet with the design on the prepared primed and painted surface with the design facing up and trace the contours of the image with a ballpoint pen.
- Now your childhood coloring skills will come in handy. Acrylic paint is easily diluted with water to the desired consistency. Apply the paint in light, thin strokes, covering the leaves and turning them green. To do this you will need a paint called chromium oxide.
- Continue painting the cutting board by painting the flowers in different shades of purple, pink and white. Mix the paint with a small amount of water so that it is applied evenly. Apply light, transparent strokes after some time to allow the layers of paint to dry.
The carbon marks will be painted over, but if necessary, you can first outline the drawing with paint and then color it. You can also add patina to the decor of the board and, using a stencil, draw cupids.
Using glissals
Relatively recently, the technique of decorating with glissal has begun to be used. This is a special substance that is applied to the surface and, using various technical techniques, original external effects are achieved - first of all, a change in the texture of the surface.
Glizal is easy to work with, it dries quickly and its use does not require a large number of tools or special skills.
Before starting work, we will need the following materials and tools:
- directly glisal. Its color can be selected from a large palette of shades;
- priming. Depending on the type of surface, it is necessary to select the appropriate type of soil;
- roller;
- brush with stiff bristles;
- spatula and sponge;
- a small piece of polyethylene and suede.
The stages of working with glissal can be divided into three - preparatory, main and final. Step-by-step guidance of all stages:
- After all the necessary tools and materials have been collected, it is necessary to prepare the work surface. It must be cleaned of dirt and dust, and then degreased for better adhesion;
- apply primer. Depending on the surface, it may be necessary to apply several layers of primer, for example, when working with glass or varnished parts of furniture;
- after the soil has dried, we proceed to applying glisal, which must be mixed with water in the proportions specified in the instructions;
- Apply the substance in a thin layer using a roller. We have about 30 minutes of time to create a new surface texture. Using a brush we create more expressive lines. Using a sponge pre-moistened with water and polyethylene, we create a general background, and if necessary, correct the already dried areas with a piece of suede;
- The glisal dries completely within about a week. The resulting original texture can quickly collapse if you touch it often. In order for our decor to please the eye for a long time, it is recommended that after the final drying of the glaze, open the surface to be decorated with a thin layer of protective transparent varnish.
DIY decoupage of old furniture
One of the most fashionable ways to decorate furniture at home is decoupage. This technique is very common in Poland, Germany, France, Asia, and Italy.
Decoupage is translated from French as “cut out”. It got its name because it is based on gluing cut-out designs from paper, fabric, leather and other materials onto the surface, followed by varnishing.
In our time of computer technology, the flight of fancy in this method of furniture design is unlimited. This is where you can truly express yourself. In addition, this interesting method does not require virtually any financial investment. You can use what is available in every home.
Although you can buy special decoupage kits, you can order them online or look for them at craft supply stores.
For DIY decoupage you will need the following tools:
- Pieces of lace, newspapers, scraps of magazines, napkins, scraps of fabric, dried flowers, etc.
- Decoupage glue or PVA.
- Scissors, stationery knives, blades.
- Sponge, paint roller for smoothing the picture.
- A cloth for removing excess adhesive.
- Acrylic or polyurethane varnish to secure the result.
- Brush with soft bristles.
- Primer.
- Acrylic paint.
Let's look at decoupage techniques.
Classic way
The classic method involves gluing a picture to the front of the surface. After the picture has dried, it is covered with a layer of varnish , which must be sanded until smooth.
For an example of this technique, let's take the design of an old stool using the classic decoupage technique. Each of you probably has a Soviet-era stool at your dacha, so we’re going to transform it with a napkin with a floral pattern.
- First of all, using a metal spatula or sandpaper, we will get rid of the old paint.
- Let's apply a new coat of paint to the stool.
- Separating the top layer from the napkin, carefully cut out the design.
- Glue the flower to the selected area of the surface.
- We smooth the glued element with a roller to get rid of unevenness and bubbles.
- Blot off excess glue with a rag or sponge.
- After the decor has dried, coat the stool with varnish.
This method can be used to decorate any other furniture. You can also cover the image with a layer of gold leaf or just metallic paint. You can shade the drawing using a dry brush and pastel paint.
Reverse decoupage technique
The reverse decoupage technique is used to design transparent furniture. Here the drawing is glued to the reverse side of the surface .
Types of internal filling of a frame facade
Depending on the configuration, panel inserts can be:
- flat - they are absolutely smooth panels without any protrusions or overlays;
- volumetric - with the presence of figured protrusions or carved adjustments;
- typesetting - consist of individual lamellas connected to each other;
- figarean - with a convex central part, gradually turning into thinner edges;
- floating - with inserts of the same thickness as the frame.
>
Depending on the material, the panels can be:
- from laminated MDF or chipboard;
- natural wood;
- veneered MDF;
- glass;
- plywood.
The insert can have not only a square or rectangular shape. In individual design projects for furniture sets, there are also round, oval, trapezoidal and even polygonal panels.
The framed facade of the cabinet looks impressive on its own, but it is often additionally decorated with the help of:
- carved and forged elements - decorative overlays made of wood and metal;
- triplex - laminated glass with different effects;
- stained glass - patterns on transparent surfaces.
Styling of paneled facades
Paneled facades have been used since the Middle Ages and have not lost their former popularity.
Modern designers are guided by the experience of centuries-old traditions and offer panels suitable for different styles:
- Gothic (peak popularity from the 11th - 12th to 15th - 16th centuries) - furniture in this extravagant design is characterized by pointed arches, multi-color stained glass windows, wood carvings and ornate forged elements;
- Baroque is a pompous style brought to Russia by Peter I. It is characterized by rich decoration of facades with stucco and carvings. The use of panels of unusual shapes is encouraged - with curls and spirals;
- classicism (XVIII-IXX centuries) - a balanced and harmonious style. Frame facades are made in two contrasting colors and are moderately decorated with forged elements and marquetry.
Cabinet fronts made in modern styles, for example, minimalism or hi-tech, are distinguished by clear lines and minimal decor.
Photo of furniture with paneled framed facades
>
Attractive, practical and affordable, frame cabinet fronts allow you to make your interior unique, creating a special, cozy atmosphere in your home. And their high performance characteristics will ensure durability of the furniture complex, allowing owners to use it for many years.
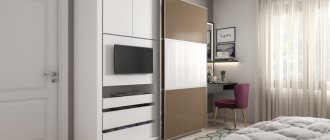
Wardrobe restoration
Built-in furniture usually comes into the house with a ready-made design; the customer chooses it himself, so it meets all existing requirements. But it often happens that after another renovation, the cabinet doors do not fit well into the new design style. In such a situation, you can also use restoration and completely change the appearance of a large object. Today there are technologies that allow this to be done quickly and inexpensively.
One wardrobe – different decor options Source media.makler.md
Using stencils
If you want to have furniture painted with bright colors, but do not have the talent of an artist, then stencils will come to the rescue, using which drawings are made. You can buy them in hardware stores or prepare them yourself from cardboard. You will also need spray paint. The transformation method is simple and creatively interesting.
A small stool can be decorated
Any outdated furniture can be restored
The result will be better if the surface of the furniture is made smooth. The stencils are applied to the desired location; to ensure accuracy of the design, they can be secured with masking tape. And after that they spray paint. Finally, it is recommended to varnish the product. If you need several colors in a drawing, you can use acrylic paints; they fit perfectly on wooden surfaces.
Designer items are not cheap, but you can always create them yourself. In this case, the thing will turn out exactly as it was imagined, and the creative process will bring incredible pleasure. Creating individual furniture decor using improvised means will transform any interior and add uniqueness to it.
Decorating furniture by aging
Recently, it has become fashionable to use rare furniture in the interior; it is very expensive, and it is difficult to find a decent piece of furniture from the last century.
But many designers believe that it is worth it, because antique furniture will add a unique charm and aristocracy .
You can create a vintage item with your own hands by artificially aging it.
For artificial aging you will need:
- Stain.
- Water based paint.
- Craquelure varnish.
- Sandpaper.
- Brush.
- Acrylic paint in a metallic (eg gold) color.
You want to create a shabby feel for the furniture you're remodeling. This can be done using one of three techniques.
The first step for any of the techniques below is to clean the products from old varnish and paint.
Aging furniture using stain. This method is suitable for furniture made of light wood. It looks very natural.
- Apply a layer of stain to the prepared product, carefully treating cracks, edges and bends.
- Use a wet sponge to remove the stain from the middle of your furniture, leaving the edges and curves untouched.
- Rub antique wax into the dried product.
Aging with paints and craquelure varnish. By painting and applying craquelure, you can easily achieve the effect of a cracked and worn surface with your own hands.
- Choose two paints of the same color, but in different tones (lighter and darker).
- This point is painting an object with a dark tone of paint.
- After the first layer has dried, apply a second layer, but this time light.
- Let the layers dry completely.
- Using sandpaper, sand down those areas of the furniture you want to decorate where you want darker paint.
- Coat the product with varnish.
Furniture aged with gold paint looks truly chic and will enrich any interior .
- Paint the item you are decorating with any color.
- Once the paint is dry, use a sponge and work quickly with your hands to coat the furniture with metallic acrylic paint.
- Reveal your work with varnish.
Patination technology
One of the most original furniture decor options. Most often used for finishing the facades of kitchen units, chests of drawers or cabinets. The essence of the technology is to give a new surface the appearance of an old one, that is, to artificially achieve the effect of aging. Furniture with patinated facades will look much more presentable and very original. This is an ideal option for furniture in classic or baroque style.
In order to decorate furniture with your own hands using patination, you need to stock up on the following materials and tools:
- patina of the required color (sold in special stores for artists or decorators);
- protective soil-limiter;
- art brushes;
- special flexible spatulas;
- sponge;
- furniture clear varnish.
First, we treat the prepared surface with a special primer. We apply it only to those places where there will be a patina later. After the composition has dried, we begin to apply the patina with a medium-sized brush. It is necessary to be careful and apply the composition evenly.
Afterwards, you can use flexible spatulas to give a certain texture to the surface. The patina takes quite a long time to dry - at least a week. After final drying, protect the decorated surface with a thin layer of varnish. The result is a magnificent effect that will give the furniture an antique look.
painting
For those who know how to draw, there is another type of furniture decoration - painting.
Furniture with paintings in the Chinese style The painting is done in an ornamental style, and the surface can also be decorated with a whole picture. They draw in monochrome and full color - it all depends on your idea. For those who don’t know how to draw, but really want a chest of drawers with a pattern, there is also a solution: try your hand at decoupage. You can read more about this technique for decorating furniture in the publication Renewing old furniture. Decoupage.
A little history of decoration
Decorating is a set of techniques and artistic techniques that can be used to enhance the expressive properties of furniture products.
Classic decoration techniques known to craftsmen since ancient times: carving, inlay, pyrography (burning), gilding, gesso, applied decor. In fact, these methods are also applicable to modern materials from which wooden furniture is made: solid wood, plywood, wood boards. In the hands of skilled craftsmen, such furniture becomes a real exclusive, the price of which increases the selling price of the finished product several times. But there is one thing: manual labor is not only highly paid, but also requires appropriate qualifications, and it is quite difficult to find real decorative masters.
Therefore, the applied art of decoration was replaced by printing techniques: embossing, decoupage, pyrotyping, screen printing. The latest methods of decoration are metallization, direct digital and thermal transfer printing.
On an industrial scale, decoration is carried out using two methods:
- The decor is applied directly to the structural elements of the product;
- Separately, decorative elements are made, which are then applied to the furniture (overlay decor).
DIY furniture decoration
If your furniture is worn out, out of fashion, or you’re simply tired of it, don’t rush to throw it away. New furniture will cost a lot of money, but you can always remake the old one with your own hands, turning it into a completely different, stylish thing.
Not everyone you know can boast of exclusive handmade furniture. By following our tips, you can give your old products a second life.
So, what techniques for decorating old furniture with your own hands we will look at in this article.
- Decoupage technique.
- Covered with new fabric.
- Aging.
Decorative films
Today this method is the simplest and at the same time very effective. Construction stores sell a large number of adhesive-based decorative films for decorating facades. A huge selection of patterns will make the furniture bright and unusual. The advantages of the technology are obvious:
- ease of use;
- durability of films;
- When properly glued, furniture facades will practically not differ from their factory-made counterparts.
We apply the film to the facade in advance and determine the required dimensions. After marking, cut off the excess.
In order to stick the film, you just need to prepare the surface (clean it from dust and degrease), and then, after removing the protective backing, place the film with the front side towards you and begin to gradually stick it. You should carefully ensure that air pockets, bubbles and screeds do not form under the film. We eliminate all defects using a roller, which we carefully smooth the surface with.
Despite the apparent simplicity and visible advantages, decorative films have their drawbacks:
- Use only on flat surfaces. Furniture facades with a frame structure or with elements of decorative carvings cannot be covered evenly and beautifully with film;
- When gluing, you must be very careful to ensure that the film does not wrinkle or distort;
- After some time, there is a possibility of the coating peeling off from the base.
Frame facades made of aluminum profiles
Understanding the questions of what types of furniture facades there are and which facade is better, one cannot help but touch upon the topic of frame facades made of aluminum profiles, which are an aluminum frame with fillings made of various materials inserted into it: MDF, glass, plastic and others.
The best use of facades is the manufacture of furniture in modern Art Nouveau or hi-tech style. Facades filled with various glass with decorative films, stained glass, engraved, textured or mirror look especially original. Most often, aluminum profile facades are used in combination with other furniture facades designed in the same style. A unique feature of aluminum facades is their high moisture resistance. The disadvantages include the high cost of both the profile itself and the filler. In addition, the manufacture of facades from aluminum profiles requires special special fittings.
Furniture decoration options
Decoupage
Applications made of various materials on facades are a trend in furniture decoration that is not losing its relevance. True, if in the old days fabrics were used in decoupage, today - ready-made stickers, and less often - artistic painting with acrylic paints. Culinary recipes, old newspaper clippings, creative slogans, colorful ornaments, photographs and landscapes - images can be selected to suit any interior style and decorate standard facades, tabletops and other smooth surfaces with them.
Dimensions of furniture fronts
The market is characterized by a wide format (height, width) range, allowing you to choose a façade to suit any “color and taste”. Typically, manufacturers adhere to a certain standard range of sizes, but there are companies that produce facades of almost any size to order. The possible size of the facade is significantly limited by the material from which it is made. Frame facades usually have a certain minimum possible size, depending on the size of the profile used. The maximum size of MDF facades lined with PVC film is limited by the capabilities of the equipment used. Facades made from slab material are characterized by the widest range of sizes, limited only by the size of the original slab.
What is a furniture facade
The facade of cabinet furniture is understood as the totality of all visible parts facing its front, and sometimes side, surface. The facade ultimately determines the appearance, cost, and attractiveness of furniture for the consumer. The area of facade parts on average does not exceed 30% of the area of the parts that make up the product. The cost of the facade is approximately 25-30%, and can reach 80% of the price of the entire product.
The facade includes several main types of parts: doors, front walls of drawers, vertical and horizontal decorative overlays, cornices, etc. All furniture fronts can be classified according to numerous characteristic features, for example, by style, appearance or design. Facade doors are their main constituent element.
It is easy to change the appearance of furniture by simply updating the facades. Replacing facades is not a difficult task. The fastening is usually designed in such a way that the facade is easy to unfasten, replace with a new one and adjust the latter vertically, horizontally, as well as its inclination. In this case, the fastening part - the so-called filler part - remains in its place, and another facade is mounted to it. Drawer fronts are also quickly replaced. A variety of reasons lead to the decision to change facades, both prosaic - wear and tear due to careless use, damage by active children, direct exposure to sunlight, improper use of detergents, etc., and more sublime - the thirst for change, renewal, often associated with repair.
Brief summary
Decorating cabinet furniture yourself is not that difficult. It is worth choosing the necessary decoration technique depending on the desired effect, be patient and get to work. By following simple instructions you can turn an ordinary piece of furniture into an unusual decorative accessory.
It is worth remembering that various methods of external decoration must be combined with the stylistic design of the furniture itself in order to achieve maximum effect. Very often, decorators use several technologies at once, trying to give maximum originality to the item. Don’t be afraid to experiment and implement your design ideas to the fullest – the result will be the best praise!
List of sources
- www.dizainvfoto.ru
- mastermdf.ru
- links-stroy.ru
- mebelsuite.ru
- www.wikipro.ru
- moiinterier.com
- Vproizvodstvo.ru
- Author: Sergey
Share with your friends!