DIY pencil case cabinet, calculations, drawings and diagrams
One can only marvel at the versatility of the pencil case. This compact and practical piece of furniture finds a place anywhere - in the hallway, nursery, bedroom, office, kitchen and even in the bathroom. Depending on its purpose, it can be equipped with shelves, drawers and retractable storage systems. Household appliances are built into the kitchen cabinet, and the bookcase is closed with glass doors. Thanks to the simplicity of the design, making a pencil case with your own hands is not so difficult. The key to success is correct calculation of the design and the desire to try your hand at making furniture.
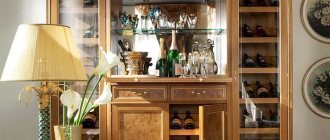
Cabinets: a wealth of choice
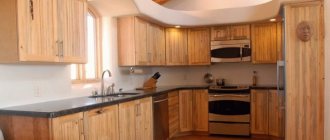
Due to the popularity of built-in household appliances, the most popular type of kitchen cabinet today is the column. And this is understandable: the amount of equipment in a modern kitchen is so great that a person is faced with the question of where to hide it.
Microwave oven, multicooker, food processor, oven, dishwasher - and this is not a complete list. Floor canisters-speakers are a quick and optimal solution to this problem.
With their help, you can competently plan your kitchen space: there will be more free space, and it will be convenient for the housewife to cook when all the equipment is correctly placed, and there is no feeling of clutter.
Review of half-bar stools from IkeaPull-out systems for the kitchen - what are they? 75 photos of ideas and new designs!
- Open shelves in the kitchen - 55 photos of ideas for use in design
If you need to hide the refrigerator, use a tall pencil case with a door.
For apartments with a small kitchen, the ideal option is a corner pencil case, which will save precious centimeters.
DIY drawings of pencil cases
Usually the question of how to make a pencil case with your own hands is asked when there is a need for additional storage space and some kind of narrow space to place a compact piece of furniture. The design of the pencil case is quite simple and, at first glance, it is not at all difficult to implement the plan.
- The first step: take measurements and decide how this cabinet will look.
- The second step: think through its internal contents so that the cabinet is functional and fully fulfills its assigned role.
Often the allotted overall dimensions initially “interfere” with ideas. And already at the design stage you can understand that what you want is impossible to achieve. Let's dwell on the main points and nuances of design.
Pencil case with shelves and a niche for clothes on hangers
So that the sides of the pencil case do not “bend” over time, and the cabinet itself does not warp, it is necessary to stiffen the structure. This can be done in two ways:
- In a cabinet with shelves, it is worth rigidly securing some shelves, in addition to the lid and bottom. At a height of about 1.5 m, one in the center is enough; higher, two are better. The remaining shelves can be made removable, mounted on shelf holders.
- In a pencil case where a high niche for storage is required (for clothes on hangers or household equipment), a so-called “stiffening rib” is installed. Its role is played by a panel installed vertically along the rear wall. It is usually located under the top shelf.
Pencil case with drawers
When designing drawers, you should think about their practicality. Let's highlight a few key points:
- The internal width of the box with a material thickness of 16 mm is 90 mm less than the overall width. That is, with a pencil case width of 300 mm, the “useful” width of the box will be only 210 mm.
- The depth of the drawer is limited by the length of the guides. The shortest is 250 mm. You can read more about calculating a drawer in a closet here.
- It is better to place drawers in a pencil case at a height of no more than 1200 mm from the floor. Otherwise, they will be inconvenient to use.
DIY cabinet pencil case for the kitchen
Most often, a pencil case in the kitchen is a tall floor cabinet with built-in household appliances - an oven, microwave, and sometimes a washing machine or dishwasher. The last two units are placed strictly on the floor, and the cabinet is “built on” above them.
The oven and microwave can be placed at a convenient height. Usually they maintain symmetry with the position of other cabinets and cabinets in the kitchen.
The design of the kitchen cabinet itself is extremely simple. Just like other cabinets, it is installed on adjustable legs. For built-in appliances, it has a width of 600 mm and a depth of 550 mm along the body. It is better to look at the distance at which to mount the shelves and, possibly, make cuts, in the technical data sheet of the installation.
If you don’t need to build equipment into a kitchen cabinet with your own hands, then its dimensions are arbitrary. The main thing is to maintain symmetry with respect to other items of the kitchen set. We are talking about the height of the modules, depth, location of open niches and shelves covered with facades.
DIY bathroom cabinet
Increased humidity in bathrooms requires increased moisture resistance from furniture. This quality is achieved in several ways:
- Firstly, when making a bathroom cabinet with your own hands, moisture-resistant materials are initially selected.
- Secondly, the design eliminates the traditional plinth box in the plinth. The cabinet body in the bathroom should stand on high legs or be suspended.
- Thirdly, when assembling, avoid through holes - through them, access to moisture is “opened”. The case body is assembled on eccentric ties and furniture dowels.
- Fourthly, all joints (fasteners, butt ends) are additionally treated with sealant.
How to calculate and make a pencil case with your own hands?
Once the drawing of the pencil case cabinet has been drawn up and its design has been thought out, you can proceed to the next stage - calculating the details and drawing up a cost estimate.
Calculation by material
Most cabinet furniture is made from laminated chipboard. This is perhaps the easiest material to process. Its thickness is 16 mm.
If there are increased requirements for moisture resistance (for example, you plan to make a pencil case yourself for a bathroom or loggia), then it is better to take laminated MDF. This material costs a little more, but in terms of durability it will fully justify itself. MDF thickness – 18 mm.
You can try to calculate and make a pencil case with your own hands from ready-made furniture panels. In this case, it is better to make the depth of the furniture body equal to the width of the workpieces - this will result in less waste and less cutting work. Furniture panels are sold in construction hypermarkets such as Leroy. The thickness of the material can be different, ranging from 16-25 mm.
Depending on the thickness, the dimensions of the workpiece parts also change. For example, with a pencil case width of 400mm, the length of the inner shelf is:
- Chipboard – (400-16x2)=368 mm
- MDF – (400-18x2)=364 mm
- Furniture panel – (400-20x2)=360 mm
An example of calculating a cabinet made of laminated chipboard
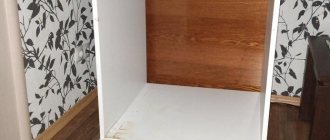
For an example of calculating a do-it-yourself pencil case cabinet made from chipboard, let’s take the option in the photo.
A similar design with an overhead bottom and “through” shelves is used for any cabinets with legs. Including kitchen cabinets and pencil cases. Please note that the version in the photo does not use an overhead facade, but an internal one, recessed between the sides and the bottom. This means that the shelves behind it should also be recessed, that is, less than the rest in depth.
Calculation of a pencil case cabinet made of 16 mm thick chipboard according to the given drawing and diagram with overall dimensions АхВхС will look as follows:
Drilling of chipboard canister parts according to additive cards, assembly according to drawings
After the parts of the cabinet-case are cut out, the visible ends are pasted over with an edge, you can proceed to the next stage - marking and drilling to confirm the blanks for further assembly.
Special additive cards will help with this.
If there are shelf supports, you need to be careful. For their installation, blind holes are drilled on the inside of the parts, and for confirmations, through holes are drilled on the front side. In this case, in the drawing of the additive map, the sidewall will be drawn on one side, and two sides will need to be drilled, mirrored to each other. Horizontal parts can be “rotated” arbitrarily.
After the parts are drilled, you can begin assembling according to the drawings of the cabinet-cabinet diagram.
You can read about how to mark the sides of a pencil case for installing drawer guides in the same section, in articles on making a chest of drawers.
Source
What is a kitchen floor-standing pencil case made of?
The materials for making a floor cabinet can be very different; their choice depends on the financial capabilities of the customer, the overall interior of the apartment and the purpose of the pencil case. When choosing materials, special attention should be paid to pencil cases for the kitchen and bathroom; these places have high humidity and the temperature often changes in them.
Basic materials:
- Wood - this material is distinguished by its high cost, but despite this, a wooden set is very popular. One of the disadvantages is the impossibility of using it in places with high humidity, since the wood may lose its appearance and properties.
- MDF is a material that costs much less than natural wood, has an impressive appearance, but also needs proper care.
- Chipboard is the cheapest option, but is sensitive to water and does not tolerate moisture.
- Plastic - this material is not the most environmentally friendly, but it is not afraid of water and wear-resistant, is inexpensive and is the best option for decorating bathrooms and kitchens.
- Metal - furniture made from this material is very durable, but does not fit into many interior styles. Metal is often used for the frame.
For final finishing, surfaces can be painted and polished; glass doors are used as decoration, which makes the product light and also simplifies the process of finding dishes in the cabinet. Such cabinets - speakers in the kitchen are very convenient, many items fit into them, and you can put built-in appliances there. Even if the size of the kitchen is small, they will not be bulky.
You can make a furniture set yourself by drawing up drawings and diagrams.
When choosing furniture, you need to carefully monitor the quality of the goods offered and make purchases only in well-known stores.
Convenience of design
Today, furniture companies offer a fairly large selection of models of cabinets, which to some extent make people's lives easier. For example, a pencil case with shelves can accommodate a sufficient number of things, clothes, household items, while saving room space due to its small size. Such cabinets are especially appropriate and necessary in small apartments, where every occupied meter counts.
The main feature of the pencil case is that it can be installed in any room, regardless of its purpose. A small model of a cabinet made of moisture-resistant materials will fit perfectly into the interior of a bathroom; a protocol cabinet in dark colors is suitable for a hallway.
For children's rooms, you can use light-colored products, but in the bedroom or living room, a stylish bright accent in the form of a pencil case with drawers would not hurt.
Some design features of the products under study will help you correctly evaluate all the advantages of the pencil case:
All these design features have not gone unnoticed by consumers today, which is why cabinets are so in demand and loved by many.
A corner cabinet fills a corner. Suitable for any size room, as long as it is square or similar in shape.
Having chosen a suitable design, you can begin to create a project for the future cabinet. Since this piece of furniture lasts for many years, it is worth considering what functionality may be required from it. It is better to build a drawing on whatman paper, recording all measurements there.
Decide on the location and dimensions of the cabinet. If there is a niche in the room - ideal, but if it is not possible to build it in, choose a place where nothing will interfere with it.
Consider the internal content: the location and number of shelves and drawers, their sizes, additional elements such as mezzanines or interior lighting.
We suggest you read: Which bath to choose for a small bathroom
Do not forget about the choice of external decoration and decorations. The colors “oak”, “alder”, “beech” are the most popular today. Or you can choose wood with an interesting pattern and leave the original pattern. Get creative and decorate the doors with a carved pattern.
Mark and drill
First of all, they start by marking the sidewalls:
The drilling process goes something like this
- If the product will stand on the floor, then the bottom shelf is marked with an indentation of 50-60 mm. From the edges, a step of 50 mm is usually used.
- The top shelf is marked with an indentation of 8 mm. It depends on the density of the material, if it is 16 mm, then the middle is 8 mm, but if it is more, then, accordingly, the center shifts.
- The remaining shelves are laid out in a chaotic order, that is, as you need. With the exception of the center shelf, it is necessary for rigidity.
Please note that the central shelf is rigid, the rest are removable for ease of use
For your information! For reliability, it is best to order a few more stiffening ribs that are attached along the rear wall. Through them you can pull the pencil case to the wall.
- All marks for hard shelves are drilled with an 8 mm drill. On the side where the Euroscrews will be screwed in, you need to go through it with a countersink.
- For removable shelves, use a 5mm drill bit. The depth should be no more than 10 mm, since the shelf holder itself is recessed into the material by 6 mm.
Various types of shelf supports
We drill rigid shelves and stiffening ribs with an indentation of 8 mm and 50 mm with a 6 mm drill.
Interesting! If you do not want to drill a lot of holes, then it is better to use plastic or metal corners and attach them to self-tapping screws. This is another way to do without power tools, however, it is not as aesthetically pleasing.
DIY kitchen pencil case
Fittings and fittings for a pencil case made by hand38 mm finishing nails. 22 mm finishing nails. 50 mm finishing nails. Wood screws No. 10 89 mm. Standard metal holders for shelves 96.2 cm long – 4 pcs. Standard metal holders for shelves 96.8 cm long – 4 pcs. Metal supports for shelves – 16 pcs. Door handles – 4 pcs. Self-closing loops – 8 pcs.
Making a pencil case body
1. Manufacturing of parts. Cut out the walls, roof, bottom, shelves, mounting strips and protective panel of the cabinet-pencil case in accordance with the dimensions indicated in the list of materials for making a pencil case for the kitchen with your own hands. Then make cutouts in the side walls for the protective panel, as shown in the figure “Detailed view of the side wall of a DIY kitchen cabinet.”
2. Selection of grooves. Select horizontal grooves from the inner sides of the side walls, the position of which is indicated in the figure “Detailed view of the side wall of a pencil case for the kitchen with your own hands” (see the article Connections in grooves and seams connections).
3. Choosing grooves for shelf holders. Using a milling machine, select vertical grooves with a depth of 4.8 mm and 15.9 mm, as shown in the figure “Detailed view of the side wall of the panel for the kitchen with your own hands.” Don't forget that the second wall of the pencil case should be a mirror image of the first.
4. Selecting folds. Select 10 x 10 mm folds on the back inner edges of the side walls, as shown in the figure “Detailed view of the side wall of a DIY kitchen cabinet.” These rebates are 3mm deeper than the thickness of the back wall, which will provide freedom of adjustment if the walls in your kitchen are not quite ideal. Then, using a straight cutter, widen these folds by 2.5 cm so that they go down 8.9 cm below the top groove and rise 8.9 cm above the bottom groove. These folds are intended for installing pencil case fastening strips in them. Using a chisel, bring these folds to squareness.
5. Assembling the pencil case body with your own hands. Attach the roof, bottom and fixed shelf to the side walls using glue and four 38mm finish nails for each groove.
| Detailed view of the side wall of a DIY kitchen cabinet |
| General view of a pencil case for the kitchen |
| Giving the box a rectangular shape Assembling the box can be a challenge. It happens that you have to deal with connecting long parts. Giving the box a rectangular shape can be done using the back wall without a tape measure or square. To do this, at least one corner of the back wall must be completely straight. |
6. Attaching the protective panel of the pencil case. Make cutouts for the side walls in the protective panel, as shown in the figure “General view of a pencil case for the kitchen.” . Attach the protective panel to the side walls using adhesive and two 38mm finishing nails on each edge.
7. Installation of fastening strips. Apply glue to the widened folds of the side walls, insert fastening strips between them and strengthen both ends of the planks by driving two 38 mm finishing nails into the side walls.
8. Rear wall mounting. Apply glue to the back folds of the side walls, to the back edges of all horizontal panels and to the back surfaces of the fastening strips. Place the back wall in place so that its top edge is flush with the top of the roof. Reinforce the back wall with 22 mm finishing nails.
In the same way as a pencil case, you can build pantries: by equipping a cabinet built into the wall with shelvesManufacturing of front frame and shelves
1. Manufacturing and fastening of racks and crossbars of a pencil case. Cut the front frame posts according to the dimensions indicated in the list of materials for creating a pencil case with your own hands, and attach them to the body using glue and 50 mm finishing nails. Cut the crossbars, writes Infobud, corresponding in length to the distance between the racks, and then attach them with glue and nails so that the upper edges of the crossbars are flush with the top edges of the side walls, fixed shelf and bottom.
2. Edging of adjustable shelves. From solid wood, cut the pads for the front edges of the adjustable shelves in accordance with the dimensions indicated in the list of materials for the kitchen cabinet-pencil case. Glue the pads and press them to the shelves with clamps.
3. Installation of a pencil case. Before installation, sand all solid wood parts and then apply the final finish of your choice. Move the pencil case to the wall in the chosen location. Make sure it is upright. Otherwise, straighten it using spacers, placing them under the side walls or protective panel.
| Installation of cabinets and furniture There are no ideally strictly horizontal floors or vertical walls. Installation of cabinets and furniture is carried out in the following order: determine the highest point of the floor, mark the level line, install the cabinet, finish with protective linings. |
4. Installation of shelves. Using a metal hacksaw, cut pieces of holders to the required length. Start making cuts from the top ends of the holders so that they fit well with each other. Insert the holders into the grooves of the side walls and secure them with the supplied nails. Insert metal shelf supports into the holders and place the shelves on them.
Manufacturing and finishing of cabinet doors
1. Making doors. The dimensions of the doors, given in the list of parts for a DIY pencil case, are chosen so that the doors overlap the opening by 1 cm on each side.
2. Cabinet door trim. Finish the doors so that they are in harmony with the cabinet body. Attach door handles and self-closing hinges with the screws included. Then hang the doors on the cabinet.
Convenient kitchen with pencil case
A cabinet-pencil case is a narrow object, similar to a column; it can be used as a separate element of furniture or come complete with the rest of the set.
Cabinet purpose:
- Storing dishes and other kitchen utensils, such as gift sets, that are not often used;
- Storage of cleaning products, textiles and napkins;
- Storage of built-in and small appliances, such as a toaster, coffee machine, etc.;
- Storage of spices and bulk products, canned food;
- Storage of alcoholic beverages.
Often not all compartments of the pencil case are filled. Some are left free and various decorative elements are installed. The size of such a cabinet can be chosen by anyone, depending on the wishes of the apartment owners. In cases where the standard size is not suitable, you can make custom-made furniture.
Making a cabinet diagram
All parts of the do-it-yourself bathroom cabinet, except for the back wall, which can be made of plywood, are made of chipboard. This means the slab will have to be cut. Regardless of whether you are going to do it yourself or order it from a store, you need a diagram:
- Select a scale.
- Draw the outline of the slab to scale.
- Draw the largest parts of the bathroom cabinet - on the diagram they can be located close to each other, without any gaps.
- Place smaller parts in the free spaces.
- Add all dimensions to the drawing.
Important! It is better to arrange the cabinet parts so that the contours of some are a continuation of the contours of others - this will make it easier to saw.
Types of corner cabinets for the kitchen
A corner cabinet is a tall and narrow cabinet, the surface of which at the back resembles a corner. This element does not take up much space and has a large capacity. This type of cabinet is most popular for use in small rooms; it can make corners less noticeable and saves kitchen space. It can be part of a kitchen set or installed as a separate object. In such cabinets you can store almost everything that is useful for use in the kitchen - food, appliances, household products and more.
Advantages of a kitchen column for a small kitchen
When there is a problem with organizing storage in kitchen cabinets, you can use a special pencil case. As a rule, it holds a lot of kitchen utensils; it is convenient to put in such a cabinet those items that are not used every day.
Manufacturers' catalogs offer many different options for organizing the kitchen space.
To learn more about the range and see design ideas, you can go to the website of the official manufacturers. One of the most popular is the column cabinet.
Let's talk about tools for assembling cabinet furniture
Is this your first time making a pencil case for your bathroom or kitchen with your own hands and you don’t have the tools yet? It's okay, you can easily get them if you know what exactly you need. For the manufacture of cabinet furniture will be very useful:
- jigsaw;
- a circular saw;
- electric drill;
- screwdriver with a set of bits;
- Sander;
- sandpaper;
- Screwdriver Set;
- ruler;
- roulette;
- carpenter's square;
- edge tape;
- wood glue;
- fittings - hinges for doors and handles, as well as fastenings for shelves;
- wood screws;
Important! Typically, a jigsaw is designed to cut boards up to 70 mm thick. This is enough for the eyes - in the most serious case, the thickness of the slab will be no more than 38 mm. It is better to cut long rectangular parts with a circular saw.
Making a pencil case with your own hands
If the kitchen is of modest size, it is best to install furniture that is not bulky but also functional. Nowadays, furniture is often made independently, this allows you to avoid unnecessary costs and make elements of the desired size.
What you need for a homemade cabinet:
- It is necessary to prepare materials. You can assemble a cabinet with several shelves that can be adjusted, while one can be fixed. Shelves must rest on specially made holders, which are made of metal. You can also make them yourself or buy them at a hardware store.
- You need to decide on the height - will it be up to the ceiling, or do you need a lower size? However, its height should not be allowed to differ from the top points of other furniture. Otherwise, it will immediately catch your eye.
- The materials you will need are side walls, a bottom, a lid, a shelf that will be fixed, as well as canvas for other shelves. You will also need a piece of plywood for the back wall, wooden strips for fasteners and a door.
- You should purchase accessories in advance, namely nails, screws, metal holders, shelf supports, door handles, door hinges.
It is necessary to remember about drawings and diagrams, which must also be developed in advance. They must be strictly adhered to, and the cabinet must be assembled extremely carefully. Careful attention must also be paid to the processing and cutting of parts; everything must be done with high quality.
Color and design
For each interior, you need to choose a specific color scheme and cabinet design. The main varieties are presented in the following styles:
- Classical. Subtle and neutral tones are used, such as white, beige or brown. The design is dominated by wooden overlays, arches, vertical projections with capitals or cornices.
- Modern (loft, modern). Matte or glossy facades using plastic, film, metal or enamel are used. These styles are dominated by bright, but not provocative colors or combinations of two shades.
- High tech. A kitchen in this style is decorated with metal parts, glass, and lighting in cool shades. Current color solutions are gray, steel, white. The surface of the facade for this design is usually made glossy.
- Rustic (country, Provence). Wood furniture predominates in this style. The design includes painted details, antique finishes, textured materials and carved elements. In addition, the rustic style is characterized by handles made of wood or copper, hinged doors and square legs.
Types of cupboards, internal filling options
Color design can visually smooth out the transition from one cabinet to another. Glass or mirror surfaces are also used for facade decoration. Photo printing continues to be popular; furniture facades can be decorated with any image. Still lifes with fruit, photographs of the city at night, abstract patterns, floral and animal motifs are popular.
Shabby chic style has become popular lately. It consists of using expensive furniture with an aged effect. This style is suitable for those who prefer Provence or country, but want to try something more elegant.
Classical
Loft
Modern
High tech
Country
Provence
Shabby chic
Assembling the pencil case
If you accurately made the markings and drilled the holes according to the rules, then no difficulties should arise during assembly. In order to facilitate the process, you should adhere to this order.
- Prepare a site for assembly; its dimensions should be slightly larger than the parameters of the pencil case. This will make the work process easier.
- Lay out two sides, bottom and top, on the floor. Let the back wall lie nearby. Place the top and bottom pieces on the edge, and place one side panel on them. Check the alignment of the holes and fix the elements using confirmations.
Confirmat (furniture screed)
The second confirmation is screwed in
Important. Exercise extreme caution; in this position, the bottom and top easily break off from their sockets, as a result of which two big problems arise. First, you will have to re-drill the holes; the plugs will become asymmetrical, which has a very negative effect on the appearance of the pencil case. Secondly, if the chipboard cracks, there is no way to repair it; experienced carpenters will always immediately see the problem area. The only way to save the situation is to completely replace the damaged part.
- Place the second side panel on the ends of the bottom and top and attach it with confirmations. Now the structure has become a little more stable, but this is not enough for complete peace of mind.
- Place the pencil case frame on the floor with the right edges facing down. Secure the back wall. It can be fixed with small nails or self-tapping screws. We recommend using the first option: it is easier to drive in nails, and the work goes much faster. But this does not affect the strength of the pencil case.
- Screw the legs to the bottom. In most cases, leg manufacturers equip them with self-tapping screws. But most often their length is not enough for a reliable connection. It is better to buy more suitable screws, just make sure that their length does not exceed the thickness of the slab. There is no need to adjust the legs; this operation will be done at the final stage of installing the pencil case in place.
Connecting elements at an angle
Rear wall mounting
The frame is assembled, attach the doors to it.
Where to collect a pencil case for the bathroom?
For any carpentry work you need some kind of workshop. In this case, the kitchen itself is most suitable - it is more convenient to assemble a bathroom cabinet with your own hands on the floor.
Important! The bathroom is less comfortable, even if it is quite spacious. There you will certainly be disturbed. The structure is placed in a vertical position when all that remains is to secure the shelves and doors, and the frame is already ready and the back wall is screwed on.
The workshop should have:
Drawing
If you haven't found a suitable drawing of a pencil case, make it yourself. Mark on it the dimensions of the parts, as well as the location of the fittings - hinges, shelf holders and everything else. Even if you are going to make a small pencil case with your own hands, drawing up a drawing will help you understand how the parts will be arranged and where additional cuts need to be made:
- Transfer the layout to the chipboard and cut it exactly to size.
- Wipe the parts (dust will inevitably accumulate on them).
- Degrease them with alcohol (this can also be done during assembly).
Rules for choosing a narrow pencil case for the kitchen
Before you make a purchase of a kitchen set, you need to decide what it will be used for. Will it be a cupboard or will large and heavy equipment be built in? Depending on this, the model and the material from which it will be made will be selected.
Basic rules to follow when choosing:
- The height of the cabinet should be equal to the height of the rest of the set;
- The depth should match the rest of the furniture;
- The material must be of high quality, and the company must be a well-known manufacturer that guarantees quality.
Almost all manufacturers offer interesting models of different sizes and colors, and everyone can choose what they need.
In conclusion, we note that designing a kitchen cabinet is relevant if after a major renovation there is an unused narrow opening, then you can insert this cabinet into it and use the entire kitchen space functionally.
Manufacturing materials
There are several main materials from which kitchen cabinets are made:
- Laminated chipboard (LDSP) is the most cost-effective option for cabinet production. If the outer coating is damaged and moisture gets into unprotected areas, the material begins to swell and deform. Also, due to the low resistance to loads, the parts fastenings built into the chipboard can break out if overweight or sudden movements.
- Fine fraction (MDF) is a more expensive raw material from which kitchen sets are made. Due to the carbide resins they contain, MDF boards are more resistant to moisture and mechanical damage. The density of this material allows it to be used as a load-bearing base for sliding modules or doors more successfully, since it is more resistant to tearing out and loosening of holes than chipboard.
- Natural wood is the most expensive material for making cabinets. It has high strength and attractive appearance. This material requires careful care. It is recommended not to let the wood dry out or become too saturated with moisture, as this will deform its fibers and make it less durable.
- Plastic is rarely used to make pencil cases. This material is not susceptible to moisture and is easy to clean. Plastic is used to make decorative elements, as well as internal cabinet parts.
- Side panels for built-in kitchen appliances, handles, fasteners, load-bearing bases, external parts of the facade, and internal filling are made from metal.
Criteria for choosing modular furniture for the kitchen, tips for arranging it
When making doors or shelves for a pencil case, glass or transparent plastic is used. Glass facades can be covered with a pattern or made with stained glass decor.
laminated chipboard
MDF
Natural wood
Plastic
Metal
Glass
What it is
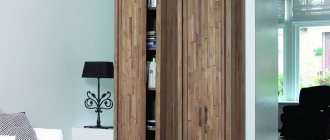
A pencil case is a rather unique piece of cabinet furniture, in which the height is much greater than the width. Overall, this product has modest dimensions. It will fit perfectly into the living room or hallway, and can also be placed in a children's room, bathroom and even in the kitchen.
Today, narrow cabinets have become very popular. Distinguished by their large height, they have door leaves of different types. The pencil case acts as an independent piece of furniture or in combination with other interior items
It is important here that the color of the product is combined with the prevailing palette in order to maintain harmony and comfort in the home
Oven cabinet designs
There are two main types of oven modules. Moreover, each of them has its own additional variation. The most common type is an oven under the hob. And the second, in my opinion more convenient, is an oven in a pencil case.
The design of the cabinet under the hob has two options - with a drawer at the bottom of the oven and with a drawer at the top of the oven. I will tell you about the pros and cons of each design in the following paragraphs.
The design of a cabinet in a pencil case, at eye level, has an option with a work surface above the cabinet and in a pencil case at eye level without a tabletop. I will tell you about the pros and cons of each design in the following paragraphs.
Peculiarities
Experts advise purchasing modular installations as storage systems. Spacious, you can not only place the necessary kitchen utensils in them, but also use the surface of the cabinet as a base for a countertop.
Single-level cabinets will look laconic and stylish. When choosing such a headset, you must clearly understand what you want to place in it. A matter of personal preference remains the selection of color, texture, number of shelves, racks, and retractable modules. A solid bottom row of furniture will create a comfortable work area where everything will be at hand. Models that are simple at first glance are suitable for restrained interior styles, such as high-tech, modern, loft, constructivism.
Source