Methods for connecting tabletop parts
Three types of connections for kitchen countertops are used:
- joint to joint without euro-saw;
- joint to joint using a euro saw;
- the use of a T-shaped profile made of aluminum alloy.
Euro-sawing is a method of processing the ends of a tabletop according to a pattern. That’s what it’s called – patterned.
In this case, the ends are cut on a milling machine. Some manufacturers, in order to reduce the cost of the work carried out, use a format-cutting machine for this.
The planes of the ends on such a machine turn out to be uneven with an allowance of a millimeter or more. Therefore, the result is an incomplete fit of the end planes and the appearance of gaps between the joined parts of the tabletop.
The ends processed on a milling machine may form a gap when joining, but it is very small - fractions of a millimeter. Therefore, it is not visible to the naked eye, and the surface appears solid.
But this is achieved under two conditions: the milling machine must be level, and the patterns must not be worn out. In addition, on dark countertops the joint with the euro saw is practically invisible.
Connecting the tabletop using a euro saw
Expert opinion
Romanova Ksenia Petrovna
Interior design expert and fabric store manager
But these two types of connection have several disadvantages. Since the euro saw is a locking connection, it is impossible to rotate the parts of the plane relative to each other - the integrity of the structure will be interrupted and a gap will form between the parts.
Therefore, if the corners in the kitchen are uneven, then when installing the kitchen set in the corner of the room there will be a gap between the wall and the countertop. If you try to close the gap by moving the plane, a gap will appear between the parts of the tabletop.
You can hide the gap near the wall with a table furniture plinth. But if the curvature of the angle is large, then this device will not help.
But, if a U-shaped set was ordered for the kitchen, then it will not be possible to solve the current problem by any means. Sometimes, if the curvature of the walls in the room is small, then it is better to install exactly along the walls, and leave gaps between the parts of the tabletop. They will subsequently have to be covered with a T-bar.
The third method of connecting pieces of countertops using a T-shaped profile is carried out without a Euro joint, because the connection is closed from above with a profile strip. It should be taken into account that the main requirement for docking is tightness. Therefore, the vertical post of the plank and the ends are treated with silicone sealant.
The aluminum profile has another important advantage in comparison with the euro saw. Most often, the parts of the countertop are joined in the area where the sink is installed, which is usually mounted in the corner, because this is where the utility lines are installed.
Eurozapil has the least protection from moisture, so there is always a possibility that the tabletop material will begin to swell at the joint. In this regard, the aluminum profile is excellent protection, because it is treated with sealant both at the joint and along the wings of the vertical strip.
In addition, it is almost impossible to disconnect such a connection. It can only be torn apart.
Therefore, if water gets under the profile, the wings of the horizontal bar will prevent the plastic from swelling.
How to make radius chipboard parts
In this article we will look at how and with what tools and devices radius (that is, having rounded) furniture parts are made.
As a rule, these are shelves and tabletops, although this is not an axiom; any elements of modern cabinet furniture can have various roundings. Let's start from simple to complex. Moreover, simplicity will be assessed by the necessary tool, and not by the labor intensity of the process (the relationship will be inversely proportional - the cheapest method has the greatest labor intensity at the lowest cost for tools and vice versa).
For marking in all cases we will need a pencil and a template (for example, a plate) or a compass. Also, almost everywhere (with the exception of small radii), we will need to saw off excess material with a jigsaw.
You can cut roughly and quickly - the main thing is that the cutting line does not affect the marking line, and also possible chips (that is, you need to step back from it by 2-5 mm).
If you are going to cover the end with an edging, especially a C-shaped one, then you can simply carefully saw off along the line with a fine-toothed file (for metal). Any chips that appear will be covered by edge overhangs. If you decide to cover the edges with an edge, then read on.
Method 1 - manual sanding
Using a sanding block, smooth the resulting cut to the marking line. The matter is quite tedious, and maintaining the perpendicularity of the edge relative to the face of the workpiece presents a number of difficulties. I’m not even talking about processing several workpieces at the same time.
But at the same time, it is possible to achieve good results if you wish (and lack a tool).
Method 2 - using a LSM
Mechanization option number one. In this case, the belt sander is placed on its side (as a rule, one of them is perpendicular to the belt) and the excess material is also sanded down to the marking line. The processing speed increases significantly, perpendicularity is at a level, and by stacking several identical workpieces on top of each other and fixing them, it is possible to produce identical parts.
Disadvantage (you can’t make a lot of exactly identical parts - the number is limited by the width of the tape)
Method 3 - using a router
When using a router, variations are possible:
Option one is to work according to a template. Either a part obtained by the previous method can be used as a template,
or a standard template prepared in advance. When passing with a straight cutter with a bearing, we simply copy the rounding, transferring it to the workpiece. (In the photo the template is under the details)
This method is optimal when producing a large number of identical parts (for example, radius shelves).
Option two is to use a compass - standard or homemade, from scrap materials (in the photo - a compass made from a standard rip fence).
The cut is carried out in several passes with a straight groove cutter. If exactly the same parts are required, then it is better to use a copy cutter - it will be more accurate.
In furniture production, both of the latter methods are used.
Source
The facades themselves will be curved tempered glass with a radius of 450 mm. I can mill chipboard parts for the bottom, top (R=460) and shelf (R=440) myself, but what should I do with the tabletop? Everything seems simple, but some theoretical questions lead to a dead end
Funtik wrote: if we pervert it, then what will the second, small, radius be and what is it actually needed for?
Funtik wrote: to pervert as many kitchen workers in our city do
You offend, it’s customary to do this everywhere! Do as in the 2nd picture, but you don’t need a small radius so deep, make it smaller. It’s hard to see in the photo, but there is still a small radius at the exit (shown by an arrow) - but here a 0.5 mm thick edge is used. With a 1 mm edge it would hardly have worked so unnoticeably.
Hello, I’m trying to design kitchen furniture myself. I haven’t heard of such a problem, I’m wondering about it.
I myself had the idea to round one corner. Therefore, I especially paid attention to how this was done in exhibition samples in various kitchen showrooms.
What I liked most was the use of a special plastic overlay profile for the curved section. It comes in different types of wood (I mostly came across these), but it also looks great on “marble” countertops. Apparently this cut is made precisely for gluing such a profile. I didn’t find out what kind of profile it is and where they get it, but it looks very good, you can’t glue the edge like that, it completely repeats the profile of the end of the tabletop and fits perfectly together.
Yes, that’s probably true, but I don’t understand why rounded facades often break (according to conversations).
Chepik, so what's the fun of a small anti-radius at the output? Technologically, why? The manager at the carpentry showroom immediately spoke negatively about the lack of a small radius, “well, the edge peels off very quickly, so we don’t do that.” I don’t understand why it should peel off faster.
Funtik wrote: so what's the fun of a small anti-radius at the output? Technologically, why?
Try cutting the edge at the angle you need, there will be almost a 3 mm black stripe, is that really necessary?
Funtik wrote: Does this happen to Made in Russia?
It happens. at least that's how we put it.
You can grind whatever you want with dope, don’t listen to these girls!
Funtik wrote: In general, where do they get edges?
Search. It is advisable to take it with glue already applied.
And why was postforming so annoying? 100% guarantee that moisture will not get onto the chipboard.
Funtik wrote: tabletop with straight cut
Who will do it and give a guarantee?
The second option slightly increased the second radius (but not its depth) and glued 0.4 mm PVC onto a waterproof transparent contact Moment. carefully cut it, sanded it with fine sandpaper, and strangely enough the black border is not visible at the transition
Joining countertops at an angle without a segment
The joint of the tabletops should be tight, with a minimum gap between the ends of the tabletops. This is difficult to achieve if the end of the tabletop has an oval and rounded front edge.
Expert opinion
Romanova Ksenia Petrovna
Interior design expert and fabric store manager
A more aesthetic option, with the claim to create a single surface of the tabletop, is an option called “euro saw”. It is suitable for chipboard countertops with any front edge.
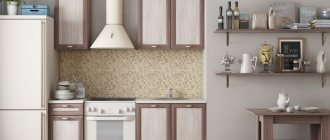
How to choose corner countertops for the kitchen
A corner kitchen is much more functional and convenient than others. If you equip everything correctly, you can save space and make this room comfortable.
The right approach to decorating a corner kitchen is not only about choosing materials and colors.
This is primarily the choice of countertop. What type of countertop can be used for a corner kitchen?
Joining tabletops through a connecting element
You can join chipboard countertops through a connecting element. To connect the tabletops through a special connecting element you need:
- Treat the open cut of the tabletop with acrylic sealant to prevent water penetration. The sealant is applied with a rubber spatula in one or two layers.
- The connecting element is attached to one of the ends of the tabletop. To protect against water ingress, sealant can be applied to the element shelf before fastening.
- The second tabletop can also be sealed (video 2).
- If necessary, the tabletops are pulled together (video 1).
Materials used
To install a kitchen covering, in addition to the corrugated sheeting itself, you will need the following materials:
- Aluminum connecting strip corresponding to the section and thickness and direction of rotation of the slab. Selected according to the characteristics of the slab (thickness, roundness).
- Ties - clamps per joint - 2 pcs. To connect the working surface, ties 100 mm long are needed.
- Silicone wood sealant to protect the ends of the tabletop from moisture.
Connections of table top parts.
See also Gray kitchen in the interior. Comparing the pros and cons
Features and Benefits
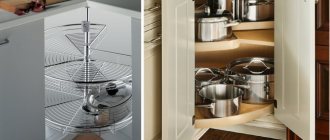
Thanks to its unique design, the corner countertop is considered an ideal solution for a small kitchen. Among the main advantages of this option are the following points.
- Ergonomics and the ability to rationally use free space. The work area, designed in the shape of the letter “L”, allows you to perform a huge number of operations. The hostess just needs to stand in the corner and she can easily reach various areas of the tabletop.
- Functionality. Today, manufacturers produce modern modules, under which many drawers can be placed, which makes them stand out qualitatively against the background of straightforward options. If you also make a hinged option above the corner one, this will greatly enhance the functionality of the headset.
- Possibility to divide surfaces. Thanks to the corner tabletop, you can visually divide the surface into several parts. For example, one will be used as a work area, and the other can be used to place household appliances or various accessories. This will look very convenient in cases where two people are working in the kitchen at the same time. Thanks to the corner tabletop, there will be no need to jostle, divide work areas, etc.
The only drawback of this option is that the tabletop is usually located far enough from the window, so there will be minimal natural light here. This problem can be solved with the help of lighting, which is installed under the upper cabinets.
Help me determine the radii for the table top
I was planning to make a computer desk. Here's what I picked for myself: " > But I can't decide on the countertop. I found two types of countertops online (photo). I plan to size 900*1400. But I can’t find out which radii to take. I will order the countertop where I will place the order for cutting the slab. I thought they would give me some advice, but no, they didn’t advise me, they said, “We’ll cut out all the radii.” It seems like R1.1 and R2.1 make the standard 50mm. Or in a different way? First of all, the radii R1.2 and R2.2,R2.3 are of interest. So who can help? Maybe someone has already done this?
Mila wrote: I drew the required life-size detail on newspaper (paper)
I want to do this too, but at least define the radius approximately, and then it will be easier to adjust. You don't want to do a lot of details. Make 2-3 drafts from the newspaper and choose what suits you best.
blin07 wrote: but at least approximately the radius,
blin07 wrote: at least approximately the radius
Hold
The company uses its own templates, usually their radii have restrictions and pitch
2blin07 Well, Mamik always has everything
But after I once had the part cut out according to the required radii, only the centers were slightly shifted, the mates weren’t drawn out perfectly, I don’t take any more risks, I give it to the cut.
Thank you very much!! I will try to cut it out of paper.
Another question is how stable the fastening of the tabletop to the table in Fig. will be. I mean the right side of the mount in the photo, marked with an arrow. Will the table top be stable and stable with such a SIDE slab?
blin07 wrote: Will the table top be stable and stable with such a SIDE slab?
Will. Furniture corners can still be placed, they will not be noticeable.
Mila wrote: only the centers were shifted a little, the conjugations were not created perfectly
When ordering, you just need to clarify that it’s not the radii that are important, but the smooth fit. And you can also clarify the parameters of important points on the drawing (for example, at the widest point, or at the narrowest.)
blin07 wrote: I mean the right side of the mount in the photo, marked with an arrow
If the front overhang bothers you, then my son has tables like this at work. He says he shouldn’t sit down and actively lean on this edge, otherwise everything is normal
mamik_25 wrote: sitting down and actively leaning on this edge is not worth it
In fact of the matter! Maybe it would be better to make the Right side rectangular to the very edge of the tabletop? Maybe it will be better? Or is it better to put another rail where the computer is?
mamik_25 wrote: When ordering, you just need to clarify that it’s not the radii that are important, but the smooth fit. And you can also clarify the parameters on the drawing
Can. I was just disappointed in their art of drawing
blin07 wrote: Maybe it would be better to make the right side rectangular to the very edge of the tabletop
By the way, it will look better then, IMHO. But if you leave it as in the picture, then you can make the tabletop thicker.
Mila wrote: you can make the tabletop thicker
In the picture in your first post it is written that the end is closed with a P-edge. Check the availability of 32mm P-edging or edges with the company where you plan to glue the edges. To save material, you can either order one large blank, in which you can place and cut two parts yourself; or use any other chipboard from the company's remnants at a reasonable price as a substrate (bottom part). In any case, first glue the two parts together and only then process the edge of the single part. In this case, the minimum edge bend radii may differ for a regular 19-22mm and for a wide edge. This needs to be clarified.
Varieties
Today, there are a huge number of options for countertops for corner kitchens that can be used when arranging the room. There are several of the most popular ones.
- A monolithic countertop is the most optimal model, since the coating is a single sheet. A distinctive feature of a solid kitchen countertop is that there are no joints between the segments, so leaks simply cannot happen. This greatly extends the life of the countertop.
- Covering in two parts. Perhaps this option is most preferable for corner kitchens. Most often, such designs are made in the shape of the letter “L”.
- From three fragments. The tabletop includes a trapezoidal element connecting straight sections. Most often, the dimensions of the central element are 90x90 cm; this is the most optimal option in terms of convenience and functionality.
Which countertop joining option should I choose?
The joining of tabletops can be done in two ways:
- The first is when the tabletop is joined without a segment. Two panels are joined at right angles on kitchen cabinets.
- The second option, docking with a segment designed for a corner cabinet of a kitchen set. This results in a rotation through the segment.
See alsoPostforming kitchen countertops: what is it, features, pros and cons, useful tips
Two parts
The joining of two parts is made at a strict right angle of 90˚ with a minimum gap. If for some reason the gap is large, then you can use a corner connecting element.
Corner tabletop in two parts.
See also: Stylish small kitchen design in 2021
Three parts
Joining the tabletop with a segment for a floor-mounted corner cabinet. The standard dimensions of the segment are 90 cm × 90 cm × 60 cm. The edge along the front comes in two types - rounded or straight.
Corner tabletop consisting of three parts.
Wood glue or silicone glue is usually used for joints, but for a more reliable fixation you can use a special metal compound.
See also Ceramic countertop for the kitchen: features, pros, cons, how to make it yourself.
One-piece
One-piece kitchen coverings are made to the measurements of kitchen cabinets. If the measurements are made accurately, then such a tabletop is simply placed on the modules and secured with self-tapping screws.
Solid countertop made of artificial stone.
IMPORTANT! A solid countertop without joints will last longer than its counterparts with joints.
See also: Kitchen layout as a dining-living room
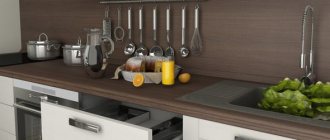
Materials
The choice of countertops must be approached with all responsibility, because a lot depends on this element of the kitchen set. It is he who is exposed to maximum load in the kitchen. Among the most popular materials that are used in the production process of countertops, the following options can be distinguished.
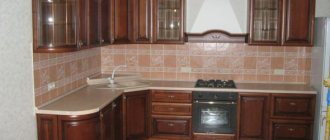
- Chipboard is the most profitable option from a financial point of view. In addition, it is lightweight, so there is no extra load on the headset. The main feature of this material is that a special composition is used in its manufacture. It makes it possible to increase temperature resistance and ability to withstand moisture. In addition, chipboard can be given almost any texture.
- MDF is much more expensive than chipboard, but this material can boast of its environmental friendliness. It should be noted that panels made of laminated boards require strong connection of the corners, otherwise moisture will get there, which will lead to swelling of the tabletop, as a result of which it will become unusable.
- Fake diamond. This tabletop looks solid and includes a large amount of natural chips. Such elements can also consist of acrylic resins. This option will be an ideal solution for people who rarely renovate their kitchen, because a stone countertop can last for many years, coping well with moisture, high temperatures and other negative factors.
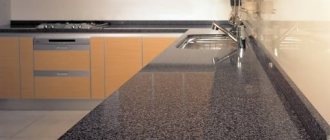
- Natural stone. These options are created for people who love everything natural and luxurious. This material is considered one of the most expensive and effective. In most cases, granite or quartz is used in the production process of this element.
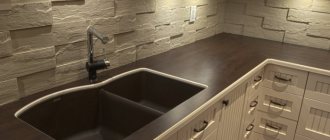
- Wood is a natural and environmentally friendly material. The main advantage of a wooden coating is that it looks impressive even without additional processing. The only drawback is that sometimes you will have to treat the coating with a special composition to protect it from moisture.
- Plastic options. If you need not just a budget, but a super-budget option, then pay attention to plastic countertops. Among the advantages are low cost and enormous possibilities in the field of decoration. However, such a material cannot boast of resistance to mechanical damage: it is extremely easy to scratch the coating.
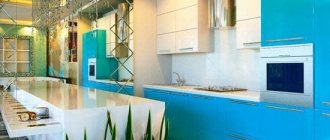
- Glass is considered the most optimal option in terms of price-quality ratio. At an affordable price, this material is wear-resistant and even after many years retains its original appearance.
How to choose?
In the process of choosing a countertop, in addition to the material, you need to pay attention to other points.
- The design of the model is important. It is best to choose monolithic options, as they are protected from moisture getting inside and therefore last much longer. This is why many people choose models made of artificial stone, because they do not have any joints.
- Product form. It is necessary to pay attention to the configuration of the countertop, the length and width of the elements, the presence of rounded or sharp corners, etc. There is no need to choose too narrow options in order to save space in the kitchen, since it will not be very comfortable to work on such a surface.
- In order for this element not to stand out, but to fit harmoniously into the design, you need to take into account its external characteristics . Color scheme and texture are important when decorating a kitchen. There are no clear recommendations here, but everything should be done in a single color scheme in order to thus support the style of the interior.
- If you buy a product made of stone , then you must check its thickness, as well as the possibility of restoration if there are scratches and other problems. Sometimes scratches and chips appear on such a surface, resulting in grinding. The thicker the tabletop, the more times you can restore the product.
- , options for corner countertops combined with bar counters have become increasingly popular This solution will be excellent for a room that does not have a lot of free space. In this case, the bar counter can easily replace the dining table. With this arrangement, it is better to give preference to a tabletop without seams to create a monolithic surface.
How to connect two parts of a corner tabletop using a seamless joining method, see the video below.
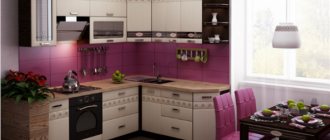
Corner kitchen styles
The corner worktop is very practical in the distribution of kitchen space; it will fit well into both large and small kitchens. The assortment of stores offers a great variety of design projects for corner countertops using a variety of coatings. In most cases, the corner tabletop is used as a dining table.
Creative countertop in kitchen design.
The most common styles from store catalogs:
- Classic style. This is an interior with ample space and the use of natural stone in the countertop. The most common colors are light colors, white, beige. Household appliances hidden behind the kitchen facades.
- The “High-Tech” style is a distinctive feature of the models - the severity of the lines, the absence of unnecessary lines, everything is laconic. Light metal structures are used. The most common color palettes: metallic, black, red, indigo, light green, sunny colors.
- The “Country” style is distinguished by the use of natural wood or MDF, chipboard, which goes very well with checkered or tiles.
- The Electric style is suitable for small L-shaped spaces. Possible varied combination of a corner dining table and decor in the whole kitchen. This style is for people who like to experiment and have a rich imagination.
The corner tabletop will easily fit into large and small spaces.
See also: Tips for decorating a window in the kitchen
How to make a corner tabletop yourself? Step by step guide
Your repost will change the Internet