Today, kitchen furniture manufacturers produce a whole arsenal of various products. However, this abundance does not always satisfy the consumer. In this case, a do-it-yourself wooden kitchen set will be an excellent alternative to purchasing ready-made kits.
DIY wooden kitchen in a modern style
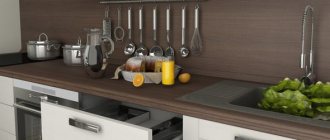
The kitchen is one of the most functional corners of the house, which means that increased operational requirements are placed on its furniture. When making kitchen furniture yourself, you should consider the following nuances.
– Small area. In old-built apartments, all the rooms are quite compact, and therefore it is important to carefully plan the rational organization of the workspace.
– Exposure to temperature changes and high humidity. Resistance to these factors is mandatory.
– High degree of exploitation. All coatings must be wear-resistant.
Do-it-yourself compact corner kitchen made of light wood
The benefits of making it yourself
DIY wooden kitchen for a country house
Personal participation in the furniture business provides a number of significant advantages.
– Personal quality control of products at each stage of production. Employees of furniture companies do not always show proper responsibility, and therefore their products often contain various defects. This can be avoided if you do the kitchen yourself.
– Freedom in choosing shapes, models and designs. You can design a kitchen set taking into account all your wishes.
– Selection of quality materials and fittings. The owner is interested in purchasing high-quality components for his future furniture.
– Cost savings. Labor costs are excluded;
– Pleasure from the process. Creating a kitchen out of wood with your own hands is a creative and exciting process.
Unusual kitchen in rustic style, made by yourself
Furniture series facades - modern
Modern furniture series facades - “Deaf”
Category: “EXTRA Finger-joined” Material: pine Price: RUB 1,850/sq.m Thickness: 20 mm
| Photo | Width | ||||
| Height | 296 mm | 396 mm | 496 mm | 596 mm | |
| 140 mm | 87 rub. | 116 rub. | 145 rub. | 174 rub. | |
| 280 mm | 173 rub. | 232 rub. | 290 rub. | 349 rub. | |
| 570 mm | 353 rub. | 472 rub. | 591 rub. | 710 rub. | |
| 716 mm | 443 rub. | 593 rub. | 742 rub. | 892 rub. | |
| 998 mm | 617 rub. | 826 rub. | RUB 1,035 | RUB 1,243 | |
| 1200 mm | 742 rub. | 993 rub. | RUB 1,244 | RUB 1,495 | |
| 1500 mm | 928 rub. | RUB 1,241 | RUB 1,555 | RUB 1,868 | |
| 1800 mm | RUB 1,114 | RUB 1,490 | RUB 1,866 | RUB 2,242 | |
| 2000 mm | RUB 1,237 | RUB 1,655 | RUB 2,073 | RUB 2,491 | |
Modern furniture facades - “under glass”
Category: "EXTRA Spliced"
| Photo | Width | ||||
| Height | 296 mm | 396 mm | 496 mm | 596 mm | |
| 570 mm | 353 rub. | 472 rub. | 591 rub. | 710 rub. | |
| 716 mm | 443 rub. | 593 rub. | 742 rub. | 892 rub. | |
| 998 mm | 617 rub. | 826 rub. | RUB 1,035 | RUB 1,243 | |
| 1200 mm | 742 rub. | 993 rub. | RUB 1,244 | RUB 1,495 | |
| 1500 mm | 928 rub. | RUB 1,241 | RUB 1,555 | RUB 1,868 | |
| 1800 mm | RUB 1,114 | RUB 1,490 | RUB 1,866 | RUB 2,242 | |
| 2000 mm | RUB 1,237 | RUB 1,655 | RUB 2,073 | RUB 2,491 | |
Modern furniture series facades - “Lattice”!!! Out of production (sale)!!!
Category: "EXTRA Spliced"
| Photo | Width | ||||
| Height | 296 mm | 396 mm | 496 mm | 596 mm | |
| 570 mm | — | — | 551 rub. | 662 rub. | |
| 716 mm | — | — | 693 rub. | — | |
| 998 mm | — | 771 rub. | — | — | |
Modern furniture series facades - “Deaf”
Category: “EXTRA Solid” Material: pine Price: RUB 2,190/sq.m Thickness: 20 mm
| Photo | Width | ||||
| Height | 296 mm | 396 mm | 496 mm | 596 mm | |
| 140 mm | 100 rub. | 134 rub. | 167 rub. | 201 rub. | |
| 280 mm | 200 rub. | 267 rub. | 335 rub. | 402 rub. | |
| 420 mm | 300 rub. | 401 rub. | 502 rub. | 603 rub. | |
| 570 mm | 407 rub. | 544 rub. | 681 rub. | 819 rub. | |
| 716 mm | 511 rub. | 683 rub. | 856 rub. | RUB 1,028 | |
| 998 mm | 712 rub. | 952 rub. | RUB 1,193 | RUB 1,433 | |
| 1200 mm | 856 rub. | RUB 1,145 | RUB 1,434 | RUB 1,724 | |
| 1500 mm | RUB 1,070 | RUB 1,432 | RUB 1,793 | RUB 2,155 | |
| 1800 mm | RUB 1,284 | RUB 1,718 | RUB 2,152 | RUB 2,585 | |
| 2000 mm | RUB 1,427 | RUB 1,909 | RUB 2,391 | RUB 2,873 | |
Modern furniture facades - “under glass”
Category: "EXTRA Whole"
| Photo | Width | ||||
| Height | 296 mm | 396 mm | 496 mm | 596 mm | |
| 570 mm | 407 rub. | 544 rub. | 681 rub. | 819 rub. | |
| 716 mm | 511 rub. | 683 rub. | 856 rub. | RUB 1,028 | |
| 998 mm | 712 rub. | 952 rub. | RUB 1,193 | RUB 1,433 | |
| 1200 mm | 856 rub. | RUB 1,145 | RUB 1,434 | RUB 1,724 | |
| 1500 mm | RUB 1,070 | RUB 1,432 | RUB 1,793 | RUB 2,155 | |
| 1800 mm | RUB 1,284 | RUB 1,718 | RUB 2,152 | RUB 2,585 | |
| 2000 mm | RUB 1,427 | RUB 1,909 | RUB 2,391 | RUB 2,873 | |
Deciding on design and construction
Simple and reliable wooden kitchen frame
Particular attention should be paid to the design of the kitchen frame. Kitchen cabinets come in frame and frameless varieties. In frame ones, the frame serves as the basis, making the structure quite stable and durable. It should be noted that the frame is not the most common type of facade for wooden furniture. For a DIY kitchen set, a frameless façade is more suitable. In this design there is no base frame, and the doors are fixed directly to the frame. The absence of a frame significantly expands the cabinet space, making it more convenient and functional. It is important to remember that the appearance of such a kitchen set will be a little unusual. Therefore, adherents of traditional forms are better off opting for frame furniture.
The process of assembling a frame kitchen on site
As for the frames themselves, they also have different variations. The most common are prefabricated and glued. Prefabricated frames are cheaper, but lower quality. A responsible master will not skimp on quality and will opt for a glued frame.
DIY installation of a finished kitchen frame
Choosing the right design is also very important. It must be carefully considered, taking into account the placement of the stove, oven, sink, dishwasher and washing machine. The main design highlight of DIY wooden items is the emphasis on naturalness, simplicity and environmental friendliness. By embodying this idea, the product acquires its true meaning, uniqueness and character. Since the entire composition is a complex and intricate system, it is better not to overload its individual parts with decorative delights. The cozy texture of wood more than compensates for such minimalism.
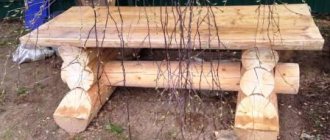
Original DIY wooden kitchen in rustic style
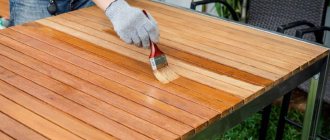
Technology for burning wood at home
Designers and consumers are attracted by the aesthetic appearance of the resulting material - the maximum revealed wood texture, unique in each case.
By the way, burnt wood can have different colors, and not just black or brown-brown: during finishing processing, the use of oils of different colors is allowed. Burnt wood is appreciated by those whose style is individuality and creativity. Metal fences: types and areas of use The fence also requires more careful maintenance. In order for it to serve for a long time and remain as beautiful as after installation, it must be tinted or coated with anti-corrosion agents at least once a year.
Required Tools
Tools for assembling a kitchen set with your own hands
To work independently on an array, you will need the following equipment:
– hacksaw for cutting;
– tape measure for taking measurements;
– confirmations;
– screwdriver, emery sheet, hexagon, primer;
– a manual router – you will need it in order to efficiently profile the edges and holes for fittings;
– Forstner drill;
– level for accuracy of placement of parts;
– iron – it helps to glue edge tapes well;
- electric drill;
– jigsaw;
– plane (preferably electric).
Manufacturing process: step-by-step instructions
- Preliminary preparation
Before you begin assembling it yourself, you need to prepare all the components and parts of the future array. They are cut out from the selected material using a jigsaw. Their saw cuts need to be sanded. Sandpaper works well for this purpose. To prevent moisture and mold from entering, a melamine edging tape is placed on each of the cuts. In order for the dimensions of all elements to be clearly verified, it is advisable to create a cutting map. There are special services for this on the Internet. This preliminary work will allow you to avoid errors in cutting. In addition, this diagram will take into account the size of the saw cut.
The initial stage of the kitchen furniture manufacturing process
- Assembly of elements
Assembling upper cabinets in the kitchen
After taking into account all the measurements, individual parts and elements have been prepared, they need to be laid out in order of assembly. This will make the assembly process more streamlined.
Kitchen cabinets are assembled according to the following algorithm:
- If there are drawers, then the guides are installed first. In this case, be sure to use a level.
- If shelves are provided, you need to drill holes to attach them.
- Separate holes are drilled for inter-wall fastening.
- Its side walls are attached to the bottom of the cabinet.
- The top part is attached.
- The legs are attached.
Once all the products are assembled, you can begin their installation.
Kitchen furniture assembly
- Installation
If the kitchen assembly process coincides with the renovation, then all construction work should be completed before installation begins. The walls and floor of the room must be prepared for fastening furniture. You can take a piece of MDF as an apron. Installation usually begins with the lower elements. To do this, use a level. After all the products are connected to each other (Euro-ties are used for this), a common wall is fixed behind the entire array.
DIY kitchen installation and assembly
In the countertop you need to mark the location of the stove, work surface and sink. At each section, corresponding holes are cut out and treated with construction sealant. The tabletop itself is attached with self-tapping screws to the finished cabinets.
Installing a countertop is a responsible process
After this, the upper elements are installed. The most optimal distance between the tabletop and the bottom of the upper cabinets is 650 mm. In order to determine the height of the canvas for fastening the upper elements, it is necessary to add to the indicated distance the height of the cabinets and 10 mm occupied by the fastening structure. The upper tiers are secured with special canopies installed on the rear walls.
At the end of the kitchen installation, you fix the doors in the open position with your own hands. To do this, the door hinge is fixed on the door, and then mounted in the wall.
Installed doors in open position
After installing the headset itself, electronics, built-in elements and various accessories (handles, rails, dryers, etc.) are installed.
Installation of an oven and built-in hob
Furniture series facades - figured
Curved furniture series facades – “Deaf”
Category: "EXTRA Spliced"
| Photo | Width | ||||
| Height | 296 mm | 396 mm | 496 mm | 596 mm | |
| 140 mm | 87 rub. | 116 rub. | 145 rub. | 174 rub. | |
| 280 mm | 173 rub. | 232 rub. | 290 rub. | 349 rub. | |
| 570 mm | 353 rub. | 472 rub. | 591 rub. | 710 rub. | |
| 716 mm | 443 rub. | 593 rub. | 742 rub. | 892 rub. | |
| 998 mm | 617 rub. | 826 rub. | RUB 1,035 | RUB 1,243 | |
| 1200 mm | 742 rub. | 993 rub. | RUB 1,244 | RUB 1,495 | |
| 1500 mm | 928 rub. | RUB 1,241 | RUB 1,555 | RUB 1,868 | |
| 1800 mm | RUB 1,114 | RUB 1,490 | RUB 1,866 | RUB 2,242 | |
| 2000 mm | RUB 1,237 | RUB 1,655 | RUB 2,073 | RUB 2,491 | |
Curly furniture facades - “under glass”
Category: "EXTRA Spliced"
| Photo | Width | ||||
| Height | 296 mm | 396 mm | 496 mm | 596 mm | |
| 570 mm | 353 rub. | 472 rub. | 591 rub. | 710 rub. | |
| 716 mm | 443 rub. | 593 rub. | 742 rub. | 892 rub. | |
| 998 mm | 617 rub. | 826 rub. | RUB 1,035 | RUB 1,243 | |
Curved furniture series facades - “Lattice”!!! Out of production Sale!!!
Category: "EXTRA" Material: pine Price: 1950 rub/sq.m Thickness - 20 mm
| Photo | Width | ||||
| Height | 296 mm | 396 mm | 496 mm | 596 mm | |
| 570 mm | — | 440 rub. | — | — | |
| 716 mm | — | — | 693 rub. | — | |
| 1200 mm | — | — | — | RUB 1,395 | |
| 1500 mm | 866 rub. | — | RUB 1,451 | — | |
| 1800 mm | — | RUB 1,390 | — | — | |
| 2000 mm | — | RUB 1,544 | RUB 1,934 | — | |
Curved furniture series facades – “Deaf”
Category: “EXTRA Solid” Material: pine Price: 2,300 rub/sq.m Thickness - 20 mm
| Photo | Width | ||||
| Height | 296 mm | 396 mm | 496 mm | 596 mm | |
| 140 mm | 114 rub. | 153 rub. | 192 rub. | 230 rub. | |
| 280 mm | 229 rub. | 306 rub. | 383 rub. | 461 rub. | |
| 420 mm | 343 rub. | 459 rub. | 575 rub. | 691 rub. | |
| 570 mm | 466 rub. | 623 rub. | 780 rub. | 938 rub. | |
| 716 mm | 585 rub. | 783 rub. | 980 rub. | RUB 1,178 | |
| 998 mm | 815 rub. | RUB 1,091 | RUB 1,366 | RUB 1,642 | |
| 1200 mm | 980 rub. | RUB 1,312 | RUB 1,643 | RUB 1,974 | |
| 1500 mm | RUB 1,225 | RUB 1,639 | RUB 2,053 | RUB 2,467 | |
| 1800 mm | RUB 1,471 | RUB 1,967 | RUB 2,464 | RUB 2,961 | |
| 2000 mm | RUB 1,634 | RUB 2,186 | RUB 2,738 | RUB 3,290 | |