In the 5th grade, children have a very interesting subject - technology, in which they make models with developed interior designs for different rooms. In this article we want to offer an option for creating a kitchen project. This task is very useful for a child, as it develops his imagination, creative thinking and creativity. Of course, for the project to turn out beautiful and neat, a fifth grader will not do without the help of an adult. Modeling chests of drawers, a refrigerator, a stove, and dishes are complex processes, so be prepared, dear parents, to take part in the development of a kitchen design.
Options for children's kitchen sets
Children's homemade kitchens can be simple, from cardboard boxes and stools, or assembled from decorated wood boards. Some craftsmen create real masterpieces for their kids. It all depends on your abilities, skills and preferences, as well as the availability of free space in the children's room.
Children's kitchens in the photo
Children's kitchen made from cardboard boxes - the simplest homemade option
A children's kitchen can be made from a wooden stool, equipped with hooks and handles
Kitchen set made from cardboard boxes: cabinets, hood, refrigerator and microwave
An original children's kitchen is made from an old nightstand
A homemade children's kitchen assembled from fiberboard sheets will last longer than the cardboard version
Any old furniture will be useful for making a children's kitchen.
A children's kitchen can be made from plywood and equipped with a lighting
My dream kitchen 5th grade technology drawing
It is advisable that before making a three-dimensional project, the child sketches his idea on a piece of paper. This drawing may look like the one shown in the picture above.
The layout of furniture and decorative elements in the kitchen can look like this:
DIY structures for the street or cottage
For outdoor games, you can also make a kitchen corner. Children love to play with water, so a good solution is to add a sink to the design. You can wash dishes and toys in it without fear of spilling the contents or getting splashed.
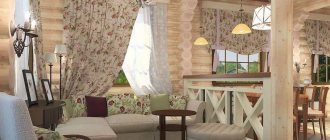
It is better to make a kitchen for a summer residence from moisture-resistant materials. The design should be simple and functional. A small kitchen corner with shelves and a sink can be mounted directly on the wooden wall of a country shed.
The basis of a children's kitchen for games in the country is the wall of a barn
When building a play area with a kitchen, you can use wooden blocks and remnants of boards that were not used for their intended purpose.
Even a novice master can make a country version of a summer kitchen on logs
Manufacturing stages
Products made from thick paper differ in shape, size and complexity of assembly. Regardless of the purpose of the design or the number of components, the manufacturing stages for each of them are the same. The step-by-step instructions include several mandatory points.
Create a drawing
The first step is to take measurements of the place or room where the furniture will be located. According to the parameters, calculate the dimensions of the desired product. Next, draw a drawing of the future furniture on an A4 sheet, be sure to indicate all the obtained values, observing the scale. You can do all this in a special program if you have experience working with it.
You can take ready-made drawings for furniture manufacturing and adjust them according to your wishes and measurements.
Regardless of how the diagram is executed - manually or using a program, it must contain a three-dimensional image of the object, general view projections from above, side, back, as well as separate projections of the constituent elements indicating the exact dimensions. Then the drawing is transferred to sheets of cardboard using a pencil, tape measure and ruler. You can use ready-made patterns; just place them on a sheet of cardboard and trace them with a pencil.
Instructions for installing furniture hinges, the nuances of their adjustment
Before starting work, it is important to make a drawing of the future product
Manufacturing of parts
The raw materials for the manufacture of all elements must be smooth and without creases, since it will be impossible to straighten them later. Each detail is drawn separately using a pattern or projection from the main drawing. Then it is cut out with a stationery or construction knife. The sections must be wiped down and covered with paper or tape.
The patterns should mark the folds and grooves, which are also cut out.
Strengthening the structure
Many novice craftsmen are interested in how to make cardboard furniture durable. To do this, you should follow simple rules:
- protect the finished product from moisture and increase its strength by applying parquet varnish to the surface;
- maintain symmetry, since asymmetrical furniture is less stable;
- take dark cardboard - it is stronger than light cardboard;
- increase the number of transverse inserts, as well as the layering of the part by adding sheets;
- cover the edges with craft paper;
- if necessary, use stiffeners to strengthen the structure.
Kraft paper is a type of wrapping material that is made from wood and is highly durable.
Parquet varnish will protect the surface of the product from moisture and increase its strength.
Dark cardboard is stronger in operation than light cardboard
You can strengthen the structure by gluing the edges of the product with kraft paper
Assembly
Before assembly, you should check all parts for possible defects. If there are dents in some places on the cardboard, they need to be filled. Further finishing will hide all inaccuracies. During the assembly process, all parts can be glued, inserted into grooves or extended. The latter method is used to strengthen the structure and give it optimal thickness. Elements assembled from several layers of cardboard must be placed under a press after gluing and left to dry for a day. Upon completion of assembly, the resulting ribs are treated with kraft paper.
Grooves and stiffeners must be coated with glue, thereby extending the service life of the structure.
Insert parts
Glued elements
Extended design
Dent putty
Pasting the edges of the product with kraft paper
Decoration
Having completed the assembly, you should start working on the external design of the structure. Decor options are selected individually:
- finishing with fabric, patterns (decoupage), decorative stone;
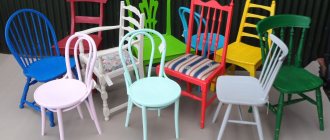
- painting with acrylic paints;
- pasting with wallpaper, colored paper.
Nuances of making furniture drawings, review of useful programs
Possible options can be used individually or combined. After finishing decoration, it is recommended to coat the product with varnish to secure the result.
Fabric finish
Painting with acrylic paints
Pasting with wallpaper or colored paper
Suitable materials
The simplest option is a kitchen made from cardboard boxes. Even a mother can make it, armed with tape, a stationery knife, self-adhesive film, paints and, of course, imagination.
Making a children's kitchen from cardboard boxes can be done by any craftsman
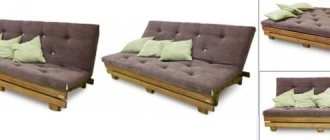
The next option, which mom can also handle on her own, is a kitchen in the form of a cover for a chair, table and other base. Sewing skills are required here.
The kitchen in the form of a chair cover is simple to implement and does not require male strength
If dad gets down to business, the list of building materials increases significantly:
- wooden boards, chocks;
- plywood;
- chipboard and fibreboard sheets;
- old furniture or parts thereof.
Be careful! The main thing when creating a kitchen is the safety of the child. The structure must be well secured, no sharp objects, exposed wires or small parts.
Play corner made of chair and cover
The cover kitchen option is very relevant for small apartments. This design helps save space and money at the same time.
Any mother can make a kitchen chair cover
To create such a kitchen you will need:
- scissors;
- ruler;
- a sheet of thick paper or cardboard;
- cotton fabric for the base - 2 m;
- fabric for curtains - 50 cm;
- fabric for side pockets - 50 cm;
- scraps of colored material for functional elements (windows, handles, oven doors, burners);
- fabric for edging the cover - 8 m;
- hooks;
- strip of fabric with Velcro;
- large buttons - 4 pcs.;
- sewing machine;
- iron;
- pencil or felt-tip pen.
- Measure the dimensions of the chair on which the cover will be placed (A - height from the floor to the seat, B - width of the chair in front, C - depth of the seat, D - width of the seat at the back, E - height of the back).
Measure the chair and cut out the base
Cut the fabric, leaving some extra for the seams.
Cut out the required number of burners for the fabric stove
Sew the burner handles to the side of the cover
Sew the oven door from two pieces of fabric and make a piping around the edges
Mark the boundaries of the door on the cover
The window will be located on the back of the chair
Sew a curtain for a window from colored fabric
Sew a pocket for kitchen utensils to the side of the cover
Sew the cover on a machine, add a contrasting edging on the sides
With the help of fixing tapes, a child can learn to tie knots and bows
Kids will really like playing with this kitchen.
Homemade version from a wooden bedside table
To make a wooden kitchen you will need male strength. Use an old bedside table as a base.
An old bedside table is a suitable basis for creating a children's kitchen
To work you will need:
- wood paint;
- jigsaw;
- plastic bowl;
- switches for gas burners;
- assembly adhesive;
- faucet for washing;
- curtain fabric;
- wire for fastening.
Step-by-step instruction.
- Remove the doors from the nightstand and paint it.
- Cut a hole and insert a plastic bowl.
Remove the doors, paint and make a hole for the sink - Paint gas burners on the top panel.
- Glue the switches.
- Secure the faucet near the sink.
Draw the burners, glue the switches, attach the faucet to the sink - Insert self-tapping screws under the tabletop on each side and secure the wire with the curtain to them.
Add a curtain to decorate your kitchen - The small children's kitchen is ready.
A children's kitchen made from an old nightstand is suitable for games in the country house or apartment
Incredible kitchen made from boxes - even adults will love it
Beautiful and simple Mushroom applique. Templates can be obtained for free. Details in my post here.
Hello! Tell me, have you tried to make your children’s playroom yourself? If you have experience in this matter, share it in the comments! I and all readers will be very grateful to you for this! And, continuing the topic, today I will tell you what needs to be done to make a kitchen made of cardboard for a child with your own hands. Of course, everyone can participate in the manufacturing process, both adults and our main assistants, children. After all, everything is done for them.