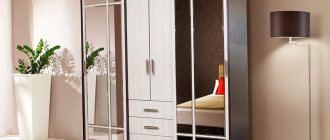
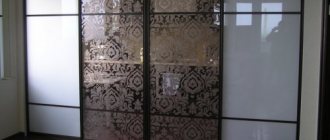
Self-assembly of furniture helps to significantly save money. It’s good if a person has simple skills in assembling objects. It will be useful for beginners to learn how to assemble a wardrobe themselves. Step-by-step installation steps for each element of the product will allow for quick installation.
Among all types of clothing storage products, the leading place today is occupied by the wardrobe. It is multifunctional, spacious, comes in different shapes and sizes, and does not require additional space to open the doors. That is why most people, when choosing between a wardrobe and a sliding wardrobe, prefer the latter option.
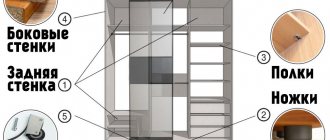
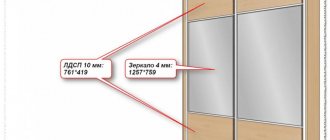
Assembling a sliding wardrobe with your own hands in the video presented is not at all difficult - all you need to do is have the necessary tools in your apartment and be familiar with the design of the product. Often, when ordering a cabinet without the services of assemblers, the company sends a document that contains a drawing of the product. This also lists all the component parts, which are numbered in order. By looking at the drawing and comparing the elements of the cabinet, you can intuitively assemble the product.
To work according to the sliding wardrobe assembly diagram, you will need the following tools:
- building level - to check the levelness of the installation parallel to the floor;
- corner;
- rubber and regular hammer;
- straight and Phillips screwdriver;
- roulette;
- pencil and ruler;
- screwdriver;
- wood drill - to make holes;
- metal drill – for installing an aluminum base.
Additional tools for assembling furniture yourself include a jigsaw, drill and sandpaper. It is also necessary to prepare all the details of the cabinet, which means checking the diagram to ensure that the number of items matches. Pay attention to the fittings and mechanisms: if there are drawers in the closet, ball guides should be included.
Doors for the product are often supplied ready-made. They are pre-installed with rollers and a strip of soft material. The door must be installed in the final phase.
Tools
Assembly order
The base (bottom sheet of laminated chipboard) is screwed with euroscrews (confirmats) to two longitudinal legs made of laminated chipboard. The supporting part must have an edge so that the material does not swell from moisture while standing on the floor. You can immediately nail the thrust bearings - 3 pieces per strip.
The work takes place on the floor and therefore the box is assembled face down
.
You need to attach the middle post to the base of the Basya cabinet and then the side ones, and in order not to return to the bottom again, put plugs in the holes of the Euroscrews. Don't forget to install heel supports on the side racks of the cabinet.
The next step is to tighten the top lid of the cabinet and install the plugs. To give rigidity to the box, install shelves that are tightened with Euroscrews between the sections (in some configurations such shelves are not available).
We measure the diagonal and nail the back wall
Before nailing the back wall, make sure that the wardrobe is rectangular in shape. This is done with a square, placing it on the corner of the cabinet, or using a tape measure to measure the diagonals. You can use two options at once to make it more accurate. All angles should be equal to 90º, and the diagonal of the two sides should be the same. In case of unevenness, it is necessary to level the housing by moving it to a smaller direction.
If the box has the exact shape and details, then you can nail the back wall of the cabinet. The reinforcement wall is attached not only around the perimeter, but also to the shelves.
Now the structure should be rigid and can be installed in a vertical position.
Installation and configuration of doors
Two running rollers are screwed to the top of each door. It happens that mirrors come attached to the middle door of Basya's closet, but if the manufacturer did not glue it, then you will have to do it. To do this, you need to attach a mirror and outline it in a circle. Then plant it on liquid nails.
Now you need to install the lower guides and upper rails for the rollers. Stepping back 2 cm from the edge, screw the guide at the bottom and the rail at the top in the same way.
Then carefully insert the doors into the grooves of the profile. The motion of the rollers should be soft, and the doors should fit well and not touch or cling to anything. In case of poor running, the rollers can be adjusted. After this, screw the rollers with a fixing screw. We screw the guides onto the lower parts of the doors. Now we install the top front strip and install shelves and a rod for dresses. The Basya cabinet is ready for use.
Can be made to order;
2000*1200-4700rub
2000*1100-4600rub
2000*1000-4500rub
Delivery in St. Petersburg and the Leningrad region the next day after ordering. Payment upon receipt. Payment method: Cash upon receipt, bank card at the address, bank transfer for legal entities. Delivery within St. Petersburg - 600 rubles. to the entrance Delivery rates in the Leningrad region can be clarified with managers when placing an order. Pickup of the finished order from 2 Bestuzhevskaya str., from 11 to 21 Furniture is delivered unassembled, in original packaging. Assembly by our specialists - 10% of the cost of furniture, but not less than 500 rubles. Ascent on foot - 80 rub./box/floor. The number of boxes of a specific module must be specified when ordering. Elevator ride - 100 rubles per box. ORDERING FURNITURE FROM 15000 RUR DELIVERY WITHIN THE CITY FREE DELIVERY Social discount 7% The discount is provided to pensioners, disabled people, labor veterans, combatants, families with more than 2 children. The discount is provided to the beneficiary buyer PERSONALLY upon presentation of a “pension” or other relevant document. The discount does NOT apply; for family members of the beneficiary, for discounted and promotional goods.
We also accept orders for custom-made furniture, taking into account your budget.
We send furniture to other regions by transport companies.
Hello again. Today we will assemble our wardrobe, we will do this according to the instructions below.
So, we took the parts from the cut. We didn’t want to glue the edge ourselves, so we ordered gluing there, especially since the price of gluing is not that high.
We also purchased all the necessary fittings for the cabinet and the necessary fasteners.
The floor turned out to be not entirely level, so the cabinet had to be built not on a plinth, but on adjustable legs; accordingly, the detailing was slightly altered.
The introductory part is finished, let's start assembling.
How to assemble a wardrobe?
Assembling the Basya sliding wardrobe does not present any difficulties for a person who knows how to use tools. Such furniture can be placed not only in the bedroom, but also in the country house or in the hallway; everywhere this furniture will look completely relaxed and organic.
“Basya” perfectly matches the format of budget furniture. Compared to other Basya models, it costs two and a half times less, but it also looks very presentable.
Instructions for assembling the wardrobe are included with each unit of product, but difficulties still arise from time to time in its layout, especially in the question of how to assemble a wardrobe for a beginner. In addition to the manual, it is recommended to watch the video materials on the website, which show in detail how to assemble the Basya wardrobe.
Wardrobe diagram "Basya"
The “Basya” cabinet is assembled as follows:
- First, the frame is installed. All cabinet components are marked and numbered, so it will be easy to work. Assembly begins from the bottom corner. The side wall is connected to the bottom using self-tapping screws, and another wall is installed in parallel nearby. Before doing this, it is better to look at the photo in the instructions.
- After the frame is assembled, the back wall comes into play, which is attached with small nails to the assembled base. Also, instead of nails, 3 mm screws are often used.
- The product should be assembled from top to bottom, the wall is fixed on both sides, it gives rigidity and stability to the entire structure. It is very important to control that there are no distortions. For these purposes, use the following tool:
- construction square;
- good meter level;
- roulette;
- plumb line
If there is the slightest distortion, the door will not close well and it will be impossible to fully use the cabinet.
1 2 3
The assembled frame is prepared, which means it’s time to attach the back panel; it is attached both from the outside and from the inside. After completing this assembly phase, it is recommended to test how smoothly all the elements are fastened, and if something is done incorrectly, this will negatively affect the operation of the product, and the service life will be noticeably reduced.
- After the frame is installed, the installation of the shelves begins. They are fixed with the help of special cylindrical wooden blocks, which are called chopiks. Moment glue, screws, and dowels are also actively used. It should be noted that all markings are on standard parts, so the process of installing blocks does not present any difficulty.
- The most important step is the door layout. It is very important that there are no distortions, then the door will close and open normally without effort. In this case, it is important to install the guides correctly.
- After the door is installed, a mirror is mounted on it. How to attach a mirror, it is recommended to look at the assembly diagram of the Basya sliding wardrobe with a mirror.
- After the assemblers have completed the main work, the fittings can be installed.
As you can see, the description is quite accessible even for a primary school student. You can determine the correct installation of the Basya wardrobe by some characteristic features:
- the product rests on the floor, without any distortions;
- there are no gaps at the joints;
- the door opens and closes silently without any effort.
Having made sure that everything is fine, the “Basya” cabinet can be safely used, loading it with contents.
Can be made to order;
2000*1200-4700rub
2000*1100-4600rub
2000*1000-4500rub
Delivery in St. Petersburg and the Leningrad region the next day after ordering. Payment upon receipt. Payment method: Cash upon receipt, bank card at the address, bank transfer for legal entities. Delivery within St. Petersburg - 600 rubles. to the entrance Delivery rates in the Leningrad region can be clarified with managers when placing an order. Pickup of the finished order from 2 Bestuzhevskaya str., from 11 to 21 Furniture is delivered unassembled, in original packaging. Assembly by our specialists - 10% of the cost of furniture, but not less than 500 rubles. Ascent on foot - 80 rub./box/floor. The number of boxes of a specific module must be specified when ordering. Elevator ride - 100 rubles per box. ORDERING FURNITURE FROM 15000 RUR DELIVERY WITHIN THE CITY FREE DELIVERY Social discount 7% The discount is provided to pensioners, disabled people, labor veterans, combatants, families with more than 2 children. The discount is provided to the beneficiary buyer PERSONALLY upon presentation of a “pension” or other relevant document. The discount does NOT apply; for family members of the beneficiary, for discounted and promotional goods.
We also accept orders for custom-made furniture, taking into account your budget.
We send furniture to other regions by transport companies.
A sliding wardrobe is a universal piece of furniture. You can compactly place a lot of things in it, leaving the usable area of the apartment free. The only negative: assembling a wardrobe from master furniture makers is expensive. However, you can save money by assembling the wardrobe yourself.
Installation Guide
Before assembling the cabinet, prepare the necessary tools and parts
Before you start assembling the Maestro sliding wardrobe, you should read the step-by-step instructions.
- In the package you should find:
- leading fasteners;
- racks that secure the sidewalls;
- internal bulkheads.
It is necessary to find the main structural elements, so that the assembly algorithm for this product will be approximately clear.
- Assembly of the main block, frame.
When assembling the Maestro sliding wardrobe, first of all, you should mount the unit, which is located at the bottom. The massive slab is screwed to stands that are located along the elongated side. The fastening elements are self-tapping screws (confirmants), which work quite effectively. The hex key is sold with the cabinet and is always included in the packaging.
- Installation of internal partitions. The lower ends of the partitions have holes; chopiks (small cylindrical wooden elements) are inserted and secured into them. Vertical bulkheads are being installed (someone may need to help, the elements weigh a little, but they are bulky).
- Installation of shelves. The installation of shelves is very important, they give rigidity to the entire structure, in this case they perform the same role as the ship’s frames. The shelves can be “mounted” on self-tapping screws, this will be quite reliable.
- Installation of racks on the side, installation of the cover. The final step is to install the racks and the lid on top. These nodes are installed almost simultaneously. First of all, the side elements are mounted; at the bottom they are secured with self-tapping screws. Then the top cover is installed; in this case, you should carefully study the drawing so that all the joints and holes match.
- Centering of the structure. You should take a tape measure, a square and a two-meter level. Diagonals are measured and angles are set. The structure is secured with self-tapping screws.
- Installation of chipboard sheets. The sheets are nailed on the back side of the product. These elements also give the cabinet additional stability and rigidity. The sheets have different treatments and are often coated with a pleasant color scheme. They are nailed using small nails that are included in the package. As a rule, markings on where to nail such nails are present on the panels.
- The most labor-intensive and crucial moment is the installation of rails. At the bottom of the rail there are special recesses along which the wheels move; this process should take place without any effort. The holes in the guides are already there; you just need to secure them correctly using self-tapping screws.
As you can see, the “Maestro” cabinet has a simple assembly diagram
Care and precision are required; if there is an error during installation, the doors will move with difficulty or will jam
Assembly instructions
In order to start assembling according to the diagram, you must first unpack all the parts. One box contains doors, another contains walls, and the third contains a mirror.
Assembling a wardrobe involves the step-by-step implementation of the following steps:
- First of all, we unpack the box with the walls and begin to assemble the frame, arranging the parts so that the assembled structure is face down.
- To fasten the parts to each other, you need to use special screws - confirmats or, as they are also called, Euroscrews. This fastening element does not destroy the material and is able to withstand pull-out and bending loads.
- We begin mounting from the bottom corner, attaching the side wall to the bottom part.
- We install a parallel wall and a stand dividing the frame into two halves.
- We fasten the side wall with the stand-up shelf located in the center. This is necessary for a more rigid attachment.
- To complete the installation, screw the cabinet lid, but not all the way.
- Thrust bearings must be nailed to the base of the cabinet.
- Using a tape measure, we measure first one and then the second diagonal. When fastened correctly, they should be equal. If there is a difference between them, then it is necessary to align the frame by shifting it to a smaller side. The structure is considered correctly fastened if each of the four corners is 90 degrees, and both diagonals are of equal value.
- Now you can begin attaching the back wall, which consists of three parts. Each part is fixed with nails nailed at a distance of 10-15 cm into the ends of all elements. We start from the side on which the shelf is located. Having laid and leveled the sheet, we draw a segment that determines the level of the previously fixed shelf. This must be done in order to nail the back wall not only to the ends of the structure, but also exactly to the shelf. After all the parts are nailed, you need to fasten them with special profiles.
- We proceed to the doors - we screw the running roller to each from the top on both sides.
We hang the doors
Before this stage, you need to check the gutters in the lower bar for the absence of debris that will interfere with the movement of the rollers, once again make sure that the planes are horizontal and check all connections for rigidity.
The door is first inserted into the top rail.
And then the end rollers need to be placed in the groove of the lower rail.
All 4 doors are installed in this way (the main thing is not to confuse the picture).
In principle, there is nothing complicated in installing a wardrobe. You just need to take a responsible approach to all stages of its assembly, and then you will not only improve your skills as a home craftsman, but also probably be grateful for preserving the family budget.
Wardrobe assembly instructions
Our procedure for assembling the wardrobe will be as follows.
You need to start assembling from the bottom of the cabinet, namely by assembling the base and installing the legs.
We take a part called the bottom and mark its lower side for installing the base and legs as shown in the diagram below:
The plinth can be secured to the bottom using mini fixes (eccentrics, rasteks - whoever calls them), confirmats or ordinary plastic corners.
Since this will still be an invisible area, and the cabinet will not stand on a plinth, but on legs, I decided to secure the plinth using plastic corners. The legs were secured with 3.5*30 screws.
Just when you screw the legs, don’t overdo it (you can over-tighten it, and the sharp part of the screw will come out from the back side).
We attach the four parts of the base to each other using confirmations. For convenience, take yourself a corner clamp. You can use it.
We will attach the sides to the bottom and roof with minifixes. They are great for fastening perpendicular parts, and they also manage to completely hide the fastener.
If space allows, it is convenient to assemble the sliding wardrobe lying on the front part and fasten it using confirmations. But since I didn’t have any free space in my room, I had to assemble it standing up and use eccentrics (rastexes, minifixes) as fasteners.
On the bottom and roof of the cabinet (from the inside) we mark holes for installing the minifix rod.
Before installing the sides, using a level, the bottom of the wardrobe must be leveled as evenly as possible. Simply lean the level and adjust the legs to the maximum horizontal position.
Now you need to mark the sidewalls, the holes should exactly coincide with the installed rods on the bottom and roof. In the sidewalls you will need to do two different drillings in two different planes.
The first hole is made for a metal eccentric, which will tighten the rod, it is made in the inner side of the sidewall, with a special 15mm cutter, at a distance from the edge of the end to the center of 34mm (this is if the rod has a total length of 44mm, like mine).
In general, when fitting a part onto a rod, its head should protrude 6 mm. If this is your first time installing minifixes, practice better on rough parts, so you will feel more confident when assembling.
The second hole is made at the end of the part, with a 6-6.5 mm drill, strictly in the center (8 mm from the edge).
For a more detailed understanding of this assembly step, you can use our materials on.
- When you have made all the necessary holes, do not rush to install the sides and roof right away.
- To give the structure initial rigidity, immediately assemble the central partition with the upper shelf (we fasten it with confirmations).
- At the next stage, we need to place the sidewalls, the rear wall of the console and the assembled T-shaped partition on the lower rods, tighten them with eccentrics, and secure the upper shelf to the sidewalls (with confirms). Use an angle clamp for support.
- Next, we attach the roof and check the verticality using a level.
- If everything is fine, to provide additional rigidity, we install additional shelves using confirmats.
- Now, using 3.5*16 screws, we fasten the back wall of the fiberboard. We start from the two upper corners, and after perfect alignment, we begin to screw in screws throughout the box, in increments of 15-20mm. The fiberboard should also be secured to the central partition and the top shelf.
The hardest part of the job is finished. We put the cabinet in its place, once again check the position of the cabinet by level and proceed to installing shelves, hangers and drawers.
To have fewer plugs for holes on the visible side of the wardrobe, I decided to install the shelves on shelf holders.
Everything is simple here. We mark the required height on the sidewall, use a 4.5-5 mm drill to make a non-through hole, up to 8 mm deep, and hammer the shelf holder into it.
A sliding wardrobe is one of the most convenient and compact ways to store things. It has small shelves for light items of clothing, and large ones for bulkier items, there are compartments for storing skis, a compartment equipped with a rod for placing outerwear, etc.
The compactness of the closet is made possible by sliding doors, which do not require space to swing open; they move on special rollers located inside the structure of the door itself. Even a person inexperienced in such matters can assemble such a cabinet, since the assembly principle is quite simple and does not require the use of special tools.
Preparing to assemble the wardrobe
Assembling a wardrobe with your own hands is a labor-intensive process, so immediately find an assistant who will help you hold or supply the spare part. Before you start assembling, you need to open all the packages and sort the boards by size. After this, it will be easier to determine which elements are where.
Each panel has characteristic connection holes, which make it easy to determine its purpose.
There are 3 basic diagrams for connecting chipboards:
using confirmed screws;
eccentric couplers (minifixes);
one of the above methods, but with the addition of wooden dowels (chops).
Each connection has its own characteristic holes on the plane and at the ends of the boards. There are two types of holes for confirmations:
- in one part through in a plane with a diameter of 7 mm;
- in the second part there is a blank with a diameter of 4.5 or 5 mm.
There are also 2 pairs of holes made for eccentric couplers:
- in one part there is a blind part in a plane with a diameter of 5 mm into which the minifix rod is screwed;
- in the second part there is a hole at the end of 8 mm connected to a recess in the plane with a diameter of 15 mm for the clamping cylinder.
Holes for dowels are made blind at the end and in the plane with the same diameter from 8 to 10 mm.
Before assembling the wardrobe, look at the set of hardware; their presence will make it clear what type of connections you have and in what order to assemble the elements.
Main assembly steps
The wardrobe is assembled strictly according to the diagram, vertically or horizontally. The second option is better, this way you can prevent skewing of the parts being connected. If the height of the ceilings does not allow you to raise the finished cabinet, then it is better to carry out the work in a vertical position.
You can easily assemble a sliding wardrobe with your own hands if you follow the step-by-step instructions.
In such a closet you will place twice as much clothes without the expense of the enormity of the furniture itself.
The first step is to attach the base and adjustable legs to the bottom. They are necessary if the floor is uneven. Next, we begin assembling the body. We connect the sides to the base. To make the structure durable, we attach an intermediate rack and a shelf. This is necessary so that the sidewalls do not tilt. Then we screw the remaining parts and attach the lid. It is advisable not to nail the back wall, but to screw it with self-tapping screws. At this stage we put the cabinet in its place. We install guides for drawers, holders for shelves, and a bar for hangers. Check that the drawers should slide out smoothly.
You need to familiarize yourself with all the details of the product (so as not to confuse anything during the assembly process and not have to start all over again), prepare the tools and the place where the assembly and installation will take place.
This work will take a lot of your time.
Next up is door installation. First we attach the guides, then we fix the rail with screws. We insert the doors, check that they open and close smoothly. Adjust them if necessary. Lastly, glue on the sealing brushes. We attach plugs to the confirmation holes.
As a rule, sliding wardrobes, like all furniture, are assembled in the lying position of the cabinet.
Do not warp the cabinet parts, keep the corners straight.
To summarize, we can say that assembling a wardrobe is not such a difficult job. Your desire, skill and ability will allow you to do this without difficulty.
After you do everything, be sure to check how the doors work (do they creak, move freely, etc.), how securely the shelves and other parts are fastened.
Be careful that until the cabinet body is assembled and the back wall is installed, all fasteners can be easily broken.
Assembly steps
First of all, the frame is assembled. It is necessary to connect the frame elements. To do this, you need to insert the choppers into the prepared holes and screw the confirmations into them, with the help of which the frame is secured. It is more convenient to connect cabinet parts lying down. You should start from the bottom shelf, so to speak, the bottom of the closet.
After the frame is ready, we proceed to placing the partitions of the three-door cabinet. It is very easy to determine where the top and bottom of the partitions are, since there are holes for dowels in the lower part of the partition. There are also blind holes on the bottom shelf (bottom of the cabinet) into which dowels are inserted, and only then we install partitions on them. It is worth noting that initially you should not fasten the confirmations to the end; you must leave them free to move.
To provide rigidity to the structure and protect it from loosening, it is necessary to install the rear wall of the cabinet. The wall must be strengthened with the laminated side facing out. The wall is secured with small nails, which are driven in around the entire perimeter of the cabinet.
For each shelf, special holes are prepared into which you need to install corners or other fasteners provided in the kit, and it is on them that you need to install the shelf. The shelves are fastened using corners or confirmations.
After this you can install the cabinet
Here it is important to level the structure and only after that it is necessary to tighten all the fasteners completely. To ensure that the doors open freely when using the cabinet and do not jam, it is necessary to level it using a level
After this, you need to install the guide rails for the cabinet doors. Using a screwdriver, holes are made for fastenings along the entire perimeter of the rails. The holes must be chamfered for screwing the screws flush and you will need to make 4 holes for each strip. The first thing you need to do is secure the bottom rail.
For the top rail, you need to make staggered holes in both strips. Screws are included in the wardrobe kit for attaching the slats. The distance from the front end of the top cover to the beginning of the edge of the rail must be at least 3 mm.
The next step is to install the rods and fittings inside the cabinet. First of all, we mark the attachment points for the holders, drill holes and tighten the screws
It is important to install the rod mounts correctly so that they are level. Whether the fasteners are installed correctly or not can be checked using a level
The final stage is installing the doors. Installing the doors must begin from the top, for which we insert the doors into the upper rails, and then the end rollers are placed in the groove of the lower rail. Thus, all 3 doors are inserted in order, the main thing is not to confuse the front and inner sides.
Installation of wardrobe doors
Now that the cabinet is almost assembled, all that remains is to install the doors. It is advisable to first adjust the level of the cabinet. Otherwise, the doors will not close tightly. To install the top guide, you need to drill at least 5 holes for self-tapping screws, two on each side and one in the middle. The guide should be level with the edge of the cabinet lid. To install the lower guide, you also need to drill three holes with a diameter of 4 mm, and chamfer it with a drill of a larger diameter so that the screw head is flush with the guide. Sliding wardrobe guides from different manufacturers require different cabinet edge offsets. To simplify installation, you can simply place the guide on the installation site, and fix it when the doors are installed. Installing the door into the guides. First, the upper rollers are inserted into the upper guide and raised all the way, then the lower rollers are inserted. First, the two side doors are inserted into the second track, then the middle door into the first track. The doors are adjusted with a hex wrench (sometimes with a cross screwdriver). When the level is set correctly, the door should fit snugly against both walls of the cabinet. Now you can glue the sealing brushes. First remove the protective film
Attention, after removing the protective film, it is not recommended to touch the place where the brush will be glued with your hands. Greasy fingerprints will make the brushes less durable.
Self-assembly of furniture helps to significantly save money. It’s good if a person has simple skills in assembling objects. It will be useful for beginners to learn how to assemble a wardrobe themselves. Step-by-step installation steps for each element of the product will allow for quick installation.
Among all types of clothing storage products, the leading place today is occupied by the wardrobe. It is multifunctional, spacious, comes in different shapes and sizes, and does not require additional space to open the doors. That is why most people, when choosing between a wardrobe and a sliding wardrobe, prefer the latter option.
Assembling a sliding wardrobe with your own hands in the video presented is not at all difficult - all you need to do is have the necessary tools in your apartment and be familiar with the design of the product. Often, when ordering a cabinet without the services of assemblers, the company sends a document that contains a drawing of the product. This also lists all the component parts, which are numbered in order. By looking at the drawing and comparing the elements of the cabinet, you can intuitively assemble the product.
To work according to the sliding wardrobe assembly diagram, you will need the following tools:
- building level - to check the levelness of the installation parallel to the floor;
- corner;
- rubber and regular hammer;
- straight and Phillips screwdriver;
- roulette;
- pencil and ruler;
- screwdriver;
- wood drill - to make holes;
- metal drill – for installing an aluminum base.
Additional tools for assembling furniture yourself include a jigsaw, drill and sandpaper. It is also necessary to prepare all the details of the cabinet, which means checking the diagram to ensure that the number of items matches
Pay attention to fittings and mechanisms: if there are drawers in the closet, ball guides should be included
Tools
Sliding wardrobe “Basya”
You can assemble Basya's wardrobe yourself.
You will have new experience, while you will save money and raise your authority in front of your family. The Basya wardrobe is suitable for a hallway or bedroom. Thanks to its small dimensions, it is spacious, but the main advantage for small apartments is the sliding doors. This article will not talk about its advantages, but about how to properly assemble a cabinet.
Make room on the floor for ease of use during assembly. There are times when this is not possible, then find an assistant and assemble the wardrobe while standing. Understand the instructions, lay out all the components and arrange the racks, shelves, and other components in order.
The internal parts of the external racks have many holes for shelves and other elements. In order not to confuse them during assembly, marks can be placed on the sides - left and right sides.
To assemble Basya you will need:
- hammer,
- rubber mallet,
- roulette,
- metal square,
- screwdriver,
- screwdriver,
- 4 mm hex key.
Assembly order
The base (bottom sheet of laminated chipboard) is screwed with euroscrews (confirmats) to two longitudinal legs made of laminated chipboard. The supporting part must have an edge so that the material does not swell from moisture while standing on the floor. You can immediately nail the thrust bearings - 3 pieces per strip.
The work takes place on the floor and therefore the box is assembled face down.
You need to attach the middle post to the base of the Basya cabinet and then the side ones, and in order not to return to the bottom again, put plugs in the holes of the Euroscrews. Don't forget to install heel supports on the side racks of the cabinet.
The next step is to tighten the top lid of the cabinet and install the plugs. To give rigidity to the box, install shelves that are tightened with Euroscrews between the sections (in some configurations such shelves are not available).
Before nailing the back wall, make sure that the wardrobe is rectangular in shape. This is done with a square, placing it on the corner of the cabinet, or using a tape measure to measure the diagonals. You can use two options at once to make it more accurate. All angles should be equal to 90º, and the diagonal of the two sides should be the same.
If the box has the exact shape and details, then you can nail the back wall of the cabinet. The reinforcement wall is attached not only around the perimeter, but also to the shelves.
Now the structure should be rigid and can be installed in a vertical position.
Two running rollers are screwed to the top of each door. It happens that mirrors come attached to the middle door of Basya's closet, but if the manufacturer did not glue it, then you will have to do it. To do this, you need to attach a mirror and outline it in a circle. Then plant it on liquid nails.
Now you need to install the lower guides and upper rails for the rollers. Stepping back 2 cm from the edge, screw the guide at the bottom and the rail at the top in the same way.
Then carefully insert the doors into the grooves of the profile. The motion of the rollers should be soft, and the doors should fit well and not touch or cling to anything. In case of poor running, the rollers can be adjusted. After this, screw the rollers with a fixing screw. We screw the guides onto the lower parts of the doors. Now we install the top front strip and install shelves and a rod for dresses. The Basya cabinet is ready for use.
Hello again. Today we will assemble our wardrobe, we will do this according to the instructions below.
So, we took the parts from the cut. We didn’t want to glue the edge ourselves, so we ordered gluing there, especially since the price of gluing is not that high.
We also purchased all the necessary fittings for the cabinet and the necessary fasteners.
The floor turned out to be not entirely level, so the cabinet had to be built not on a plinth, but on adjustable legs; accordingly, the drawing and detailing were slightly redone.
The introductory part is finished, let's start assembling.
Our procedure for assembling the wardrobe will be as follows.
You need to start assembling from the bottom of the cabinet, namely by assembling the base and installing the legs.
The plinth can be secured to the bottom using mini fixes (eccentrics, rasteks - whoever calls them), confirmats or ordinary plastic corners.
Since this will still be an invisible area, and the cabinet will not stand on a plinth, but on legs, I decided to secure the plinth using plastic corners. The legs were secured with 3.5*30 screws.
Just when you screw the legs, don’t overdo it (you can over-tighten it, and the sharp part of the screw will come out from the back side).
We attach the four parts of the base to each other using confirmations. For convenience, take yourself a corner clamp. You can use the instructions for drilling for confirmations.
Next we will need to install the cabinet sides, the central partition and install the roof.
We will attach the sides to the bottom and roof with minifixes. They are great for fastening perpendicular parts, and they also manage to completely hide the fastener.
If space allows, it is convenient to assemble the sliding wardrobe lying on the front part and fasten it using confirmations. But since I didn’t have any free space in my room, I had to assemble it standing up and use eccentrics (rastexes, minifixes) as fasteners.
On the bottom and roof of the cabinet (from the inside) we mark holes for installing the minifix rod.
Next, along the marked points, we make holes with a confirmation drill, NOT through, 10-11 mm deep, and screw in the minifix rod.
Before installing the sides, using a level, the bottom of the wardrobe must be leveled as evenly as possible. Simply lean the level and adjust the legs to the maximum horizontal position.
Now you need to mark the sidewalls, the holes should exactly coincide with the installed rods on the bottom and roof. In the sidewalls you will need to do two different drillings in two different planes.
The first hole is made for a metal eccentric, which will tighten the rod, it is made in the inner side of the sidewall, with a special 15mm cutter, at a distance from the edge of the end to the center of 34mm (this is if the rod has a total length of 44mm, like mine).
In general, when fitting a part onto a rod, its head should protrude 6 mm. If this is your first time installing minifixes, practice better on rough parts, so you will feel more confident when assembling.
The second hole is made at the end of the part, with a 6-6.5 mm drill, strictly in the center (8 mm from the edge).
For a more detailed understanding of this assembly step, you can use our materials on installing an eccentric coupler.
- When you have made all the necessary holes, do not rush to install the sides and roof right away.
- To give the structure initial rigidity, immediately assemble the central partition with the upper shelf (we fasten it with confirmations).
- At the next stage, we need to place the sidewalls, the rear wall of the console and the assembled T-shaped partition on the lower rods, tighten them with eccentrics, and secure the upper shelf to the sidewalls (with confirms). Use an angle clamp for support.
- Next, we attach the roof and check the verticality using a level.
- If everything is fine, to provide additional rigidity, we install additional shelves using confirmats.
- Now, using 3.5*16 screws, we fasten the back wall of the fiberboard. We start from the two upper corners, and after perfect alignment, we begin to screw in screws throughout the box, in increments of 15-20mm. The fiberboard should also be secured to the central partition and the top shelf.
READ MORE: Summer men's suits: how to choose color, model, fabric
The most difficult part of the work is finished. We put the cabinet in its place, once again check the position of the cabinet by level and proceed to installing shelves, hangers and drawers.
To have fewer plugs for holes on the visible side of the wardrobe, I decided to install the shelves on shelf holders.
Everything is simple here. We mark the required height on the sidewall, use a 4.5-5 mm drill to make a non-through hole, up to 8 mm deep, and hammer the shelf holder into it.
Thanks to their thoughtful design, sliding wardrobes save a huge amount of usable space. The “Basya” sliding wardrobes performed especially well.
Assembling the Basya sliding wardrobe does not present any difficulties for a person who knows how to use tools. Such furniture can be placed not only in the bedroom, but also in the country house or in the hallway; everywhere this furniture will look completely relaxed and organic.
Instructions for assembling the wardrobe are included with each unit of product, but difficulties still arise from time to time in its layout, especially in the question of how to assemble a wardrobe for a beginner. In addition to the manual, it is recommended to watch the video materials on the website, which show in detail how to assemble the Basya wardrobe.
The “Basya” cabinet is assembled as follows:
- First, the frame is installed. All cabinet components are marked and numbered, so it will be easy to work. Assembly begins from the bottom corner. The side wall is connected to the bottom using self-tapping screws, and another wall is installed in parallel nearby. Before doing this, it is better to look at the photo in the instructions.
- After the frame is assembled, the back wall comes into play, which is attached with small nails to the assembled base. Also, instead of nails, 3 mm screws are often used.
- The product should be assembled from top to bottom, the wall is fixed on both sides, it gives rigidity and stability to the entire structure. It is very important to control that there are no distortions. For these purposes, use the following tool:
- construction square;
- good meter level;
- roulette;
- plumb line
The assembled frame is prepared, which means it’s time to attach the back panel; it is attached both from the outside and from the inside. After completing this assembly phase, it is recommended to test how smoothly all the elements are fastened, and if something is done incorrectly, this will negatively affect the operation of the product, and the service life will be noticeably reduced.
- After the frame is installed, the installation of the shelves begins. They are fixed with the help of special cylindrical wooden blocks, which are called chopiks. Moment glue, screws, and dowels are also actively used. It should be noted that all markings are on standard parts, so the process of installing blocks does not present any difficulty.
- The most important step is the door layout. It is very important that there are no distortions, then the door will close and open normally without effort. In this case, it is important to install the guides correctly.
- After the door is installed, a mirror is mounted on it. How to attach a mirror, it is recommended to look at the assembly diagram of the Basya sliding wardrobe with a mirror.
- After the assemblers have completed the main work, the fittings can be installed.
What tools are needed
Significant expenses in purchasing the tool will not be required. To assemble a kitchen set, a wardrobe or a hallway, you need to have the usual set of tools: a screwdriver, a hex key for confirmation, a screwdriver, various drills, a bat for confirmation, an awl, a pencil, a tape measure, a square, fine-grained sandpaper, an electric drill, a stationery knife, iron, joint knife, rubber mallet, clamp for parts.
The distance between opposite corners should be the same.
Assembling a wardrobe with your own hands is quite easy and anyone can do it simply by following the instructions.
It is unrealistic to guess what tools will be needed to assemble furniture. It depends on what kind of project it is - difficult or not.
Now you need to install the wardrobe doors.
To open a closet, you don't need to remove chairs or move other furniture.
We place the rails - guides
Now the most crucial moment is the installation of the lower and upper rails for the doors. The bottom rail has two grooves for the movement of rollers:
And the top is divided into two sections:
In both, you must first drill holes for screws to attach them to the base and cover.
It is enough to make 4 holes in each plank. We fasten the bottom rail first, marking the corresponding fastening points.
To ensure that the doors do not jam and they move evenly, it is necessary to install the cabinet strictly horizontally, which can be done using a regular building level.
The top rail is attached in a similar way with the only difference being that you need to drill holes in a checkerboard pattern in both compartments.
Screws from the set supplied with the cabinet are used as fasteners.
Preparation before assembly
First you need to prepare the room. The final outcome of the case depends on this, how much time you spend on work. The important point is that nothing interferes. Make sure all materials and necessary tools are at hand.
As a depth limiter, you can use a 6 or 8 plastic dowel mounted on a drill.
With the help of a wardrobe, you will visually separate different zones in the room, for example, a working area from a relaxation area.
Assembling furniture at first glance seems simple. Many people make mistakes, resulting in defects: the doors and sashes do not fit together well, the doors can creak when opening, misalignment of the holes causes misalignment of parts, furniture does not stand securely on the floor. To avoid this, you must adhere to certain rules and instructions.
Built-in wardrobes of various models, made from natural and artificial materials, are very popular in interior design.
Some models of wardrobes can be transformed to suit the features of the room: the presence of a corridor, recesses in the wall where the wardrobe can be placed.
Choosing a location and measuring the area for a wardrobe
Before proceeding with the installation of the structure, the novice craftsman is recommended, firstly, to arm himself with instructions and watch training videos on the topic: how to assemble a wardrobe at home. Secondly, choose the right place for the cabinet and draw a diagram of the future design. The thing is that the furniture is made with perfectly even corners. Floors may have unevenness. Therefore, to avoid distortion of the cabinet, arm yourself with a water level, plumb line or square and choose a suitable place.
Using a tape measure, take measurements and mark them on a piece of paper. Construction flaws in details that are not visually visible will become noticeable on paper (if any). Be sure to measure the distance between the walls at the bottom and top of the cabinet. You should end up with a rough outline.
Assembling the cabinet: step-by-step instructions
The instructions for assembling a sliding wardrobe will allow even a novice craftsman to perform high-quality installation work. Before you begin, prepare the necessary accessories:
- toucan shelf holders – 12 pcs.,
- adjustable legs – 6 pcs.,
- sliding door system,
- Fi25 pipe for hangers,
- flanges-rods – 4 pcs.,
- mortise handles – 4 pcs.
For fastening the frame, shelves, doors:
- universal screws (3x16 and 3.5x30),
- plastic corners (20 pcs.),
- confirmations (6.4x50 – 100 pcs.),
- confirmation plugs (50 pcs.),
- stoppers and limiters.
To install the wardrobe yourself, you will need the following tools:
- a set of screwdrivers (phillips and straight);
- imbus key,
- cord plumb,
- level,
- pliers,
- hammer,
- screwdriver,
- roulette,
- stationery knife.
Step one: installing the base
The assembly of the wardrobe begins with the installation of the base, namely the base and legs. We take a part called the base and make drawings on it.
We fasten the base using confirmations. Since this area will not be in the field of view, the cabinet stands on legs and not on a plinth, you can use plastic corners. We fasten the legs with 3.5x30 screws.
We also fasten the 4 parts of the base together with confirmations.
Step two: housing assembly
Having assembled the base of the cabinet at home, proceed to installing the body - sides, partitions, roof.
- We secure the side walls with confirmations.
- We fasten the back wall with screws (no need to nail it).
- We install vertical walls and a roof on the confirmations.
- We attach cross ties in each section separately, at different levels. In this way, it will be possible to ensure the necessary rigidity over the entire height of the structure. We will install one continuous unifying tie in the center.
It is very important to install the stiffeners correctly. Otherwise, the cabinet may sway. The role of stiffeners will be performed by transverse ties together with the rear wall of the cabinet.
Step Three: Installing Shelves
As a rule, even for novice craftsmen, assembling shelves does not cause any difficulties. The shelves are located in separate sections. There are several ways to attach them:
- If the shelves are located axially, a corner furniture tie should be installed. It will connect the horizontal plane of the shelf with the vertical intermediate wall. In order not to break the symmetry, install corner ties on each side of the central axis of the mounting wall.
- Fastening the shelves using a “helicopter” – along the central wall of the cabinet. This method falls into the non-standard category. First you need to take one shelf and fix it in the center on the confirmation, turning it 90° along the axis. Attach the next shelf to 2 confirmata. Then return the previous shelf to its original position and reinforce it with tightening furniture corners.
If you want to have removable shelves, you do not need to secure them with confirmations. Install the “shelf supports” and insert the shelves. In this case, there is one big advantage - the absence of plugs for holes on the visible side of the cabinet.
To install shelf holders, make drawings on the inside, clearly defining the height of the shelves (make sure that the angles are even), and use a 4.5 mm drill to make blind holes. The depth of the holes should not exceed 8 mm. It is recommended to use a drilling depth limiter, if there is none - a plastic dowel for 6 or 8, which is installed on the drill. Hammer the shelf holders into the holes.
Step four is the most important
The most important step in installing a wardrobe is installing the doors. The door leaf must be leveled.
The stages of work are as follows:
- Install a door rail into the top opening of the cabinet. It needs to be secured with screws.
- Drill holes for screws in the lower profile.
- Install a stopper on each end of the guide rail. The stoppers will secure the doorway in the closed position.
- Insert the bottom profile inside the cabinet and screw it to the bottom.
- Replace the sliding wardrobe door. Carefully insert the upper door rollers into the upper profile, and the lower wheels into the recess of the lower guide profile.
- Adjust the doors to each side of the cabinet. This should be done when they are in the closed position. Adjust the wheels located on both sides of the door leaf. Adjust the left one along the left side surface of the cabinet, the right one, accordingly, along the right side.
- After making sure that the door panels are aligned correctly, open and close freely, and do not pull, strengthen the lower guide rail with screws.
To finish assembling the cabinet, apply a rubber gasket to each door to reduce the impact of opening and closing them. If you follow all the recommendations on how to assemble a wardrobe, you can easily and quickly complete all installation work without outside help.
How to mount
The easiest way to deal with all the complexities of installing a Basya wardrobe is to entrust this process to professionals. But, if you don’t want to spend extra money, or are simply used to doing everything yourself, then you can try to assemble your furniture yourself.
When the frame is ready, you can nail the back wall to the base. Chipboard sheets are attached using self-tapping screws. They begin to be fixed from above and fall down. The back wall must be secured both from the outside and from the inside. After completing this process, it is advisable to check whether all parts are securely fastened - an installation error can significantly reduce the life of the cabinet.
Having secured the main parts, you can fix individual shelves inside the cabinet. To secure the five shelves, you will need self-tapping screws, wooden dowels, glue and a drill. The main tip to remember when installing shelves is to start at the top and work your way down.
When installing shelves, pay attention to the fact that their front edge is in front, and not rough, raw edges.
The most difficult step is installing the door. The sliding wardrobe door mechanism must be installed so that the door opens and closes well. How convenient it will be for you to use the wardrobe depends on how correctly the mechanism is installed. All rollers and fixing elements are included with the main parts. Additionally, there is also a mirror for the facade on a film basis. Finally, after all these procedures, close all visible holes with the decorative plugs included in the kit and check the quality of the assembly.
You can determine the high-quality assembly of Basya's wardrobe by a few simple details. First of all, a well-mounted cabinet stands level on the floor, without tilting anywhere. There are no cracks or openings at the fastening points. And the compartment door slides smoothly when opening and closing and does not make any unnecessary sounds. A properly installed closet can be moved to the desired area and you can start filling it with things.
Sliding wardrobe “Basya”
The Basya wardrobe stands out among similar designs with its compact size and reasonable price. It will fit perfectly into the interior of not only any room, but also the hallway. A small, but at the same time, spacious closet does an excellent job of storing not only items of clothing, but also shoes.
The cost of this wonderful model with a mirror is three times lower than other products with a similar design. Its low price does not in any way affect either the appearance or the quality of the components.
Material and color
The Basya sliding wardrobe is produced by a Russian manufacturer from sheet composite material made by pressing. To give it a wood-like pattern, it is laminated, and to be resistant to moisture it undergoes special treatment.
The color solutions of the proposed model are presented in three variants, based on the contrast of two colors, and in one monochrome. In three versions, the frame and central door are made of a dark, rich shade, and the two remaining hinged sliding doors are made of light colors. The color versions of the produced models are presented in combinations:
- bleached oak with wenge, Wallis plum with wenge;
- light shimo ash with dark ash
Size and filling
The three-door wardrobe is produced by the manufacturer in one size.
The assembled height of the product is 200 cm, which allows it to be installed in a room with low ceilings. The length of the cabinet is only 130 cm, which makes it possible to place this piece of furniture even in a small space. A depth of 50 cm makes it possible to place a fairly large amount of clothing and bedding.
The sliding wardrobe "Basya" is externally beautiful, modern, consisting of a strong body and a magnificent facade, the design of which is represented by three sliding doors. A large mirror is attached to the central part. Behind the attractive external façade lies a functional interior.
READ MORE: Facing bricks for facades: types of material and features of its choice
The cabinet frame is divided into two spacious compartments. One contains a rod attached parallel to the rear wall. Here you can place clothes, hanging them on hangers, and below, if desired, you can store boxes of shoes. In another compartment there are three shelves for storing folded clothes and bed linen.
In order to start assembling according to the diagram, you must first unpack all the parts. One box contains doors, another contains walls, and the third contains a mirror.
Assembling a wardrobe involves the step-by-step implementation of the following steps:
- First of all, we unpack the box with the walls and begin to assemble the frame, arranging the parts so that the assembled structure is face down.
- To fasten the parts to each other, you need to use special screws - confirmats or, as they are also called, Euroscrews. This fastening element does not destroy the material and is able to withstand pull-out and bending loads.
- We begin mounting from the bottom corner, attaching the side wall to the bottom part.
- We install a parallel wall and a stand dividing the frame into two halves.
- We fasten the side wall with the stand-up shelf located in the center. This is necessary for a more rigid attachment.
- To complete the installation, screw the cabinet lid, but not all the way.
- Using a tape measure, we measure first one and then the second diagonal. When fastened correctly, they should be equal. If there is a difference between them, then it is necessary to align the frame by shifting it to a smaller side. The structure is considered correctly fastened if each of the four corners is 90 degrees, and both diagonals are of equal value.
- Now you can begin attaching the back wall, which consists of three parts. Each part is fixed with nails nailed at a distance of 10-15 cm into the ends of all elements. We start from the side on which the shelf is located. Having laid and leveled the sheet, we draw a segment that determines the level of the previously fixed shelf. This must be done in order to nail the back wall not only to the ends of the structure, but also exactly to the shelf. After all the parts are nailed, you need to fasten them with special profiles.
- We proceed to the doors - we screw the running roller to each from the top on both sides.
- Then we begin to work on the middle door, on which we will attach the mirror. We place it on the surface face up and apply a mirror to it, which we trace, having previously placed it evenly. We degrease the prepared surface, and remove the protective films of double-sided tape from the inside of the mirror. In order for the mirror to stick evenly, you need to lay linings between the mirror and the door; their thickness should be greater than the tape. Then we begin to carefully remove them.
- Now we install the shelves in the linen compartment from top to bottom, and then attach the dress rod. We screw in the upper rails and lower guides, having previously drilled holes in them. We start with the bottom guide, stepping back from the edge about 2 cm, and finish with the top.
- Carefully install the doors into the grooves of the profiles. We check the movement of the doors: it should be smooth and without unnecessary sounds, and the doors should fit tightly. If necessary, we make adjustments by tightening the running roller. Next, tighten the fixing screws and install the lower guides on each door. After that, we hang the doors and fix the top bar with self-tapping screws.
A sliding wardrobe can be installed not only in the bedroom, but also in the living room or hallway. It does not take up much space, so it will fit even in a small apartment. All these characteristics are relevant for a simple and inexpensive Basya wardrobe, which will be discussed in this article.
This cabinet is perfect for those who are slightly on a budget and looking for an inexpensive cabinet in a compact size. This model costs two or even three times less than its analogues, but at the same time it looks just as good and serves no less. It is available in several basic colors, so you can choose a cabinet that will fit perfectly into any interior you choose.
The only drawback that almost all buyers note is the difficulty in assembling it. Or rather, the lack of simple and understandable instructions that explain in detail how and in what sequence you need to assemble Basya’s wardrobe.
How to mount
The easiest way to deal with all the complexities of installing a Basya wardrobe is to entrust this process to professionals. But, if you don’t want to spend extra money, or are simply used to doing everything yourself, then you can try to assemble your furniture yourself.
When the frame is ready, you can nail the back wall to the base. Chipboard sheets are attached using self-tapping screws. They begin to be fixed from above and fall down. The back wall must be secured both from the outside and from the inside. After completing this process, it is advisable to check whether all parts are securely fastened - an installation error can significantly reduce the life of the cabinet.
Having secured the main parts, you can fix individual shelves inside the cabinet. To secure the five shelves, you will need self-tapping screws, wooden dowels, glue and a drill. The main tip to remember when installing shelves is to start at the top and work your way down. When installing shelves, pay attention to the fact that their front edge is in front, and not rough, raw edges.
The most difficult step is installing the door. The sliding wardrobe door mechanism must be installed so that the door opens and closes well. How convenient it will be for you to use the wardrobe depends on how correctly the mechanism is installed. All rollers and fixing elements are included with the main parts.
You can determine the high-quality assembly of Basya's wardrobe by a few simple details. First of all, a well-mounted cabinet stands level on the floor, without tilting anywhere. There are no cracks or openings at the fastening points. And the compartment door slides smoothly when opening and closing and does not make any unnecessary sounds. A properly installed closet can be moved to the desired area and you can start filling it with things.
VIDEO: DIY wardrobe. How to assemble a wardrobe?
A sliding wardrobe is one of the most convenient and compact ways to store things. It has small shelves for light items of clothing, and large ones for bulkier items, there are compartments for storing skis, a compartment equipped with a rod for placing outerwear, etc.
The compactness of the closet is made possible by sliding doors, which do not require space to swing open; they move on special rollers located inside the structure of the door itself. Even a person inexperienced in such matters can assemble such a cabinet, since the assembly principle is quite simple and does not require the use of special tools.
Download a video and cut an mp3 - we make it easy!
Our website is a great tool for entertainment and relaxation! You can always view and download online videos, funny videos, hidden camera videos, feature films, documentaries, amateur and home videos, music videos, videos about football, sports, accidents and disasters, humor, music, cartoons, anime, TV series and many other videos are completely free and without registration. Convert this video to mp3 and other formats: mp3, aac, m4a, ogg, wma, mp4, 3gp, avi, flv, mpg and wmv. Online Radio is a selection of radio stations by country, style and quality. Online Jokes are popular jokes to choose from by style. Cutting mp3 into ringtones online. Video converter to mp3 and other formats. Online Television - these are popular TV channels to choose from. TV channels are broadcast absolutely free in real time - broadcast online.
A sliding wardrobe is one of the most convenient and compact ways to store things. It has small shelves for light items of clothing, and large ones for bulkier items, there are compartments for storing skis, a compartment equipped with a rod for placing outerwear, etc.
The compactness of the closet is made possible by sliding doors, which do not require space to swing open; they move on special rollers located inside the structure of the door itself. Even a person inexperienced in such matters can assemble such a cabinet, since the assembly principle is quite simple and does not require the use of special tools.
Preparatory work
Make room on the floor for ease of use during assembly. There are times when this is not possible, then find an assistant and assemble the wardrobe while standing. Understand the instructions, lay out all the components and arrange the racks, shelves, and other components in order.
The internal parts of the external racks have many holes for shelves and other elements. In order not to confuse them during assembly, marks can be placed on the sides - left and right sides.
To assemble Basya you will need:
- hammer,
- rubber mallet,
- roulette,
- metal square,
- screwdriver,
- screwdriver,
- 4 mm hex key.
