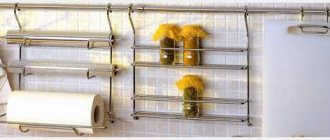
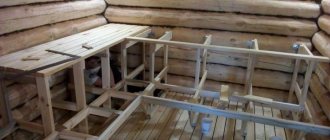
Of course, this design is as convenient as possible, since you can store many items on it: books, jars of food, flower pots and more. The main criterion for purchasing is the strength and reliability of the material. However, there are cases when the shelf is arbitrarily subjected to gravity, which subsequently causes damage. How to prevent such a situation or first prevent the surface from harm will be discussed below in the article.
Natural wood
Solid wood of soft varieties usually contains knots. Some types of pine are generally free of knots. The most affordable wood used for shelves is pine. Spruce, which is also available, has a much larger number of knots. Natural wood has a pleasant color and smell and comes in planks, but they are relatively expensive, especially if they are planed on all sides.
Hardwood (oak, beech, ash) is even more expensive and therefore used in furniture shelves, but is very rare in garages.
How to prevent sagging shelves
No matter how strong the tree is, the shelves sag if the supports are located too far from each other. Chipboard tends to sag even under light weight, so it requires a smaller distance between supports. Here are practical recommendations for the distance between supports depending on the material, its thickness and load.
| Material | Thickness (mm) | Length at light load | Length at medium load | Heavy duty length |
| Natural wood | 18 | 800 | 750 | 700 |
| Joiner board | 18 | 800 | 750 | 700 |
| Chipboard | 16 | 750 | 600 | 450 |
| MDF | 18 | 800 | 750 | 700 |
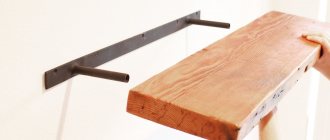
However, you can give the shelves additional rigidity. A wooden strip, flange or metal profile attached to the bottom surface of the shelf will increase its rigidity. Where convenient, you can attach a rail to the wall to support the rear part of the shelf. You can also place a bracket on the wall, which will additionally support the shelf in the middle of the span, which means it will help to significantly increase the rigidity of the structure.
But you don’t need to get carried away when adding rigidity to the shelf! In addition to the sagging of the shelf between the supports, there is also the load-bearing capacity of the supports on which the shelf rests. So, for an adjustable shelf system on a metal profile, it is recommended to set the pitch between the vertical guides to 700-800 mm, which is quite enough for chipboard shelves under normal or light load.
Trying traditional methods
Ask your father or grandfather how to secure a dowel in a loose foundation. You'll probably get a lot of good advice. We have collected some of the most popular ones that people have been using since Soviet times. After all, back then there was not such a wide selection of fasteners, and any means were good for home repairs.
Wooden cork
Helps strengthen the dowel in a large hole. Take a cork or a small piece of wood and cut several thin strips the length of the fastener. Place two to three strips into the hole and then drive in the dowel. Wooden seals will hold it in the material. By the way, sometimes a match is used for this purpose. Only it is inserted inside the plastic element, and not into the hole itself - it acts for wedging.
This method is suitable for attaching lightweight objects, such as paintings or lamps.
Insulating tape
No renovation has ever been done without it! Savvy users began to use it to seal dowels in the wall. You need to wind the tape in the direction of the fastener thread and install it in the hole. By the way, if this material is not at hand, you can replace it with cellophane.
The method is suitable for fastening structures that will not be subject to large weight or dynamic loads.
Plaster bandage
A more reliable seal option. You can buy such a bandage at the pharmacy. First, they wrap the dowel with it, then moisten it and install it in the wall. When the gypsum hardens, the element will be further strengthened at the base. This is an excellent option compared to putty, which can spill out of the hole.
The fasteners are protected from free rotation, so large elements, such as shelves or an aluminum profile, can be mounted in this way.
Liquid Nails
Perhaps this is the most expensive and time-consuming method. But very effective! You will need a gun and liquid nails. The adhesive composition is introduced into the hole, filling it until it stops, and the dowel is inserted. You can also attach a self-tapping screw without screwing it in completely. Then leave for a day until the composition completely hardens. And only then they screw in the hardware until the end. In this way, it is possible to securely fix the fasteners that will support the brackets and guides.
All of the above methods are successfully used in home repairs. They are good if you need to seal one or two holes, or, in extreme cases, five. What if you need to install about 1000 fasteners? Is it really necessary to perform such manipulations with each of them? In addition, a more serious load requires a different approach. Let's look at some professional solutions.
How to attach shelves in a closet with your own hands?
A handmade cabinet allows you to store any items in an organized manner. It is very important to properly manage the free space by installing shelves, hangers, and drawers. It is these elements that divide the territory into separate segments, which makes it possible to organize the arrangement of objects and ensure ease of operation of the structure. How to make a cabinet convenient to use? You need to take seriously the creation of a project and the selection of materials for the cabinet. The information presented in the article will help in this matter.
Rules for fixing shelves in your closet
If you want to get the job done efficiently, follow these recommendations:
- the number of compartments must be equal to the number of sashes. However, this rule is not relevant if the furniture is equipped with wide doors, behind which it is quite possible to create a couple of compartments with shelves;
- It is most convenient to place linen inside the rack, whose height is 35-40 cm;
- It is better to arrange books in cells with a height of 20 to 35 cm. The distance between the shelves should be sufficient to accommodate all items;
- the optimal height of the opening in which clothes will be stored is 150-160 cm;
- Items with significant dimensions are best placed on corner shelves;
- in general, the depth of a compartment-type cabinet is 60 cm. These are standard dimensions for models created in the factory.
You can make a cabinet with your own hands, deciding on the dimensions yourself. It is important to take into account that the door mechanism takes up about 10 cm, this reduces the internal volume.
Possible causes of malfunctions
The reason for each malfunction has its own, let’s consider each one separately:
- If the door falls off, the load is too great for the hinge. The reason in this case may be weak screws or screws.
- If the hinges are completely torn out, then the depth for the screws was incorrectly calculated or the door is very heavy.
- When fasteners are deformed, peeling of the wood coating is most often observed. This occurs due to improper wood processing technology or wear of moving parts.
- Due to manufacturing defects, defective fasteners may result.
- If furniture is often disassembled and reassembled, then the holes in the seats may no longer hold the fasteners.
- If the doors are opened carelessly, loosening occurs. It can cause shifts and, as a result, deformation.
- The problem can also be caused by improper fit.
There may be several reasons for a malfunction.
Preparing shelves before installation
To make shelves well, you need to carry out preparatory measures. First you need to determine what is best to make the shelves in the closet from. The most common options are chipboard and identical materials. Chipboard is relatively economical and versatile in use. It is easy to work with: the slabs are perfectly sawn, which allows you to obtain workpieces with certain parameters.
We must not forget that such material is flexible. To prevent it from deforming from the weight of objects placed on the shelves, you need to take care of strengthening it. To give the workpieces the necessary rigidity, a narrow strip of wood should be secured to the upper (or lower) surface. Secure it along the back and front edges. Cut the workpiece to the desired size. For this purpose, it is recommended to use a saw (electric or circular).
If the edge looks unsightly, it is worth processing it so that things do not cling to it and do not deteriorate. Experts recommend using heat-adhesive tape specifically for working on the shelf. Its use allows you to give the product an aesthetic appearance. Just apply the tape to the edge and iron it with a heated iron.
Location options
If you decide to build a compartment with your own hands, you should choose the location of the shelves and how to fix them. There are two main options:
- On different axes. This option is considered simpler. In this case, it is important to select the appropriate fastener to be used, and also to ensure that the planes remain parallel to each other.
- On one axis. To implement this method, you may encounter a number of difficulties. It is important to achieve a strong union of elements located in the same plane, provided there is a partition separating them.
Be sure to take into account the functional features of the design. Take into account the purposes for which you will use the cabinet, as well as the loads that will be placed on the shelves every day. Only then will you be able to do quality work.
It is equally important to choose the screed method. Today there are several types:
- screw involves the use of a screw and a barrel. The disadvantage of this option is the complexity of implementation;
- a conical tie is usually used to join thick elements;
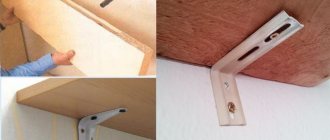
- corner - the most common option, which involves the use of furniture corners. This fittings are sold in almost every furniture store or specialized department. Such elements are inexpensive and quite easy to handle;
- the dowel will give the design additional rigidity;
- Euroscrew is a simple method of fastening, which, as a rule, does not cause difficulties;
- eccentric screeds are increasingly used by modern furniture manufacturers. It is durable and unnoticeable.
The most common problems with furniture hinges
Adjusting hinges involves properly tightening or loosening hinge components. It is worth remembering that each furniture hinge consists of several elements. These elements:
- The hinge tab is the unadjusted part of the hinge that is permanently screwed to moving doors or furniture fronts with two machine screws.
- The hinge fastening is the second part of the hinge (also screwed with two screws, but adjustable - fixing the height of the door), which is attached to the cabinet itself.
- Two adjusting screws – screws located on the mounting hinge; the first (located deeper in the closet) regulates the deviation of the door from the furniture, the second (located closer) is used to raise them.
The furniture hinge consists of three elements.
The most common problems with furniture hinges: the door falls off completely, the hinges are torn out by the roots, the fasteners have been deformed, manufacturing defects, frequent disassembly, loosening, improper fit. These problems can occur due to various reasons. From factory defects to poor-quality installation or wear. In this case, it is necessary to restore, strengthen, or simply replace the hinge with a new, durable and reliable option.
In case of problems, the mechanism is repaired or replaced.
How do you install shelves in a closet?
The whole process can be divided into several stages:
- Performing markings. When performing this work, it is very important to monitor horizontal levels. This is necessary in order to prevent the movement of items located on the shelves in the future. If the weight is unevenly distributed, this will increase the stress on the fasteners. Because of this, the fasteners may break and the shelf may collapse.
- Choosing a mounting method. If you choose a corner tie as one of the simplest methods, use furniture corners. They make the connection stronger. The downside is that the corners cannot be hidden.
- If aesthetics is of paramount importance to you, you should choose a non-standard method - the “helicopter” method. This method involves the use of euroscrews (a total of three pieces are required).
- Screw a screw into the center of the first plane, secure it to the partition, but do not tighten it too tightly. Rotate the surface 180º around the longitudinal axis to find a place to attach the adjacent element.
- Secure the adjacent structure using the 2 remaining screws. Try to tighten them well, and then return the first plane to its usual position.
- Fully tighten the shelves from the outside of the structure.
If any points remain unclear, look at the photos on our website to understand the situation, do the job efficiently and equip the cabinet with side shelves. As a result, you will get a durable and reliable structure that will last for a long time.
Corner shelves for the kitchen
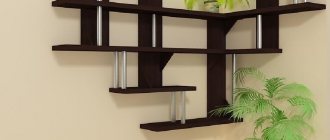
The kitchen accumulates a considerable amount of all kinds of jars with spices and sauces, small utensils for cooking, serving, and the like. If the main cabinets are already full, corner shelves on the wall will come to the rescue in the fight against kitchen chaos. They are hung above the dining area, above the stove or in another suitable place. Of course, such a shelf must be durable and spacious, so we opted for a two-tier structure made of fiberboard.
Kitchen shelf layout and diagram
The tools needed are similar to those used for the living room shelf. The fittings and fasteners are also similar, but you will additionally need hinged hinges and confirmations (furniture screws). The first step is to measure the available free space and, focusing on it, draw up a drawing of the shelf, indicating on it the parameters of all parts. Take the sketches given in the article as a sample or find others on the Internet.
Work on the construction of a kitchen corner shelf is carried out in the following order:
- We make sidewalls. To do this, contours of parts are applied to sheets of material, which are then cut out with a jigsaw. It is more convenient to perform this work for two sidewalls at once, if it is possible to fasten 2 sheets of fiberboard with clamps.
- If chips occur when cutting parts, they are treated with sandpaper or a grinding machine.
- The cuts on the sidewalls are covered with trim tape, ironing it with an iron. In places of bends, the iron is applied to the tape with the nose part.
Sidewalls and crossbars
- After making all the sidewalls, cut out the rectangular crossbars with which they will be connected. To give the design originality, the edges of the crossbars are rounded. Pasting the sections is done in the same way as on the sidewalls.
- Let's start assembling. At the junction of the two inner sidewalls with the upper crossbars, slots are cut out in the side parts of such a length and thickness that the upper part of the shelf fits into them.
- In the remaining joints, two holes for confirmations are drilled on each side with a drill.
Connecting parts
- The shelf elements are joined and fastened by screwing in the confirms until a slight crack appears when tightened.
- The last crossbar of the shelf is inserted into the pre-cut grooves. At the point of contact with the outer sidewalls, it is fixed with confirmations.
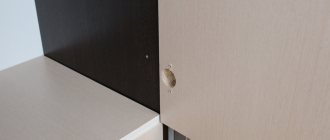
- Finally, the fastener heads are masked with decorative plugs and the shelf is hung in the chosen location. Suitable hangers can be purchased at the market or at a hardware store.
Assembled shelf
