How to sew a mattress cover with your own hands: patterns for a mattress, types of mattress covers
Comfortable orthopedic mattresses are expensive. If you don't cover them with something, they will very soon look shabby, and you will have to buy a new one, or figure out how to fix it. To prevent this from happening, it is put in a fabric case. You can buy it, but it’s cheaper to make it yourself. You just need to figure out how to sew a mattress cover with your own hands with corner elastic bands, with sides or a mattress cover with a zipper; for this, select the appropriate instructions. The cases are also stuffed with insulating materials or, if necessary, a waterproof layer is hemmed to protect the mattress from moisture.
Taking measurements
The fastest and most convenient way to sew a mattress cover is to choose a model that covers the top and sides, and is secured with an elastic band. The step-by-step instructions for sewing such a product are clear and easy.
You might be interested in How to use permanent fabric dyes
Before sewing a mattress cover, you need to know only three measurements: the length, height and width of the mattress. The length and width of the product are laid out on a piece of fabric, then the thickness of the mattress is added on all sides and another 15 cm for the hem.
Only three measurements are needed
Important! If the width of the fabric is smaller than the width of the mattress, then you will need to measure half the width twice in length, remembering to leave allowances for the connecting seam.
What materials and tools will you need?
It’s easy to make a mattress cover with your own hands; even someone who only saw a sewing machine in school during handicraft lessons can handle it.
- Measurements. First, measure the length, width and thickness of the mattress to cut a piece of fabric. The piece of material should be:
- no less than two mattress lengths;
- no less than two widths;
- for a model with sides, add the thickness of the mattress multiplied by 4 to the four sides of the fabric.
For a case with corner elastic bands, the thickness is not taken into account.
- Choice of material. The fabric from which the cover is made is selected that meets the specified requirements:
- if the sheet should protect only from dust and dirt, then linen, cotton, bamboo, and terry material are suitable;
- in order to protect the mattress from moisture, choose a material with a waterproof layer;
- if it is important to keep the bed warm longer, the mattress cover is made of quilted fabric;
- when the temperature in the apartment drops very much, sew on a layer of padding polyester;
- Foam mattress covers and cases made of woolen material with a fleece layer will help retain heat;
- on hot days, it is better to put a jacquard or silk cover over the mattress.
Before purchasing, keep in mind that silk is more difficult to work with. It slips, and it is more difficult to sew from such fabric than from jacquard.
You can sew on the waterproof lining yourself by purchasing it separately. The main thing is not to get confused with the sizes, because the seam on the bed is very well felt.
To secure the cover choose:
- wide elastic bands, the quantity depends on the mattress cover model: either 2 pieces for opposite sides, or 4 pieces for the corners;
- The elastic band is calculated to be 45 cm shorter than the perimeter of the mattress.
- Preparing tools. To make a case you will need not only fabric, but also:
- threads;
- scissors;
- pencil for light fabric;
- chalk or bar of soap for dark fabric;
- construction tape or measuring tape;
- pins;
- sewing machine.
You don't have to worry that pencil and soap marks will remain on the fabric. They will wash off during washing.
Pattern for the case
Before you start cutting out, choose what type of mattress cover to sew. A sheet with elastic bands in the corners is pulled together at the corners; if desired, a padding polyester layer is sewn to it. A mattress topper with sides has an elastic band around the perimeter of the fabric. This case holds more firmly, because the sides go under the mattress, and there the edges are tightened with an elastic band.
- Case with corner elastic bands. They can do without a pattern, because this option is easy. You only need a sheet of paper to take measurements and make a drawing. If the mattress is orthopedic, then you will need to transfer the shape of the corner onto paper, since they are often rounded. This corner is cut out and applied to the fabric as a template.
- Mattress cover with sides. The principle of operation is almost the same as for the previous case:
- measure length, width and thickness;
- take all measurements and make a drawing;
- make a template for the corners;
- cut out the base of the cover;
- cut out the side stripes.
The width of the strip for the side is equal to the thickness +1-2 cm for the allowance +10 cm (what is under the mattress) +3 cm for sewing on the elastic.
When drawing a drawing, take into account seam allowances of 1-2 cm;
Cutting details (already with 1 cm seam allowances)
- square 62*62 cm – 1 piece;
- rectangle 82*11 cm – 2 pcs.;
- rectangle 22*12 cm – 2 pcs.
Example of layout on fabric.
“Spaces” between parts are not needed; they are in the figure for clarity. You need to cut end-to-end, the allowances are already included. You can draw on fabric directly with a ballpoint pen or felt-tip pen. Cut the sling: 62 cm - 4 pieces, 8 cm - 2 pieces. Burn each piece at both ends with a lighter!
Zipper: put on two sliders at both ends. To put on the sliders, you need to separate the teeth of the zipper, 10-15 cm is enough. The slider is inserted into the zipper with the end where there are 2 holes. We insert one half of the zipper 0.5-1 cm into the slider, then insert the other half of the zipper into the other hole of the slider. Gently pull the slider, holding the zipper at the beginning. Happened! (If not, this video will help.)
When inserting the sliders, make sure that they fit together smoothly, without bends or waves on the zipper. If it doesn’t work out exactly , we take one out and insert it again.
After inserting the sliders, 6 cm from the zipper needs to be cut off, because We bought a zipper with a length of 90 cm, but we needed 82 cm plus 2 cm for reserve.
Sewing a mattress cover
The amount of fabric depends on the type of case chosen and whether a padding polyester layer is sewn on.
For sewing bedding, they sell special material that is the same width as the mattress. Therefore, there is no need to sew the main part from several pieces of fabric. The price of such material is determined only by the length of the product.
The sheet model can be single-layer or double-layer. A padding polyester is sewn into a two-layer case, so they buy 2 times more fabric. Insulation is taken according to product measurements.
Mattress cover with corner elastic bands
First, a rectangle is cut out for a single-layer cover according to preliminary measurements. For a two-layer model, you need two identical rectangles, but it is better to add 3-5 cm so that the insulation does not bunch up at the edges. The corners are cut out according to the template.
- On a smooth surface lay a layer of fabric, padding polyester and again fabric. To ensure that everything is the same, the corners and cuts are aligned.
- The edges are pinned, then the product needs to be swept around the perimeter.
- The mattress cover is quilted, lines are marked in stages, and pins are pierced along the line.
- After stitching, the product is tried on. Excess edges are cut off.
- The elastic bands are pinned on the inside and the case is tried on again.
- Cut out bias tape, the width of which is the width of the finished part multiplied by 4, and 2 cm for thickness. The parts of the binding are connected at an angle of 45°.
- Stitch the binding on one side in a taut state.
- The trim is sewn on the outside so that the cut turns inward.
- Iron along the edges.
How to sew a mattress cover with your own hands: 2 master classes
The mattress cover can be put on the mattress like a cover, or held on by rubber bands in the corners. Choose the model you need and follow the instructions - sewing a mattress cover is easy!
Let's say right away: now we are not talking about a mattress topper, essentially an additional thin mattress that is placed on top of the main mattress and can perform orthopedic and other functions. Toppers are made from latex foam, coconut shavings, foam rubber, and their production is comparable in complexity to the production of a thin mattress. We are talking about a mattress cover or pad. This device primarily performs a hygienic function. The mattress protector protects the mattress from dirt and is easy to remove and wash. A mattress cover made of waterproof material will protect the mattress from moisture. A cover or pad extends the life of the mattress and protects you from many problems during its operation. This mattress cover is easy to sew with your own hands.
Model with sides
For mattresses with rounded corners, you can sew a mattress topper model with sides. This model is also used if the length or width of the fabric is not enough for a one-piece cover.
If the mattress has round edges, then it is important to build the correct sketch:
- The upper part must fully correspond to the dimensions and curves of the mattress.
- The pattern of the side parts will be separate. Its height consists of the mattress height, hem allowance and seam allowance. If the length of the fabric allows, then you can cut out the side in one piece (add the width and length of the mattress, multiply by 2 and add seam allowances). If the length is not enough, then you can make the length of the sides in accordance with the length and width of the mattress, not forgetting about the seam allowances, and then sew them at the corners.
- Sew the sides to the main part.
- Make a drawstring and insert an elastic band in the same way as for a one-piece cover.
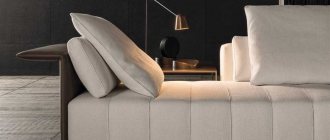
A model with a quilted top and sides.
A mattress cover will help housewives keep their sleeping area clean. It will protect the mattress from dirt, bacteria and germs, as well as harmful insects living in bedding, and will also prevent the occurrence of possible skin and other diseases caused by microorganisms. The mattress cover is easy to wash, dry and iron, it will take much less effort than cleaning the mattress.
Waterproof covers are indispensable for children's mattresses
Sewing a mattress cover with your own hands is very simple and quite quick; all you have to do is choose the right model and good fabric.
Children's mattress cover (master class)
How to sew a mattress cover for a baby stroller or crib - very simple! The filling for the mattress can be made of foam rubber, batting, or synthetic fluff. Quilted batting (can be found at a fabric store) works great. Our master class will tell you how to make a mattress cover filled with foam rubber.
I would like to say a little about the fabric from which we will sew a mattress cover with our own hands. It is better to soak the fabric in advance in warm water 40 g and iron it with an iron. This applies to all natural fabrics. Otherwise, after the first wash, the cover may “sag” and not fit on the filling.
To work you will need:
- A piece of foam rubber 80 cm long and 40 cm wide.
- Fabric for the cover.
- Zipper to match the color of the fabric, length - 18-20 cm.
- Sewing machine (if you don’t have one, you can sew it by hand, using a “needle forward” stitch).
- Scissors, ruler, pencil, drawing paper.
Take a sheet of paper and draw a drawing of the finished product. We will have 2 rectangles on the piece of paper. The first rectangle is the size of your product (80/40 cm). From it on the sides lay narrow strips with a length equal to the length (80 cm) and a width equal to the thickness of the foam rubber + 2 cm for allowances. The second rectangle is a rectangle 80/40 cm + 2 cm on each side.
First we sew in the zipper. To do this, we put our 2 parts face to face, and sew small areas in the places indicated by a thick line on one side and on the other (see photo).
Leave a hole equal in length to the zipper. We will later sew a zipper into this place. Sew the 2 parts of the mattress along the bold lines.
Place the zipper in the middle. Let's check how much space we left for the zipper.
Next, you need to iron out the 2 small seams we just made and the center hem.
We pin the zipper and sew in the zipper. The zipper should be sewn on the wrong side. We remove the pins.
Next, we’ll sew together the narrow strips of fabric that we put aside from the very beginning in the drawing, in the first drawing - in the corners. Then we will sew 2 main parts along the three remaining sides. We turn the mattress cover inside out and put it on the foam rubber.
Decorate the corners with pom-poms.
Here is the finished do-it-yourself mattress cover, sewn for a baby stroller.
Removable or non-removable cover
As mentioned above, the cover can be removable or not. Mattresses are placed in non-removable covers during their production. And the best option would be a second mattress cover, removable and put on top of the stationary one. There are original mattress covers with a fastener. Such mattress covers are convenient when purchasing a mattress, because by unzipping the zipper, you can make sure that the mattress is actually made from the material stated.
You might be interested in Simple patterns for a robe dress with buttons: sewing order
But removing such a cover for washing is very inconvenient, because it is made of thick, heavy fabric and will not fit into every washing machine. Sewing a non-removable cover is all the more irrational, because its most important function is to keep the mattress clean, and, accordingly, it itself must be clean.
Stationary zippered cover
A removable mattress pad usually has a zipper. It can be located along the entire perimeter of the mattress, only on one side, at an angle, covering one side in length and the side adjacent to it in width. The fastener can also be button, Velcro, lace, elastic, and so on.
The cover can only cover the top of the mattress
Important! It is not necessary to sew a removable mattress pad in the form of a cover covering the mattress on all sides. It is more convenient to make it hide only the top and side parts, and only slightly capture the bottom, tightening it with an elastic band.
Mattress cover with elastic band (master class)
The next cover option is a cover with an elastic band. Suitable for both cotton and orthopedic mattresses. A simple pattern, and the mattress cover will be sewn quickly, in one evening. In order to sew a mattress cover with an elastic band, it is better to take a thick, non-fading fabric; a new thick sheet will do. It is better to buy a sheet in Euro size, usually 240/280 or 240/220 cm. Before buying, measure your mattress and figure out what size sheet is suitable, taking into account the fold at the bottom.
To work you will need:
- Fabric for the cover (any thick fabric will do).
- Rubber band or elastic band.
- Safety pin for threading an elastic band.
- Sewing machine.
- Centimeter, ruler, pencil.
In order to draw our future cover on a piece of paper, you need to measure the length (a) of the mattress, width (b), and height of the side (h). Draw a pattern on a piece of paper.
Let's draw our drawing. The fold line means our piece of fabric is folded in half. Set aside ½ the width of the mattress from the fold. Dimension b is the length of the mattress. We have a rectangle ½ ab. Around this rectangle we will put it to the left, to the right, and from the bottom we will put h+15 cm on the hem.
We continue the lines with a stroke, we get shaded squares. We cut it out with scissors, leaving a seam allowance of 1 cm. This is the final version of our pattern according to which we will cut the cover.
Fold the fabric in half along its entire length. We transfer all our measurements onto the fabric with a pencil and ruler. Carefully cut out according to the intended pattern. Next, we put the right sides together, and sew down segments c and c1 on one side and the other. We will get 4 corners. We process the cut edge of the seam so that the fabric does not spill out. Next, we need to process the bottom cut of the product. Fold the edge over twice and sew a hem seam. The width of the hem seam should be such that it is convenient to insert an elastic band there.
We retreat from the corner 50 cm, and use a safety pin to thread an elastic band or elastic band. We secure the ends of the elastic with stitches. We are able to assemble only in the corners, in other places of the cover it is just a hem seam.
Sew in an elastic band
There are several ways to sew elastic into a mattress cover. For example:
- Use an elastic band; the elastic is sewn onto the folded fabric using a zigzag stitch.
- The corner method is when pieces of elastic attached to the fabric grab the mattress at the four corners, preventing the fabric from moving.
- The standard method is to create a drawstring into which the elastic is pulled.
Note! In order to beautifully sew in an elastic band, one of the corners must be pre-processed, leaving a hole in it for pulling the elastic through, and the remaining corners must be stitched in the usual way. Insert an elastic band into the remaining hole using a pin and tighten it.
The final touch is to insert the elastic
It is more convenient to do this by pulling the cover over the mattress so as not to make a mistake with the length of the elastic band. Having stretched the elastic on the mattress, you can easily trim off the excess length and tie or sew the edges of the elastic together.
You might be interested in this. Patterns for dresses and kimono robe: sewing with your own hands