Why is delivery needed? This is an interesting question; some parents don’t know the correct answer. In their opinion, a book can simply be rested against a table lamp and this is quite enough for comfortable reading. But pediatric medicine has its own opinion on this matter.
How to make a book stand with your own hands
- With the stand, the child gets used to maintaining correct posture. Modern medicine claims that poor posture does not go away without a trace, the vital functions of all internal organs are disrupted, and the child cannot develop properly. In addition, a crooked back is an unpleasant cosmetic defect.
- The more comfortable it is to sit reading a book, the more time a child can study, the faster he gets used to reading, the less negative reactions he has to school activities. In addition, the stand makes it possible to adjust the correct angle of inclination of the pages and the distance to them, which has a positive effect on the visual organs.
Book reading stand
- Small children take pride in their personal stand and enjoy using it. Accordingly, they automatically spend more time reading books.
- The supply can serve as a real designer decoration for a child's room. There are exclusive designs; they can be made from expensive and prestigious materials.
Wooden book stand
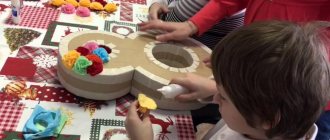
- Most models can be made together with children. There is no need to talk about the benefits of spending time together with children. In addition to close communication, teenagers gain practical work skills, which will always be useful in adulthood.
As you can see from the list, a stand is needed, try to have one in every children's room.
Wooden reading frame
Convenient homemade bookends made from whatever is on hand
Sometimes, reading for a long time, your hands can get tired, and although you want to continue an exciting activity, you need to change your position and free them so that the book does not fall. If there is no convenient holder nearby, then it is quite possible to make it yourself from improvised means available in every person’s home. Such a product, despite its simplicity, will be simply an indispensable companion for those who like to study something new and interesting in the future.
Let's take a look at two fun, easy ideas that make great bookends.
Second life of toys
Almost every child has rubber animals. It's a pity that no one needs them when children grow up. At the same time, you can make such a huge number of cool things out of them that we even wanted to buy them specially in a children's store.
For book stops, you can use two toys to place each on a pedestal, or cut one large one, as in this tutorial. Another fun idea that's perfect for the upcoming New Year holidays is to use rubber deer heads.
From a piece of plywood
This base is very durable and easy and convenient to use. For it you will need:
- plywood, two rectangles measuring 20*22cm;
- furniture handles (with bolts) – 2 pcs;
- a metal rod will serve as a retainer;
- two loops;
- drill.
The manufacturing process consists of the following steps:
- Drill two holes the same size as the handles. Distance: from bottom to top 1.5cm;
- a pencil mark is made in the middle;
- an indent of 8 cm is made from the middle on the sides and more holes are drilled (diameter 4 mm);
- Small loops are installed between two blanks.
In this way, the two blanks are fastened together and can be opened like a book.
- metal handles are installed in drilled holes;
- the latch is put in place;
- Next you need to make 7 holes with a drill starting from the bottom of the workpiece in the middle. The distance between them is 2cm. This is done so that in the future the angle of inclination can be adjusted.
The stand is ready - you can start using it.
Metal
You can also make your own book holder from metal.
To be more precise, metal wire is used here.
I’ll say right away that I won’t give any specific recommendations for weaving and making a holder in this case.
Just take the wire and give it the shape that you think is beautiful and original. Do not forget that the product must withstand the weight of books.
For book accessories, it is recommended to use wire with a diameter of 4-5 mm.
Source
Cardboard stand
The strength of the finished product is not inferior to the previous version, and its ease of manufacture is a significant plus in favor of this method.
For preparation you will need:
- thick cardboard;
- ruler, scissors;
- pencil;
- glue gun;
- PVA glue;
- newspaper;
Optional:
- paints;
- brushes;
- paper napkins.
The assembly algorithm is as follows:
- You need to cut a blank from cardboard:
- size – 350*560mm;
- bend it into two parts with dimensions: 350*420mm and 350*140mm.
- Similar to the previous point, make the same blank.
- Coat them with hot glue and glue them together.
- Next, you need to cut out a part measuring 50*140mm, 2 pieces, from thick cardboard.
- Glue them together.
- When the small part dries, you need to glue it to the larger one. It turns out to be a fixative.
- Again you need to cut out several parts from cardboard:
- 50*290mm,
- 100*290mm – bend it in half and glue it edgewise to the first one.
- The resulting parts need to be glued to the lower front part of the stand.
- Coat the joints well with glue.
- The entire resulting stand needs to be generously greased with PVA and compacted into several layers of newspaper.
- When everything is dry, all that remains is to cover it with acrylic paint of your favorite color.
Using basic materials, you can easily make a convenient stand for your book very quickly and without spending almost any money on it. Spending time reading or studying will become much more comfortable and enjoyable. You won't have to be distracted by tired or numb hands.
Source
Convenient DIY book stand options
It is not always convenient to read while sitting on a sofa or in an armchair, especially for schoolchildren who need to sit at the table and study homework. In addition to the textbook, you also need to place a notebook on the table, and doing this so as not to crane your head when you need to look at the page is quite problematic. An excellent solution to this problem is a do-it-yourself book stand made of wood, it will be beautiful and convenient. Ophthalmologists also recommend using stands for textbooks, since reading a correctly positioned book will strain your eyes less.
Wall bookshelves
A DIY wall bookshelf is the classic and most common way to store printed publications.
The simplest shelf is a wooden board with brackets for attaching to the wall.
More sophisticated - four boards that form a rectangular structure or multi-tiered options of any shape.
Classic stand
There are many options for how to make bookends with your own hands, but the most practical and simple is the classic one. Making such a holder is not difficult, since it consists only of a front plane located at a slight angle, a rear support and front holders for book pages.
This option will also be convenient in the kitchen, because the recipe from the book or notepad will be in front of your eyes all the time. Use it for your tablet too.
Pay attention to such a minor element as the front holders. It is important that they do not obscure the page at the bottom of the book and that the lines of text are visible. After all, you can find beautiful designer stands that have large holders. They are just for beauty; they are absolutely not suitable for reading books.
The easiest way to make a book stand is to use plywood. The vertical part should be of sufficient width and height to hold the book well. The back part, which holds the structure, can be secured with furniture hinges or cut at an angle. If you use a loop, then glue a stopper board on top of the loop, as shown in the figure. If you cut at an angle, then select a comfortable level of inclination in advance and adjust the rear element to this size.
To make the reading stand as practical as possible, it needs to have front page holders. Glue a strip 1-1.5 centimeters high, this will be enough to hold the book and not cover the text on the pages.
Ironwork
You can forge a real work of art from iron. But how to make a book stand out of iron if you are not a blacksmith? - using wire. The flexibility of the material can give it any desired shape. For a book accessory you will need a wire with a diameter of 4-5 mm, 4 pins with a diameter of 1.5 mm.
It’s not difficult to make an elegant interior book support; you just need to have imagination and some craft-making skills.
For such creativity, all kinds of, but at the same time, affordable household items will be useful.
Universal stand
Nowadays it is popular to read from mobile devices - e-books, tablets, phones. You can make a holder for them too. Below in the picture you can see an example of a stand for e-books, made by yourself.
For this stand you will need two planks - the horizontal one will be thicker and longer, the vertical one will be thinner. The optimal width would be 20 centimeters. In addition, you will need two tongues to act as stoppers.
The production itself is very simple. A groove is made on the lower stand, the width of which is equal to the thickness of the vertical plank. The groove should be deep enough so that the vertical part does not wobble. Further in front you need to drill two holes, dowels are inserted into them. Make two more grooves in the horizontal board. They are needed not to decorate an accessory, but for gadgets that are smaller in size than a book. Also, each groove made will allow the device to be placed at a different angle.
When all the parts are prepared, they are sanded and covered with stain or varnish. This stand does not take up much space and is also versatile.
In addition, if you modernize this stand a little, and make the vertical board higher, and attach another vertical holder to its rear edge, then you will have additional space for books and notebooks. Making such a stand for notebooks with your own hands is also easy. This will help keep your workbench organized if you are using multiple sources of material for your work.
Of course, there are many beautiful solutions, but it is worth remembering that first of all you need to pay attention to practicality. Although, if you don’t like the result, you can always redo it, since wood is an inexpensive material; in addition, you can work with it after the product is ready.
Methods for attaching shelves
In this case, it means fastening mainly wall shelves and some corner structures.
Most often, the fastening method is standard: metal plates with holes are installed in the back of the shelf.
Let's look at this whole process step by step. Holes are drilled in the wall according to the markings, dowels are driven in and screws are tightened. Then you just have to hang the shelves and you're done.
Floor shelves, as a rule, do not require any fastening. True, there are also suspended structures. They are attached to the ceiling or ceiling beams using ropes or metal chains. Sometimes - against the wall.
Today, when making a wall shelf with your own hands, the so-called hidden fastening method is often used.
For example, you can make a metal frame of suitable size from a profile pipe, which is then attached to the wall. After this, the shelf itself is assembled from boards, chipboard or plywood, in the form of a box.
The shelf simply “slides” onto the frame, and it won’t go anywhere. You can read more about this method of fastening in our article.
A similar method of fastening can be done without using a metal frame. In this case, a plank with wooden dowels is attached to the wall. First we make the shelf itself.
You need to drill the appropriate holes in the shelf. It is simply put on the dowels. However, this design is not designed for heavy loads.
This is important to understand. Read about this mounting method on the website
There is another option that is useful when installing a shelf in a niche. Grooves are selected on the sides of the wooden shelf to the required depth, and metal guides are attached to the walls inside the niche itself.
Then the shelf is simply “slipped” onto these guides, and thus securely fastened. This is how easy it is to make home furniture with your own hands.
If you are interested in this method of fastening, you will find all the detailed information with step-by-step stages of work, including a photo and video review, in the article.
Some tips for beginners
If you want your homemade book holder to be not only practical but also beautiful, then you should follow a few simple rules in your work.
First, pay attention to the appearance of the material you will use. After all, it won’t be difficult to find two beautiful planks of the right size; you can even use waste from furniture production. And this amount of materials is quite enough for the plan.
Second, remember that sandpaper or a sander are your best friends in any carpentry job. They allow you to give the wood a beautiful and finished look, and in addition they will always help eliminate minor flaws on the wood.
Third, never rush, it is better to think everything over carefully, measure and paint, and only after that start processing the part. In carpentry, a difference of a few millimeters can result in the entire product needing to be redone. So if you don't want to do extra work, don't try to do everything quickly.
Feel free to show your imagination. After all, by spending very little time you can make a unique and practical accessory that will not only show your individuality, but also help you in work and study.
Master class on making a technological do-it-yourself book stand
Source
Idea 12. Flower vase
Glass bottles for wine, milk or other drinks are almost ready-made vases that are just waiting to be painted with acrylic paints and/or trimmed.
You can find detailed instructions on converting bottles into vases and candlesticks, as well as about hand-painting vases in these materials:
- Vases made from glass bottles: decor, painting and trimming
- Hand painted vase: 3 master classes and 45 decor ideas
- Pasta crafts - 15 ideas for adults and children
- Kitchen wall decor - 12 super ideas
- Indoor flowers and plants for the kitchen
- Everything about sewing an apron for the kitchen - instructions, tips and photos for inspiration
- DIY paper flowers - 4 master classes for beginners
- Homemade shelves for the kitchen - stylish, convenient, easy
How to make a book stand with your own hands
Why is delivery needed? This is an interesting question; some parents don’t know the correct answer. In their opinion, a book can simply be rested against a table lamp and this is quite enough for comfortable reading. But pediatric medicine has its own opinion on this matter.
How to make a book stand with your own hands
- With the stand, the child gets used to maintaining correct posture. Modern medicine claims that poor posture does not go away without a trace, the vital functions of all internal organs are disrupted, and the child cannot develop properly. In addition, a crooked back is an unpleasant cosmetic defect.
- The more comfortable it is to sit reading a book, the more time a child can study, the faster he gets used to reading, the less negative reactions he has to school activities. In addition, the stand makes it possible to adjust the correct angle of inclination of the pages and the distance to them, which has a positive effect on the visual organs.
Book reading stand
Wooden book stand
As you can see from the list, a stand is needed, try to have one in every children's room.
Wooden reading frame
Wooden holder
Let's start with the most classic version. This is a DIY book holder made from wood.
A great option to keep a few books off a shelf or coffee table, keeping them neat and tidy. Plus, the limiter itself complements the interior with its appearance.
The design can be based on planks, bars, even a whole log or some old cutting board that can be given a second life.
Here we consider this option:
Decorate the resulting structure the way you want. There are no restrictions here. It all depends purely on your imagination and imagination.
Types and materials for making book stands
In the table we provide only general examples of constructive solutions; everyone must make their own personal adjustments, taking into account their skills and desires.
| Types of book stands | Short description |
| Made from natural wood or plywood. Chipboard and OSB boards are not used due to poor physical characteristics: they are afraid of shock loads, cannot withstand cyclic forces, and react negatively to direct contact with water. Children often drop coasters or use them for other purposes than for outdoor games. Wood and plywood can withstand loads unforeseen during design; chipboard and OSB cannot, they crumble. By the way, a beautiful wooden stand can be used in the kitchen for reading books with recipes for making various dishes. Such products can be stationary or prefabricated/dismountable, the angle of inclination is constant or can be adjusted to the needs of users. | |
| They are made very quickly, but can break just as quickly if dropped, overloaded or other mechanical impacts. They are very afraid of water. It is recommended to make structures for use as a decorative element; long-term and frequent use is not permitted. | |
| The most commonly used wire is steel, iron, copper or aluminum; the diameter is adjusted depending on the calculated maximum loads. |
Video - Stand made from a book hanger
Step-by-step instructions for making a folding stand from boards
We will give a description of how to make a stand that can be folded and in this position take up minimal space. Manufacturing material - pieces of boards, dimensions and components are indicated in the figure.
To work, you will need a band saw or electric jigsaw, a grinder and a drill. If you do not have such tools, then the stand can be made by hand, but this will take much more time.
The inner part of the product can rotate on a wooden axis and fold/unfold. When unfolded, the wooden axis rests at an angle of approximately 35°, which meets medical recommendations.
Book stand diagram
Step 1. On paper, draw two life-size sketches. One for internal parts, and the second for external ones. For external parts, the pattern is larger than for internal ones. Make not only an outline, but also mark the location of the holes. Take your time and, if necessary, correct the appearance of the elements. Make sure they are symmetrical and beautiful.
Step 2. Glue the pictures onto the boards; you can use any glue. Keep in mind that each part will need two pieces, find material for all of them.
Sketches are glued to the bars
Step 3. Use a band saw to cut out the blanks for the stand. Work carefully and remember to follow safety regulations. The smoother the cuts, the less time you will have to spend on finishing the spring look. Keep this in mind and take your time, sanding always requires much more effort than quality sawing.
Practical advice. If you do not have a professional band saw, you can use an electric or manual jigsaw.
To cut with a hand jigsaw, take boards up to one centimeter thick; working with thick ones is physically difficult and takes a long time. In this way, you need to prepare four parts: two large external and two small internal.
Step 4: Sand the stand elements. The work will go much faster if you have a sanding machine. Turn it upside down and place it firmly on your workbench. Use various available means to fix the tool; during operation it should not move and, especially, fall to one side. This is fraught with injury; the machine can travel quite a long distance due to inertia.
It is better to grind two identical parts at a time, hold them firmly with your hands and carefully finish the cut plane and corners.
Sanding two parts at once
Prices for popular models of eccentric sanders
Important. The workpieces have roundings of small radius; these surfaces cannot be approached with a machine; they must be sanded manually.
Step 5: Drill holes for the wood axles. The diameter of the drill depends on the size of the axis. The holes are located on the same line if they are drilled in two parts at once. Clamp them with clamps, and only then drill them out. It will be much more accurate to work on a drilling machine; it keeps the drill at a right angle. If you use a drill, the angle can be controlled using a simple device. To make it, you need to cut a corner at a right angle in a bar approximately 5 cm thick. During drilling, this block is pressed tightly against the surface of the parts, and the drill along its entire free length with its side edges rests against straight planes.
Of course, the accuracy is not perfect, but it is much better than drilling by eye. And for our product there is no need to maintain dimensions accurate to tenths of a millimeter.
Step 6. Remove paper sketches from the blanks and finally sand the surfaces. Remember that the stand is made for children, carefully remove all sharp edges, do not leave burrs, make the surfaces as smooth as possible.
Step 7. Cut the wooden sticks to size. The end always cracks, cutting them off is quite difficult; it is recommended that the workshop have a template for such work. It is made simply and quickly; a box with side walls at right angles is knocked together from scrap materials. A cut is made very carefully in the bottom and walls with a circular saw; its height should slightly exceed the working protrusion of the saw. Now the stick is pressed against one wall of the device and sawed off to length. Due to the fact that its opposite side has a stop, the end does not break off. You will need four pieces of round sticks.
Trimming round sticks
Step 8. Assemble the stand using wood glue and allow it to dry completely for about a day.
If you have the desire and time, varnish the surfaces of the product. There is no desire - the stand looks attractive anyway.
Stand folded and unfolded
Preparation of tinted varnish
Making a stand from thin planks
Stand made of thin slats
Stand, rear view
Now let’s look at the method of making a stand from thin 12x32 mm slats, approximately 2 m will be required. When purchasing, pay attention that the front surface has a beautiful appearance and a pronounced structure. The number and location of curved knots should not create difficulties when cutting out parts.
Selecting suitable slats
Step 1. Cut two long pieces of 45 cm and three short pieces of 28 cm from the slats. You can change the dimensions slightly depending on your wishes and the availability of material.
Make the markings in such a way as to remove crooked knots with minimal loss of high-quality slats.
Practical advice. The accuracy of cutting will increase significantly if you immediately provide for the width of the cut.
To do this, when marking, make two lines at each end of the part. The distance between them is equal to the cutting width of the tool used. In our case, we use an ordinary hand hacksaw for wood with fine teeth; such tools have a 2 mm tooth set. Accordingly, the distance between the lines is two millimeters; while cutting, the blade must be kept exactly in the middle of the lines.
Step 2. Carefully level the ends of the planks with a regular hand plane.
Press the slats firmly against the device, and use a plane to make smooth reciprocating/forwarding movements. The knife should be very sharp, cutting depth approximately 0.1–0.3 mm.
To prevent chips from appearing at the end, the rail must be pressed against the bar along its entire length. To align the end, pull it out no more than 0.1–0.3 millimeters. The work requires a certain skill, it is better to practice a little on unnecessary sections. This will give you experience and eliminate the possibility of damage to parts of the stand. Constantly monitor the length of the elements.
Step 3. Lay out all the prepared parts on a flat surface, select their most beautiful planes and place them in one direction. This will be the front part of the stand; make marks on the parts so that you don’t confuse the optimal position later.
The strips need to be numbered
Step 4. On long workpieces, step back 80 mm from each end, make shallow notches with a knife. There will be two vertical jumpers here. Find the location of the third, it should lie exactly in the middle.
Marking the position of the notches
Step 5. Mark the dovetail joint on the short planks.
Work very carefully, checking the correctness of each mark several times.
Markings at the ends
Step back three millimeters along the edges and draw lines at an angle of approximately 80° to the end. It is better to use a special device; if you do not have one, then you need to buy a school protractor.
Marking device
If the width of the slats is the same, the work is much simpler; you can use the first plank as a template and mark all the remaining ones using it. If the width is slightly different, then you need to keep the dimensions of the joint, the width and length of the dovetail should be the same everywhere. It doesn’t matter how much you have to cut to achieve this result.
Step 6. Using a special saw, cut the connections in all horizontal parts (short strips).
Cutting a connection element
There is no such tool - use a hacksaw. This will take a little more time, but not critical. The new blade cuts wood quite quickly and produces excellent quality. First, you need to make side vertical cuts, and then cut the tail to half the thickness of the part. You should end up with a dovetail whose joint thickness is half the thickness of the batten.
Correct the correctness of the cut with a chisel, achieve maximum quality.
Using a chisel to trim an element
Step 7. Use the short strips as a template and draw connections on the long ones.
Finished vertical strips with cut connections
Drawing markings on horizontal bars
The algorithm of actions has no fundamental differences.
Step 8. Very carefully use a hacksaw to cut along the lines of the planks only to the middle of the thickness, remove the wood with a chisel.
Cutting grooves on long planks
Use a chisel to remove burrs and excess wood
Step 9. Dry assemble all the elements, check the strength of the connections. They should go in with little effort.
Connecting elements without glue
Everything is okay? Glue the elements together and allow time to dry.
Now all that remains is to make the simplest emphasis and you can use the product.
Simple stand stop
Plank. on which the book will be installed
Prices for clamps
There are options for installing adjustable stops, but they don’t need to take a long time. Why? The tilt angle of the book stand is standardized and is 35°. There is no point in changing it from 0° to 180°. No one reads books under such inclinations; there is no need to waste your time.
Stand after painting
Book stands are most often used by children while doing school homework. Unfortunately, the load on a fragile developing organism often exceeds acceptable physiological norms; parents must make every effort to reduce the negative consequences of prolonged sitting at the table. Correct posture can be achieved by supplying books and individually selecting the size of a highchair . Read how to do it on the pages of our website.
Source