- February 14, 2020
- Crafts
- Svetlana Pavlova
In the life of any person there are important dates: birthdays, anniversaries, anniversaries that you want to celebrate in a special way. First of all, you need to unusually decorate the room where the celebration will take place. For this, three-dimensional numbers are suitable, which can be made from cardboard and decorated with original flowers from ordinary paper napkins. It turns out very original, solemn and beautiful. This article will tell you how to make three-dimensional numbers from napkins with your own hands.
Necessary materials and equipment
At first glance, it seems that making numbers with your own hands is simply impossible. It's actually not that difficult. The manufacturing process will take some time, but the positive emotions that the hero of the day will experience are worth it. You will need:
- Paper napkins - plain, multi-layer or single-layer. Their color depends on the date of the celebration, the gender of the hero of the day and the surrounding environment. The required quantity is calculated based on the surface area of the numbers. Several shades are sometimes combined in one number.
- Threads are simple cotton.
- Scissors and a stationery knife - use only sharp tools so that the contours of the flowers are even.
- Meter-long ruler and tailor's meter.
- Stapler – simplifies the fastening process.
- PVA glue and tape.
- Cardboard for making a frame. Packaging boxes from household appliances are suitable.
How to make a three-dimensional figure from napkins with your own hands
The interior decoration looks original and unusual. Due to its volume, it can be installed on a cabinet, placed on the floor or even hung on the wall. Indeed, despite its large size and volume, it is quite light.
The costs of purchasing work equipment and consumables are minimal. Everything is done according to the scheme, extremely easy.
Required materials and tools
Take a look around and evaluate what you have in your home to create your own “masterpiece.” You will need a standard set of office supplies:
- thick cardboard, preferably large boxes from household appliances;
- pencil or pen;
- sharp stationery knife and scissors;
- masking tape;
- PVA glue;
- stapler
In addition, you will need a large amount of paper napkins. It is better to take a variety and in an assortment of colors: this way the figure will be bright and noticeable.
@2Decorwind.ru
General recommendations
To make it smooth and voluminous, you need to carefully cut out the number from thick cardboard, making room for gluing the two sides to each other. To do this, use a pencil and a ruler to draw a diagram.
You can download ready-made templates on the Internet and transfer them to prepared cardboard. It's much faster and more convenient.
The second figure is outlined in accordance with the first one already cut out. This way the edges will be smooth and there will be no skew. The base of the figure is flat, dimensions - 25*10 cm. To make it stable, make a double bottom.
Sidewalls - narrow rectangular stripes. In the case of complex numbers with curves, several short sides are made, which are then glued with masking tape or Moment glue.
Next, they begin to assemble the base. This is easier to do with the use of a quick-setting composition or hot melt adhesive. It holds much better and hardens in seconds. Don't use tape. Maximum - you can use masking tape, since it has a porous structure and the napkins will adhere well to it.
General instructions for making a frame of volumetric figures
The production of numbers begins with a frame on which paper elements are attached. The cardboard must be thick so that it does not deform during decoration. The basis for numbers from napkins can be flat or voluminous. The latter look much more impressive. To do this you will need:
- Cut out two identical numbers from cardboard using a stencil or templates. You can draw them yourself or print them from files from the Internet.
- Decide on the width of the numbers and cut out a rectangular tape for the end part.
- For numbers “0”, “4”, “6”, “8”, “9”, which have an internal closed space, additional side parts will be required.
- They work very carefully with the figures “0”, “2”, “3”, “5”, “6”, “8”, “9”, which have rounded edges.
- Having completed all the preparations, all the cut out parts are secured with tape.
The preparatory stage of work is over.
General instructions for numbers
General recommendations for all forms are the same. Since the figures imply volume, all numbers require cutting out two identical shapes and connecting them with end parts. You can draw the side protrusions in advance, which will then help secure the two parts together, but it is possible to make them separately.
The first figure is drawn on cardboard with a ruler, as well as using a downloaded and printed template. The second one needs to be traced around the first and also cut out.
Individual parts are made according to the following recommendations:
- Bottom. Flat base, size 25x10. It can be made in two layers to increase mass and stability.
- Sidewall. Rectangular segments of the same width. In complex shaped numbers like 2 or 6, they should be short in length to ensure a rounded shape.
Glue is selected separately. The most accessible method is PVA. School stationery is suitable for one-time use. Its problem is long drying time. In this case, “Moment” is preferable, which dries in seconds and holds much better.
But an even faster method is hot melt glue. It will allow you to fix large pieces of cardboard. It will allow you to fix large pieces of cardboard. In addition, it allows you to glue joints, and drying occurs in 1 minute.
Read: Solid wood tables
You cannot use regular tape. It is dense and has no pores, so napkins simply won’t stick to it. Masking tape works better because its surface has a cellulose base.
Flat numbers from napkins: step-by-step instructions
It is very easy to make them with your own hands. If the numbers for a celebration are needed only to decorate the walls in the room, then they can not be given volume, but made flat. This will take much less time - there is no need to glue a three-dimensional frame, and the number of flowers will be much smaller.
For production you will need:
- foam or cardboard to create a base;
- from 3 to 5 packs of napkins;
- double sided tape;
- PVA glue;
- a piece of twine;
- sharp scissors and a stationery knife.
Manufacturing instructions:
- Draw or trace the outline of the number on cardboard or foam board.
- Cut out two identical pieces from cardboard.
- Glue them together with double-sided tape, not forgetting to insert a twine hanging loop inside.
- Make from 20 to 50 flowers, their number depends on the size of the numbers.
- Glue the flowers onto the base with glue.
- Carefully straighten all the buds.
Make additional decorations - glue green paper leaves between the flowers, attach a bow from a ribbon or make a beautiful butterfly, stick on glitter.
From foam plastic - how to make
A do-it-yourself number 1 for a year old, made from polystyrene foam, will be voluminous and will help decorate a room for a party, a photo zone or a garden area if the event is held outdoors. To make it, it is most convenient to use a sheet of thick foam plastic.
A number is cut out from a sheet according to pre-prepared sketches, which is then decorated in any convenient way.
For decoration, corrugated paper, flowers made from napkins or using scrapbooking techniques, etc. are used. In this case, you will still need to work hard to create beautiful flowers, of which you will need a lot. If there is very little time left before the event, then the number can simply be covered on all sides with fringe or paper with a beautiful pattern.
Different types of flowers from napkins
Numbers for birthdays or other celebrations are most often decorated with flowers. They should be fluffy and easy to assemble. For a large figurine size you will need from 200 to 400 pieces. Let's look at the technique of making some varieties of flowers:
- Astra - you will need three napkins, scissors and thread. Stack them one on top of the other and fold them like an accordion. Tie the middle with thread and round the edges. Spread the petals, starting from the center. Squeeze the paper tightly in the middle - this will be a bud. Spread the leaves underneath to create a gluing area.
- Rose – Take six napkins and fold them into a stack. Fold them in half twice, trim the edges with zigzags, fasten the tip and fluff the flower. This is the easiest way to make roses for decorating birthday numbers from napkins.
- Chrysanthemum - unfold the napkin and cut it along the folds, fold the squares into a stack. Make an accordion; imperfect folding will give it a natural look. Fold it in half and tie the middle tightly with thread, rounding the edges. Gently spread them out, starting with the first layer.
There are many technologies for making flowers from multi-colored napkins. The article provides the simplest manufacturing methods, using which you can quickly prepare for any celebration.
Gluing the decor is an important step in making numbers
This is the last, final stage before the volumetric figures from napkins are ready, when the flowers need to be glued to the product. The plan for this procedure, how to position the workpieces, is thought out in advance. Apply glue in horizontal or vertical lines. Make sure there is no empty space between the colors.
Proceed carefully and carefully so as not to spoil or crush the buds. Use a pencil, inserting it into the middle of the flower and pressing it firmly against the frame, or press it with your fingers from below under the petals. When gluing is finished, straighten all the flowers so that they look lush. The back and side surfaces of the numbers do not need to be decorated, but simply covered with suitable paper - contrasting or matching.
Number 1 made of fabric: master class
You can sew the number 1 for a year old with your own hands.
For this you need the following materials:
- beautiful fabric;
- filler (this can be synthetic winterizer, cotton wool, foam rubber, etc.);
- needle and thread or sewing machine;
- scissors;
- chalk for marks.
The process for making such a figure is as follows:
- First you need to decide on the size of the future unit . You can draw the layout yourself on a large sheet of paper or print it on a printer. After which it is transferred to fabric folded in 2 layers.
- After this, you need to cut it out , not forgetting the allowances necessary for sewing together individual parts of the figure.
- Additionally, the sides are cut out .
- When all the parts are ready, you can start sewing . It is more convenient to start from the bottom. In this case, the seam that connects the front and side parts will be less noticeable.
- Next, you should sew on the back , leaving one side unsewn. Through this hole the unit will be turned inside out and then filled with filler.
- Before turning the number inside out, you need to make small notches . Thanks to this, there will be no folds or thickenings at the edges of the figure, and the piece itself will be smooth on all sides.
- After turning the number inside out, you can start filling it . This must be done tightly, compacting the material chosen for this inside. It needs to be kneaded periodically to prevent lumps from forming.
- When the number is completely filled, you need sew the remaining hole using a hidden seam.
- Finally, the piece can be decorated with ribbons, lace , buttons, beads or any other decor.
Making a unit. detailed instructions
The number “one” is one of the most popular - it is used when decorating a child’s room when he turns one month, one year old, when his first tooth appears, or any other event that occurs for the first time. For the volumetric version, two flat units are cut out of cardboard according to a template. The side parts are rectangles that have the same width, and the length is equal to the length of each individual part of the number. Flower arrangements can be very different in color and shape.
Step-by-step instruction:
- Glue the cut parts with tape.
- You will need a large number of colors, the description of which is above.
- Glue - you can use PVA. It is applied in horizontal or vertical lines.
- Start gluing from the edge, moving towards the center.
If it is assumed that the number “one” will consist of colors of two tones, then approximately a third of the total number of colors is made of one tone, the other third - of the second tone, and the rest should contain both the first and second shade.
Making the number two
There are some difficulties in producing this figure. How to make the number “2” from napkins? The two, compared to the one, contains several smooth bends, so the cardboard frame is made a little more complicated. For this:
- Using a stencil, using a stationery knife, cut out two identical twos and a rectangular strip 10 cm wide from cardboard to give volume to the number.
- Cut the strips into pieces of approximately 6 cm. Glue the parts with masking tape to the end on the outside and inside.
- Make paper flowers and glue them to the frame.
- Prepare an additional decoration in the form of a crown from gold paper and glue it to the number using a glue gun.
This will be a wonderful birthday gift for your princess.
Unit for a boy - how to make
To make a one for a boy you need to take:
- corrugated paper;
- silicone glue;
- cardboard;
- double-sided tape.
Process of creation:
- Make a three-dimensional unit out of cardboard.
- Cover the finished figurine on all sides with blue corrugated paper.
- Cut out 5x5 cm squares from paper.
- Using a pencil, make a tube from each square, which you then glue to the number. Thus decorate the entire unit.
- Decorate the figurine with a bow tie, figurines of a car, airplane, or other decoration that the birthday boy will like.
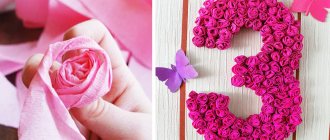
Let's make a three
The number “3” from napkins is made to decorate the room when the baby turns three years old or to add solemnity to the room where an event dedicated to the anniversary will be held, the date of which includes three. It will require even more effort to make than a two-piece, because it has many semi-ovals. To make it you need:
- Take a piece of cardboard and draw its outline on it. Two such parts need to be made.
- Cut out a rectangle and glue it with tape, first to one outline, then to the other.
- When the figure is ready, you need to make flowers from paper napkins prepared in advance.
- Take PVA glue and carefully glue it to the frame so that no free space is visible.
The number is ready, it can be used to decorate the room, creating a festive mood for the hero of the occasion and everyone present.
Edible unit
One may be edible. For this, any baked cakes are used, from which a number is cut out. It is coated with cream or mastic on all sides. You can also form figures from mastic, which will then be used to decorate the unit on top. You can also bake gingerbread cookies in the form of a single piece, and cover it with sugar or chocolate glaze on top.
The number 1 for a one year old boy or girl can be made edible.
Animal figurines or fairy-tale characters made from mastic can be used for decoration.
By making the number 1 for their baby’s one-year anniversary with their own hands, parents will be able to create a special festive atmosphere. A room decorated in this way will please the hero of the occasion and will be remembered by all guests for a long time.
Four: a detailed description of how to make the number correctly
The number “4” should be made from napkins by analogy with one; only straight lines are used to draw the frame. The color shade is chosen depending on the gender of the hero of the occasion. For ladies, both young and old, warm tones are used; for men, cool shades are suitable. Let's get started:
- Draw the outline of the number on the cardboard or trace the template. We cut out the blank with a stationery knife.
- We apply the cut out shape to a piece of cardboard, trace and cut out exactly the same second flat shape.
- To glue them together, you need to get several rectangles of the same width, the lengths of which will be different and correspond to the individual external and internal parts of the figure.
- Glue all the rectangles to flat images with masking tape to get a three-dimensional figure.
- Choose the shape of flowers you like and make the required amount from paper napkins.
- Carefully paste over the figure - and the craft is ready for use.
Step by step guide
To make a figure, you first need to acquire templates or draw sketches. Then they are transferred to cardboard and the future base is cut out. There is one for each number.
@Hockey-samara.ru
Frame making
The design technology is similar, but still has its own nuances.
- Zero. It's easy to make, despite its shape. Cut out two identical ovals and several even rectangular strips. Then install the central part, gluing it to the inside of one workpiece. Then attach the second one from above and close the side holes with rectangular inserts. After everything is dry, we start decorating with napkins.
- One. You will have to draw and cut two blanks, measure the long side part and make a rectangle of cardboard to size. Glue it. We proceed in the same way with the short part, decorating the sides. Next comes the base and completing the process with small square patches.
- Two. With this figure everything is more complicated, since it has bends. We also cut out the blanks and connect them using rectangles. They need to be folded into the correct shape to achieve smooth transitions. We connect the inner edges with the outer ones, and it’s easier to make the “tail” even. If necessary, trim with a stationery knife.
- Three. One of the most complex figures. The templates are first connected to each other by gluing them to each other on small pieces of cardboard. Then they cut out long rectangular strips and cover the sides with them, gluing them with masking tape. The ends are covered with short patches.
- Four. It is done by analogy with the number one. Accuracy of measurements is important here in order to cut out rectangles. The master encounters difficulty when designing the internal triangle. Pieces of cardboard are glued with masking tape and fitted tightly to each other.
- Five. Closing the ends begins from the top, measuring the distance and preparing the corresponding rectangles. Then the short straight part at the base of the figure is shaped in the same way. Long thin strips are used to process the ends of the semicircular part.
- Six and nine. The template is transferred to cardboard and blanks are cut out. Then the inner and outer circles are decorated using long rectangular stripes. It is better to fasten the edges with hot glue and additional masking tape. This way the seams will be secure. To make the number nine, proceed in the same way, but by turning the template 180 degrees.
- Seven. This is a simple number, the creation process of which only requires precise measurements. Cut several long strips of cardboard, as well as a couple of pieces to cover the ends. Carefully glue all this onto the sides of the figure with glue and tape.
- Eight. The blanks are fastened together and the ends are covered with long rectangles. On the outside, one or more strips of cardboard are used. We glue the inside with small pieces or a clearly defined piece, which is secured with tape.
The process of creating a figure is very creative and interesting. You can involve children in making crafts.
Features of making the number “five”
To make a template for this figure, experienced craftsmen suggest drawing a figure with a predominance of straight lines to facilitate cutting and gluing the elements.
But if the hero of the day turns 55, then you need to try to give the numbers “5” from napkins a curved shape for his birthday. This will focus the attention of those present on the anniversary, emphasizing the importance of the event being celebrated. Work on the numbers in this order:
- Cut out two identical cardboard images, outlined according to a pre-prepared template.
- Measure individual outer and inner sections and cut cardboard rectangles to the appropriate length and constant width chosen for the thickness of the figure.
- Tape all the rectangles to both parts of the frame.
- Decorate the resulting volumetric figure with prepared flowers from paper napkins. They can be one tone or contain several shades. For a special occasion or to celebrate the birthday of a five-year-old child, get creative and additionally add sparkles, beads, and for the child - funny pictures.
Volumetric figure: interesting ideas
If you decide to repeat one of the master classes, be sure to try adding your own details to the figure. For example, an unusual decor or color combination. We have specially prepared several ideas for inspiration.
Making the number six
The number “6” made from napkins is perfect for celebrating a child’s sixth birthday or a more serious anniversary of 60 years. In the first case, you need to choose cheerful bright colors of napkins for decoration, in the second - calmer shades. The image of this figure contains mainly elements in the form of ovals and semi-ovals. The manufacturing procedure is the same as when modeling other numbers:
- Cut out two identical sixes from cardboard using a template.
- Cut cardboard rectangles to glue two images together.
- Secure with tape.
- Decorate the figure with flowers.
Having made this figure, you will immediately get a three-dimensional image and the numbers “9” by turning the first one backwards. The only thing that needs to be taken into account is the stability of the base on which they will stand.
Cardboard unit: step-by-step instructions
The easiest way to make a flat figure is to use ordinary cardboard. For this purpose, an ordinary cardboard box is suitable, on which the outline of the number is applied, and then it is cut out with sharp scissors. Decorate in any convenient way. At a minimum, it is painted with paints, wrapped in foil or covered with beautiful bright paper.
The creation will become even more festive if you attach a crown, flowers, butterfly figures or any other decoration to the top of the figure. If it is a boy’s birthday, then it is customary to decorate the number with drawings or figurines of airplanes, ships or cars. This decor is easily attached to the wall, curtains or to the birthday person’s chair using double-sided tape.
A three-dimensional unit will look much more attractive. First, a frame is made, which will then be decorated. Thick cardboard or large voluminous boxes are used for the frame.
Next you need:
- Make a template by drawing a layout of the future number on paper. It is best to use a sheet of notebook paper or special paper with markings. In this case, you should take into account the scale of the product, its height and width.
- The figure is transferred to cardboard, having previously increased it. Exactly the same figure, only in a mirror image, should be cut out from another piece of cardboard.
- To make the structure stable, you need to make a bottom . In this case, you should take into account the parameters of the figure (its thickness and width). The wider they are, the more stable the unit will be, however, it will also need more decor. If the figure is planned to be hung on the wall, then the thickness can be minimal. In this case, the length of the bottom should be the same as the width at the bottom of the number.
- Using paper and glue or tape, attach the bottom to one of the sides of the figure . Such manipulations can only be carried out from the inside of the future unit.
- After this, you can glue the second half of the number using wide tape, further strengthening the fold line .
- The top of the structure is made in the same way .
- Using tape, connect all parts of the figure between themselves (top and two sides).
- To keep the frame strong, all external folds should be taped .
- Finally, all sides are closed . It is important that the dimensions of all workpieces correspond to the dimensions of the bottom.
If everything is done correctly, you will end up with a beautiful three-dimensional unit that can be used to decorate a holiday room.
How to make a seven correctly so that it is stable
The number “7” from napkins is often made for a child’s birthday when he or she turns seven. After all, this is a serious date, the baby finishes going to kindergarten and enters the first grade of school. It is easy to do, because its contours consist almost entirely of straight segments. But the difficulty is that it is very unstable, because it has a small support area, so it has to be made heavier or the base expanded. Another way is to make a wall-mounted, flat version. To make it, take:
- A large cardboard box that needs to be found in advance. Divide it into separate sheets, lay it out on the floor and draw a silhouette of the number. For a flat figure you will need to cut out one, for a three-dimensional figure - two identical contours, which will need to be glued to rectangular strips of the same thickness with masking tape.
- Make voluminous, lush flowers from napkins and glue them to the figure with PVA glue.
Instead of cardboard, you can also use foam. For additional decor, beads, butterflies and all kinds of bows are suitable.
Making a figure eight
This figure from napkins is probably most often made for the holiday of March 8th. It is customary for us to celebrate this day with work groups in public places. To raise the festive spring mood, the room is decorated with bouquets of fresh and artificial flowers, placing between them the symbol of the holiday - the number “eight”. To make it:
- Draw a template consisting of two circles - large and small in diameter.
- Cut out two identical eights and rectangles of different lengths but the same width.
- All parts are glued together with tape.
- Prepare delicate spring flowers from napkins and glue them to the base.
The finished figure is used to decorate the room.
Napkin decor – flowers
The number 1 for a year old, decorated with napkins with your own hands, looks very beautiful and lush. To make it you will need colored napkins and patience. For flowers, only single-layer napkins of different colors are suitable. The napkin is folded in half. There is no need to unroll it first. In the middle, the workpiece is fastened with a stapler.
Thin wire can be used to secure the base of the flower. Using scissors, trim the edges of the napkin to make a circle.
The top layer of the napkin is carefully collected so that petals are formed. Gradually, all subsequent layers are formed in a similar way. After all the edges of the napkin are raised, the petals are carefully straightened. Using a glue gun, all the flowers from the napkins are glued to a pre-prepared piece.
Number "zero"
Celebrations dedicated to round dates deserve special attention. They are held on a large scale and attract many people. The premises are necessarily decorated in a special way; they often display a number corresponding to the age of the hero of the day, where the number “0” is indispensable. It is made using the same technology described above. Two completely identical blanks are cut out according to the template. Rectangular strips are glued to the sides and then decorated with paper flowers.
