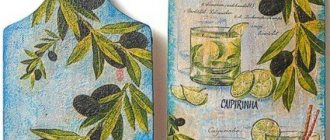
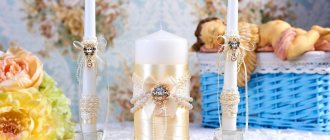
photo, Provence style, fabric, newspapers
Author Victoria Reading time: 4 min. Published 02/10/2018
Do-it-yourself shelf decoupage is a great way to breathe second life into a “boring” piece of furniture. Decoupage is a technique for decorating objects using various images on paper or fabric. Thanks to this technique, you can not only create cute souvenirs, but also decorate the interior. As with most crafts, this technique requires patience and perseverance. If you are afraid that you will not be able to cope with a large amount of work, then you can start with small items.
Working with wooden surfaces
The use of decoupage techniques looks especially harmonious in the interiors of kitchens in the Provence style, which involves the use of only natural materials, the presence of many open shelves, decorated with floral patterns and necessarily aged. You can purchase special blanks for decoration or process existing interior items. Whatever option you choose, you need to familiarize yourself with the features of working with wooden surfaces.
Special preparations are sold already prepared for work; by purchasing them, you can immediately begin decorating. If you did not purchase a special wooden blank, then you should initially sand it with sandpaper or a grinder, and then apply primer. If you want to decorate old objects, then remember that the surface for decoupage should not be rough. That is, the object of decoration will have to be thoroughly cleaned of old paint or varnish.
After you apply the primer to the wooden piece, proceed directly to decoupage. Below you can find a master class on decoupaging kitchen shelves.
Master class on decoupage shelves
Shelf decoupage can be done using napkins, fabric and even old newspapers. Getting started will be the same in all cases.
In order to decoupage an old shelf, you will need:
- fine sandpaper (so-called “zero”) or sanding machine;
- priming;
- acrylic paint;
- PVA glue;
- three-layer napkins or fabric with a suitable pattern, old newspapers;
- brush;
- scissors;
- glossy or matte varnish, craquelure.
Prepare the surface as indicated above. If necessary, paint the shelf in the desired color.
While the paint is drying, start preparing the material with which you plan to decorate.
Decorating a shelf with fabric
You can decorate a shelf not only with paper, but also with fabric. To do this, take a piece of fabric that fits the size of the shelf, or combine the decoupage technique with patchwork and use scraps. You will need the same materials as when working with paper.
The fabric should be chosen only cotton. The prepared flaps should be soaked in the adhesive solution for about 30 minutes. Then glue them onto the prepared surface and let dry.
The finished product must be coated with several layers of varnish to protect it from environmental influences.
Decoupage is a very interesting technique. Restoring shelves using this technique does not require large material costs. With its help you can easily breathe life into old objects. The top shelf in the kitchen, decorated in this way, will become a feature of your interior.
Decoupage shelves in Provence style
Decoupage of a shelf in the Provence style involves the use of discreet paint (for example, lavender or ivory color is suitable), the presence of plant or floral prints, as well as aging. Abrasion and roughness will give an aged look. You can apply the paint in two layers, then lightly sand it, thus giving the shelf an antique look.
Choose a napkin with a suitable image. Separate the layer with the pattern from the other layers, cut out the desired element with scissors. Instead of using scissors, you can carefully tear out the design along the contour. In this case, the edge will turn out uneven and when gluing it will look more like a painting.
Take PVA glue; if it is too thick, dilute it with water. Apply glue to the napkin and to the shelf. Apply the picture and brush or roller over it, smoothing it thoroughly. Movements should be directed from the center to the edges in order to remove excess air.
After the product has dried, go along the edge of the napkin with a sponge dipped in paint of a suitable color. With this technique you will hide the edges of the napkin, and the transition from the motif to the base will be smooth.
The surface must be allowed to dry and then varnished. Since gloss is inappropriate in the Provencal style, use matte varnish. If you need to get cracks, dry the varnish with a hairdryer or use a special one - craquelure.
Decoupage shelves with newspapers
To work, you will need a prepared kitchen shelf and a stack of old newspapers. It is recommended to use the most interesting newspaper clippings; it is better if they have a different font and headline size. Foreign newspapers will be interesting.
The technique for applying newspapers to a wooden shelf is the same as for applying napkins. You can cover individual areas or the entire shelf. In the latter case, the edges of the newspaper clippings should be glued slightly overlapping. Let the shelf dry very well and cover it with several layers of varnish.
Base requirements
The preparatory stage for creating cabinets using the decoupage method is choosing a base, most often wood or chipboard. Wooden products look harmonious with inserts of papier mache, tin or glass. You need to be especially careful when using a plastic base, as the technique may simply not be suitable.
When choosing a basis for decoupage, you should adhere to the following rules:
- The wooden surface is treated with sandpaper to level it well. If there are grooves, they are filled with a special wood putty, after which they are sanded until the surface is smooth;
- glass products must be thoroughly washed and dried so that no lint remains. It is important to degrease the surface before starting work;
- Tin items can be cleaned well with water and vinegar mixed in a 1:1 ratio. If the tin has rusty stains, they can be easily cleaned with a brush or a wire brush.
Master class: decoupage linden shelves
Shelf with decoupage “Leaves are falling”.
List of materials: linden shelf, napkin, PVA, varnish, acrylic, sandpaper, three-dimensional contours, oil paint. I bought a blank linden shelf, I can’t get past the shelves, I love decorating them so much!
I filled all the recesses, dried them, sanded them with medium-sized sandpaper, not only where the recesses were, but also the entire surface of the shelf, then went through the primer twice with intermediate drying.
I mixed white and brown acrylic and my first layer of paint, which will be visible from the scuffs, turned out like this.
When the paint had dried well, I rubbed a candle on all parts of the shelf where I would like there to be scuffs.
Then I mixed a lot of different acrylics and selected the color I liked. Painted it.
I didn’t like the first result, after a good drying I applied another layer of paint to even out the color of the shelf, I applied the paint with a sponge and somewhere with a brush.
This is finally my favorite time in this job! Using sandpaper, quite coarse, scrape off the paint from those places where the candle was smeared. I forgot to say that the second layer of acrylic should dry well (it dried overnight for me).
I don’t have the patina that makes the paint look antique, so I diluted a little oil paint with vegetable oil (I think you can use any) and I happened to have olive oil on hand. I smeared it a little in the corners and wherever it seemed necessary to me and, if it was a little dark, I rubbed it with a little dry cloth (I trained separately from this work), but I read this from someone, I didn’t make it up myself. In a crisis this will be useful to many, I think...
It started to look so aged, just what I wanted... I also did this procedure for the first time (I liked it). And we bought pens in healthy olive oil...
Favorite pastime: picking up fragments of napkins, arranging them, gluing them!
Here and there I added bronze curls (outlines).
That’s what she did, my dear, with Love and Joy!
And this is the view from below.
I collect frogs and can’t miss the opportunity to show my favorites to the people! Hurray! Thank you for reading my MK!
How to decoupage an old cabinet, an overview of popular techniques
Old wooden things can be restored to their former beauty by turning them into a work of art. If there is furniture in the house that is scratched in places or has an unsightly appearance, there is no need to rush to throw it away. The most common basis for decoration are cabinets. It is possible to independently not only restore the deformed structure of individual areas, but also completely transform a piece of furniture. A technique such as cabinet decoupage has been particularly popular lately, so finding all the necessary materials for creativity is not difficult. The subject of pictures and paints should be selected so that the furniture looks aesthetically pleasing and harmonious.
Decoupage furniture: shelves
Details Category: Master classes
In this article, or master class, I present the idea of decoupage shelves: a combination on one surface of the aging techniques “shabby”, crackle (use of 1 step composition), the use of bitumen (imitation of “burns”), features of the use of rice paper .
The very idea of decorating these shelves can be used both in the restoration of already “used” items and in adding artistic variety to new items. In my case, these are new blank MDF shelves with laminated surfaces, which I decided to “cheer up” in a rustic style. Why in the village? I can't think of any other definition 
A master class on decoupage of these shelves was written at the request of the editors of the International Publishing House "TOLOKA", as well as a master class on decorating the doors of a bedside table and a chair for a musician. Therefore, everything is shown in the diagrams on already completed works, after a while.
The home of these shelves is a small cozy office at the university, where the chairs-piano-armchair-pictures-on-the-walls are from Soviet times. All these things have been updated, remade, decorated in a common theme. Accompanying these shelves is a bedside table with restored doors and this chair.
General view of two shelves
Top shelf
STEP 1: primer-painting
I primed and painted the surfaces (both shelves were done at the same time). Painted in 4 layers, drying after each layer. And they became an even, beautiful “ivory” color.
STEP 2: surface preparation for cracks with 1-step crackle
With acrylic art paint (burnt umber) I painted in one layer only the outer ends and about 1 cm from the ends of the upper and lower surfaces of the shelves (this color will later appear from under the “cracks” and “scuffs” after applying the top layer of ivory paint). I also randomly painted the corners of the shelves in those places where the 1-step crackle would be applied.
Where it is painted over with brown acrylic
STEP 3: aging using the shabby technique: working with a candle.
I ran a candle along the edges and ends of the shelves (you can get an idea of working with a candle here). Without fanaticism!
STEP 4: distressing with 1-step crackle On the brown paint, where cracks are expected to be, I applied 1-step crackle in 1 layer.
I have this on the outer corners: the ends, top and bottom of the shelves (as this usually happens in life). STEP 5: Revealing cracks and abrasions
1. “Show” the cracks. Apply contrasting paint over the tack-dried 1-step crackle. In my case, this is the ivory background paint that the shelves were originally painted with. Here are the cracks showing up! Moreover, the shelves at this stage are painted entirely in ivory color, taking into account the peculiarities of working with 1-step crackle. After this, do not overdry the paint on the shelves, remembering that “shabby” abrasions are best done on a surface that has not completely dried.
Cracks at the end of the shelf
Cracks on top of shelf
2. Make shabby abrasions. Using the blunt side of a knife (I have a serving knife with a wonderful rounded end and teeth there for this purpose - very convenient; a palette knife is generally recommended) I removed the top layer of background paint (I used ivory color) from the edges and ends of the shelves, where I touched it with a candle . Undry paint, as a rule, comes off very well, and in this place the lower, brown layer becomes visible. I use sandpaper in “shabby” carefully: only for grinding surfaces (if necessary), removing burrs from the top layer of paint removed with a palette knife or knife. This produces smooth, imperceptible transitions from color to color, more naturally conveying the effect of a worn (“aged”) surface.
Scuffs with a candle
STEP 6: decoupage I chose the thinnest rice paper (14 g/sq m) with roses to match the picture on the doors of the bedside table and the mirror. The motifs pasted over the cracks are, in my opinion, very effective. I glued it dry. The pictures themselves are cut out somewhere, torn out somewhere. I have collected more information about rice paper and how best to use it in the form of my own impressions in a separate article.
Motifs (decoupage) on the top shelf
Motif (decoupage) and abrasions seen very closely
STEP 7: imitation of burns Bituminous varnish will help us with this. Using a cotton swab, I just went over some of the surfaces that appeared in the shabby. The main thing, again, is without fanaticism. We always remember the picture of what the surface of a wooden thing looks like after burns and, following the inner artistic impulses of the soul, we apply bitumen with light tangential movements. In some places I rubbed and rubbed the bitumen with a cotton pad immediately after application, and in others I left the line applied to the edge of the shelf to dry.
Shelf angle
End (edge) of the shelf
Another corner of the shelf
Step 7: finishing coat The shelves are coated with 1 layer of yacht varnish using a “brick” foam sponge. The choice is not accidental. Yacht varnish gives the yellowness of the surface necessary for “aging”, and a coating of 1 layer gives the very unevenness of the coating (yellow stains), emphasizing the effect of a faded or “burnt-out” item. And the shelves are the place where flowers live, which means the protective coating – yacht varnish – is just right.
November 14, 2012 With love, Evgenia Bazhenova
We bring bold ideas to life: techniques and techniques
Decoupage panels for the kitchen will allow you not only to transform old things by creating unique decorative elements, but also to realize your bold creative ideas. There are several decoupage techniques that are used to create panels, decorate walls and furniture:
- Gilding is a specific coating technique that involves creating an additional decorative coating using golden paint;
- Shadow technique. Through a combination of pastel and dry brush, it is possible to soften the transition lines, avoiding harsh lines;
- Tinting with color paints allows you to add a special flavor and creates a more colorful picture;
- Creating artificial aging using abrasions and special techniques;
- Patination is the creation of darkened areas. This is a kind of imitation of wear and tear, discoloration in places where hands are constantly in contact with the surface;
- Craquelure is the creation of artificial cracks on the surface to be decorated to give a special color and original texture.
Decoupage of shelves | Country of Masters
Good afternoon, dear residents of SM! Today I want to show the shelves that I made for quite a long time, about a month, since I create only during breaks between studies. The preparations were made by Vanya’s sister’s husband. My mother and sister primed the blanks and varnished them. I made this shelf as a gift for my grandmother.
Closer.
In this work I used 4 napkins, abrasions along the edges with the help of a candle, flowers on the inside on the sides with putty through a stencil, on the shelves themselves there are bird paws also through a stencil, acrylic paints, many layers of varnish.
Putty through the stencil.
Here too.
Barrel.
Arriving guests.
Scuffs.
View from above.
We'll leave this shelf for ourselves. I used 4 types of napkins, candle abrasions, two-component Maymeri craquelure 753-754, drawings through a stencil with paint, prints of a rubberized napkin, sprays with a toothbrush, acrylic paints, a lot of varnish.
Closer.
Bottom.
Barrel.
Closer.
There are prints of rubberized (vinyl) napkins on the shelves. I spread acrylic paint on a napkin and applied it to the shelves, carefully removed + sprays.
Scuffs.
Lavender shelf. I used fragments of 5 napkins and a printout, candle scuffs, some splashes, acrylic paints, a lot of varnish.
Pattern painted through a stencil.
Barrel inside.
General form.
View from above. I placed bouquets of lavender on the shelves, the background changing from one color to another (pastel colors).
Scuffs.
Side view.
Today we have sunshine, but a week ago it was covered with snow... Our Count is on guard.
His faithful girlfriend Aza.
This is our Varyushka on the willow.
After a walk he rests.
Kitchen shelf “Visiting Grandma”
Today we will make another shelf. Why "Visiting Grandma"? Yes, because the shelf turned out to be old, as if worn out by time.
Author: Inna Chornenkaya
Odnoklassniki page
To work you will need:
- plywood,
- wooden frame 70 mm wide,
- wooden stalk,
- metal and plaster fittings,
- Oak color stain,
- construction colors,
- jute rope,
- glue moment “Crystal”,
- sponge,
- brushes,
- nails,
- screws,
- construction finishing putty,
- PVA glue,
- sandpaper,
- stencils-3D,
- rice napkin,
- jigsaw,
- hammer,
- screwdriver and screwdriver attachments for grinding and cutting round holes.
I sawed the plywood and knocked down two boxes like this.
Next, I file the sides and immediately make holes for the handles in them. I made round holes using a screwdriver and this attachment.
I knock down the entire body with nails, and where necessary with self-tapping screws. When I assembled the body, I realized that the wooden slats in this condition did not look very good, so I tore them off and sawed new ones, a little longer in size, so that they would span the entire width of the shelf.
Like this. Now they look better.
I don't really like working with rice pads. When gluing, they stretch very much, but this is the only pattern that suited me for this job. That's why I bought it.
As usual, I coat the body of the shelf with PVA.
Then I glue the napkin, also lubricating it with PVA on top.
As you can see here, before I started gluing, I didn’t even cut anything out.
It is much more convenient, when the napkin has dried a little, to “cut” it off from the body of the shelf with sandpaper.
It turns out very easily, quickly, and most importantly smoothly.
Here is a rice napkin glued to all places.
Then I cover the entire body (where there is no napkin) with stain.
Next, I add chocolate and red-brown colors directly to the remains of the stain that was used to paint the body. I stir it well.
I put on gloves and use a sponge to “smack” all the edges of the shelf (where the napkin is glued).
It turns out like this. Later, when we varnish the body, it will look darker.
I am diluting the solution. For those who are new to my blog, I will repeat: The composition of the solution is putty + pva + water + the same colors (chocolate and red-brown). The color of the solution should match as closely as possible the color of the shelf body. So, we attach the stencil directly to the places where the napkin is pasted. You need to fasten it as best as possible so that it fits evenly to the entire surface. There is no room for error; if the solution is smeared on a napkin, it cannot be removed.
I apply the solution, remove the excess and carefully remove the stencil from the body.
That's it, it turned out smooth, I'm happy! Wash the stencil after each time you apply the solution (well, that’s understandable).
When the solution has dried, after 2-3 hours you can (and should) sand it thoroughly using fine sandpaper.
I remove the dust with a brush. After sanding, the bas-relief turned out to be much lighter, but it doesn’t matter, after a layer of varnish it will again acquire its original color.
I wipe with a slightly damp sponge.
I “place” metal fittings on the glue.
And I had this plaster decor. It seems to me that it would come in handy here, but it is white.
I take brown spray paint and after 3 layers of spraying our decor turned brown.
The body is almost ready, but we haven't worked on the handle yet. I saw off the cutting to the required length, rounded its ends by grinding and inserted it into the previously drilled holes.
Of course, the cutting stays there “not lethally”, so we will glue it and decorate it right away.
Lubricate the joints with glue.
And we begin to wind the jute rope.
To make it less noticeable, I knit a knot from below, right at the base.
We have already decorated the inside of the handle, now we are doing the same on the outside.
Here. The rope is finished.
I burn the rope.
Jute rope has a fringe like this. In other jobs this would be useful, but here I don’t need it. So I burn it with a lighter. It’s more convenient to do this with a piezo lighter.
This is what the rope looks like after firing.
Covered the handle with stain.
I used sandpaper to go over all the ends of the plywood (only where there was no napkin) and varnished the entire surface of the body. When the varnish had dried, I sanded the entire body a little and varnished it 3 more times. I glued silicone feet to the bottom of the shelf (which I wrote about in the previous topic). And that's it, ready!
Decorating a bookcase | Magazine of the Fair of Masters
This spring I was blessed with a bookcase! In the photo it has already been restored by a carpenter. I had to replace all the shelves, cut out the missing leg and thoroughly sand the top layer. Without a carpenter... And it would have stood for a long, long time due to my busyness, if not for the textile festival in October of this year, which I showed up for. I showed up at the festival and they gave me 4 square meters. What should I fill in? Of course, with whatnot! It will be possible to put my toys, boxes, flowers and a lot of other beauty on it! In addition, it fits perfectly into the niche of my studio both in size and in the interior...
In general, I had this idea. So that on the shelves, as if there were lace napkins... Our grandmothers. Crocheted. Wipe off the dust and it's good. There is no need to wash anything). Of course, I couldn’t find any decoupage napkins like that. But I found some cute pictures and printed them out at the copy center. I decided to make the main color dark brown, and paint the shelves on top of the main color to match the print. Then age it so that the main brown color shows through from under the colored shelves. I’ll confuse you now, it’s probably better with pictures, it will be clearer.
I started from the top shelf. Logical, right? I covered the surface where the torn out motif would be approximately located with primer. After drying, I sanded it.
While the soil was drying...
I placed the torn lace motif on the cellophane and applied universal waterproof glue with a brush in two layers.
After drying, I turned it over, wet it a little and slowly began to roll off the excess paper to thin it out.
The process, of course, is not for the faint of heart... A little later I tried another method. It seemed easier to me. But not by much. In general, you need to thin the motif as thinly as possible so that the transition of paper into wood is less noticeable.
I got busy here and didn’t shoot the intermediate frame, but I’ll tell you everything! :)
This is a napkin already glued to the shelf.
It's simple. I spread PVA onto the sanded primed surface and placed the napkin with the cellophane facing up. And then, using a dry cloth, I removed excess PVA and air from the center to the edges. Then I carefully removed the cellophane. Almost ordinary decoupage. Many people do this with files.
The holes that formed did not bother me at all, but on the contrary, they later added some piquancy to my bookcase, which was going to get old anyway. And in general, I have long caught myself thinking that some moments-flaws in creativity, in the future, lead to some new ideas...
I painted it with one layer of acrylic paint - burnt sienna. I rubbed the edges with a candle to make further work with sandpaper easier.
This shot was taken much later, but I’m showing it to you because I didn’t take it in time.
After drying, I applied background paint - 2 layers. For this shelf, if anyone liked the color, I mixed green, blue, black and white. Sanded it.
But I decided to make this shelf differently. I immediately glued the torn motif onto PVA, face down, onto the primed surface. And after drying well it became thinner.
For some reason it turned out strange. As the green color thinned out it turned into turquoise, but I just needed a green shelf... I had to paint on it...
And then, according to the same scheme. Main color. Applying wax to the edges of the shelves.
Bedspreads for 2 times. And with the main brown, it turned out to be 3 layers.
Sanded it. In those places where the wax was applied, brown paint is visible, which was what needed to be proven :)
And so on for all five shelves.
As you already understood, I painted the balusters at the same time as the shelves. But they turned out so perfect and deep brown that I decided to work with them some more. Since I didn’t have bronze paint, and gold wasn’t suitable, I took a bronze outline. And using an almost dry brush I rubbed the protruding areas.
The balusters then became more voluminous.
And for even greater volume, I scraped a black pastel with a stationery knife and rubbed it, rubbing all the indentations with my fingers.
I took it outside and applied the spray twice. The spray is matte. Thank God there is no wind today and the weather is whispering...
Shelves close up.
And here is the whole bookcase! Not a bookcase, but an art object! I think it turned out great!
A little later, I want the napkins to remain matte, and the shelves themselves to be slightly glossy... There will be a 3D effect. It's a matter of varnish :)
Thank you for being with me and, of course, I will be glad to see your comments!
Yours, Elena Zlokazova.
DIY glass shelf for the bathroom
The idea of making a shelf for my bathroom has been brewing for a long time. Yes, somehow at first there was no suitable idea, then there was no time, and sometimes there was no inspiration.
And when the “stars aligned” - a wonderful idea came from scrap materials, a little time was found and inspiration descended, which is the most important thing.
So, I present to you my first master class. I apologize in advance for any shortcomings.
Necessary materials:
- Three glasses (I have doors from an old shelf, sealed with translucent film)
- Reels from oilcloth (I made them in the store, they have been waiting in the wings for a long time)
- Scissors
- Meter
- Ruler
- Stationery knife
- Pencil
- Acrylic paint (white, golden)
- Acrylic lacquer
- Sandpaper
- Napkins
- Twine
- Stencil
- Double-sided tape
- Silicone gun
- Decor
We take a reel, measure the required length, mark it with a pencil and cut out a hole for the glass with a stationery knife. We do not cut completely, but only half the circle.
To make the glass fit better into the hole, use a ruler to slightly move the slot apart and place the glass there.
We perform a similar movement the required number of times. I have 4 legs with 3 holes in each.
Next, paint the legs with white paint in 2-3 layers.
The next steps are decor.
We decoupage the bottom of the legs. I glue the napkin with folds because I don’t see the need for perfect gluing. Plus the napkin is too thin and breaks easily.
When everything is dry, we go over the roughness with fine sandpaper. Here's a before and after photo. It fits me.
I wrap the next opening with twine and double-sided tape.
Using a napkin of a color that suits me, I decoupage the penultimate opening. The napkin lays much smoother.
When everything is dry, we sand it.
The two front legs are almost ready.
I decided not to bother with the hind legs, because they won’t be particularly visible. Only on the sides I made a suitable “plant” design using a stencil and gold paint.
We open the decoupage parts with 3-4 layers of varnish.
We assemble the shelf. First I fix the glass on the rear legs.
Then the front ones.
I tie the legs with a thick tourniquet - this is both a decorative element and the tourniquet also serves to strengthen the structure. At the same time (or at the end) we glue everything with silicone glue.
When thinking about decorating the top, I had to trim the front legs a little. I think it's better this way.
I wrap the back legs with twine. The flowers are made of plaster, the middle of them is not painted, it’s like an aroma stone and aromatherapy (I found it in my supplies).
I make flowers from jeans. Add some shells and beads.
And we admire the result.
Stages of work
The easiest way to decoupage furniture is with napkins. Instead, you can use clippings from newspapers, magazines, or a plot on rice paper. First, the necessary materials and tools are prepared: napkins, PVA glue, acrylic varnish, brushes, primer, sandpaper. Master Class:
Give each layer time to dry, this will protect the cabinet and decor from damage. Some craftsmen cover the base with furniture wax instead of varnish. This is allowed, but the pictures themselves must still be varnished.