Decoupage for beginners on wood from napkins: 5 stages
Making decoupage on wood is not difficult, so even novice needlewomen can easily cope with this task. The decoupage technique is considered quite simple. Products made using this technique. They have a beautiful and original appearance. Decoupage involves applying a finished pattern to the surface of the product. Typically, wood and glass are used as materials for decoupage. Most often they are covered with cloth or paper. Decoupage for beginners on wood from napkins is a common type of decoupage. Wood is an environmentally friendly material, which makes the product more valuable. You can choose a variety of items as wooden products: boxes, boards, boxes, decorative figures, interior items.
Simple wood decoupage for beginners: napkins and general instructions
The decoupage technique appeared in the 17th century. This type of decoration has become so popular today due to its ease of execution. There are many types of materials that decorate, as well as a wide variety of materials used to produce decoupage.
Creative work begins with choosing the item that will be decorated. When it comes to wood, the choice is very large: from boxes and trays to pieces of furniture.
Before starting work, beginners need to familiarize themselves with the instructions and general rules that apply to all decoupage techniques. You should also prepare the necessary tools and materials, without which high-quality decoration will be impossible.
Before you start decoupage, you should definitely prepare the wooden surface
What you should pay attention to:
- Preparing the wooden surface;
- Study of issues related to sealing joints and irregularities;
- Selecting the type and quality of surface primer.
Preparatory work is extremely important, since the quality of the decorated surface depends on it. All stages of work must be performed carefully, in the exact sequence. Do not neglect the advice of professionals - small nuances can sometimes significantly simplify your work.
Decoupage for beginners from napkins
Beginning craftsmen can safely start decorating the product and transferring the plot they like onto it. To stick napkins correctly, you need to familiarize yourself with the nuances of decorative work. The dimensions of the product affect the complexity of the decorative process. It is better for beginners to start their experiments by decorating small objects.
It is interesting to choose napkins that depict rare paintings - this makes the product unique.
Stores sell a special set of decoupage for children. They contain small blanks and materials that allow children to complete decoupage on their own from start to finish. Children can complete more complex types of work with the help of adults.
In order to quickly and correctly glue the napkin to the product, you must carefully read the instructions for beginners
The simplest steps:
- Prepare the surface;
- Separate the top layer of the napkin;
- Cut out the image;
- Glue the napkin;
- Coat the product with varnish.
A special procedure may be additional varnishing in order to make the surface of the product more durable. There are times when the image you like is located on a postcard that is made of thicker cardboard. Then a special delamination technique is required, which allows you to separate the top layer from the postcard without damaging it. This technique is convenient to practice on wallpaper. Among beginners, an important aspect of gaining experience is sharing knowledge. Visiting forums and specialized sites quickly turns a beginner into an experienced decoupage master.
How to make decoupage from napkins on wood: preparation of material
After choosing a wooden object for decoupage, you should begin to directly clean it from possible dirt and dust. Typically, such items are wiped with damp microfiber. You should pay attention to the presence of wood defects that may affect the quality of decorative work.
If the item being decorated has chips or cracks. They must be sealed with construction putty.
Putty can be purchased at any hardware store. Instructions for preparing the solution can be read on the packaging or on the Internet. Apply the putty to the wooden surface using a spatula. After this procedure, it is better to treat the surface with sandpaper.
In order for the napkin to stick evenly, it is necessary to thoroughly clean the wooden surface of dirt.
Instructions for processing wooden surfaces:
- Apply wood primer. The material can be purchased at a construction or art store. The surface is primed with a sponge or brush. After finishing the work, the wood should dry well.
- Sand the primed surface. To do this, use sandpaper.
- Wipe the product from dust using a damp cloth.
The surface can be primed twice. This will lead to a stronger effect: the tree will become perfectly straight. If the master is satisfied with the initial result, re-application of primer and sanding are not necessary.
Additional details
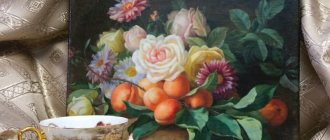
Using putty you can create the effect of a real brick wall . This technique will help hide uneven edges of the picture and blend harmoniously into the subject. To do this, use a stencil to apply putty to the surface of the painting along the edges. After drying, sand the edges with sandpaper. We create volume in the picture using a colorless modeling gel. The gel can be applied in a thin layer using a spatula. After drying, the gel becomes transparent. Finally, we coat the painting with acrylic varnish.
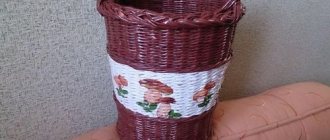
The technique is successfully used to decorate any objects, such as furniture. Decoupage is very popular among novice needlewomen and is used to decorate small things: trays, stands, boxes, pots, bottles.
Selecting materials for decoupage on wood with napkins: master class
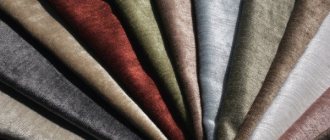
Before you begin the decorating process, you need to prepare a set of materials and tools. Napkins for decoupage can be very diverse: this concerns sizes, paper quality, multi-layering and decor. It is important to decide on the design in advance.
The blank for decoupage must be prepared separately - the wood must be carefully processed.
Materials and tools can be purchased at specialized craft stores. Many materials can be found in art stores. It is important to remember that the quality of the work performed depends on the quality of the auxiliary materials.
When doing decoupage, experienced craftswomen recommend preparing materials and tools in advance so as not to be distracted during the work process.
Necessary materials:
- Wooden blank;
- Napkins;
- Scissors;
- Tassels;
- Acrylic paints;
- PVA glue;
- Varnish for decoupage.
To decorate wood with napkins, you can also use special decorative glue and acrylic varnish. Three-layer napkins are most suitable for decoupage. The images on them can be very different.
Doing it right: decoupage wood with napkins step by step
Work on decorating wood must be done carefully and in accordance with the instructions. At the same time, you should not be afraid to work with paper - even if the napkins are torn, they can easily be glued to the product and the “breakage” will not be noticeable. To get started, separate the top layer from three-layer napkins.
The napkins are cut into pieces of the required size. If there are unnecessary inscriptions or numbers on the napkin, they can be cut out or carefully torn out by hand.
After the fragments are ready, they need to be “tried on” to the object being decorated. This will help avoid problems with decoupage. After this, you can start gluing the napkins.
A soft brush is indispensable when decoupage, which helps to quickly apply glue to the surface.
Step-by-step actions:
- Using a soft brush, apply glue to the napkins.
- The fragment is applied to the product.
- Leave the product to dry for half an hour.
- Dry the surface with a hairdryer.
- Paint over it with acrylic paint of a suitable color.
The final stage is coating the product with acrylic varnish. The varnish can be applied in one or two layers. Decoupage with napkins is very easy to do - even a beginner can handle this task.
Decoupage napkin holder in Provence style
The presence of napkins on the dining table is a matter of convenience and etiquette, while the presence of a napkin holder is a matter of aesthetics and interior design. If the interior of your kitchen or dining room is designed in Provencal style, then you can support it with a cute little thing made by yourself, a napkin holder in Provence style.
Today we will work with decoupage, background modification, spray painting and dry brushing.
To decoupage a napkin holder in Provence style, we will need the following materials:
• semicircular napkin holder with a heart;
• matte acrylic varnish;
• decoupage varnish (glue);
• acrylic paint “Acrylic-Hobby De Luxe” Provençal Lavender;
• paints for painting;
• acrylic primer;
• decoupage card;
• old toothbrush for spraying, sandpaper, synthetic brushes, foam sponges, stencil.
Lightly sand the workpiece and wipe off any accumulated dust.
Apply a thin layer of acrylic primer and let it dry. To apply, use a brush or foam sponge. Considering the style in which the work will be done, it is not necessary to apply and sand the primer perfectly evenly.
We tear out the motif from the decoupage card.
In this master class we will use the “Jeronimo” decoupage card; it is very thin and it is better to work with it by analogy with decoupage napkins. Thick decoupage cards and prints require a different approach. 
Apply glue varnish for decoupage to the workpiece.
We apply the torn fragment of the decoupage card, smooth it with our fingers from the center to the edges, coat the top with glue (amply enough so that the card is completely saturated). Remove excess glue.
On the other side of the napkin holder I made a composition with pieces of ornament from the same decoupage card.
When the glue dries, let's work on the “complex background”.
We put the paint on the palette, with a suitable brush (you can use a stencil type brush or use a small piece of foam rubber), apply the lavender color with a tamping motion, immediately without waiting for it to dry, add the remaining shades little by little, creating smooth transitions and flows of colors.
If the paints have time to dry, you can add a drop of “Acrylic Drying Retardant”.
We process the edges of the workpiece with a darker color.
At this step we already have the following result:
We paint the inside of the napkin holder with Acrylic-Hobby De Luxe paint in the color of Provençal Lavender.
Using a stencil we apply the inscription in purple.
Then we paint on the bridges of the letters with a thin brush (you can circle all the letters “by hand” for a more “careless effect”, giving a feeling of handmade work.
We paint the base of the napkin holder with a dark purple color.
Using a bristle (or old “shaggy” synthetic) brush, we imitate abrasions using the “dry brush” technique. Use a light shade of paint for dark areas and a dark shade for light areas.
We spray with purple and lavender shades of paint (you can read more about this technique in the article “How to spray in decoupage?”).
We cover the well-dried work with matte acrylic varnish (two or three thin layers with intermediate drying are enough). The napkin holder is ready! You can put it on the dining table.
The author of the master class is Tatyana Simonova, creative workshop “Girl With Eggs - Handmade Gifts”.
Decoupage: implanting a napkin into wood
There is a decoupage technique called “implanting a napkin” into wood. This technique is slightly different from simply covering a wooden product with napkins. It requires more serious preparation and elaboration of details. To “implant” the napkin you will need a fairly large amount of materials.
This technique involves the use of wax, acrylic primer, acrylic paint, varnish, glue, brushes, napkins, tape, wax polishing cloth, sandpaper.
Before starting the main work, the tree must be carefully prepared. For this purpose, the technique of burning and brushing is used. You can find instructions for this technique on the Internet.
The technique of “implanting a napkin” into wood allows you to make a beautiful, original and unique product
How to perform “implantation” step by step:
- Rub dark wax into the wood.
- Sand the wooden surface.
- Apply the napkins and let them dry.
- Rub the surface of the product with dark wax.
- Coat the product with varnish.
This technique requires careful execution of the work. The appearance of the surface to be decorated depends on this. Master classes on “implanting” napkins into wood can be found on specialized websites.