Definition with necessity
To figure out what furniture can be restored. You need to understand that the costs of specialists will be appropriate for antique furniture. It is better not to take risks with it to avoid harm.
Ordinary old furniture that has lost its former attractiveness and was purchased at a shopping center can be restored manually yourself.
Desk with cabinet
The countertop is covered in knife marks, so the best option would be to fill it with epoxy.
The cracked leg is glued together and clamped with clamps. At first glance, the leg appears to be made of oak, but in fact it is pine with oak veneer.
The spacer is damaged. It is firmly glued in, so it needs to be cut out and a new part made. The tabletop is divided into several parts using bars to fill it with different colors. You need to get all the bubbles out. Bubbles will be especially visible on black epoxy: when sanding, white dust will clog into the uneven areas.
Once the epoxy has hardened, the bars are removed and the remaining gutter is filled with gold epoxy. All remaining unfilled holes were filled with the same color. The remaining epoxy went to the bottom of the drawer.
The tabletop was polished with mesh grinding wheels, grit from 60 to 600. Finally, it was polished with water with a 1500 grit wheel. The perimeter of the tabletop was machined with a milling cutter.
To prevent the epoxy resin from being scratched, it is coated on top with 2 layers of varnish with interlayer sanding.
These are the results. What was fashionable before is now becoming relevant again. If you use old furniture in moderation in a modern interior, it turns out beautifully. This is much better than laminated chipboard furniture with designs from the 2000s. Natural wood will last at least another 50 years; the varnish may just have to be renewed.
pros
Saving time and money. There is no need to use the services of cargo taxis, movers and restorers.
Confidence in the result. Cost control, selection of desired materials and the ability to follow all instructions personally.
Implementation of ideas. Furniture can be customized to your personal ideal. In the creative process, new thoughts may arise and a desire to correct what has been started.
For example, add intensity in color or add accessories. And the need to coordinate every change is eliminated. And after accepting the job, it is unlikely that changes will be made.
Antique furniture restoration workshops in Moscow reviews
Restoration workshops value reviews of their work because they can be used to track how restored objects behave a year, two, three, even 10 years after restoration.
Observing restored museum exhibits is an integral part of scientific work.
When working with private collectors, this process naturally becomes more complicated, since the restorer does not have constant access to the item. And yet, information is coming. So that we have the opportunity to evaluate the correctness of our actions.
Of course, it’s nice to receive such feedback: Natalia Rubenova Guest Client 05/13/2018 10:28 I express my deep gratitude to Elena and the entire creative team of the restoration workshop for the highest quality of work. Everything that I restored in this workshop, and this is not a little, including chairs, armchairs, a table, a sideboard, a mirror, a hanger, was made with love and care for things dear to me! I hope to continue to collaborate with this highly professional team in the future!
But here is a review that, although it does not reflect the quality of the carpentry service provided, touched me to the core.
Dear Elena Alexandrovna, Thank you very much for your help. You were able to correctly explain to me how to insert a needle into the slot of a Singer machine so that the thread does not break. Your friendly, patient and benevolent explanation to a stranger to you gives me hope that there are still real intelligent people left in our country. With affectionate gratitude, GM
Best regards, Galina
Thank you all for allowing us to do what we love. Best regards, Elena Zhilina.
True professionals will always help a novice colleague, potential customer, or just a lover of antiquities with good advice and reliable information.
We don’t know everything, and it’s impossible, but we are constantly searching.
Antique restoration is our specialty. A huge amount of scientific knowledge has been accumulated in various areas of DPI. We cooperate and have the opportunity to receive advice from leading industry experts. The official website of Restoration LLC does not have the opportunity to widely publish restoration technologies that have been tested for years, but not approved in official circles. This does not mean that they cannot be used successfully in practice.
We willingly share “secrets” and sources of information.
Disadvantages of restoration
It is preferable to leave it to specialists to give new shapes to old furniture or work on small details. A person without experience who does not know the nuances of work can completely ruin items.
Saving personal time. By handing furniture over to professionals for restoration work, you can forget about it and wait for the finished result.
DIY work requires an investment of energy in your free time; evenings and weekends will be devoted to the process. If you don’t treat your business as a hobby, then soon the activity will begin to burden you.
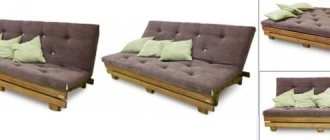
Eurobook sofa - 130 photo recommendations on how to make and assemble a comfortable and compact sofa- Assembling furniture with your own hands - 105 photos and a detailed video of how various furniture elements are assembled
Do-it-yourself bookshelves - ideas for building shelves and shelves quickly and easily from scrap materials (155 photos and videos)
Allocation of special territory. Giving new life to old furniture is a dusty task. Chemical compounds, sawdust and dirt will fill the room.
It is necessary to allocate space for freedom of action. It is advisable to carry out work in non-residential areas: street, garage, workshop.
If restoration work is carried out in an apartment, then one room should be completely circled, and the floor should be covered with cellophane or paper.
Stages of restoration work
Preparation for restoration
There are certain requirements for the premises where restoration work will take place. It should have a constant temperature in the range of 18–24 ° C and air humidity not higher than 75%. Before starting work, it is recommended to keep the furniture indoors for 3-4 days.
Before disassembling, it is important to analyze the design of the object, see how the master adjusted the parts, formed the joints, what he fastened with, and what tool he used. If you understand the assembly principle, disassembling the product will be much easier.
To work with antique furniture you will need a wide range of tools, both electric and manual. Professional restorers often collect antique tools or make replicas of them to get closer to the conditions in which old cabinetmakers worked.
This is what the workplace of a restorer working with antique furniture looks like
Disassembly
They begin to disassemble furniture by separating overhead decorative elements, locks, and removing upholstery. If the upholstery is valuable, for example, a handmade tapestry or original embroidery, they dry clean it and try to preserve it. Filling (horse hair, plant fiber), belts are most often changed, springs are repaired.
Next, they move on to disassembling the item into individual elements. Before doing this, it is recommended to photograph all complex components, especially if there are several similar connections. All small parts are numbered so as not to be confused during assembly. If any piece breaks off, it is immediately fixed with tape so that it does not get lost.
Antique furniture is most often assembled with tenons, which dry out over time, become loose, and cracks appear at the joints. To disassemble such a unit, you first need to soften the old wood glue. This is done using alcohol, which is poured into the cracks. After waiting time, the parts are carefully separated.
Connections on nails are disassembled using pliers and long-nose pliers, being careful not to damage the wood. Wallpaper nails are removed by grabbing the stem and pulling away from you.
This is what an antique chair looks like disassembled
Cleaning and washing off paintwork
Clean the product from dust using a soft brush and a damp cloth. Stubborn dirt is removed with liquid dishwashing detergent.
Next, remove the old paintwork. To do this, use special removers that dissolve and soften the varnish. The remover is applied liberally to the surface, and when the varnish swells, carefully remove it with a spatula, non-woven abrasive, or brush. You need to work carefully so as not to leave marks or marks on the wood.
When the varnish and tint come off, all the wood defects will begin to appear. Now you can move on to the next stage of restoration.
The old coating is washed away to natural wood
Repairing damaged parts and strengthening wood
Let's look at what wood defects there are and how they can be eliminated.
- Nail marks, cracks, chips in places of assembly and upholstery are filled with pieces of wood, matches placed on glue and/or putty made from wood dust and moisture-resistant PVA D4 glue. This composition strengthens wood well.
- Cracks and gouges can also be filled with restoration wax, but it does not reinforce the material, but only masks the defect, so this method is more often used on the front part of the object.
- The broken parts are replenished by sealing from an array of the same rock. It is cut exactly to size, placed on glue, and after drying, the remaining cracks are filled with mahogany dust and carefully filled with molecular glue. The same method is suitable for filling cracks and gouges in veneer.
- Traces of insects and rotten parts are removed with a chisel, the wood is impregnated with a biocidal composition and restored using liquid wood.
- To restore lost veneer, it is recommended to use old material (restoration workshops usually have such supplies). If there is no old veneer, a new one is selected that is as similar as possible in pattern, texture, density and thickness. Thin veneer can be glued in two layers.
The restored areas are scraped and passed over with fine-grained abrasive paper.
An example of damage to wood and veneer on an antique table
Required materials
An individual list of materials should be selected for each piece of furniture. But there is a standard set of devices that will be universal for almost all ideas.
It is recommended to make a list in advance. You can use equipment rental because professional tools significantly save time, effort and give a higher assessment of the quality result.
- White table: 115 photos and videos describing the selection and construction of cool and easy-to-use tables
- Do-it-yourself tabletop: video instructions for making a tabletop + 140 photos of the most modern ideas
Corner sofas - 130 photos and videos on how to choose and where to place modern original corner sofas
For DIY work you will definitely need: a sanding machine, a construction vacuum cleaner, an electric jigsaw, a screwdriver and a construction hair dryer.
Small details should include: sandpaper, brushes with rollers, several spatulas of different sizes.
To maintain health safety, buy good protective gloves and a respirator. Don't forget about removers, wax, paint, mixtures for sealing cracks.
Materials for work can be found in specialized stores, or use advertisements. Often the necessary compounds are sold at a reduced price, the remains from repairs do not match the color.
Types of jobs
There are several sequential types of furniture restoration work:
- A visual inspection will help determine the quality and quantity of damage.
- Disassembly will make it possible to remove interfering elements.
- Cleaning will remove dust, grease stains and small dirt.
- Minor repairs will help to cope with refinishing, repairing cracks and chips.
- Decoration work includes updating the veneer, painting, painting, and applying new patterns.
Time spent
It is impossible to accurately calculate the time spent. For example, you can spend one day on small items. Larger works may take several months to complete.
- Do-it-yourself computer desk: 150 photos of making corner tables and features of the choice of materials
- DIY ottoman - step-by-step guide to the best homemade ottoman options (video + 125 photos)
- Coffee table: simple and stylish design options and design ideas for coffee tables (115 photos)
Deadlines are calculated based on the working material. Each composition has a certain drying period.
It is necessary to carefully read the instructions and strictly follow the advice and instructions for restoring furniture. If the recommendations are not followed, the final result will decrease in quality.
Before each application of a layer of varnish, you need to be sure that the previous one has dried completely. To save time, buy mixtures that do not require long drying. It's a good idea to read reviews before purchasing.
Plan all your purchases clearly. This will help you avoid unnecessary trips to the store. The necessary materials should be purchased immediately and kept on hand.
Reincarnation of the Vienna chair
This old beauty was found in a landfill. It did not have a seat, but the frame was quite strong. The new seat was cut out of 6 mm plywood, and the base was carefully sanded.
In the 1950s, such chairs appeared in many homes. They were made at the Ligna factory in Czechoslovakia, copying the design of the No.788 Bresso model, which was developed by Mikhail Thonet in 1890. Their main feature is bent parts.
Sequencing
Each piece of furniture has its own step-by-step instructions. To figure out how to restore upholstered furniture with your own hands, you should add a little to the list.
But just like with a set of tools, there is a standard set of actions.
The benefits of restoring furniture yourself
Restoring Soviet furniture, of course, will not bring a lot of money, but furnishings from the Russian state can bring good money.
Restoring chipboard furniture with your own hands will help save the family budget from unnecessary expenses.
During such actions, you can gain amazing experience, acquire new knowledge, and try yourself as a real designer.
As scrap materials, you can use leftover wallpaper, fabric, leather, wood and other materials that you would hate to throw away.
Note!
- DIY feeder - step-by-step instructions for creating a feeder + detailed diagrams with photo reviews
- Do-it-yourself rugs - TOP 120 simple patterns with master classes on how to make them yourself + photo reviews of finished rugs
Do-it-yourself dolls: a master class on making a beautiful doll. Simple instructions with photo examples of ready-made options
Disassembling items
The very first step will be to disassemble the furniture. The work process will be much simpler if you disassemble it as much as possible. Remove the doors, unscrew the handles, take out the shelves, preferably unscrew the frame parts.
But don’t get carried away; parts stuck to the glue should not be disturbed. There is a risk that during assembly it will not be possible to repeat the fastening of the elements. It is advisable to remove all fittings.
To simplify the assembly process, you should photograph the fastening points in advance. Label the accessories and put them into bags.
What is furniture restoration and what types does it come in?
Restoring antique furniture is a labor-intensive and painstaking process, the main task of which is to restore the item while preserving its original appearance. It requires not only special skills, but also enormous patience. Sometimes, in order to bring an antique product back to life, you have to completely disassemble it, put each individual element in order, and then put it back together again.
Depending on the purpose of restoration, restoration can be either museum or commercial.
- During museum restoration, the master is faced with the task of preserving the current condition of the object: since the furniture of the museum collections will not be used, interventions in the structure are undesirable and are kept to a minimum.
- Commercial restoration assumes that after restoration the furniture will be used for its intended purpose, so it is important to restore not only its appearance, but its functionality.
Restoration does not always require disassembling the product. Sometimes it is enough to restore only the damaged part, update the decorative coating or change the upholstery.
Removing the top layer of varnish
To remove paint and varnish material, use sandpaper, a hair dryer or varnish remover. A smooth surface should be achieved using any convenient method. Methods can be combined. The main thing is to come to a result.
Don’t forget about your health and use a respirator, gloves and goggles. Since the work is very dusty, particles of chemical compounds will fly in the air.
Required materials and tools
Updating polished furniture, like any other activity, requires the use of various materials and tools. So, you will need:
- sandpaper cloth;
- solvents used for varnishes and paints;
- paints. It is better to take acrylic or alkyd. You choose the color at your discretion.
- brushes, rollers, rags;
- construction hair dryer (if network);
- polishing machine (also, if available).
Prepare everything in advance so that the creative process is not interrupted.
Working on defects
Using specialized mixtures for grouting chips and scratches. The next step is to smooth out all the cracks and smooth out the uneven surface.
For scratches, grout is used, large cracks are filled with furniture wax, abrasions should be filled with putty.
Updating polished furniture
Today you can rarely find painted furniture. Wardrobes, chests of drawers and tables covered with oil paints are becoming a rarity. Mostly modern apartments are furnished with polished products. It's beautiful and practical. But such furniture also ages over time.
The polishing becomes covered with cracks and chips. The time for replacement is coming. But maybe it’s worth holding off? This article discusses options on how to update polished furniture.
Finish coating
If you want to preserve the original wood pattern, then use varnish, wax or oil as a finishing coat. When completely changing the color, choose paint or enamel for furniture.
When choosing bright and light shades, pre-paint the parts white. With this move, the paint will lay beautifully in the chosen tone.
Furniture inspection
A visual inspection will begin the process of restoring furnishings.
If there are traces of fungus or mold on the wood, all measures must be taken to prevent the development of this process. To do this, infected areas are either permanently removed or carefully treated with special means.
If the varnish is being removed, a disinfectant should be applied to the cleaned surface.
Restoration of old furniture
Before starting work, you should carefully think through or even sketch in color what the finished product will look like. Study photos of furniture restoration with your own hands and head to a specialized store for materials.
The list of goods includes: brushes (for paint and varnish), paint, paints and varnishes, sandpaper (hard and soft), primer, paraffin, spray bottle, glue, masking tape and napkins for decoupage.
Chair restoration
One of the most common problems is a broken leg. The new leg should be the same type of wood as the chair.
- — The broken leg is removed;
- — A new leg is made according to measurements and blanks;
- — The new leg is sanded, then painted and polished;
- — When the paint dries, the new leg is attached to the chair.
The advantages of furniture after restoration with your own hands are obvious; these are not only money saved, but also the opportunity to learn how to give furniture a second life.
Step by step steps
Furniture disassembled from its fittings should be sanded. To make the work progress faster, it is better to use a grinding machine, but in the absence of this, the process can also be done manually.
Cover the top layer with a primer before painting. Apply in one layer and set aside until completely dry. The time is selected according to the instructions, usually a minimum of three hours.
Parts that are not planned are sealed with masking tape for painting. Paint is applied to exposed elements in one layer. After drying, the paint layer can be repeated to enhance the color intensity.
To achieve the scuffed effect, rub the necessary areas with a wax candle.
The next layer of paint should be a tone lighter than the previous one. Alternatively, add a little white paint and mix. Having sealed the joint lines with masking tape, it is permissible to paint the protruding areas in a different shade.
For the decoupage technique, details are decorated. The finished napkin with a pattern is moistened with water, straightened out until smooth and covered with PVA glue.
At the finish, apply two layers of varnish, remembering to dry each layer completely.
Applying varnish
If all the preliminary work was done correctly, then there will be nothing difficult in applying the varnish. The main thing is to wait until the paint layer is completely dry.
- The varnish should be applied in two or three layers;
- The layers should be thin;
- Apply the next layer of varnish only after the previous one has completely dried;
- It is better to apply the varnish with a sprayer, roller or special brush.
Recommendations
For quick renovation, there are ways to restore furniture yourself:
Simply sand it with a sanding machine and coat it with clear or light varnish.
Get rid of dirt, sand with light sandpaper and paint.
You can get rid of defects using drawings. If you don't have artistic skills, use a stencil. The patterns are applied with acrylic paints and covered with clear varnish.
Using the decoupage technique.
Step-by-step instruction
Before updating furniture, it is necessary to carefully examine it and determine the nature of the defects. To get rid of polish and coating wear, you need to do the following:
- The coating must be thoroughly cleaned of dirt.
- A camouflage mixture is applied to the cracks; after it dries, a transparent varnish must be applied.
- When the mastic has dried, the surface is treated with polish.
If the furniture has traces of severe abrasions, it is best to completely sand it, and only then putty and paint.
Who is suitable for furniture restoration at home?
Restoring furniture on your own gives old furniture a second life. Interior items can be updated beyond recognition, according to your taste.
DIY repair of cabinet and wooden furniture with your own hands is suitable for those who want to preserve their favorite things and save money.
Work on updating furniture, if desired, can be carried out even in an apartment. Even a beginner can handle the technique. The main thing is to be able to use carpentry tools and follow all instructions.
Small jobs can be completed in a couple of days. By following all stages of restoration, your favorite furniture will last for another year.
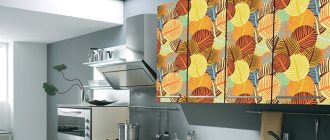
Furniture decoration
Decoration is the final stage after restoration. To make old furniture sparkle with new colors, the following methods are used:
- Dyeing a different color
- Application of drawings and ornaments
- Artificial aging
- Scorches
- Decoupage and appliqués
- Pasting with tinted film
The main weapon when updating old furniture is creative thinking and a set of necessary tools. Even an old, cracked cabinet can be turned into a stylish piece of furniture using one of the proposed methods.
Photos of DIY furniture restoration
Tell your friends