The decoupage technique allows you to create real works of decorative and applied art using simple materials. This type of handicraft, which competes with artistic painting, can be practiced by a person who lacks not only an artistic education, but even drawing skills.
The decoupage technique (translated from French as “cut”) is based on the artistic decoration of interior items:
- Furniture;
- Crockery;
- Textiles;
- Office supplies;
- Household utensils
using a cut out image. The source of the pictures are decoupage napkins made using a special technology.
Rules, features of work, necessary materials for decoupage
Decoupage - applique for adults. In order to get an excellent result, you need desire, a little free time and material for creativity:
- Special napkins;
- Scissors for cutting;
- PVA glue or special adhesive composition;
- Varnish;
- Sandpaper;
- Alcohol;
- Tassels.
And, of course, an object for decoration.
Devices and tools
It is absolutely certain that for decoupage, as for any other needlework, you need to provide yourself with the necessary tools and materials.
Of course, each needlewoman chooses the most suitable set of tools for herself. But the following will remain unchanged in each list:
- sandpaper;
- spatula and putty;
- brushes;
- palette
The differences are most often found in the tools that are needed to smooth out the pattern after it has been glued. Thus, these can be foam sponges, ordinary kitchen sponges, or a piece of fabric. Perhaps, only by trying one, another, and a third will the needlewoman settle on the most preferred tool.
See also:
- Read about the quilling technique here
Necessary materials for decoupage
By the list:
- Base (we are talking about the surface to be decorated);
- Primer (by the way, it is not used every time. More often the work surface is “primed” with simple acrylic paints. The needlewoman herself chooses a matte or glossy texture);
- Paints;
- Glue . This may be glue special for decoupage, sold in handicraft stores. But by and large, you can try with PVA glue (but over time, unfortunately, yellowness may appear);
- Varnish . Most often, the coating is varnished on those objects that will then be often used for their intended purpose (well, for example, a plate or watering can). The varnish should be acrylic: matte or glossy, in a can or in a jar (the latter is applied with a brush). With its help, it is necessary to open the surface after the top layer of glue has completely dried (we talked about this above);
- Motive.
Read more about the latter.
Napkins for decoupage: what are they?
Napkins for decoupage are the most popular type of material for this type of needlework, the basis of the technology, so it is very important to know what this material is, what it comes in and how to choose it correctly.
Napkins for decoupage differ from serving napkins not only in their bright and unusual designs, but in their texture and material. I would like to warn you right away that some table napkins are not suitable for decoupage, since some of them are: low quality paper ones - too thin; and others: premium cellulose ones are too thick.
So, special napkins for blending, distinguished by an unusual picture or ornament, sometimes even by an entire compositional group, are different depending on the parameters:
- Number of layers. Napkins come from single-layer to four-layer (regardless of the number of layers, we use only the top layer);
- Size. Napkins are available in different sizes:
- In the shape of a square: 21x21 cm, 25x25 cm, 33x33 cm, 40x40 cm;
- Rectangular: 33x42 cm;
- Round, the standard diameter of which is 32 cm.
- Image Location:
- Four identical motifs;
- Four motifs, identical in pairs;
- Four different motifs;
- Two motives;
- One image that occupies the entire area of the napkin.
Designer napkins are small editions made in a specific style.
When choosing napkins for work, you need to pay attention to their properties:
- The top layer is very thin, working with it requires tension, but it is the thinness and transparency that ensures excellent merging of the image with the surface being decorated;
- The paper from which the napkins are made can stretch and form folds. Therefore, before sticking it onto an object, it has to be processed;
- When applied, the napkin blends into the background. This factor must be taken into account when choosing the color on which the image is placed.
Advantages of napkins for decoupage:
- A large assortment range: color, theme, style allows you to choose material for any type of work;
- The small transverse size of the layer, otherwise known as thickness, facilitates the process of implanting the pattern;
- Availability - you can even buy napkins in a supermarket;
- Cost-effective - the price of napkins, especially for beginners, is low.
Minuses:
- A certain size limits work, for example, with large objects;
- An extraneous background that interferes with the harmonious combination with the background of the decorative item.
Compared to other materials for decoupage, a napkin, given its advantages, is the most practical.
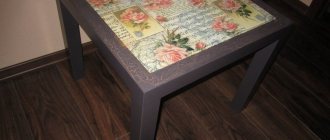
Making decoupage - step-by-step instructions
- The stool is primed using PVA.
- Then it is plastered with fine-grained sandpaper.
- Take a napkin in which you should separate the white layer, which is not needed in this task, from the colored one.
- The glue can be diluted with water only if it has become very thick. In other situations you shouldn't do this.
- The work must be done very carefully.
- Moving towards the edge (from the center), you need to glue a decoupage colored napkin, and it is important to draw its edges very clearly.
- The brush should not be dry, and the glue packaging should be marked that it can be used on hard surfaces.
- One-component varnish is poured into one of the cells, and you apply it with a brush. The applied layer should be medium. Not too thick, but not thin either.
- It should be applied in one direction once, no more.
- In about ten minutes it will dry, while you have time to prepare the paint, stirring it so that the structure becomes homogeneous.
- It should be applied carefully. When everything is ready, dry it with a hair dryer, turning on medium power at a distance of twenty centimeters.
- Varnish is poured into the palette from the first jar, then your masterpiece is covered with it, and wait until it dries.
- The candle is rubbed unevenly on the legs of the product.
- Then you should soak a sponge in water and apply paint to the legs of the furniture, choosing a color darker than wood.
- Then a lighter version of the paint than this is also applied, again with a sponge.
- The stool should be turned on its side, the other legs should be decorated in the same way, and wait until they dry.
- The bolts should also be painted over so that they do not spoil the appearance.
- The two-part varnish should have a thick consistency and should also be applied perpendicular to the previous layer.
- The varnish is dried with a hairdryer, maintaining the optimal distance.
- The brush is dipped into the varnish, then it is applied to the areas that should be highlighted in gold.
- Your hands should remain clean and dry.
- For gold-colored potal, put paper (a clean white sheet) on it, then the patal is cut into strips and glued to the desired areas.
- Using a strip of fabric, apply the bitumen to some of the “golden” areas and wait until it dries completely.
- Bitumen is picked up with a sponge, then some cracks are rubbed. And voila!
DIY organza bow - step-by-step instructions with description and photo
You can also make absolutely any New Year's decoupage with your own hands and much more. Here no one limits you from expressing your own fantasies and creating extraordinary masterpieces.
Glue
The quality of the adhesive material is important when working with decoupage technique. It is the glue that will allow you to preserve a thing you created with your own hands for a long time.
Glue for decoupage must have certain qualities:
- Homogeneous creamy consistency;
- Average drying speed;
- Transparent finish;
- Neutral odor;
- Reliable packaging;
- Availability of a special device for application.
Depending on various factors: quality, durability, method of decoration, you can choose different glue for creativity:
- Special glue for decoupage expands the possibilities; it can be used:
- Not only for finishing wood, ceramics, stone, cardboard, glass, but also fabric, candles;
- For decorative purposes, and dishes decorated with such glue, for example, can be used for their intended purpose;
- Not only for fixing, but also for adding gloss and shine;
- For working with gold leaf or potal;
- For outdoor work, creating decorative elements on concrete, metal and wood.
- PVA glue. In order for this adhesive to be suitable for use in decoupage techniques, several conditions must be met:
- Use PVA glue intended for construction work;
- Before use, dilute the glue with water in a ratio of 2:1.
- Glue prepared at home from the following products:
- Starch, water and sugar;
- Egg whites and granulated sugar.
There are many options for glue for creativity; at the initial stage, you can get by with a simpler product; with experience, you can afford to purchase a high-quality, expensive product.
Who is suitable for decoupage?
Decoupage is applique - most of us are familiar with such activities from kindergarten. The technique itself requires both attention and perseverance, so the ideal candidate for a decoupage artist would be a person who would like not only to do beautiful work, but also to have fun and escape from the everyday hustle and bustle.
Important: There are no health restrictions when exercising, but you need to remember that some substances used in gluing can cause allergies.
That is why it is necessary to carefully familiarize yourself with the composition of the mixtures before you sit down to work. Otherwise, decoupage is a great activity both for evening relaxation for adults and for children's entertainment.
Drawing
In order for work done using the decoupage technique to look harmonious and of high quality, it is very important to choose the right design and think through options for its design. To do this, you need to take into account important nuances:
- Size of the drawing. It is necessary to correlate the size of the image with the size of the object being decorated;
- Color solution. The correct combination of the color of the picture and the background of the napkin and the workpiece will facilitate the work process and improve the result;
- Style. To create a harmonious artistic image, it is important to choose napkins of a certain style: retro, fantasy, glamor, country, hi-tech. Of course, they can be successfully combined, but this must be done with taste;
- Background. The color of the blank canvas should favorably emphasize the applied image, and not distract attention from the drawing.
Taking into account all the points, the decision to use a specific drawing is made by the master himself. After all, the author’s work is good precisely because of its special handwriting and individual approach.
Surface application
Decoupage is creativity, and in creativity such a concept as composition is very important. When decorating a workpiece using the decoupage technique, it is necessary to take into account the harmonious arrangement of the napkin fragments in relation to each other and to the shape of the workpiece itself. Compositional basis of decoupage:
- Determining the center that carries the main creative and semantic load;
- Symmetrical or asymmetrical arrangement of the drawing, depending on the idea;
- The harmonious existence of all elements of the work: the shape of the object, the style, the design, the color of the background, the design.
The idea is at the forefront, its embodiment is the main decor - the napkin motif, all other details serve only to decorate it.
Using a file
The “file method” is simple and universal. It makes it possible to transfer a fragment of a napkin to absolutely any surface: flat, round, to adjacent edges.
To use this method you need to prepare:
- Plastic file for storing documents;
- Water;
- PVA glue;
- Varnish.
The algorithm of actions is as follows:
- Pour water into the center of the file;
- Place the required piece of napkin in the water, face down;
- Straighten the pattern and drain the water;
- We attach the file with the stuck pattern to the object for decoration;
- We fix the drawing;
- We gradually lift the film and remove it;
- We fix the wet fragment of the napkin with PVA glue;
- After the drawing has dried, apply a layer of varnish.
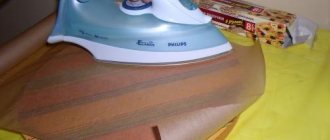
Using an iron
This method can be used when decorating a flat surface. Steps for iron/glue technique:
- Apply a primer to the surface;
- On top of the primer, use a brush to coat the entire area with PVA glue or glue stick;
- Using a hairdryer, thoroughly dry the item;
- Lay out and level the napkin on a dry, flat surface;
- We use parchment paper for baking: iron the napkin through it with a heated iron;
- We move the iron from the edge to the center;
- Coat the fixed composition with PVA glue.
This is the easiest way to allow a beginner to do his first simple work using the decoupage technique.
How to make a work of art out of a bottle
The ideal way to learn decoupage technology is to practice on empty glass containers. Empty bottles don’t cost much; if you want, you can always ask for them or even find them on the street, so you can experiment to your heart’s content, learning the basics of a simple craft and achieving perfection.
Decoupage of bottles with napkins helps to turn some original, interestingly shaped bottle into a vessel for drinks that will delight the eye of you and your guests.
In order to decorate the bottle, you need to thoroughly clean its surface, removing any remaining labels and glue. Then you need to go over the glass with a high-quality detergent, alcohol, or, in extreme cases, ordinary “white” vodka. It is better to prime the surface of the bottle, which will make the pattern more saturated.
Then, using nail scissors, we need to cut out the pictures that interest us and glue them onto the bottle using special glue, but regular PVA glue will also work.
When our work dries, we need to cover the surface of the bottle with several layers of acrylic varnish. This way we can protect the resulting vessel and the images on it from various adverse influences.
Watch as a giftDecoupage of bottles: the best ideas, simple methods and modern styles (110 photos)
- Decoupage cutting board: master class and technique for beginners
Using a fan brush
This method will help neat needlewomen decorate concave or convex objects:
- Place the napkin on the surface of the object;
- Pour water on it;
- Using a fan-shaped brush, carefully smooth the pattern with water;
- In the process, we smooth out the resulting wrinkles;
- Finally, coat with PVA glue.
All three methods of gluing napkins are effective in their own way. Depending on the complexity of the work, the size of the decor and the item that you intend to transform, you can choose one of the proposed ones.
Decoupage glass vase in vintage style
The execution of this technique is a little different. Here you need to age the base of the object on which the drawing will be applied. This technique is also called craquelure.
First, apply the background coating until it is completely dry, take the craquelure varnish and cover the surface.
A web of tiny cracked lines appears on it. Do-it-yourself decoupage of a vase looks especially impressive and elegant.
Decoupage technique: design of wooden and metal surfaces, glass and ceramics, plastic.
We have already said that you can decorate almost any surface with a napkin. But there are peculiarities of working with each material.
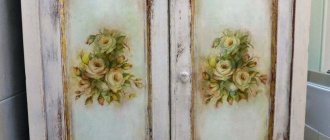
- Decoupage on a wooden surface. Before applying a design to wood, it must be prepared:
- Sand and putty if required;
- Apply primer;
- Paint it.
And stick the chosen motif onto the dried workpiece and finish everything with a varnish coating. This technique is suitable both for working with small workpieces and for decorating furniture.
- Decoupage plastic. In order to turn a faceless plastic thing into a unique one, you first need to prepare its surface:
- Degrease with an alcohol solution;
- Clean with sandpaper;
- Apply a layer of gypsum primer;
- Sand again;
- Paint with acrylic paint in light shades.
After all the manipulations, paste the selected pattern (when working with plastic, do not skimp on glue). After complete drying, the work must be coated with several thin layers of varnish.
- Decoupage on glass. Glass is the most difficult to work with, but the result of painstaking work is interesting objects that can delight others. Before you get creative and decorate the glass with a bright motif and fix it with varnish, you need to prepare the product:
- Degrease with alcohol and dry;
- Allocate space for decoration;
- Tint the surface with primer or paint (do not touch the place where the drawing will be located).
- Decoupage of ceramics or porcelain. The technology for working with ceramics is the same as with glass, the only difference is the need to treat the smooth surface with sandpaper.
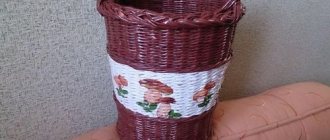
- Decoupage of metal objects. Buckets, cans and old saucepans will get a new life thanks to applications. But first, before the sacrament of creativity, the metal must be processed:
- Sand the surface;
- Treat with an anti-corrosion agent;
- Prime;
- Paint with construction acrylic paint or car paint in cans.
And, as usual, in decoupage - apply a napkin motif and varnish.
With this knowledge, working with various surfaces will be enjoyable and will remain unchanged for many years.
Decoupage is one of the ancient types of creativity, which, due to its ease of execution and incredible results, has become one of the most popular. There are no restrictions for practicing this type of needlework. Everyone can feel like an artist and a craftsman at the same time by picking up a decorative item, a paper napkin and a little patience.
Decoupage - simple and beautiful
One of the most common handicraft techniques is decoupage - attaching an ornament or design to an object and then covering it with varnish. Decoupage allows you to replace artistic painting, turning everyday objects into original works of art.
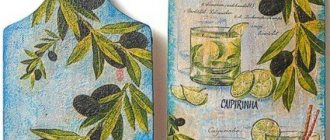
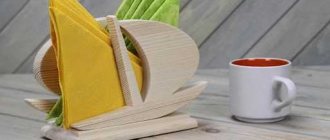
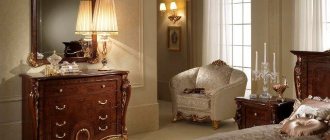
In the photo of napkins for decoupage, we see that a special print is applied to them, which allows you to decorate household items. Decoupage napkins are best suited for decorating wooden furniture and boxes.
Very often, glass and ceramic bottles, dishes, coasters and candlesticks are decorated with decoupage. A glass bottle of cognac, whiskey or champagne takes on a completely different look with the help of decoupage. Such things bring comfort to the home, which is sorely lacking in the modern world.
Why is decoupage so popular? There is nothing surprising. The decoupage technique has two main advantages - simplicity and beauty. Its use makes it possible to make objects much more attractive, but only minimal skills are required from a person.
There is no need to turn into a professional artist, you just need to study the technology and try it in practice.