What wood is suitable for making benches?
Sauna benches are designed for use in special conditions, so special wood must be used for their manufacture.
The material for bath furniture must have the following characteristics:
- Low thermal conductivity. The surface of the product must be resistant to overheating so as not to cause burns on the skin.
- Wear resistance and dense structure. During intensive use, the wood should not dry out, deform or collapse.
- Resistant to high humidity and temperature changes. The material must be inert to the negative effects of the environment to ensure a long service life of the finished product.
All of the above characteristics correspond to trees such as birch, oak, aspen, poplar, linden and abashi.
- Oak has high strength and durability. It is able to withstand prolonged exposure to high temperatures and high humidity. Oak benches will become a stylish decoration of any bath interior. The only drawback of the material is its high cost.
- Linden is a practical, wear-resistant and durable material that, when heated, can release aromatic substances. In addition, it is resistant to overheating and deformation. With prolonged exposure to high humidity, linden benches may darken, which will not affect their performance characteristics.
- Aspen is a popular and cheap material that is used to make bath benches. It is resistant to cracking and deformation, easy to process and maintain. A serious disadvantage of aspen is its susceptibility to internal rot, which is why such products are less durable.
- Poplar and birch are excellent raw materials for the production of benches. They have low thermal conductivity and resistance to high humidity. Other advantages of materials include affordable cost and ease of maintenance.
- Abashi is an exotic wood that is becoming increasingly popular due to its unique performance characteristics - low thermal conductivity, resistance to overheating, rotting, deformation and fading. This is high-quality, but expensive material.
A bench for a steam room can be made of deciduous trees; coniferous and exotic species are suitable for the washing room, dressing room and relaxation room.
Types of wood used for benches
Selection and preparation of material for building a bench
Not every type of wood is suitable for furniture in such a specific room as a bathhouse. The material must be dense, free from knots, and have low thermal conductivity. When making benches, only durable tree species are used: linden, oak, birch, poplar. Their characteristics allow the furniture to be used for a long time in conditions of high temperature and humidity.
- Linden is easy to work with, and when heated, it releases beneficial substances into the air. Light linden boards become darker after being in a humid environment.
- A bench made of larch will last for many years, but the cost of the material is quite high.
- Durable light maple wood will not crack from moisture and has low thermal conductivity.
- An oak bench will undoubtedly decorate your bathhouse; if the cost of the material does not matter, please yourself with beautiful and durable furniture.
- Aspen is often used by craftsmen to make bathhouse furniture. It is inexpensive and creates a special microclimate. But wood has a drawback - over time, it rots inside.
- Abashi wood has grown in heat and moisture and does not lose its color and structure for a long time. Not everyone can afford this excellent, but expensive material.
Resinous wood
Deciduous varieties are preferable for the production of benches for a steam room. At high temperatures, coniferous wood releases resin that burns the skin. In a washing room, where it is not so hot, the optimal material would be pine or larch. These trees are not afraid of moisture, but only become harder.
Types of benches
To choose a bench for a bath and sauna of a suitable design, you should take into account the functional features and dimensions of the premises, the number of visitors simultaneously receiving procedures, and the features of the bath furniture.
There are several structural types of benches: stepped, three-tier, two-tier and single-tier.
Stepped design
It is intended for use in small-sized bathhouses. The top of the bench is long and wide enough to accommodate an adult in a lying position. The small lower part is used for sitting or as a platform for climbing onto the upper shelf.
Three-tier design
A bench in a bathhouse with three tiers is intended for use in large rooms, while the distance from the third tier to the ceiling should be 130 cm. A similar design is installed in a steam room to regulate the degree of heating of the air (the higher the bench, the hotter the air). The upper and lower tiers have a removable structure, and the middle tier has a stationary structure.
The distance between each of the tiers should not be less than 100 cm. The lower bench has small dimensions: width - up to 60 cm, length - up to 95 cm.
Two-tier design
Benches on two tiers are designed for large sauna rooms. The wide design allows you to freely place an adult of average and tall height in a lying position. To get to the upper tier, the design provides an additional ladder.
You can build two-tier benches along walls that do not have windows or built-in ventilation systems, since they can contribute to drafts.
Single-tier structures
Such benches are designed for small-sized steam rooms and washing rooms. The best option is mobile structures that can be quickly installed in any room. They are simple and easy to use and easy to maintain.
Requirements for bath benches
There are basic requirements that apply to such products installed in baths and saunas.
- A bench for a bathhouse, assembled with your own hands, should not be covered with varnishes or paints. To protect the product from the negative effects of moisture and temperature, special antiseptics are used.
- Built-in and mobile structures are installed only against blank walls without ventilation and windows, at a safe distance from heating equipment. During installation, a small technological gap is maintained between the wall and the bench.
Bath bench: design features
The bench in the bathhouse is somewhat different from the usual one. Firstly, its width and length are determined by the number of bathhouse users, their height and build. Secondly, such products involve the arrangement of several tiers, which is unusual for ordinary benches.
Important! Hot air and steam in the steam room accumulates under the ceiling. On a 3rd tier sun lounger it will be noticeably hotter than on the lowest one. This point should be taken into account when planning the steam room and arranging benches.
There are 2 options for sauna benches - sitting and lying. The dimensions of the sauna bench depend on the purpose and the position that the steamers prefer to use:
- the minimum seat width is 30–40 cm for a sitting bench, for a more comfortable position 60 cm is recommended, and 80–90 cm is required for a lying bench; the value in the latter case may be greater: this is the width that a person occupies while lying down and placing his hands freely;
- the width of the step of the lower bench must be at least 40 cm;
- the distance between tiers is from 40 to 60 cm. As practice shows, the optimal range is 45 cm, the minimum distance from the floor of the bathhouse to the desired tier is 40 cm;
- a bench for a bathhouse is made with your own hands of a certain length, and the size is determined by the preferred position: in a sitting steam room, the length of the bench is equal to the width - at least 40 cm for each user, a 60 cm long option is more convenient; for sitting with bent knees, 90 cm is required, and for lying down, but with bent knees - at least 150 cm; The length of the bench for lying is 180–210 cm and is calculated according to the height of the tallest user of the steam room.
Wooden benches: design features
Let's first talk a little about terms. The fact is that we somehow naturally manage to make words interchangeable - “bench”, “bench”, and then “shelves” (some write “canopy”, but in this writing it’s already something like tents over the bed). We still need to differentiate somehow.
Of course, there are stationary and portable benches. But let's agree that in a bathhouse a bench is a portable seat, a bench is, well, if not attached to the wall, then at least a seat adjacent to it, and a shelf is a lounger or seat intended for steaming or being steamed exclusively in the steam room. The shelves can be stationary, removable, folding, folding, tiered. Even if a bench or bench is used as a shelf, if people are steaming on it, we will call it a shelf or shelf.
By and large, there is no difference - I took the shelf outside, it became a bench
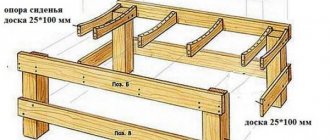
Now let's move on from philology to carpentry. The simplest bench is not a board with two wide legs. You need to understand that a board with two legs will not last long. Those sitting will rock it, so sooner or later it will collapse - the fastening is not so large that this will not happen. Therefore, the simplest bench is a seat board, a couple of four legs and braces, or a transverse brace between the legs in the middle of the height of the legs or close to the floor.
The second important point is sustainability. Do it in such a way that the person who sits on the edge does not tip over along with the bench. A heavy structure, low or with a wide seat will not tip over.
ADVICE! However, there is such a nuance: it is better to make such pieces of furniture from not too massive boards, because the more massive the board, the longer it will take to dry after gaining moisture. Take this fact into account!
There is one more rule regarding what a seat in a steam room should be like: gaps must be left between the bars. The optimal gap width is 1-1.5 cm. It is clear that they are needed to drain water and speed up drying.
Ergonomics
Ergonomics is the science of how to make things and processes comfortable for humans. In this case, we are talking about ensuring that the seats in the bathhouse do not cause inconvenience due to their size.
Of course, much when choosing sizes will be dictated by the size of the rooms themselves for which you are planning to make benches for a wooden sauna with your own hands. But the height of the seat is a point that is of great importance, but depends little on the size of the room.
It is preferable that the seated person's knees are not raised relative to the pelvis, so the seat should not be too low. However, too high is also uncomfortable - your legs will dangle in the air without support, which increases pressure on the vessels under the knees and in the hips. Therefore, we can proceed from the height from the floor to the knee bend of adults.
Various ergonomics manuals advise making the height from 30 to 50 cm. We believe that it is easier to derive the arithmetic average from the measurements of the people who will most often use this bathhouse.
The width of the seat depends on how they will sit on it - if they sit as usual, then 30-40 cm is enough, and if reclining, then 60 cm.
Those benches on which the steamer will lie must be long enough to accommodate him at full height, and also wide enough so that he can freely place his arms along his body. It is also better to measure such things on specific people.
BY THE WAY! Adherents of the Russian bath should remember that the height of the upper shelf on which the steamer lies is about 85 cm, and the shelves cannot be covered with clapboard to the floor, because the steamer’s feet are located under the bench or shelf.
Before introducing you to the drawings, we recommend that you take a look at our other material, which describes in detail all possible types of benches.
Preparation of materials and tools
Materials
Wood is a capricious material, or rather, sensitive to how it was prepared and dried. Therefore, you need to not just take the first board of a suitable species that comes across, but take a closer look at it, and, if possible, measure the humidity.
- IMPORTANT! Because a tree that is improperly dried after cutting and cutting will definitely warp - it will “lead”, that is, it will either change its geometry or twist it.
When inspecting boards for carpentry, of course, first of all look at the number of knots . They are known to cause a lot of problems for woodworkers.
Also pay attention to the dimensions . Boards can be very uneven - both due to uneven shrinkage and due to cutting too quickly. The reasons may be different, but you will have to adjust it to the desired size later.
ON A NOTE! The presence of mold, rot and cracks on the purchased material is unacceptable!
And since we are telling you about benches for a bath, we need to clarify in a separate paragraph which types of wood are best suited for such purposes.
Steam room
Resin leaks
If the bench will be in a steam room, then immediately discard coniferous wood. They begin to secrete resin at temperatures above 40 degrees.
Deciduous ones are fine . For example, you can take aspen, linden, poplar, ash .
Washing
There are no high temperatures in the washing room, but the water flows generously. This is where you can use coniferous species - it is the resins that make them more resistant to high humidity and prevent them from rotting.
Take the same pine - it is the cheapest. All others are also suitable - deciduous ones are also possible if you use water-repellent impregnations.
Rest room and dressing room
There are no restrictions on wood - make it from what you feel like. Humidity will be high here too, but you can freely use both impregnations and varnishes. So the choice is yours.
Required Tools
When making a bench for a bathhouse, you will need the following equipment:
- a miter saw or wort with a reward to cut boards straight or at different angles;
- hammer and construction mallet for assembling parts on dowels;
- a screwdriver or drill with an attachment for drilling slots;
- sandpaper or sanding machine for processing boards;
- measuring tape and square;
- self-tapping screws for fixing the benches to the wall; in the steam room it is better to use stainless steel or at least galvanized fasteners.
Depending on the chosen complexity and qualifications of the master, additional devices may be required.
Means of protection
Of the popular wood species, the most resistant to the effects of water and steam are larch and aspen. This wood does not require any protective agents. Other materials should be treated to prevent damage from rot and mold.
Important! Different impregnations are used to protect benches in saunas and Russian baths. In the first case, the air can heat up to 100–110 degrees, but against the background of low humidity. In the second, the heating temperature does not exceed 60 degrees, but the humidity reaches 50% and higher.
For Russian steam rooms, preference is given to waterproof and water-repellent materials. These include:
- oils – for steam rooms, compositions are produced that are absorbed into the wood and do not form a film;
- oil wax - most often it is a mixture of linseed or hemp oil with wax;
- bleaching - such products contain strong oxidizing agents; such treatment not only protects the wood in the bath, but also prevents darkening.
Some allow the use of special varnish that is resistant to high temperatures. But in practice, experts do not recommend using varnish in a steam room, especially for benches.
Material of manufacture
Bath benches are always made of wood, but not all types are equally good for these purposes. When making your own, you should give preference to materials that are characterized by strength, resistance to moisture and high temperatures:
- Linden. Reliable, durable wood, when heated, releases a pleasant aroma, as well as substances beneficial to the human body. The only drawback is the appearance of a dark shade due to constant contact with moisture.
- Cedar. Reliable, easy-to-process material, capable of absorbing small amounts of water. It has an attractive texture, a good smell, and is characterized by disinfecting properties.
- Larch. It lasts a long time, does not deteriorate under the influence of high humidity, but is expensive. A bench made of this material can be installed in any room of the bathhouse.
- Maple. Strong, durable wood that does not darken or crack with regular contact with water. The material has low thermal conductivity.
- Oak. Reliable, practical wood with a beautiful texture. A bench made from it will become a real decoration of the bathhouse. The disadvantage of the designs is their high cost.
- Aspen. Budget material that creates a special microclimate in the room. It does not last long and begins to rot due to high humidity. Such benches can only be used in dry rooms.
- Abashi. Exotic wood, the high cost of which pays off with a long service life, is resistant to heat and moisture, and durable.
- Birch. Heavy material with high density. It is characterized by strength and does not deform when exposed to negative factors.
Master classes on making simple benches for the garden with your own hands
You can make a bathhouse bench with your own hands from a variety of materials. Only deciduous trees are allowed in the steam room; coniferous trees produce smog when heated, which causes burns. For rooms with lower temperatures, benches made of larch and pine are suitable. These types of wood gain hardness and strength due to exposure to moisture.
Linden
Cedar
Larch
Maple
Oak
Aspen
Abashi
Birch
Making a wooden bench
Bath bench assembly diagram
This part is necessary for use as a replacement for the lower part of the shelf, footrests, basins and buckets.
To make a bench with your own hands you need:
- cut the block into several 40 cm pieces (future supports);
- transverse posts 60 cm long are cut out from another block;
- nail the supports from below, and attach the base for the seat on top, formed from boards 1 m long;
- cover the base of the bench with wooden boards, leaving 1 cm gaps;
- coat the finished furniture with an antiseptic containing vegetable oils.
How to make a simple bench without a back
Simple bench without back
To make a bench with your own hands you will need:
- hammer,
- plane,
- Grinder,
- hacksaw,
- roulette,
- screwdriver
The materials used are: wooden beams measuring 50x50 cm, wooden panels 20 mm thick and 100 mm wide, wood fasteners. The frame of the product is made from timber, and the slats will become the flooring.
Drawing of a bench for a bath
Operating procedure:
In order not to make mistakes when making and installing a bench, a drawing is first made that determines all the dimensions and location in the room. It will be easier to start working with a clear diagram at hand. Benches designed for one person are made 90 cm long; if there are more people, 50 cm is added for each person.
Saw the existing timber into four equal parts of 40 cm each - these are blanks for the bench legs. Measure two 60 cm sections from the other beam for the cross posts and saw them off with a hacksaw. Sand all parts to perfect smoothness. Nail two legs to each crossbar. To create a frame, attach two 1 meter long beams to the crossbars.
Sanding the board
Sand the prepared slats with a special machine or sandpaper so that you don’t feel any discomfort when touched. Stuff the finished planks onto the prepared frame. Leave 1 cm between adjacent crossbars; this gap will allow the wood to expand as it swells and water to drain from the bench. For fastening with dowels, holes are drilled with a slightly smaller diameter than wooden nails. If you can’t hammer in the dowels, you can use self-tapping screws. Their caps must be recessed into the wood by 5 mm, and the holes are sealed with wood putty. This will protect people from being burned by hot metal, and the screw from corrosion.
Note! To saturate the bench you need a special antiseptic, which can be purchased in the store. This is usually a composition based on vegetable oils.
Multi-tiered structures are made using a similar scheme.
Making a two-tier bench
To make such a design you will need a drawing. This is the only way to take into account every little detail and insure yourself against remaking the bench. Working with such a workpiece is much easier and more enjoyable.
Let's look at how to make a structure 3 m wide, 3.6 m long and 2.4 m high.
- At a long blank wall, install a frame made of 50x70 mm timber.
- Sand 12 pieces of 110cm length and 6 pieces of 90cm length for the top shelf.
- For the bottom shelf, sand 6 pieces of 140 cm length and 6 pieces of 60 cm length.
- Make seats (flooring) from boards approximately 20x120 mm, their length should correspond to the length of the wall.
- For free flow of water and ventilation, leave 1 cm gaps between the boards.
- For the transverse ligament between the posts of both shelves, it is necessary to prepare 3 beams.
- For the upper tier, knock down the racks in a U-shape and connect them with two boards. Using 5x5 or 10x10 cm bars, attach the structure to the wall.
- Knock down the racks for the lower tier in an L-shape. Combine the long sides with the racks of the upper tier. Connect the lower racks together with boards.
- The work on the frame is completed. Now lay the boards on the tiers. To connect, use convenient fastening methods (the best option is wood nails).
Types and dimensions
The model and parameters are selected depending on the purpose and installation location of the structures. There are standard sizes of wooden benches for a bath:
- Bench for lying down. The height of the product reaches 50 cm, width - 90 cm. As for the length, 150 cm is enough for two people. If the number of vacationers is larger, another 60 cm is added for each of them.
- For sitting. The width of the structure is 40 cm. Such models are equipped with a backrest, so their height varies from 50 to 110 cm.
- For the sauna. Products with a width of 60 cm are optimal. The height will be the same as that of benches intended for sitting.
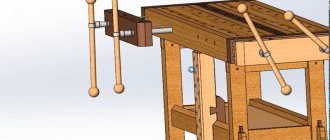
The nuances of making your own bench press from wood and pipes
There is another type of bath benches - for the steam room. The surface length reaches 180 cm. The following types of products are distinguished:
- Single-tier. The sauna bench is suitable for any small space. Most often, this design is mobile.
- Two-tier. Installed in spacious steam rooms, designed for people of tall or average height. You can climb to the second level using an attached ladder.
- Three-tiered. Installed in large baths with high ceilings. The optimal distance between the lower and upper benches is 100 cm.
- Stepped. Used in small steam rooms. You can lie down on the upper bench; the lower bench is used for sitting or as a support when climbing onto the upper tier.
Multi-tiered benches are ideal for installation in a steam room. With their help, vacationers will be able to choose the optimal temperature regime for themselves. It is better to install a small mobile bench without a back in the dressing room or wash room.
When installing structures with several tiers, experts recommend making the upper levels removable and the lower ones fixed.
Single-tier
Bunk
Three-tier
Stepped
Finishing and decor
The finished bath bench must be treated with a natural-based antiseptic composition. If you want to make it in country style, then you need to adhere to the following algorithm of actions:
- Sand the surface along the grain with a brush.
- Clean with a grinder until a relief pattern is formed.
- Apply translucent glaze in two batches.
- Wipe the surface with a dry sponge; when it dries, remove the glaze.
- Cover the bench with varnish.
Making and giving the bench the desired appearance is quite simple if you follow all the recommendations regarding assembly and finishing.
How to properly sand wood for a bench in a steam room?
To start creating benches for a bathhouse, you need to understand the basics of forming their design:
- Before using for their intended purpose, boards or beams must be thoroughly sanded, since a special surface will have to be created for them. This is done using a professional version of the machine or a suitable piece of sandpaper;
- It is recommended that the corner parts of the benches being created be properly rounded, as this will eliminate the risk of injury or minor scratches due to the surface being too hard;
- The finished product must offer sufficient strength and reliability since it will be used by adults and possibly larger people;
- When applying a protective coating, it is better to avoid synthetic types of liquid, since they can release toxins during significant heating. It is better to use natural oils that do not harm humans if evaporated;
- To ensure the best drying option, do not sew up the space under the bench itself;
- Between the created bench and the wall of the steam room, a gap of about 10 cm should be left, as this is recommended by experts.
How to make a bench in a bathhouse: video
Assembling a bench for a bathhouse, although simple, has its own subtleties. You can appreciate the complexity of the work if you once see the whole process.
Placement of benches
In order to rationally use the space in the bathhouse, you need to think in advance where the benches and other pieces of furniture and accessories will be located. The optimal solution is to place the bench near a blank wall where there are no drafts. Installing a bench close to the stove is undesirable and unsafe.
The most effective option for placing benches in a bathhouse is considered to be a corner one, in the shape of the letter “G”. The upper and lower tier are installed along one wall, and the middle one is installed adjacent to them. There is also the option of placing benches in the form of a “compartment”, like on a train, where one tier is located above the other.
Care instructions
In order to extend the service life of the bench, you should adhere to the following tips:
- wipe dry both the seat and the back of the bench after each procedure;
- regularly ventilate furniture;
- periodically treat wooden benches with oil or oil wax;
- if there is contamination, use warm water with laundry soap, but aggressive cleaning agents should not be used due to the active chemical compounds in their composition.
If traces of mold or mildew are detected, the affected furniture elements must be replaced.
In addition to care recommendations, you need to know that when making wooden sauna benches with your own hands, the surface should be sanded to perfection. To avoid injury and splinters, all corners must be rounded. It is advisable to use fastening elements not made of metal, but of wood - dowels. A good prevention against rotting and fungal development is the gap between the furniture and the floor. Otherwise, dampness will begin to accumulate in such places, which will cause damage not only to the bench, but also to the walls.
Making a bench for a bath yourself
Basic criteria for choosing wood
The best choice when making furniture for a couple's room is deciduous wood. Coniferous analogues are of little use, because at high temperatures they release resinous substances. When selecting material, consider the following factors:
- The wood must have low thermal conductivity, otherwise it will be uncomfortable to sit on the bench.
- Wood fibers must have a dense structure. Thanks to this, the material will not split or split during processing and operation.
Remember that wood that cracks easily quickly begins to rot, which threatens bathhouse visitors with splinters.
Wooden bath furniture should have increased strength. After all, she will experience extreme humidity and temperature conditions.
Considering these points, linden, aspen, birch and oak wood are best suited for a bench in the steam room. You can also use maple and poplar. The linden tree has gained the most fans. It has a light and durable wood that has a healing effect.
Aspen is similar in characteristics to linden. However, it is more common, so it costs 1.5-2 times less. However, this wood has a drawback - internal rot. From the outside, the material looks durable, but inside, destructive processes have begun.
For benches in the washing area, locker room and rest room, you can choose coniferous wood types: pine, spruce, cedar. The temperature in these rooms is low, and the moisture resistance of these wood species is good.
Return to content
Optimal bench design
Before you make a bench for a bath, you should think about its design. The minimum size of the product is 1.5 m in length and 40 cm in width. Optimal parameters: length – 1.8 m, and width – 60 cm. Most often they use benches attached to the floor or walls of the bathhouse. There are also portable and collapsible analogs that allow you to take them out to dry.
In a steam room, benches usually have two or three levels. The top one should be the widest. At the same time, its height should be such that, when sitting on it, the tallest member of your family does not rest his head on the ceiling. You can put a regular bench in the sink.
The main features that need to be taken into account when making a bench for a bath:
- Good grinding avoids splinters
- The product must be stable and durable so that you can lie or sit on it without fear, as well as place basins, bowls and buckets of water on it
- It is necessary to cover only with environmentally friendly antiseptic compounds. Impregnation when heated should not emit harmful substances
- It is better not to close the gap under the bench, otherwise, with high humidity, a rapid process of rotting of the bench itself, as well as the walls of the bathhouse, will begin.
- Leave a small gap between the bench and the wall so that water can drain onto the floor
Return to content
How to make a bench without a back?
- First, you will need to make two posts in the shape of the letter P. To do this, cut 4 pieces of timber 40 cm high for the legs and 2 pieces 60 cm long for the crossbars. Attach the bars to the legs.
- Place 10 slats on top of the racks, having previously cut them in accordance with the selected length of the bench. Leave gaps about 1 cm wide between them. They are necessary for the smooth contraction and expansion of the tree due to temperature changes, as well as for water drainage.
- At 15 cm from the floor, connect the racks to each other with slats. This must be done on both sides.
- Additionally, secure the legs with special corners. They can be wooden or made of stainless steel. This will significantly increase the strength and rigidity of the structure.
- Don't forget to round off all the edges of the bench elements using an edge cutter.
- When you finish making the bench, saturate it with an antiseptic composition.
The best way to fasten parts of bath furniture is with oak dowels. They are driven into holes drilled in the areas where the elements join.
However, to do this requires some skill. If you do not have the necessary skills, use wood screws or nails.
If you use metal fasteners, be sure to recess all screw or nail heads to a depth of about 5 mm. After assembling the furniture, cover the holes with a mixture of sawdust and glue. This way you will protect yourself from burns, and the metal from corrosion.
poparimsya.com>
Other articles
- Bath accessories photo
- Antiseptic for baths
- Antiseptic for the bath inside
- Salt bricks for baths
- Brick stove for a bath
- The best wood-burning sauna stoves
- Brick wood stoves for baths
- Linen wool or jute, which is better for a bath?
- Basalt insulation for baths
- Glue for tiles in a bathhouse on the floor
- Do-it-yourself camp stove for a sauna
- Which antiseptic for a bathhouse is better?


