Modern office furniture is so thoughtfully designed that even long hours of work at the computer are comfortable. But sometimes during constant use certain inconveniences arise, for example, creaking. This unbearable sound is not only annoying, but also leads to a decrease in performance. If a similar problem occurs in an office or enterprise, they usually call a specialist, but at home this service is not available to everyone. This article will tell you why computer and office chairs squeak and what to do first. Eliminating trouble with your own hands is not so difficult, and a basic set of tools necessary for all manipulations can be found in every home.
Necessary tools for repair
To repair a computer chair and eliminate unwanted sounds, you will need the following tools:
- screwdrivers - Phillips and straight;
- hexagon;
- pliers;
- hammer;
- special furniture lubricant;
- spare accessories.
Most often, there is no need to change any parts of the chair; they break very rarely. The entire repair will consist of lubricating the mechanism or tightening the bolts. For lubrication, it is best to use WD-40 spray. If you don’t have it at hand, or the product doesn’t help, you can use any oil lubricant or even regular Vaseline.
Avoid direct sunlight
Exposure to direct sunlight will dry out and discolor your cane furniture over time—and drying out is what will lead to tears and breakage in the structure. Instead, you want to keep it hydrated.
Our customer Christina also has a rattan bug
One method is to keep your figures in a room where you have a humidifier, or, if you live in a humid climate, on a covered porch. Katherine leveled the ideal conditions with a cigar humidor.
It is better to bend the latches from the entrance side of the guides, but there is no need to bend them too much, since they are soft and are reluctant to return to their original position.
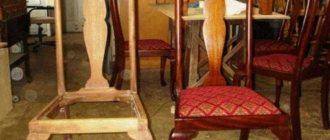
Now we disassemble the mechanism and pay attention to the serviceability of its elements. In my case, the spring responsible for the smooth tilt of the back was broken, but everything else was intact. It is difficult to find such a serviceable spring, so we do without it, but we don’t throw away a broken one either, since it is needed for the operation of the mechanism
It is difficult to find such a serviceable spring, so we do without it, but we also do not throw away a broken one, since it is needed for the operation of the mechanism.
Possible problems and errors
Problems with wheels on office chairs occur when they are used on hard surfaces. On parquet and laminate flooring, plastic rollers wear out quickly. They are more suitable for short-pile carpets. For hard floors, you should choose computer chairs with rubberized wheels. When choosing, you should pay attention to the elasticity of the seat material. It's worth trying to sit in it. If there is a dent left after standing up from it, it is not suitable for long-term use.
Gas elevator failures are most often associated with the fact that the maximum permissible load is exceeded by users. You should pay attention to this characteristic when purchasing a chair. Breakdowns and creaking of the gas lift may be associated with exceeding its service life. Most often, with careful use, a computer chair lasts no more than 10 years, after which the gas lift is replaced and you can continue to work in it.
Other options
You shouldn’t rule out other reasons why the sofa creaks. How to fix the problem if we are talking about a folding structure? First, you should examine the state of the transformation mechanism, which could have failed. There are two ways to fix the problem - by completely replacing the elements or by fixing them.
Uneven supports are another probable explanation for the “musicality” of a piece of furniture. To fix the problem, they need to be adjusted in height. To do this, you need to stock up on plastic plugs or other sufficiently stable material at hand.
Friction of metal parts can also cause the sofa to squeak. If we are talking about an iron structure, lubrication of the elements will help correct the situation. To do this, use machine oil. It must be carefully dripped along the joints of the fastenings
It is important that the oil does not affect the furniture upholstery or its wooden parts. Adding lubricant should only be started after preliminary preparation.
The surface should be thoroughly cleaned of grease stains and furniture.
Repairing sofas is a task that anyone can handle. Don't rush to the store for new furniture if your old piece makes an annoying sound.
The sofa consists of a frame structure, spring blocks, filling, upholstery and a folding mechanism. Creaking and other extraneous sounds can occur in both metal and wooden parts of the frame. The reasons why a sofa creaks can be different. To get rid of them, first determine the area from which they are emitted, and then establish the signs of their occurrence.
An unpleasant creaking sound most often occurs due to the friction of homogeneous elements made of metal (for metal creaks) or wood (for wooden ones), which appear due to wear and tear of the sofa structure. Very often sounds are heard at the joints, in spring blocks. The reason may also be poorly tightened bolts on the fasteners. Let's look at how to eliminate a creaking sofa in more detail, since it will depend on the type of design and type of product.
Fixing the defect yourself
After prolonged use, users notice that the chair begins to make grinding noises and other unpleasant sounds. What to do if your computer office chair squeaks depends on the root cause:
- Most often the problem occurs when bolts are loosened. To correct the situation, you need to turn the chair over and, depending on its model, use a screwdriver or hexagon to tighten all the fasteners until they stop. If some of them scroll, you will need to remove the element, pour sealant or PVA into the hole and quickly screw the bolt back. After this, you cannot turn the chair over, much less use it, until the glue is completely dry.
- To figure out why the back of an office chair creaks, you need to remove it. This is easy to do: unscrew the screw and, lifting the element up along the guides, pull it out. After this, you will need to remove the plastic trim from the back in the same way. The plywood frame has metal plates secured with bolts. All of them must be checked and screwed well. If necessary, gaskets or sealant can be used. In addition, it is recommended to clean the backrest from dust.
- Quite often the swing mechanism of an office chair creaks. You can get to it after removing the backrest. At the point where it connects to the seat there is an L-shaped mechanism responsible for tilting. Dust also collects there, so a squeaking sound may be heard when swinging. The mechanism can be easily disassembled by removing it from the case, but it is important to remember the assembly order. After dismantling, it is cleaned of dirt and lubricated. To assemble furniture, all steps are performed in reverse order.
- A computer chair often creaks due to the drying of the lubricant that covers all the moving parts of such furniture. This substance is short-lived, sometimes it dries out in the warehouse, so even a new product can make a squeaking noise. Therefore, it would be useful for any user to know how to lubricate an office chair so that it does not squeak. For this purpose, you can use any lubricant except grease. It is very convenient to use a special product in a can. It is best to first disassemble the mechanism, wipe it from dust and remnants of old lubricant, and only then apply a new layer of it. You don't have to completely disassemble the chair to do this. If the lubricant is in a can, you just need to spray it on all problem areas. But often this is not enough, since dust and dirt accumulate inside during operation.
- If the chair squeaks when turning, the problem is in the bearing located at the bottom. Lubricating it is very simple: to do this, you need to turn the chair over, remove the latch and the washer holding the gas lift in the middle of the cross. After this, you can easily pull out the cross, exposing the gas lift mechanism. There is no need to disassemble it anymore, it is better to wipe and lubricate it like this. If the device fails, it must be completely replaced.
The instructions for any office furniture indicate that lubrication and checking of the mechanism, as well as tightening of connecting elements, should be carried out every six months.
Causes of squeaking and ways to eliminate it
Drivers consider the appearance of a squeak to be a harbinger of an imminent breakdown of the noisy unit. If the vehicle's chassis is configured correctly, the moving joints should not make any sounds. However, worn friction pairs may creak when moving relative to each other. This phenomenon often occurs in cars with high mileage, but components of a new vehicle can also become noisy. The source of a squeak when the car is stationary cannot always be determined. To find it, car mechanics alternately wet the hinges with penetrating lubricant or water. The disappearance of noise indicates a faulty part.
For your information!
In wet weather, after overcoming deep puddles, the squeak may disappear and appear again after the suspension parts have dried.
Ball joints and ends
Checking the front suspension arms, steering rods, stabilizer struts will allow you to identify a damaged joint. The design of the latter is a steel pin with a sphere at the end, which is clamped in plastic inserts. When the lubricant in the ball joint stops reducing the friction force (it has dried out or been washed out with water), a squeaking noise may appear when the parts move together. Hinge diagnostics:
- Inspect the anther. There should be no traces of grease, rust, or damage on it.
- Unscrew the hinge and remove the protective cap.
- By rotating the pin, inspect the condition of the sphere; the presence of corrosion products, chips, or scuffs on it is not allowed.
- Check the play. To do this, vigorously move the finger from side to side. Ease of movement is a sign of excessive wear and the part should be replaced.
After inspecting the hinges, the unsuitable ones are replaced with new ones, and the serviceable ones are filled with fresh lubricant before being installed in place. Assembly procedure for the old one:
- The hinge is washed in gasoline or kerosene, thoroughly wiped and dried.
- Fill the cavity with new lubricant.
- Install the boot on top. If the old one is damaged, you need to install a new one.
- Place the hinge in place.
Shock absorbers
In conditions of poor quality road surface, the racks quickly fail. Oil drips near the neck indirectly indicate damage to the shock absorber. The creaking of the latter occurs when the rod rubs against the sealing elements, or at the points of attachment to the suspension units. A little penetrating lubricant applied to the mating surfaces and subsequent movement of the vehicle will help determine the source of the noise. For accurate diagnosis, problem areas are moistened one by one.
Oil shock absorbers are subject to restoration. Other types of racks must be replaced. Repair sequence:
- Dismantle the shock absorber.
- Disassemble the sealing unit and wash all parts with gasoline.
- Inspect the rod, piston and cylinder. Dimensional deviations should not exceed acceptable standards (they are different for each model). If the difference is greater, the working surfaces are bored to the repair size, followed by honing.
- Fill the oil to the indicated mark and reassemble everything in the reverse order.
- Install a new sealing unit. The latter, if the rod and cylinder are bored, must be of repair size.
- Put the shock absorber in place.
Anti-roll bars
Stabilizers are attached to the car body through rubber or polyurethane bushings. The latter allow the parts to rotate around their axis. When materials are abraded, a small gap is formed at the contact point. As a result, the stabilizer creaks and moves freely. To determine the source of the sound, you must use an inspection hole. Positioned near the stabilizer, rock the car. The amplitude of movement is enough to find a noisy place. Worn bushings definitely need to be replaced.
For your information!
If you plan to postpone the repair, you can place a piece of a car or bicycle inner tube under the rubber inserts. This will delay replacing the bushings for a short time.
Silent blocks
This design combines metal clips and rubber bushings. Most often, creaking occurs when they move mutually. The phenomenon is absolutely normal even for new cars. It is not necessary to change the silent blocks; it is enough to inject graphite lubricant into the friction zone using a medical syringe with a needle. The procedure is performed without removing the parts.
A car's suspension is directly related to the safety of the driver and other road users. If a squeak occurs in the suspension area, you should diagnose the chassis elements. Only in this case is it possible to assess the condition of all component nodes.
How to go through the floor
If you cannot eliminate the squeak using simple methods, it becomes necessary to dismantle the coating.
Dismantling
First you need to remove the baseboards. When needed for reuse, they are removed very carefully.
To determine the location of the nails, carefully pry the baseboard with a pry bar. Then it is recommended to use it to remove the boards
When removing bars, they should be numbered immediately. This will help you lay the boards in the required sequence. Cracked and rotten boards are numbered and set aside.
Cleaning the base
After removing the boards, it is recommended to carefully remove the base. Otherwise, it will not be possible to determine the causes of the creaking. If there are cracks in the concrete base, they need to be widened, cleaned and primed. Damage can be repaired with cement mortar. It is also permissible to use a special putty.
Setting lags by level
It is recommended to set the logs level. They must be located in the same plane. For leveling, a long level measuring 1.5-2 meters is required. If it is necessary to raise the logs, it is permissible to use spacers or special anchors. After aligning the logs in one plane, they are firmly attached to the base.
Insulation and sound insulation
To do this, the floor is covered with waterproofing material. Insulation is placed on top. Its role is played by polystyrene foam or expanded clay. It is also permissible to use mineral wool.
The insulating layer is covered with a membrane, which helps remove moisture and prevents dust or mineral wool lint from entering the home. All coverings are attached to the joists with a stapler and staples.
Installation of new coating
Finally, the old boards are returned to their place. If necessary, some of them are replaced with new ones. The boards are fastened so as to leave some distance between them. The gap should be 8-10 millimeters. It will help maintain the integrity of the coating as the material expands.
The office chair is creaking - what to do?
The office chair is creaking - what to do?
Is your office chair squeaking? You need a good Phillips screwdriver and WD-40.
Creaking can occur for several reasons. The joints between the plywood frame and metal parts may creak if the screw connections or the metal parts attaching to the plywood become loose.
Solution:
You need to disassemble the chair, remove the plastic covers, lubricate the metal-plywood contact area, tighten the screws well, and assemble the chair.
2. The “Permanent Contact” mechanism connecting the seat and backrest creaks. Solution: lubricate the mechanism.
3. Creaks at the junction of the crosspiece and the gas lift. Solution: lubricate the bearing in the crosspiece. A very rare cause of squeaking.
4. “Drummer” - if all else fails.)))
In detail using the example of the Prestige chair.
- Most likely the back is creaking.
We are repairing it. To do this, unscrew the figured screw A (see diagram), pull the back up and pull it out of the Permanent.In the lower part of the backrest we find two screws that secure the plastic cover to the plywood frame, unscrew them. Pull the plastic trim (carefully) along the plywood frame. The direction is upward, if you imagine that the back is in its usual place. The fasteners should come out of the grooves in the plywood frame. If they come out, the pad will hang loosely. Remove the cover. The metal insert is attached to the plywood frame with four screws. Most likely they are not tightly screwed. It happens that one or two screws are lost (if more, then the back will no longer hold on). You can get these screws in our store (a couple of pieces per hand for free). Tighten the screws well and attach the plastic cover to the frame. You can, just in case, lubricate the place where the insert is mounted with plastic gaskets and a metal plate.
- We are repairing the seat.
Turn the chair without a back upside down. We remove the Permanent by unscrewing the figured screw B. The “Piastra” mechanism is attached to the seat with four screws. We unscrew the screws, lubricate the metal-plywood contact area, and tighten the screws tightly.If the seat stops squeaking, good. If it creaks or if the armrests are loose, unscrew the screws, remove the piastrum with gas lift and crosspiece to the side, and remove the plastic cover.
The armrests are attached to the seat with three screws each. We twist them tightly. Reassemble in reverse order.
- Unscrew the curly screws A and B. Remove the Permanent. Unclip the plastic case. Lubricate all metal parts in contact with each other or spray with WD-40. Assemble the cover, assemble the chair.
- If the chair creaks when rotating without load and the creaking comes from below, then the gas lift bearing needs to be lubricated. Turn the chair over. There is a lock in the middle of the cross. Let's take him out. Carefully, so as not to lose small parts, remove the washer and pull out the gas lift. Lubricate the bearing and reassemble in reverse order.
- If lubrication of rubbing parts and surfaces does not help, then the last option remains - the gas lift creaks.
In this case, the creaking will be like clicks, i.e. at the very beginning of swinging in any direction. This means that the hole in the gas lift “sleeve” is much larger than the gas lift rod and the rod swings freely in the hole (it will be clear if you turn the chair over and determine the play by rocking the cross.) This problem is “treated” by replacing the gas lift sleeve, or the gas lift assembly.
How to remove the gas lift of an office chair
You should not use a gas wrench to remove the gas lift - you will damage the surface and it is not a fact that you will be able to remove it this way.
To change or try to repair the gas lift of the chair, you must first remove it. To do this you will need a wooden or rubber mallet. Having turned the chair over the table surface, take it by the gas lift cartridge itself and use a mallet to tap on the piaster (the metal platform to which the seat is screwed), but without fanaticism - so as not to damage it.
But, if not, go to any auto repair shop and ask them to weld the broken seam.
male version of squeak elimination
https://youtube.com/watch?v=see2b4eZr2w%3F
I hope that you liked the article, if you want to correct the author or share your thoughts, leave a comment below. I recommend joining one of our groups on social networks:
and then you will be aware of new articles and I will be glad to see your ideas.
_ _ _Read in full » https://100uslug.com/skripit-ofisnoe-kreslo-chto-delat/
How to fix the problem
To repair a computer chair you will need the following tools:
- a set of screwdrivers (straight and Phillips);
- hex wrench;
- hammer;
- furniture lubricant;
- pliers;
- spare bolts and nuts.
Due to squeaking, it is rare to replace parts. More often than not, to fix the problem, it is enough to tighten the bolts and lubricate the mechanism. To do this, you can use both specialized products and improvised ones - mineral oil or Vaseline.
Lubricating office chair parts
To lubricate the parts of a computer chair, you need to:
- Prepare petroleum jelly, grease or WD-40, which contains mineral oil and a solvent to enhance gliding.
- Turn the chair over.
- Find the latch in the center of the cross.
- Remove the washer.
- Remove the gas lift.
- Lubricate the washer, bearings, gaskets.
- Reassemble in reverse order.
- Turn the chair over.
See also
Step-by-step instructions for disassembling and repairing an oil heater with your own hands
Replacing fasteners
As a result of prolonged use of an office chair, the fasteners may become loose and begin to creak. To fix the problem, turn the computer chair over and tighten the bolts until they stop using a screwdriver or hexagon. Most often, 2-3 bolts are on the armrests, 4 on the rocking mechanism, and the same number on the seat. There may be more or less. It all depends on the type and design of the office chair.
If, when tightening the fasteners, it turns out that some bolts are turning, they are removed, a special sealant is poured into the hole and quickly screwed back in. Instead of sealant, you can use PVA. In this case, the waiting time must be increased until the glue is completely dry.
You can strengthen the fasteners by adding spacers or replacing the bolts with new ones. It is necessary to tighten the bolts until they stop, but do not overtighten, so as not to strip the threads.
Replacing gas lift
If a gas lift breaks down, lubricating it will not improve its performance. If it not only makes a squeaking sound, but also fails, it should be replaced. After such manipulations, the office chair will last a long time and the cost of repair will be cheaper than buying a new one.
Before you buy a new gas lift, you need to make sure that it fits the model of your computer chair. When replacing it, a number of actions are performed sequentially:
- The screws are removed from the seat.
- They press the crosspiece with their feet, and take the seat by the armrests and, rocking, pull it up.
- To remove the gas lift, use a rubber hammer and a ring drift.
- Installing a new gas lift.
It should be remembered that blows with a hammer when removing the gas lift should not be strong, so as not to damage the cross.
Wheels
To repair wheels you will need the following tools:
- screwdriver - for removing screws;
- lubricant - for processing rollers;
- hammer - for removing parts from fasteners.
If the cause of the computer chair squeaking in the wheels is dirt accumulated there, you should disassemble them, clean them, lubricate them and reassemble them. To do this you need:
- Turn the chair over and try to clean the wheels using a screwdriver, scissors and other available tools.
- If it is not possible to remove dirt, the wheels are removed from the crosspiece by unscrewing the bolts.
- The wheels are washed with water, cleaned, and inspected for damage and wear.
- If further use is impossible (damage, cracks), there is nothing left to do but replace the parts.
See also
Step-by-step instructions for disassembling and repairing a coffee grinder with your own hands
When replacing wheels, experts advise buying a complete set and replacing all 4 so that wear is even during further use.
Causes of an unpleasant squeak
Before you start repairing your bed, you need to become familiar with the main causes of extraneous noise.
Fasteners
Most modern bed models are made of metal frames, which are most often the source of unpleasant creaking noises. Cheap furniture uses metal bolts to fasten elements, which over time begin to rust and become loose.
This leads to the fact that even under minor loads, each loose bolt begins to creak.
In this case, you will have to disassemble the structure and check all fasteners. If necessary, they are replaced with new ones. If this is not possible, you can lubricate them. This will help get rid of creaking sounds for a short period of time. If the connecting component is rusty, there is no need to lubricate it, as it must be replaced.
Connections in the mechanism
Each bed has a special transformation mechanism built into it, with the help of which the product changes its shape. The following types of sofa mechanisms are distinguished, which are most often found:
- Eurobook. This is the most popular model and is used in most sofas. When unfolding such a structure, you need to slightly extend the seat and lower the backrest located at the back. For such products, fastening screws or rollers may creak.
- Pantograph. This mechanism is very similar to the previous one, since when unfolding, you also need to move the seat forward. The only difference is that this model does not have casters. Therefore, the creaking sound comes from the screws.
- Puma. When transforming such a sofa, the seat smoothly rises and then moves forward. The second half of the structure is lifted up and also moved to the side. If the connecting parts of the Puma are not lubricated for a long time, they begin to creak.
Spring sagging
Some types of sofas are equipped with spring blocks, which make the structure more elastic. Over time, they wear out, which leads to sagging of the springs installed in the block. Not only the old, but also the new sofa can suffer from this problem. Therefore, when purchasing, you need to carefully inspect the products and check them for sagging springs. If the springs sag, it is necessary to completely replace the unit with a new one. It is better to entrust such work to professionals who repair beds and other furniture.
Cracks in the frame
The frames of many sofa structures are made of durable and high-quality wood. Gradually, the wood dries out, and cracks appear in it, which creak unpleasantly when any load appears. Most often, such furniture cracks in the armrests, backs, side boards and bottom panels.
If the creaking appears due to cracking of dry wood, you will have to completely replace the part. Some try to repair them with adhesive, but this repair method is not effective. Even after gluing, the crack may continue, causing the squeak to appear again. Therefore, it is better not to waste time gluing damaged parts and replace them with new ones.
How to disassemble and repair
Repairing a computer chair yourself is not that difficult. To do this you need:
- Unscrew the adjusting screw.
- Remove the backrest from the guide.
- Unscrew the bolts and remove the L-shaped fastener.
- Remove the plastic corners using a screwdriver, carefully bending the latches.
- Disassemble the mechanism, clean it from dust, lubricate it.
- Reinstall the L-shaped device.
- Remove the four screws to disconnect the seat from the leg.
- Clean from dirt.
- Clean and lubricate the bearing located at the bottom of the leg.
- Disassemble the backrest by removing the decorative casing, unscrewing the screws and sliding it out of the locks.
- Lubricate all parts and replace if necessary.
- Assemble the chair.
As a result of consistent actions, you can not only get rid of the unpleasant creaking of a computer chair, but also repair and replace parts and fasteners that have failed.
Preventive measures
What can I do to prevent my new bed from squeaking? A fairly common problem, the following recommendations will help you get rid of it. Preference should be given to beds made from expensive natural wood. The most durable and durable:
- Oak is practical and durable, with a beautiful pattern, it is suitable for any interior;
- mahogany – noble color, original appearance and high quality. Products made from mahogany are moisture resistant and not exposed to ultraviolet rays. The furniture emits an unobtrusive aroma that repels various insects;
- rosewood - luxury furnishings are quite expensive. The products have exclusive qualities. By rubbing the wood a little, you can feel the delicate aroma of violet. High-quality pieces of furniture will delight the owners for a long time.
Pay attention to the frame - the elements must be firmly attached and should not dangle. It is better to choose a mattress with separate blocks
They are stronger and more durable. Over time, it must be turned over so that the load is evenly distributed over its surface.
When installing your new bed, try to position it as level as possible. An uneven load on the bed frame and base will subsequently lead to loosening and distortion of parts, and as a result, creaking. All fasteners must be tightly tightened so that the bed forms a solid structure. Metal products will be more durable. Another plus is their cost. Metal beds are cheaper than wooden ones. They also look beautiful and will suit almost any setting. Forged beds do not creak, they look stylish and elegant.
All wooden beds begin to creak during use. You can get rid of the annoying sound at home, the main thing is to correctly determine the cause and choose the appropriate solution.
Why does a wooden floor start to creak?
Understanding the cause of the squeak will allow you to determine how to eliminate the problem.
That is why it is so important to determine it at the stage of inspecting the parquet and listening to the squeak. So, why does parquet or parquet board squeak? As a rule, squeaking is caused by the following reasons:
- the tree dries out and decreases in size;
- the floor receives maximum load, which leads to weakening of the fastenings;
- during the installation of the floor, the conditions regarding the gap between the walls and boards were not met;
- large step between lags;
- thin wooden boards;
- air vibrations;
- violations of operating rules.
In all cases not related to a violation of the functionality of the lag, you can try to use one of the methods below to eliminate the squeak.
Parquet can squeak both in a certain place and throughout the entire surface area.
Where does the squeak come from?
The design of a computer chair is a rather complex mechanism, so creaking can occur for various reasons and at any stage of operation. There is no need to rush to return the purchase back to the store; it is worth finding out the reasons and, if possible, eliminating them.
Among the main factors for the appearance of squeaking are often cited:
- weak tightening of bolts even at the assembly stage;
- abrasion or drying out of the lubricant of joints and bearings during operation;
- the parts of the chair were of poor quality, broken or damaged as a result of use;
- obstruction of dust and dirt from the operation of mechanisms in normal mode.
The creaking may appear at different times:
- when a person sits on a computer chair;
- if the chair turns or rocks.
Most often the sounds come from under the seat. Once you find out the location of the squeak and the cause, fixing the problem will not be so difficult.
Frame
The frame of a computer chair can make a creaking sound. The instructions for use recommend periodically tightening the bolts and checking the integrity of the mechanisms. This procedure should be carried out at least once every six months. In addition, it should be noted that the fasteners are put into place only after the chair has been used under full load. For this reason, after purchasing and using it for a couple of weeks, it is worth picking up a screwdriver or hex key and tightening the bolts. The main thing is not to overdo it, tighten it all the way and no more. If bolts are constantly loosened, experts advise using thread sealant.
Rocking mechanism
In addition to the frame, the computer chair may experience creaking in the rocking mechanism. The reason is also the weakening of the bolts or the fragility of the lubricant, which often dries out while computer chairs are in storage.
How to properly paint the walls in an apartment with textured paint with your own hands, methods and templates
The entire swing mechanism consists of several parts:
- multiblock - almost never creaks, designed to fix the rigidity and tilt of the backrest;
- knee mechanism - needed for swinging, requires lubrication;
- top gun - rocking, has a screw for adjustment;
- permanent contact - regulates the angle of inclination of the back of a computer chair and its pressing against the back of the person sitting, has a spring included;
- slider - thanks to it, the planting depth can be adjusted.
All elements of the swing mechanism require periodic lubrication.
Back
Most often, the back of a computer chair creaks. To correct the situation, it is worth unscrewing the figured screw from the permanent contact and the screws attaching the plastic cover. The latter is carefully lifted up. After the fasteners come out, remove the cover. The metal insert must be secured with 4 bolts. Most likely, they are not screwed tightly or several of them are lost. By replacing and tightening the bolts, the squeaking situation can be corrected.
Gas lift
One of the most common causes of unpleasant squeaking of a computer chair is problems with the gas lift. He is responsible for adjusting the seat height. If, after sitting down on an office chair, you hear an unpleasant creaking from below, you should lubricate the gas lift.
Another test for gas lift problems is to detect squeaking noise when the seat turns and rotates under load. The gas lift should be inspected and, if necessary, lubricated. If the problem persists, it should be replaced.
Wheels
The office chair has wheels. But they rarely become the cause of squeaking. More often they stop rotating because they become clogged with dust or dirt. The wheels are accessible for inspection, so it is worth cleaning them periodically.
Operating errors leading to squeaking
There are a number of operating errors that can lead to unpleasant sounds or damage to the chair:
- All metal parts of the chair should be lubricated regularly. It disappears over time, and the creaking appears from the thorns of the parts.
- Periodically, all parts of the chair need to be disassembled to remove dust accumulated inside. It absorbs lubricant and can cause damage to parts.
- Incorrect use of the chair. Children can ride on it like a carousel. This may cause damage to the wheels.
- Heavy load on the back area. Try not to apply force when stretching back or leaning against the backrest, as there is a risk of damaging the permanent contact.
Important! Protect the chair from water (especially on metal parts and fastenings) and from mechanical damage.
Most often, squeaks are created by the metal parts of the chair due to rocking on it. Therefore, when they appear, you need to check the places where the fasteners and other metal parts are located.
Subscribe to our Social networks
Rocking mechanism
If the swing mechanism of an office chair squeaks during use, then most likely it is damaged or also requires tightening the bolts. Also, the reason may lie in dried grease; it often loses its properties even before the furniture arrives at the store.
Common swing mechanisms:
- multiblock - allows you to fix the inclination and rigidity of the backrest. You don’t have to check, it rarely makes a creak;
- knee mechanism - provides deep swing, it has two levers and an adjusting screw;
- top gun - the swing is adjusted by one lever; the top gun has an adjusting screw;
- piastra - a mechanism for adjusting the height of the chair with one control lever;
- permanent contact - responsible for adjusting the height and angle of the backrest, as well as seating depth. With spring base;
- spring-screw mechanism - attaches the backrest to the seat and is needed to regulate the rigidity of the backrest;
- slider - responsible for the depth of the seat (it can move back and forth, like in a car)
Almost all of them must be lubricated regularly. The most convenient way would be to use a special lubricant in a bottle. If replacement is required, it is better to contact your nearest service center, especially if there is a valid warranty.
Services and benefits of Mr. Fetr
By contacting Mr. for help. Fetr, you will receive comprehensive service for your car regarding the problem that is bothering you. The company’s specialists will accurately diagnose where the rattling and squeaking noises are coming from in the shortest possible time, and promptly eliminate it. In their work, all company mechanics use only high-quality and proven products from well-known brands and brands. After the repair, we will provide you with a guarantee for all work performed. With Mr. Fetr “ crickets ” and rattling will not disturb the silence and comfort of your car for a long time.
Design features
Before you begin repairing a computer chair, experts recommend carefully studying the types and design features of such products. In specialized stores you can see the following models of computer chairs, which have individual design features:
- for the manager - a five-beam hollow cylindrical base, a multi-block for adjusting back resistance, seat depth and roll level;
- for employees – light weight, multi-block adjustment of seat height, armrests and backrest angle;
- for guests - four legs, a comfortable seat and backrest.
Despite the variety of models, all computer chairs have a similar design, which consists of a number of components.
A five-point cross is a plastic or metal part that serves as a support for the entire structure.
Rollers are iron or polymer parts that are installed along the edges of the base. The maximum number of rollers is 5. A distinctive feature is the presence of metal fasteners and a hinge.
The process of dismantling a part depending on the type of base
If the structure no longer rises and locks in the desired position, it means that the gas lift on the office chair needs to be repaired. You can do this yourself. The algorithm of actions will be almost identical for both plastic and metal bases.
Plastic
Dismantling of the structure, the base of which is plastic, occurs in a certain sequence. If a person is changing a gas cartridge for the first time and does not know how to remove the gas lift from office chairs, he will need an assistant. Instructions:
- Unscrew the bolts located under the seat. Carefully remove it from the mountings.
- Stand on the crosspiece and gradually, using rocking movements, pull the chair up by the armrests. Set it aside.
- Use a rubber hammer to apply several light, precise blows to the body of the structure from the side of the cross - the gas lift should come out of the base gradually.
After this, you need to replace the part and perform the same steps in reverse order.
Unscrew the bolts under the seat
Removing the base
We insert a new gas lift and secure the crosspiece
Metal
The principle of removing a gas spring from a metal base is similar to the previous one. The only difference is that some manufacturers use fragile material in the manufacture of the structure. Therefore, it is recommended to be careful when knocking out the gas lift. The blows should be weak so that the cross does not crack.
In fact, repairing an office chair gas lift with your own hands is a simple process. If you approach the solution to the problem responsibly and study all the nuances, you can repair the furniture yourself and very quickly, rather than spending money on a new product.
Unscrew the bolts and pull the seat towards you
When knocking out the gas lift, be careful, apply weak blows
Ready
When should you go to the salon?
If you understand that it is impossible to eliminate the squeak without replacing parts, then it is best to leave this work to professionals. Selecting a suitable and high-quality part, welding and digesting parts of the structure is beyond the capabilities of a beginner or a person who has never done this. During the repair process, due to inexperience, the integrity of the seats and other parts of the car can be damaged. It should be noted that eliminating squeaks without the proper knowledge and experience can lead to injury to the driver himself. If you are not sure that you can handle the task yourself, then it is better not to risk it and entrust this task to experienced mechanics.
Treating the surface with an adhesive composition - how to do it correctly?
We are talking about pouring a special glue to get rid of the creaking of the parquet. To achieve a positive result, you need to prepare a set of tools for work in advance:
- electric drill (2 mm drill);
- masking tape;
- syringe;
- polyurethane glue;
- rags;
- wax crayons;
- dowels
Repairs begin with markings. To do this, mark points at a distance of 15 cm from each other and apply masking tape to them. Holes are prepared in the marked areas using an electric drill. Glue is poured into them with a syringe, filling the voids between the base and the parquet surface.
A regular syringe is suitable for pouring glue.
The glue will take several hours to dry. After this, you can remove the tape and traces of glue using a solvent.
To enhance the effect, the parquet is pressed to the base with a weight and is not in contact with the repaired area for some time. A day after filling the holes with glue, they move on to the final stage of repair - using wax crayons
It is important that they are as identical in color to the parquet as possible. They fill the holes and polish the finished floor with a rag.
The computer chair is creaking - what to do? How to rid yourself of discomfort
Reasons: why a computer chair starts to creak
- The screws between the parts were loose, or they were not tightened properly at the production stage.
- The grease that was on the bearings and joints has dried out.
- Due to poor quality parts or improper use, the mount broke. In this case, you cannot do without purchasing additional parts or the help of specialists.
- Also, the reason may be ordinary dust, which has accumulated in the cracks and prevents the mechanisms from working as expected. In this case, careful disassembly and cleaning of the chair will help.
In what places does it squeak?
If your office chair squeaks when you move, inspect the wheels. Often small debris or dust stuck in the cracks causes an unpleasant sound. Dirt can be removed with a narrow, long object or blown out using a can of compressed air. If a squeaking sound is heard when the chair rotates, the problem may be with the gas lift. This is the part responsible for adjusting the chair in height, torsion around its axis and the spring function (reducing the load when you sit in the chair). To inspect the gas lift, turn the chair over and look for the latch in the middle of the cross.
Remove the washer by picking up the tongue, carefully remove the gas lift and lubricate the bearings, gaskets and other parts. If you still hear squeaking or clicking noises, the problem may be more serious and require replacement.
A new gas lift will still cost less than buying a whole chair.
Many chairs have a “sore spot” - the rocking mechanism. The chair is controlled using a piastra, spring-screw or centered mechanism (you will recognize it by the protruding handle). Often the problem is a broken piastra weld. Inspect the fasteners and, if necessary, tighten the bolts with a screwdriver. It happens that after tightening, the screws quickly become loose again - here ordinary PVA glue or any other will come to your aid - pour a few drops into the gap and tighten it tightly. Do not turn the structure over until the glue has completely dried.
- When a squeak is heard from the L-shaped mechanism when changing the position of the backrest, you need to remove the side corners by picking them up with a flat screwdriver - they are connected to each other with plastic latches, so act carefully so as not to damage them. Wipe the insides with a rag, add lubricant to the spring and return the plugs to their place.
- If the armrests are loose, tighten the screws.
- Disassemble the backrest if it is the cause of the squeaking.
Instructions on how to disassemble the back of a chair
You have already disconnected the backrest from the chair and from the L-shaped part.
Inside, a metal insert is usually attached to a plywood frame. It is necessary to check the reliability of the fastening, tighten the screws if necessary and lubricate all suspicious places.
How to lubricate a chair
- Most often it is recommended to lubricate squeaking parts with WD-40. It contains solvent and mineral oil, which facilitates sliding and protects the surface from moisture. “Vedashka” is convenient to use at home, as it is produced in the form of an aerosol and comes with a narrow long spout - for carefully applying it to hard-to-reach places.
- You can use solid oil or Vaseline.
- Any lubricant for equipment is suitable, for example, which was previously used for door hinges or a sewing machine.
- Do not take vegetable oil or cosmetics - even if there is an effect, it will not last long.
Chair care
To make your refurbished chair last longer, follow a few simple rules.
- Do not swing in a chair with the swing mechanism fixed - you will destroy the gas lift, and it will not last long under such a load.
- Do not sit down on the chair abruptly, in a big way, so as not to overload it.
- To clean the chair, use mild detergents to avoid damaging the parts with aggressive chemicals and accelerating their wear.
- Regularly check the reliability of the screws and add lubricants if possible, so as not to end up completely disassembling and repairing the chair.
Conclusion
Comfortable furniture for work and relaxation is not only momentary comfort, but also a matter of your health. Many problems with the spine and joints are caused by incorrect body position during the day. Be careful when choosing and caring for your work chair to avoid big problems in the future.
Prevention
In order not to search on numerous sites and ask friends what to do if your computer or office chair creaks, it is better to prevent this problem in advance. It is wrong to neglect the rules for operating such furniture, believing that it is made reliably, and if something is wrong, then the manufacturer is to blame .
You need to know how to use chairs with moving parts correctly:
- They should not be ridden unnecessarily, rocked or tilted too far back. You should also not spin around in your chair like on a carousel.
- It is important to remember that there are weight limits that such furniture can withstand, so obese people need to choose special, stronger models.
If you don’t sit down in the chair from a running start, don’t swing on it and don’t overload it, you won’t have to think about how to repair it later. In addition, it is very important to regularly lubricate and inspect all mechanisms, tighten bolts and clean dust - then the product will serve for a long time and without failures.
Features of gas lift operation
First of all, I note that the malfunction indicated in the title always indicates a breakdown of the gas lift - a unit that performs the following functions:
- Creates a cushioning effect when you sit down. This relieves stress from the spine and makes sitting on the chair more comfortable. The element dampens the impact effect that often occurs when landing on rigid structures.
- Raises or lowers the seat due to a special mechanism. This allows you to adapt the design to people of different heights and adapt it to different types of work. For example, writing requires a different position than working at a computer, and thanks to the gas lift, adjustments are made in literally a matter of seconds.
- Provides rotation of the chair around its axis. This function is also provided by a pneumatic cartridge (this is also the name of the mechanism in question). Thanks to this element, you can rotate 360 degrees in both directions without any restrictions.
Thanks to the gas lift, the chairs become much more comfortable and functional
The design is a steel cylinder, inside of which a rod with a piston moves. The cylinder is made in the form of a sealed element of a certain shape, divided into two chambers. A valve is installed in the partition between the chambers, due to which gas moves from one chamber to another.
The gas is located in two chambers - external and internal and moves depending on the opening of the valve
When the seat is fully lowered, the piston is in the up position. When you press the lever, the damper opens and the gas moves from one chamber to another, it presses on the piston, and then it goes down, while simultaneously lifting the seat up.
When the lever is lowered, the valve closes and the structure is locked in the required position. Everything is quite simple, but if you look at the system inside, you will see that it consists of many elements. The diagram below shows a cross-section of the product.
The system inside is quite complex, but this does not matter, since we will not disassemble it
Another important element is the support bearing; it is located at the end of the rod and ensures free rotation of the chair in both directions.
The support bearing allows the chair to rotate freely in both directions
All pneumatic chucks are divided into classes, which depend on the thickness of the steel used for the elements inside which there is gas under pressure:
- Class 1 - 1.2 mm.
- Class 2 - 1.5 mm.
- Class 3 - 2.0 mm (designed for loads up to 120 kg).
- Class 4 - 2.5 mm (used on chairs that can support up to 150 kg).
The higher the class, the stronger and more durable the gas lift, but also the more expensive its cost.
Another part of the mechanism is the gas lift casing. It does not perform any functions and serves for decorative purposes, covering the metal cylinder and giving the chair a more attractive appearance. Used only on plastic models; on metal ones the structure does not close.
The casing is a simple telescopic element of three plastic sections inserted into each other
Keep in mind that the gas in the housing is under very high pressure, and any damage to the integrity is dangerous to human life and health.
Operating Instructions
In order to correct a defect that has appeared in the refrigerator, you need to perform a number of actions:
- Identify the hinges on the door that are squeaking.
- Lubricate them with a special product prepared for this purpose.
- Check the door for squeaks by opening and closing it.
Preparation
To work, you need to prepare tools and materials:
- screwdriver;
- Vaseline, mineral oil or paraffin;
- brush, pipette, syringe or cotton swab;
- latex gloves.
You should buy a lubricant in a convenient bottle with a long narrow spout. If it is not there, prepare a lubricant, syringe or pipette, with the help of which it will be easy to deliver the lubricant to its destination.
Remove all food and items stored in the refrigerator door. It is opened and raised on its hinges until it stops. For convenience, it is better to do the work together. If necessary, the door can be completely removed from its hinges. They are cleaned of dust, dirt, old grease using a brush or cloth.
How to apply
Apply a small amount of Vaseline to the joint and distribute it evenly over the entire surface. To do this, use a small flat head screwdriver.
To apply paraffin, warm it up and lubricate problem areas with a brush or cotton swab
Particular attention should be paid to areas that are heavily worn or beginning to corrode.
After lubrication
After the lubricant is applied, remove excess with a cloth that can absorb it. The door is lowered into place or hung if removed from its hinges.
Examination
To check, you need to open and close the refrigerator door several times to make sure there is no creaking. If the procedure did not help and the door still creaks, you should remove it from the hinges and lubricate the hinges more thoroughly so that the lubricant penetrates to the rubbing parts and the amount is sufficient. After this, the door is hung again and tried to open and close. The absence of a squeak indicates that the lubricant has reached the problem areas.
Eliminating squeaky seats yourself
Reasons why seats make annoying squeaking sounds include:
- · poorly secured moving parts of the seat;
- · friction of springs with the material with which the seat is filled;
- · loose “sleds” on which the seat moves back and forth;
- · low-quality metal from which parts for the seat are made;
- · “wings” of lateral back support;
- Unlubricated seat fastenings;
- · seat belt fastener at the point of attachment to the seat.
To solve problems with squeaking seats, you will most likely have to dismantle them. However, if the sound comes from the back of the seat, then there is no need to rush to disassemble it. To eliminate a squeak in the backrest, sometimes it is enough to simply unhook the rear trim. This will give you a clear view of the creaking parts, and you will be able to easily remove annoying rattles.
Even if you don’t know all the engineering tricks in your car, even a novice can eliminate squeaks in the car’s interior on his own. There are basic stages of providing emergency assistance to seats to eliminate friction accompanied by unpleasant sounds.
The first stage is to lubricate or spray WD-40 at all points where the zigzag springs interact and come into contact with the seat filling. After a certain time, the foam rubber loses its softness and becomes harder. Because of this, when it comes into contact with metal parts of the car, it makes an annoying squeaking sound.
The second stage is to lubricate with WD-40 all the attachment points of the zigzag springs with the seat frame. Additionally, you can wrap the fastening points with regular electrical tape. This will limit metal-to-metal friction. One of the options for replacing electrical tape is cambrics, which are used for electrical wires.
The third stage is to wrap the zigzag spring with electrical tape in those parts where it contacts the iron rods, which are responsible for the rigidity of the frame. In this case, the occurrence of sound is natural, because when metal rubs against metal, “crickets” always appear.
Step by step stool lubrication
In order to begin the lubrication process, you first need to disassemble the chair.
- The soft part of the seat is removed.
- All movable parts of the height adjustment are treated with liquid.
- In addition to the mechanism, you also need to clean the fasteners of the chair.
- After the seat is processed, you can move on to the back.
- The back of the chair is removed after unscrewing the bolts or screws. When all parts are removed, the rubbing surfaces are processed.
- If the chair provides for the use of wheels, then they are also treated with a solution.
The process of lubricating a chair is not complicated and you can do everything yourself, but if you have absolutely no time, you should entrust the work to professionals who will do everything not only efficiently, but also as quickly as possible.
Nowadays, you can order office furniture repairs online, and you don’t even have to leave your home. After submitting your application, a specialist will contact you and clarify the reasons for the malfunction. At the agreed time and address, a master arrives and carries out repairs, after which the chair becomes like new. If something breaks during operation, the technician can replace the part with a new one.
“The computer chair creaks.” “The chair began to creak, no matter how much I lubricated it.” “How to prevent an office chair from squeaking.” “My office chair is creaking, I’m already tired of it. ", "Not even a few days passed, a squeak appeared, we are not happy with the purchase."
These kinds of posts often appear on forums and in reviews about chairs. Every buyer believes that after purchase his chair should work without flaws, and if there is any hint of a malfunction, then the seller must be held responsible. Today we will try to look at the “malfunctions” of the chair, which can be corrected without much difficulty at home.
READ MORE: What is the difference between a hearing amplifier and a hearing aid for the ears and what is better Personal sound amplifiers for the elderly Miracle Hearing and other models
The first thing that can creak is the frame of the chair itself. After carefully reading the warranty card, you can find the following standard clause in the operating rules: “Check the mechanisms, tighten the fasteners and fixing elements of the chair every six months.” But even with a fresh assembly, loose bolts are not that uncommon.
It should also be taken into account that all fasteners will fit into place only when used under load. Therefore, a hexagon or Phillips screwdriver, depending on the model of the chair, will help tighten all the fastening bolts in a couple of minutes. 2-3 on the armrests under the plugs, 4 on the mounting of the swing mechanism and 4 on the fastening of the back of the chair to the seat, the number of bolts depends on the design of the chair.
Next on the list are swing mechanisms, which can also creak in the absence of lubrication, and the lubrication is far from durable and often dries out in the manufacturer’s warehouses. Let's look at the most common mechanisms: multiblock, knee mechanism and top gun. It’s not worth getting into the multiblock on your own; we don’t even remember a time when it creaked at all.
The most common squeak in a chair is the gas lift squeak. When you sit down in a chair and hear a crunching or squeaking sound from somewhere below, but don’t understand exactly where the sound is coming from, the 100% reason is the gas lift itself. You can take it apart and lubricate it yourself without difficulty or fear. We will clearly demonstrate how to do this.
Turn the chair upside down. Directly in the crosspiece on the back side of the gas lift column, using a flat screwdriver, you need to remove the latch holding the gas lift rod and the washer. The stories about how a gas lift will fly up like a rocket are never justified. A gas valve on a working gas lift will not break during such disassembly, unless you try to weld its rod to the swing mechanism or under blows from a sledgehammer.
Then carefully and evenly lift the cross up, the gas lift column will remain on the cross and all the internal elements of the gas lift will appear in front of you. Next, we simply lubricate everything in front of our eyes: the bearing, support washers, rubber gasket, the very top washer, which is adjacent to the column inside, most often because of its dryness, a metal creaking appears.
You can disassemble and lubricate each element separately, just be sure to remember the sequence: a rubber gasket is placed on the piston rod, then a support washer, a bearing and another washer follow. The piston rod itself can be separately lubricated with low-viscosity oil - this will give the gas lift a couple of extra HP to its life expectancy;)
After lubrication, we put the gas lift column on top and secure the rod with a washer and a latch. Don’t be alarmed if you see a plastic washer instead of a bearing or one metal support washer is missing altogether. Due to the wide variety of gas lifts, their design may well differ.
As for operation - NEVER swing in a chair with the swing mechanism fixed, thereby you yourself break the gas lift and render it unusable in a matter of days. In any case, if you want to deal with the annoying squeak yourself, then our article will help you.
Modern office furniture is so thoughtfully designed that even long hours of work at the computer are comfortable. But sometimes during constant use certain inconveniences arise, for example, creaking. This unbearable sound is not only annoying, but also leads to a decrease in performance.
If a similar problem occurs in an office or enterprise, they usually call a specialist, but at home this service is not available to everyone. This article will tell you why computer and office chairs squeak and what to do first. Eliminating trouble with your own hands is not so difficult, and a basic set of tools necessary for all manipulations can be found in every home.