What furniture is needed in a bathhouse?
They select furniture for the bathhouse, like everything else, in accordance with their tastes and financial capabilities.
But there is a certain standard set that will be difficult to do without. In a steam room, for example, shelves are required. What shape and size it will be, single-stage or in several steps, along one wall or in the form of the letters “G” or “P” - depends on the desire of the owner. But such furniture in the steam room is required. For the steam room, we can also recommend headrests, also made of wood, and footrests. All other items are optional. But it is undesirable to heavily clutter the steam room. This is usually not a very large room in which proper air circulation is important, and unnecessary objects can interfere with air movement.
Bench for a bath in a steam room (added)
You can also make shelves in the washing room, but more often you can see benches of different configurations and sizes. Stools are also used here - it is convenient to place tubs, buckets, tubs and other wooden utensils on them. There should also be a hanger, but it should be placed in a place inaccessible to splashes.
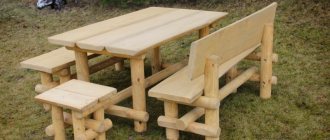
Wooden furniture for the rest room is selected based on the number of people who will gather here. Typically, a set of furniture for a bath includes a table, several benches of different sizes, a wooden trestle bed (one or several), and there may also be chairs or stools.
In general, hangers are a very fun topic. You can see very unusual products. For example, hooks for hangers are made from knots, and also from old forks and spoons
In general, bath furniture is selected so that people feel comfortable, and what exactly this will be is decided by everyone independently. But in the washroom you definitely need benches: to lay out all the accessories, masks, scrubs, towels and other bath accessories.
Form
By design, all hangers can be divided first into the following categories:
- wall-mounted (have no other support other than walls);
- floor-mounted (may not be attached to walls).
In turn, wall and floor ones can be located along one of the walls, or located in the corner.
Wall mounted
The most minimalistic version of a hanger is a board, on one side of which hooks are attached (these can be wooden sticks, forks of branches, door handles, and knockers, but most likely some kind of purchased type of holders), and on the other side there is a fastening on the wall - ears, hidden loops, other varieties.
A hanger with a shelf is not too different from it in terms of labor intensity. Everything is the same - board, holders, ears, only a shelf is added at an angle of 90 degrees, and a pair of approximately triangular-shaped sidewalls will support it in this position. You can do it without the sidewalls - glue them and place them on the screws.
The structure we conventionally call a “fence” is a little more complicated. These are several boards attached to cross slats with gaps between the boards. The upper edge is usually made smooth (because a shelf is most often attached to it), and the lower edge is either smooth, or a triangle, or rounded, or the author came up with something else.
Floor-standing
Floor designs can also be different.
For example, it could be a classic hanger in the form of a pole with a three- or four-legged support and a crown of hooks for circular placement of clothes.
Idea! A variation of such a pillar can be a felled young tree, the branches of which form “hooks”. However, first it will need to be dried thoroughly (at least a year).
In another version, it can be a frame made of round wooden elements, which rests on two “legs”:
You can turn an old door leaf into a floor hanger by attaching a shelf and hooks to it.
Corner
Corner can be either a wall or floor design. Roughly speaking, its feasibility depends on whether it is imaginable that you mentally cut the design you like so that it folds at an angle. In some cases this will not be difficult.
However, for a steam room there is no need for a floor structure, and a light wall-mounted one consists of two boards at an angle of 90 degrees and a shelf-lid in the form of a triangle or a sector of a circle. It is quite suitable for hats and towels, and if you wish, you can further decorate it.
Bath furniture drawings
You can make simple wooden furniture for a bathhouse with your own hands, buy more serious products in a store, you can find the manufacturer’s contacts and buy from him at a lower price (although not a fact) or order a set made to your taste.
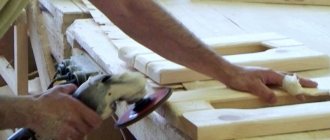
Wooden furniture from the manufacturer is, of course, good, but if you built a bathhouse yourself, then you can make furniture: the models are not the most complex, there are many available diagrams and drawings. The most important thing is to carefully process the workpieces: the edges must be rounded, all parts must be carefully sanded, first with a grinding machine, then with fine sandpaper by hand until a perfectly smooth surface without the slightest chips, burrs or other flaws.
Bath bench. DIY drawing
The parts are fastened either the old fashioned way using oak wedges, for which the corresponding grooves are cut out (a complex option that requires experience and time), or using self-tapping screws (nails are less reliable). When assembling bath furniture with your own hands using screws, “recess” the caps to a depth of 5-6 mm. Then fill the resulting holes with wood putty of the appropriate color. With this you kill two birds with one stone: the putty protects the iron from oxidation and dark spots and streaks will not appear on the furniture; moreover, if the items are used for the steam room, the metal parts will not burn the skin.
Do-it-yourself wooden bath table: drawing and dimensions (can be changed proportionally)
The table must be in the rest room. At least small. You need to drink a lot in the sauna. You will need to display teas, infusions and cups/thermoses/saucers. So without a table - nowhere. A drawing of a table that is stable and easy to manufacture is shown in the figure above. There shouldn't be any difficulties. The main connections are self-tapping. Their length is 3/4 of the total thickness of the parts being connected (so that they do not stick out from the tabletop). The diameters are all there, where to screw in is marked. Give it a try. It will work out for sure.
There is one little secret that will make the putty almost invisible: add a little dust to it, which is obtained during sanding. If you have successfully chosen the color, then after this additive the marks after sanding are barely noticeable.
Wooden bench. Can be used for a washroom or rest room in a bathhouse. Easy to make yourself
When assembling shelves for the steam room, benches, tables or other bath furniture, place the boards not closely, but with a small gap. This, firstly, will solve the problem of water drainage - it will flow into the cracks, secondly, the wood will be better ventilated, and thirdly, wood tends to expand/contract with changes in temperature and humidity, and such cracks provide the wood with this opportunity.
Conclusions : furniture for baths and saunas should be made of wood. What furniture to buy for a bath is your choice, which depends on taste, habits and capabilities. You can buy a ready-made set, you can order production from a master, or you can try to make it yourself. Any option has its positive and negative aspects, but the most inexpensive furniture for a bathhouse is obtained if you make it yourself. The only thing that can be used with restrictions in the bathhouse is upholstered furniture. In this case, you need an ideal ventilation system that will effectively remove excess moisture from the air.
Some interesting ideas that may be useful to you
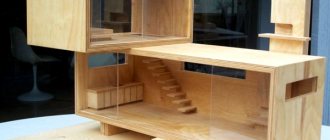
This set of furniture when folded does not take up any space at all, but looks like a wall panel
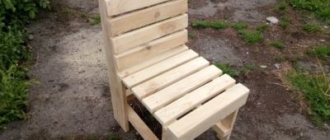
On the open terrace near the bathhouse you can make stools like this. Original, just like the tree trunk solution
Tips for choosing
When choosing wooden interior design for a wash room or recreation area, it is recommended to give preference to more durable, reliable species.
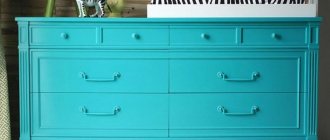
Pine has a long service life and fills the room with a refreshing smell. However, it should be remembered that wood contains resins, which are released into the environment when exposed to high temperatures. Therefore, furniture made from this type of wood is often placed in rest rooms. Benches, chairs, tables, shelves, hangers, and cabinets are made from pine.
The most successful solution when creating furniture for a steam room is linden. Wood is characterized by low thermal conductivity, environmental friendliness, ease of processing, and a pleasant smell. Linden can be used to make shelves, buckets, ladles, and footrests.
Oak has a beautiful texture, strength, and is not susceptible to adverse conditions. Pieces of oak furniture can be placed both in the steam room and in the relaxation room. More often, oak is used to create massive objects, for example, beds, armchairs, tables, shelves.
Alder is characterized by softness, moisture resistance, is not subject to deformation, and has a beneficial effect on the entire body. Alder furniture is suitable for steam rooms and relaxation rooms. Shelves, benches, chairs, and armchairs can be made from alder.
Canadian cedar has a high-quality, good texture, high strength, aroma, and has a beneficial effect on the body. Cedar furniture is suitable for both a steam room and a relaxation room. Shelves, benches, tables, and chairs are made from it.
Aspen and ash, due to their softness and rapid wear, are ideal for making bath fixtures. You can use them to make buckets, headrests, and footrests.
Larch is durable and can easily withstand high temperatures. However, the material cracks easily and is also difficult to process. Larch furniture can be placed in the steam room and relaxation room. Larch can be used to make footrests, headrests, buckets, tables, benches, chairs, hangers.
After the work, the surface is treated with a special compound. This is done in order to prevent the appearance of mold and rot and thereby extend the life of the tree. When using wood at high temperatures, applying any chemical compounds is not recommended.
Features of manufacturing furniture for a steam room in a bathhouse
There should be nothing unnecessary in this room so as not to interfere with proper air circulation. Therefore, only shelves and a bench are traditionally installed as furniture here. You can make them yourself by making the right calculations and choosing high-quality wood.
Selection of materials for furniture in steam baths and preparation
Furniture for the steam room is made exclusively from wood. It is environmentally friendly and has low thermal conductivity. In this case, the boards for the shelf and bench are selected without cracks and knots. Wooden furniture for a bath should be made of even and smooth material.
It is undesirable to use coniferous wood due to its high resin content. At high temperatures, they are released, which can result in burns. The best option is aspen, linden, African abashi tree.
When purchasing lumber, be sure to pay attention to shrinkage. Damp wood will rot and warp. Only galvanized fittings are used for fastening individual elements. Such fasteners are resistant to moisture.
Please note that the wood used for furniture in the steam room is not varnished or painted. Any chemical treatment is prohibited! Under the influence of high temperature and humidity, the impregnation will release toxic fumes and reduce the performance properties of the wood.
After choosing materials, you need to decide on the design of the future structure and the location of its installation. To do this, you can familiarize yourself with existing drawings of bath furniture or come up with your own. First of all, the shelf should be comfortable. Its optimal width is 0.6-0.8 meters, and its length is 1.8-2.2 meters. You can make it with one, two or even three tiers. However, please note that the height from the top shelf to the ceiling must be at least 1.2 meters. At the same time, in three-tier structures, it is advisable to make the upper and lower steps removable, and the middle one fixed.
Separately, you should take care of sanding the wood. It is performed twice: the first time with a grinding machine, the second time it is cleaned by hand.
Instructions for making a two-tier bath shelf
Bath shelf - diagram
Shelves for a small steam room Before making shelves for a bath, you need to take some measurements.
The shelves should not cause inconvenience. Its device can be either single-tiered or three-tiered. It is believed that the heat is higher at the very top. The design resembles the shape of steps. Once the required dimensions of the boards have been determined, you can begin to work:
- It is necessary to mount a frame of wooden posts. For this, a timber is taken.
- The racks are fastened together. You can even use metal screws here, because the body will not come into contact with this part of the shelf. The distance between the two posts should be about 50 cm.
- The frame must be attached to the walls of the bathhouse.
- Then the boards are attached to the frame. When installing them, you can no longer use metal. The distance between two adjacent boards should be about 1 cm. This is necessary so that the water can drain freely. In addition, this device allows the structure to dry faster.
Technology for making a bench for a steam room in a bathhouse
The bench in the steam room can be used to place a bucket, a tub on it, or just for relaxing. To equip it yourself, we adhere to the following algorithm of actions:
- We prepare four legs 0.6-0.7 meters long and two struts from a beam with a cross-section of 5 cm2.
- We sand two boards 0.4 meters wide and connect them together along the edges with slats.
- We fix the legs with crossbars at the top and bottom.
- We nail the resulting structures to the seat.
- We attach the struts with one side to the bottom of the seat, the other to the crossbars of the legs.
Before use, shelves and benches in the bathhouse must be treated with a special oil composition that will prevent the wood from drying out.
Specifics of installing bath furniture in a steam room
When placing furniture in the steam room, it is necessary to take into account some safety rules. It is better to mount the shelf on the wall opposite the stove, but not immediately opposite it to avoid burns. The distance between the benches and the stove should allow you to steam freely without touching the hot surface. Also keep in mind that it is not advisable to sew up the space under benches and shelves. This will lead to wood rotting due to poor drying. The distance from furniture to walls should be at least 3 cm for good ventilation.
Russian style
A mandatory rule of any harmonious structure is that outside and inside it is necessary to adhere to a single style. Baths in the Russian style are mainly built from wooden logs, and therefore even a modern building looks the same in appearance as our great-grandfathers - a structure made of untreated wood, measuring 4x6 meters, with a height of approximately 3.5 meters .
We maintain a single style
- multi-tiered shelves;
- a large wooden table with benches around;
- working fireplace;
- a huge tub of water, wooden ladles and buckets;
- red brick stove-heater;
- wooden floor boards, brooms from different types of wood, towels and sheets.
Spirit of Russian style
There may be many such small and not so small details, but they have one common feature - all the design elements of a Russian bathhouse are of natural origin, consisting of natural materials.
Exclusively natural materials
It is dangerous to use synthetic or plastic material; when heated, such shelves can release toxic substances, cause burns, and poisoning.
In the shower room and locker room, use materials such as wood, boards, natural textiles, and ceramics. All this will create a cozy atmosphere, and things made by hand will add warmth and soulfulness.
Features of manufacturing furniture for washing in a bathhouse
Unlike the steam room, the temperature range in the washing compartment is less aggressive. However, increased humidity levels are observed here. Therefore, independent production of furniture for a washing bath also requires compliance with many nuances on which the durability and strength of structures depends.
Material for furniture in the washing department of the bathhouse and preparation for manufacturing
In the washing room, as in the steam room, mainly wooden products are installed. At the same time, the choice of wood is expanding. Deciduous wood is, of course, moisture-resistant and durable, but furniture in the washing department can also be made from carefully dried coniferous wood. They have good performance characteristics.
Fasteners must be resistant to corrosion, and therefore galvanized products are the best option. It is also advisable to treat wooden products in the washing room with antiseptic compounds that prevent wood rotting.
First you need to decide what kind of furniture you will install in the washing room. Traditionally, the most functional products are placed here for comfortable procedures. The bench equipment is needed for massage, rubdowns or placing a basin; on a small shelf you can place bath accessories. It is advisable to place all furniture as far as possible from the shower or pool. If desired, you can even build a wooden font in the washroom.
Rules for making a bench for washing in a bathhouse
The width of the bench should be at least 0.6-0.8 meters, and the length - 2-2.2. This will allow several people to sit on it at once, conveniently position the tub and lie down comfortably for rubbing or massage. We carry out installation work in the following order:
- We carefully sand three boards 3 cm thick, 20 cm wide and 2 meters long. It is also better to round their edges.
- We fasten two bars with a length of 0.5-0.8 meters and a cross-section of 5 cm2 together at the top and bottom with crossbars at a distance of 0.7 meters. We make three such structures.
- We knock the prepared sanded boards together along the edges and in the middle with slats 2-3 cm thick. Leave a hole of up to three centimeters between them.
- We mount the three resulting bases onto the slats.
- We attach the legs to the boards with special struts made of timber with a cross-section of 5 cm2.
- Don't forget to bury the fasteners inside. We re-impregnate the resulting product with an antiseptic.
Furniture for auxiliary rooms in the bathhouse
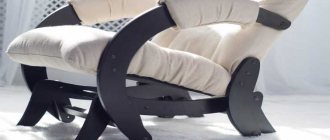
As for the furniture in the dressing room and rest room, there are no special limits here. You can use any wood to make it and turn any idea into reality. However, it is worth considering that these rooms are still characterized by high humidity, so installing upholstered furniture is not recommended
Installation of a hanger in the dressing room
Wood for furniture in the dressing room must also be treated with antiseptic compounds to resist high humidity. To build a wooden bath hanger yourself, we proceed in this order:
- Carefully sand the board 4 cm thick, 30 cm wide, 50 cm long.
- We nail wooden hooks with galvanized nails. You can purchase manufactured products or use sanded wood knots.
- We attach the resulting hanger to the wall at the entrance with wooden dowels.
If the entrance to the wood-burning stove is located in the dressing room, then the hanger should be placed away from it.
Table
So, which table should you choose? They come in different shapes and sizes, folding, folding. Of course, wood remains the preferred material , and the style is determined by the style of the interior.
The size of the table is selected according to the number of people who should fit at it to the maximum. Round and oval due to the lack of corners, accommodate more people.
Folding tables are convenient if you rarely receive many guests, and for your own needs a smaller table is suitable. In general, folding is a good way to increase space.
A folding table is a solution for those who have a very small recreation room.
However, if you want to learn much more about the criteria for choosing a suitable table, we recommend that you read this article on our website.
We also have instructions for making a table yourself, as well as drawings .
Shape selection
You also need to take into account the shape of the table: a table with one large leg, two legs or four. A table with one leg is ideal for a group of up to 5 people; a table on two legs is adapted for 5 people, but it is more convenient.
A table with four legs is the best option for installation in any bathhouse, because it is very strong. Before starting work, you need to get a tape measure, nails, a hacksaw, a level, pliers, a grinder (with special discs for cutting wood) and a plane.
Don't forget to draw the diagrams carefully. One mistake and your time is wasted. The image shows one of the most popular table models that will fit best into any space. You can increase its size or trim it.
Material selection
First of all, you need to choose the material from which to make the table.
It must be hard, dense, beautiful, transmit a minimum of heat, easy to process, do not contain resin, etc.
Preparation of material and working tools
Antiseptic for steam rooms
Be sure to keep in mind that the humidity in bath rooms is very high. Before making furniture, treat the lumber with antiseptic and special polymer preparations. So, your furniture will last much longer!
Do not forget that it is strictly prohibited to coat furniture for bath rooms with varnish! This is because it contains chemicals that, when heated, can be hazardous to your health and the health of your friends.
Once the assembly drawing for a specific piece of furniture has been developed and the appropriate material has been selected, you can proceed to the next stage - preparing the lumber for the manufacture of the structure.
We invite you to familiarize yourself with: Bathhouse with a gazebo - the advantages of a bathhouse with a gazebo under one roof. Review of projects, stages of construction. The best ideas for implementation
In order for wooden bath furniture to be functional and safe, it is necessary to thoroughly clean and process all the constituent elements of the structure. The dimensions of each part are maintained strictly in accordance with the drawing, and the connecting elements are identical to each other.
Taking into account the special operating conditions in the bathhouse, lumber is treated with protective antiseptic and polymer compounds that prevent rotting and destruction of the wood.
The work will require hand and power tools, which will allow you to quickly prepare the main structural elements and perform high-quality assembly. These include:
- grinding machine;
- screwdriver;
- jointer for leveling surfaces;
- plane;
- electric jigsaw;
- screwdrivers;
- ruler, square, construction pencil.
How to make wooden chairs and stools with your own hands for a bath?
Components for the future stool: four boards (to be used for the seat), two bars that will strengthen the boards, four crossbars and four legs.
Sequencing
- First you need to install four boards on a flat surface so that they are one centimeter apart;
- Then you should secure the boards with bars;
- It is necessary to install the legs into the grooves of the bars;
- Next, insert and fix the crossbars;
- The finished stool must be sanded and coated with a protective compound.
What types of benches and benches (chairs) are there?
There are three types of benches in the bathhouse: folding, stationary (attached to the wall) and portable. Each of them is unique and has its own pros and cons.
- Folding benches and benches are very simple and therefore compact. Even an inexperienced person can easily create them. They don't require much time or effort;
- A feature of stationary benches and benches is that they are firmly attached to the wall. They cannot be moved. But such benches are much more comfortable to sit on, because they usually have a very good back;
- It is worth highlighting portable benches and benches for the bath, which are characterized by mobility, because they can be moved from one place to another without much effort.
How to treat wooden furniture for a bathhouse and terrace, sauna (do-it-yourself tables and benches for a bathhouse)?
Everyone knows that after building a bathhouse, it is necessary to treat the furniture with special means. Our article will tell you how to cover a bathhouse bench, bench, chairs, etc.
And if this is not done, then your bathhouse will constantly be dirty, the furniture will most likely deteriorate, and various harmful bacteria will constantly multiply in it.
Therefore, processing of wooden furniture is mandatory.
The most popular means of processing wooden furniture are paints, oils, waxes, impregnations and varnishes.
Paints and varnishes are very popular these days. Painting wood with them is not difficult. Anyone can choose a suitable color for themselves. But their specific fumes can be dangerous in a bathhouse, so you should choose only special brands.
But treating wood with oil and wax is a very old method that was used by our great-grandfathers. But this does not mean that they are now irrelevant and unnecessary. Oil and wax protect wood well from rotting and prevent moisture from entering, thereby ensuring the strength of the furniture.
They do not cause any harm to humans and the environment. In some cases, and vice versa - they give the furniture a beautiful color and a pleasant aroma. Today, treating wood with impregnations is the best option.
There are a large number of impregnations: fire-resistant, moisture-resistant, anti-mold and many others. All of them are completely different from each other in their composition, properties, quality, etc.
Style
Let's start with style. This time we would like to limit theorizing on this topic as much as possible. Therefore, we will limit ourselves to introducing two poles - simplicity and ornateness, and between them let there be many intermediate options, including various attempts to imitate different eras or countries.
So, the more traditional your bathhouse is, the wider the possibilities - hangers of any degree of ornateness will suit you, and of the simplest ones, only those that combine exaggerated rigor of geometry with metal or glass elements are not suitable.
Original homemade hangers in the bathhouse shown in the previous photo
The more modern your bathhouse is, the better it is to opt for relatively simple interior elements. Of course, we are not talking about high-tech now, but simply about a comfortable bathhouse in which modern materials are used, everything is functional and there are not many references to tradition.
What do we mean by comparative simplicity? The presence of some decorative elements, but subordinate to functionality and not very attractive. Let us explain: the more original your hanger is, the more demanding it will become of its surroundings.
You need to understand the principles of stylistic unity - if you put Khokhloma on the table, then several other interior items should play with similar patterns, and the entire interior as a whole should be designed in the Russian ethno-style. A single out-of-the-ordinary object is more likely to irritate than please the eye
Let us explain: the more original your hanger is, the more demanding it will become of its surroundings. You need to understand the principles of stylistic unity - if you put Khokhloma on the table, then several other interior items should play with similar patterns, and the entire interior as a whole should be designed in the Russian ethno-style. A single out-of-the-ordinary object will irritate rather than please the eye.
Upgrading furniture
If you have never done this, the instructions below will help you do it.
But first prepare:
- a metal brush or grinder with a similar attachment;
- acumen;
- large and small skins;
- brushes;
- "White Spirit";
- wood antiseptic;
- Belinka glaze or similar.
Rural or country style
It characterizes home comfort, memories and things dear to the heart. Country style in a bathhouse, in contrast to modern apartments where minimalism reigns, is quite appropriate. It gives warmth and sunshine to rural spaces.
Country style for a bath
If you find unsightly wooden furniture at your dacha, do not rush to throw it away. Let's try to create an expensive country style in a single product.
You can make beautiful furniture for the bathhouse for the relaxation room.
- Sand wooden furniture along the grain with a metal brush. You will remove soft fibers.
- Remove the sawdust with a sweeping brush so as not to pull splinters out of your hands. The wood will then acquire relief and a contrasting color.
- Cover it with two layers of translucent Belinka-type glaze. Apply it with a brush or roller.
- Remove the layer of glaze with a dry, clean sponge. After this, the relief will be immediately visible.
Tip: When removing glaze, do not press the sponge too hard against the wood.
- Varnish wooden furniture.
- Wipe off the fresh glaze with a sponge. You will end up with bleached, aged wood.
- Give the furniture a final coat of varnish.