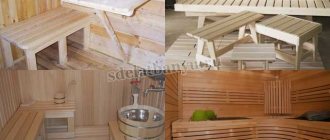
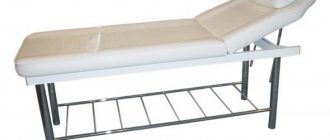
A pool table can be a great addition to a private home or cabin. Due to its appearance, this piece of furniture is an independent decorative element.
Pool tables can be purchased at the store, but the prices are very high and the size of the finished products may not fit into the allocated space, especially if you plan to create a pool room with additional furniture.
How to make a billiard table with your own hands, what it needs and how not to make a mistake in the size of the future table and accessories, you will learn in this article.
Billiard table dimensions
When calculating the size of the table, it is necessary to take into account the size of the room, provide passages for free movement of players and a place to install the Kievnitsa, where there are keys and balls.
The width of the room must be chosen in such a way that there is space on each side corresponding to the length of the Signal.
Optimal (first digit) and minimum (second digit) dimensions for a non-professional billiard table:
- Length - 3.5 m / 2.9 m;
- Width - 1.2 m / 0.9 m;
- Height - 0.85 m / 0.79 m.
Typically, the area of a pool table is 4 x 5 meters. If there is no such place, but you want to install a billiards table, you can choose one of the options:
- Entertainment table 1.2-1.8 m wide. Such a table requires small balls, and the size of the table must be recalculated to the new size. You can build a pool table with folding legs to move it to another room or outside.
- Transformer table. If necessary, a large dining table can be converted into a pool table - simply remove the worktop.
- Mitasova simulator. This is not a complete desktop, but only part of it. Used to practice strokes for playing on a large table. The simulator is installed on any flat surface (table) and can be easily removed.
If you are interested in how to make a round table, we recommend reading this article: //6.///stoly/MDF/-
Mitasova simulator.
Finishing
To make the table look more noble, you can install decorative panels under its sides, treat all visible wooden surfaces and paint them, or varnish them.
Reference . Decorative overlays under the edges will make the table visually richer, so if the carpenter has pieces of laminated chipboard left over, such decoration can be done.
If the table will be used in a room with an uneven floor, it needs to be stabilized. The easiest way to do this is to install wheels on the legs on a bracket.
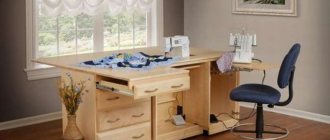
Advice . For relaxation, a massage table, a table for a laptop or sand painting can also be useful.
Equipment and accessories
Equipment and accessories for billiard games can be purchased in specialized stores. The size of the balls and the length of the signals are selected depending on the size of the table and the players.
To play billiards, with the exception of the table, the following items are required:
- triangle for collecting bullets;
- Signal stands and balloons;
- Chalk for a replica;
- Brushes and bridge;
- Forward. The average size is 1.5-1.6 m.
- Billiard balls are selected according to the size of the table: The smaller the table, the smaller the diameter should be. Balls are available with a diameter from 57 mm to 68 mm, material - polyester or plastic.
Please note: To select the correct length, place the thick end on the floor. The sticker should be between your nose and chin in front of you.
If you are interested in how to make a folding table yourself, read our article: //6./dom/mebel/stoly/123455321/-rukami.html.
What are they made of?
At the stage of choosing materials for making a billiard table, it is important to remember that wood and cloth should be as wear-resistant as possible. This will extend the life of the furniture
Sides, frame, legs, tabletop
The best option for making a table base is wood.
This material is quite strong, durable and environmentally friendly, which is important for many lovers of natural furniture.
Natural wood bars must be solid. Thanks to this, there will be no chance of dust, moisture and dirt getting into the base, which in turn can cause rapid damage to the furniture.
Solid bars can be ordered from pine, beech or oak. The last two breeds are more difficult to obtain, and they will cost an order of magnitude more.
Reference. Pine is a cheaper material and much easier to process.
For those who want to save on buying wood, you can use an alternative option, which is to replace the wood with chipboard. This material is not as durable, but it looks no less beautiful in the interior. From laminated chipboard you can make:
- supporting structure;
- legs;
- table top.
In this case, the thickness of the material should be at least 18-20 mm. If you wish, you can take a thicker one, but it is worth considering that the weight of the table will increase significantly.
Reference. A cheaper option for a countertop could be plywood. It can also replace wood and chipboard in other elements, but you need to remember that the price of the material corresponds to the quality.
Pockets
An integral element of each pocket should be metal brackets and nets that are attached to them
The important thing to remember here is the force of the ball hitting the staple and the potential for damage to thin staples. Therefore there are two options:
- Purchase ready-made metal pockets in a specialized store.
- Cast from aluminum in a plaster mold to the required dimensions.
The mesh for the pockets must be strong. You can also purchase it ready-made in a store, or weave it yourself.
Advice. The sheathing will help reduce the impact force on the bracket. It can be made of leather - this way, it will not only further strengthen the staples, but also give the pocket an elegant look.
Rubber for sides
For those who do not want to save on the quality of manufacturing a billiard table, it is worth purchasing original side rubber - it is very expensive, but during the game it softens blows well and has a long service life.
Not only the impact force, but also the rebound force of the ball, which is important in professional billiards, depends on the quality of the chosen rubber. Therefore, the carpenter can choose a cheaper option, but subsequently he will have to get used to the rebound force
Advice. Many of those who made the table themselves recommended replacing such expensive rubber with gas hoses.
Cloth
The tabletop coating must be wear-resistant, since impacts from balls can gradually wear out ordinary fabric, or simply tear it with a strong impact.
When choosing cloth, you don’t need to skimp, as low-quality material often needs to be replaced. It is better to take care of its quality in advance and take into account several important criteria:
- nylon in the fabric composition should not exceed 55%, the rest of the material should be wool;
- fabric density should not be less than 300 g/m
- For Russian billiards, natural wool is usually used as cloth.
If the manufacturer does not want to bother, you can go to a specialty store and purchase a special cloth for the billiard table. It will cost more than the above fabrics, but the owner of the table will be confident in its strength and durability.
Materials and tools
Materials needed to make the table:
- wooden legs made of laminated veneer lumber;
- Solid wood for slats and side strips;
- medium-grit sanding paper;
- Lining fabric, green billiard fabric;
- Pocket nets;
- waterproof impregnation, varnish, epoxy resin putty;
- Rubber for fixing the edge of the table with a triangular cross-section;
- chipboard sheet for the production of tabletops (best of all is a stable tabletop, without seams). Thicknesses from 16 mm to 25 mm;
- ready-made bags or metal clips for their production (you can use 4 corners of the same size);
- Self-tapping screws (about 200), furniture screws (about 40), confirmations (15-20);
- Wood glue (or PVA), rubber glue (you can take “Moment 88”).
Tools:
- Tape measure, pencil, marker, spirit level;
- Drilling and drilling (including Fostner drill);
- saw, grinder, electric puzzle;
- Screwdriver or screwdriver, wrench;
- Pliers, hammer;
- milling machine;
- Brush, spatula;
- Furniture stapler and staples.
Stages of work
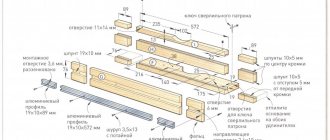
Step 1: Open cutting of chipboard according to a predetermined pattern. Experts can trust it to open when purchasing sheet metal. The table geometry is preserved.
< =»=»aligncenter wp-image» 14508″ =»/wp-content//2019/10/sche=12″4321_123454444455444″. Chipboard «width=»600″ set=»///2019/10/__- 32.jpg 600w, https://6sotok-dom.com/wp-content//2015/10/1234515/10/12454321Shema_raskroya_DSP -300×200.jpg 300w">
Step two. We are making a backing. We cut chipboard boards:
- 1295 x 310 mm - 2 pcs.
- 935 x 310 mm - 2 pcs;
- 1793 x 180 mm - 2 pcs;
- 2413 x 180 mm - 2 pcs.
Thus, we glue strips of the same width in pairs:
The glue we use specifically for wood or generally. PVA. Several screws can be screwed into the strips for quick gluing.
Please note that scratches and other slightly defective materials may be used as a backing material as their appearance does not matter. Only heavily swollen and damaged sheets are not suitable. Chipboard.
Step 3: Glue the pieces together. Secure the structure with screws.
Step 4: Cut out the pockets with a jigsaw and sand them down with sandpaper.
Step 5: Drill holes for attaching the base to the frame (Ø - 4 mm), for attaching the plate (Ø - 22 mm) and stepped holes for screws and nuts.
Step 6: We make side stencils from cardboard - contours on all sides along with profiles. A template from the short side of the table (1 piece) and a template from the long side (both sides of the middle pocket - 2 pieces) are required. Cardboard templates help you avoid mistakes when cutting cardboard and check the size of cardboard from rubber to cardboard.
Step 7: I try out the templates for the field. All holes, fasteners and cutouts must be perfectly matched to the slab. Measure the pocket openings: 70/72 for straight pockets and 76/78 for corner pockets.
Step eight. I'm making a board. Material: solid pieces of wood without defects, chips or cracks. A drill is drilled on the body of the board. Fostner drills 3 holes on the body of the board. The sides are cut out in accordance with the drawings, two grooves are cut using a cutter. In one of the grooves, PVA (or any other wood glue) is adhered to the decorative panel that covers the attachment of the outer edge of the panel to the playing field.
Step 9: Trim the strips on all sides (section 9.5 x 9.5 mm). Hold the cloth.
Step 10. Production of supports for our table. From two panels measuring 100 x 40 x 750 mm, a core with a cross section of 80 x 80 mm is glued. Plates are glued to it (thickness - 50 mm). The dimensions of the finished support are 170 x 170 x 170 x 170 x 270 mm.
After all layers of glue have dried, the supports are processed: All corners are rounded and sanded.
Please note: You can buy glued legs or have them cut by a woodshop to make them aesthetically pleasing.
Install the adjustable bracket (flange with nut, set screw, spindle) and decorative mechanism cover. The body can be made of any material. The most important requirement: it must be in harmony with the overall design of your pool table.
Step 11. We make the frames. They can be either smooth or carved. The kings are attached to the supports with furniture scales (diameter 16 mm).
Step 12: The lintel is made of solid wood with no visible damage. On both sides of the jumper we fix two 40 x 40 mm rails using screws or glue. Cut two nuts (M10 or M12) from the sides of the strip and screw into the corners of the metal with screws along the edges.
Please note: The jumper is mounted on a pole using a scale and is therefore not adjustable.
Step 13: For aesthetic appeal, wooden clips can be attached to the pool table shelves. They can be flat or carved. The brackets are mounted using metal corners or glue.
Now all the table details are ready. You can start the control unit.
Step 14. The rods are glued to the lintel. They must match the jumpers. Attach the rod to the bracket using a furniture screw or regular metal corners and screws. Confirmations are attached to the sides. All components are assembled - let's start with installation. Screws and nuts are not fully tightened!
The supports are attached to each other by kings.
We will organize support.
Tighten all bolts and nuts only after complete inspection. We put the field in place. Install the circuit boards. Secure the holes in the pockets (this should not be done during a test installation).
Step 15: Apply rubber band with rubber cement to the board. We glue the glue on the board and on the rubber and let it dry for 30 minutes. Then repeat the process. Then carefully glue the rubber to the board and tighten it slightly. Make sure the edges of the rubber and the board match. Using a sharp knife, align the edges of the rubber along the sides.
Step 16: All wooden parts must be treated with 2-4 layers of impregnation, each layer must be completely dry. Then cover the table with several layers of varnish (2-3 layers). To give the varnish the desired shade, you can add a little color to the varnish.
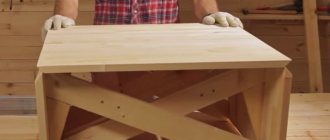
Step 17: Final table layout. Place the long frames on the supports, then the short frames along with the tie rods. Install the backing by screwing in the nuts. Place the board and level it.
Step 18: Seal all seams on the playfield with putty and sandpaper (if using laminated boards). Chipboard You don't have to be a kitten.)
Step 19: Cover the game board with fabric and staple it to the backing. Cover the boards with a cloth and place them on the table.
Step 20: Gather the pockets. They can be purchased or made from a metal corner, the top of which is cut in the sun and using a curved semicircle with a hammer.
For a pocket net, you can use any strong mesh (a regular mosquito net will suffice). You can also weave the mesh yourself (for example, from thin leather strips).
Watch the video to learn how to properly assemble a pool table:
Page 2
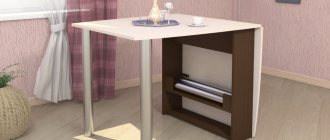
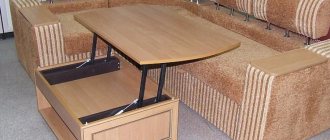
A folding table is an excellent solution for a large family or friendly business.
When folded, it takes up little space and, if necessary, the surface of the tabletop can be significantly increased with the help of additional inserts.
This design is suitable for use during holidays to welcome all guests.
You can buy a folding table in a store or make it yourself.
Folding table options
Folding tables can be made in a variety of designs and sizes: as a small picnic table or coffee table, or as a large dining or night table.
Folding tables are distinguished by the complexity of their design - from simple ones, like a folding table for a balcony, to a special mechanism for tabletop transformers.
Table materials are also used in a variety of ways. Table tops are made of glass, plastic, plastic, chipboard, MDF Wood, wood, wood, wood.
Indispensable for some models are very practical and reliable metal folding legs for the table (arms can be made of chrome-plated tubes).
How to make a metal profile table with your own hands: https://6https://6.//mebel/stoly/MDF/123455541-
The purpose of folding tables can be very different. Here are just a few examples:
Esszettel – Book
Folding table (see drawings and manufacturing instructions here)
Folding table for trade
Folding massage sofa
How to make a tennis table with your own hands
Here's how to make your own standard-sized tennis table. This is quite easy; anyone who has ever held a hammer in their hands can make such a table. Only simple materials are used here, mainly wood, and ordinary tools that are in the kit of any novice craftsman.
All dimensions, including the height of the table, can be made at your discretion, maintaining the proportions as indicated in the diagram.
Below are the necessary drawings, although the inscriptions are in English, but all dimensions are indicated in centimeters.
This structure, including the legs, is made of wood. The table is lightweight, completely dismountable, and no special precision is required during manufacturing. If you want to know a more detailed assembly procedure, you can follow the link below to the source site.
Photo source www.instructables.com/id/How-to-Build-a-Ping-Pong-Table/?ALLSTEPS
Indoor tennis table
True tennis fans will always find a way to realize their dream. Not enough money? No problem, this indoor tennis table is not made by professionals at all and is only a third of the cost compared to the factory model. Everything is thought out, the design can be easily disassembled, attached to the wall with special brackets and does not interfere with anyone. Given the large area, you actually didn’t need a lot of materials: 3-meter 50x50 timber and 12 mm thick plywood. The size of the tabletop is 2740x1525 mm, it is advisable to order two sheets of the required size so that their joint is just under the mesh. In the step-by-step photographs you can see the assembly process, although the brackets, if you don’t have welding, will have to be ordered separately, but I don’t think it will cost very much.
Photo source 7qu.ru/people/user/32/blog/1839/
Drawing of a standard tennis table
scheme
necessary details
Another option for an indoor tennis table, only with metal legs. The size of a standard table is probably known to everyone, 274.3x152.5, height 76 cm, so the easiest way is to buy two sheets of plywood 152.5x152.5x18, cut 15.5 cm from each, the trimmings can be used for stiffeners, then Buy the legs separately, secure them with screws, paint them and the table is ready. All this can be done in a couple of hours. In principle, this is how everything was done here, only the author made the legs himself.
Photo source rukami.boltai.com/topics/tennisnyj-stol/#prettyPhoto
Folding-extendable dining table
To make such a table, you can even become a novice housewife. Despite the lightness of the structure, the table is very stable.
The tabletop width is 700 mm and the length is 1200 mm. An additional center insert increases the surface area. The total length of the table in extended form is 1670 mm.
This table seats eight adults: one at each end and three on both long sides.
Materials and tools
To make a folding table ourselves, we need the following materials:
laminated chipboard 25 mm thick; PVC edge using hot melt adhesive (thickness no more than 2 mm); 50 x 50 mm (500 mm) aluminum corner - 4 pcs. Telescopic guides (500 mm) - 2 pcs. Thick metal leg (710 mm) - 4 pcs. Furniture lock - 6 pieces; Screw M4 10 mm; Self-tapping screws 20 x 4 mm and 16 x 3 mm; House gloves.
Find out how to make a round table: ///6.//mebel/stoly/-rukami.html
Tools needed for your work:
Tape measure, pencil, long ruler, marker; Clamps (for cutting L-sheets) chipboard); Construction level; milling machine; Construction hair dryer (heat gun); screwdriver; Drill and drill bit with a diameter of 4.2 mm; circular saw. Puzzle and saw blade with fine teeth (to avoid chipping the edge of the laminate). Chipboard)
Drawing and cutting of material
Before starting work, it is necessary to determine the dimensions of the future product and create a drawing of the folding table. In our example, the dimensions of the sliding tabletop when folded (left) and with an insert (right) are as follows:
How to make a kitchen table: ///6.com//mebel//:// How to make a kitchen table?
Stages of work
Step 1: First we mark and cut out three pieces of the table top from the chipboard: two identical pieces 700 x 600 mm and one for use - 700 x 470 mm. To make cuts in the area... A chipboard normal puzzle would be good.
Important: If the workpiece will be processed with a milling machine in the future, then it is worth adding a few millimeters on each side.
Then, using clamps, the sheet metal is fixed using clamps. The chipboard is installed on any flat surface. At the cutting edge adjustment level, we guide the jigsaw blade quietly and precisely.
Step 2: Edge the workpieces with a router knife to ensure perfect cutting alignment. The cutter must also work slowly and precisely and pass through each part of the cutter.
Step 3: Glue the ends of the pieces to the edges of the pieces. PVC. We fix the workpiece vertically on a chair or table using a screwdriver. Cut off the required piece of edge and apply it to the haircut and heat it with a hairdryer. All work is performed using house gloves. After the glue has completely dried, you can begin making the table.
Step 4: For safety reasons, you can cut and round the sharp corners on all aluminum corners.
Step five. Now we make two queues and a conductor. On the outside of the corner, mark 25mm from the rounded edges and draw a line dividing the side of the corner into two halves. A similar procedure is performed with each of the remaining corners.
Step 6: Attach the guides to the corners and make holes for the screws. Nail lightly (to prevent the drill bit from jumping off) and drill the hole. Put them together.
Step seven. We have two corner structures. We place them on a flat surface as follows: Corners with thin guides (movable) - inside, corners with thick guides (fixed) - outside. We drill four holes in the fixed corners and four holes in the moving corners.
Please note: all holes in the movable guides are made from the outside, from the inside in the fixed guides (i.e. the holes must be on opposite sides of the product).
Step 8. Two identical pieces of chipboard Place it on a flat surface, turn it face down. Place two telescopes on top (inside on the movable side and outside motionless) at a distance of 8 cm from each edge. The center of the telescope should coincide with the joint of the parts.
Step 9: Screw the moving side with screws (20 x 4 mm) to the right side of the tabletop and the fixed side to the left.
Step 10. On each side of the table we fix the lock using 16 x 3 mm screws.
Step 11: Open the locks and open the countertop. Insert the center piece face down between them. Pull the work surface together firmly to create a level surface.
Step 12: Install the missing lock pieces with screws for each corner of the center of the tabletop - two on each side. It turns out that the locks are opened/closed by a two-piece tabletop, and also opened/closed by a three-piece tabletop.
Step 13 Using self-tapping screws, attach the legs to the tabletop.
We open the locks and open the table top.
Insert the middle part and push the side parts. Close the locks.
For more information on how to make your own folding table, watch the video:
Page 3
A student in every class, from the youngest to the oldest, needs a place to study.
A student's desk should be functional, comfortable and not bulky. Wooden tables are most often chosen for children.
If students are already working with computers in first grade today, there should be room on the desk for them too.
Creating a school table yourself is a significant saving on the family budget. The tabletop can be modified in the most incredible way, and then the handmade table will look like an expensive designer item.
Features of making a billiard table
When making a billiard table yourself, the following tasks are set:
- save money;
- achieve strength and reliability of the structure;
- make a compact table that will optimally fit into the interior of the room.
A professional billiard table is a complex product. To assemble it yourself, you need to have certain knowledge in the field of geometry and drawing. After all, first of all, you need to develop a drawing that will contain all the proportions of the product with maximum accuracy. If you find it difficult to create one yourself, then seek help from a good carpenter. An experienced craftsman will tell you how to correctly perform the calculations so that the structure is as strong as possible.
Billiards lovers dream of having a gaming table at home or in the country.
At the next stage, materials are prepared and the table is assembled. Here you will need skills in working with various carpentry tools, as well as the ability to handle wood, rubber and other materials.
Professional pool tables have the same dimensions: the length is 360 centimeters, the width is 186, and the height is 85. In Russian billiards, the dimensions of the playing fields may differ. Pyramid lovers play on tables with a length of 3 to 4 meters and a width of 1.5 to 3. As for the height, the distance from the playing plane to the floor can vary from 79 to 85 centimeters.
The products also differ in the size of the pockets: for a pyramid their width ranges from 72 to 76 millimeters, and for a pool it reaches 88.6 millimeters. In addition, in Russian billiards the pockets have sharp corners, while in American tables they are made with rounded corners.
Pool tables are often covered with green synthetic cloth. The ball moves very easily on such material, with virtually no resistance. In Russian billiards, it is customary to use natural wool as a covering for the playing field.
Another difference between pool and pyramid tables is the material from which the tabletop is made. In Russian billiards it is made from a solid stone slab, and sometimes from concrete or hardwood. “Americans” prefer to use more budget-friendly materials, such as metal and plastic.
You can do the drawing yourself or use the services of a specialist.
School desk options
Tables for first-graders should be spacious so that there is enough space for textbooks and notebooks.
For high school students, you can purchase or make a multifunctional desk with a sliding keyboard and a large number of shelves or drawers on the surface.
It is very important that the child’s workplace is as pleasant as possible and that all the necessary conditions for studying are available.
School desks can vary greatly in appearance and design - from simple corner and straight desks to creative transformer desks.
nightstand
folding table
dining apartment
Test of strength or moment of truth
A properly designed and conscientiously assembled billiard table should not sag under load, vibrate or resonate when heavy balls fall on the surface.
The table should be leveled; for this, the legs must be equipped with this ability. You can also make them yourself; for this, durable wheels on a bracket are purchased in the store. As a rule, they have a pin that must be screwed into a nut or cage. It can be made from a piece of metal bent into a profile and a welded nut.
Properly selected rubber does not allow the ball to bounce far from the board and the board does not deteriorate.
Video:
Desk for schoolchildren
We will not deal with the typical desks that were found in all Russian homes in the 90s of the last century. Such tables are boring to execute.
Let's look at an unusual table with A-shaped legs (goats) and a durable long work surface. You can use an old door leaf with a flat surface as a tabletop.
You can install a computer on such a table: Place the monitor on the tabletop and place the system unit in one of the legs.
You can use oak or pine board for the A-post. The width of the plates used to make the legs can be any (it is advisable to use from 75 to 125 mm).
The height of the table is 75 cm. In our case, the width of the tabletop is 70 cm, length - 180 cm, thickness - 4 cm. The length of the boards to which the legs are attached corresponds to the width of the tabletop - 70 cm.
Materials and tools
To produce a school bench we need the following materials:
The board is cut - 14 pieces…………………………………………………………………………………………………………………… ………………….; Bolt - 5-6 pcs; The scale consists of 6 parts………………………………………………………………………………………………………….; self-tapping screws; Furniture screws for attaching legs (6 x 75); Desktop equipment; medium-grit sanding paper; PVA glue ; Waterproof impregnation for woodworking, varnishing or painting.
The right tools:
ruler, meter; pencil, marker; puzzle, saw; milling machine; exercise; screwdriver or screwdriver; Brushes.
If you are interested in how to make a folding table yourself, read our article: //6./dom/mebel/stoly/123455321/-rukami.html.
Stages of work
Step one. Draw and cut the tabletop. Sand it down with sandpaper or a sander. Side by side edges can be made with a special finishing edge that can be purchased from any construction company.
Please note: when using a cantilever arm, the finished tabletop width is 72 cm!
Step 2: Cut 8 boards at least 75cm long (you may need to cut the edges with a power saw) and sand them.
Step 3: The angle of the goat boards should be chosen so that the total height of the legs for a tabletop thickness of 75 cm. To do this, cut out small sticks located between the upper parts of the supports. The width between the lower parts should be 22 cm.
Step 4: Drill two 9mm holes in each of the two 70cm long boards (for attaching the goats). The holes must be equally spaced! We retreat about 3.5-4 cm from the top, it all depends on the width of the board. Drill 9mm holes in the top of the legs in the middle. Furniture screws are used to secure the legs and structure with screws.
Please note: The screw size is 6mm and the hole diameter is 9mm! This is necessary since the table legs are mounted at an angle.
Step 5: Attach two 19cm long rods to the underside of the goat. The height of the rods should be at least 3 cm from the ground. Place the two shelves on the posts and secure them with screws.
Step 6: After measuring the distance between the goats, tighten the wood strips to prevent the tabletop from moving down.
To increase the stability of the tabletop, it is recommended to use a scale. Drill holes in the base plates 8mm deep and 22mm deep in the work surface. The belt pulleys should be dipped in PVA glue and place it in the board, then carefully place the table top on it. For such a massive table, it is necessary to make 2-3 cabinets on each side.
Step 7: Saturate all wooden parts of the table. Apply at least 3 coats to the children's table (to ensure it is waterproof). Each layer must dry completely. After the last layer has dried, the table should be painted or varnished. You can add a little paint to the varnish to give it the desired shade.
Please note: the table can be decorated upon request. Decoupage is the best technique for decorating children's tables. Just choose a cheerful drawing or decorate the tabletop with pictures of your child’s favorite figures.
Basic rules[edit | edit code]
Free Pyramid (American)[edit | edit code]
The starting position of the balls is as follows: a pyramid of fifteen white balls, set using a standard triangle, is positioned so that the front ball of the pyramid is on the back mark and the base of the pyramid is parallel to the short edge of the table. The cue ball can be located anywhere within the house (but not on the house line, since it itself does not belong to the house).
After the pyramid is broken with the cue ball, you can choose any ball as the cue ball. A hit into the pocket of both the object ball and the cue ball is counted (but always after a collision with the object ball). The player who has pocketed the ball without violating the rules (played the ball) has the right to make the next shot.
Penalties are imposed if a player knocks a ball (at least one) off the table, does not hit any of the object balls with the cue ball, or otherwise makes a shot in violation of the rules (made a shot without touching the floor with at least one foot, pushed through, etc. .). If no ball is played, after the cue ball and object ball have hit, at least one of them must:
- touch two different boards (or, having reflected from one board, bring another ball to the other board or touch another ball standing close to the other board), or
- cross the center line of the table and then touch at least one of any edges (or bring another ball to the edge, or touch another ball that is close to the edge), or
- touch one side and then cross the center line of the table (or roll another ball over it, or touch another ball whose center at the time of impact was on the other side of the center line or on the center line); otherwise, the kick is also considered to have been made in violation of the rules and a fine is imposed.
In the event of a violation of the rules, the opponent of the offender has the right, after placing incorrectly pocketed and jumped out balls, as well as removing a penalty ball from the table onto his shelf, either to make the next shot himself, or to concede it to the offender. The winner of the game is the player who pockets eight balls first.
Due to the relative simplicity of the rules, the free pyramid is most often used in films (for example, in the famous scenes of the films “The Meeting Place Cannot Be Changed,” “New Adventures of the Elusive,” “Classic”) and is the most popular pyramid discipline among amateurs.
Combined pyramid[edit | edit code]
The main difference between a combined pyramid (as well as a dynamic and a classical one) from a free pyramid is that the same ball (colored, that is, the one with which the initial shot is made) is always used as the cue ball. In addition, a significant difference between the combined pyramid and all other official disciplines of Russian billiards is that after the cue ball is played, this ball is placed within the house and from there, accordingly, the scoring player makes the next shot; in this case, the player who pocketed such a ball, before the next strike, puts on his rack any other ball from the table instead of the pocketed one, and the next strike itself can be struck with the cue ball only on balls located outside the house (otherwise a penalty is imposed). If, after the cue ball is played, there is not a single ball left outside the house, the next shot is played from the “temporary” house, located in the same way as the “main” house, only on the opposite half of the table.
In the event of a violation of the rules, the opponent of the offender has the right, after placing incorrectly pocketed and jumped out balls, as well as removing a penalty ball from the table onto his shelf, either to make the next shot himself, or to concede it to the offender.
Dynamic pyramid[edit | edit code]
The rules are similar to the combined pyramid, but in return for a pocketed cue ball, the player receives the right to hit the cue ball from his hand not “only from home,” but from anywhere on the table. In this case, only an object ball can be pocketed after playing a brother-in-law, and if your own ball falls, a penalty is imposed and the blow goes to the opponent, who has the right to place the cue ball anywhere on the table.
Thus, in a dynamic pyramid, the ability to pocket a brother-in-law plays an important role, since by placing it in any convenient place on the table after pocketing, it is easier to pocket the next object ball.
Classic pyramid[edit | edit code]
Unlike other types of pyramid, it is not the number of pocketed balls that is taken into account, but their value. For each correctly pocketed ball, the player receives a number of points equal to the number of the pocketed ball, with the exception of ball number 1, or “ace,” which is worth 11 points. 10 points are added to the last object ball remaining on the table, regardless of its number. If the cue ball falls into a pocket, a penalty is imposed and the blow goes to the opponent. For each violation, the offender's score is reduced by 5 points, and 5 points are added to the opponent's score.
In total, both players can score 140 points without penalties. The goal of the game is to be the first to score 71 or more points. If both opponents score 70 points, the last pocketed ball is placed on the back mark and the next shot is determined by a rally, after which play continues from the home hand until a ball is played or a penalty.
Another distinctive feature of the classic pyramid is “custom” shots - before making a shot, the player must declare in advance the specific object ball and the pocket in which he intends to play it. If the ordered ball is played correctly, all pocketed object balls count; If only the unpocketed object ball is pocketed, it is fielded and play continues.
Unofficial disciplines[edit | edit code]
Moscow pyramid[edit | edit code]
The Moscow pyramid is a fairly popular unofficial discipline, all of which differs from the combined pyramid in that after the cue ball is played, the ball is placed on the striker’s shelf by the opponent at his own discretion, and when a penalty is imposed, the ball is placed on the table from the offender’s shelf (if there are no balls on the shelf, the offender is awarded minus one ball).
Omsk pyramid[edit | edit code]
One of the recently invented variations of the pyramid game. It differs from free play, among other things, in that the cue ball is placed in a pyramid in the third row in the center (like the black ball in pool-8) and is pocketed last. If the cue ball is potted early, it is not a loss, but a penalty. After this, the cue ball is placed on the back mark, and the player places one ball from his shelf to the back board[2].
School table for two children
A corner table can be a convenient and practical option for two children. Each child has a work space and drawers for storing educational materials. The tabletop width is 600 mm, thickness - from 16 mm.
If you are interested in how to make a round table, we recommend reading this article: //6.///stoly/MDF/-
Stages of work
Step 1: Cut the material or order it from the carpentry shop.
Step two. Collect all the boxes. They should be 6 large ones (3 for each table stand) and 4 small boxes for miscellaneous things under the tabletop. The confirmation holes were drilled with a Fostner drill bit. For each nail box of nails, use organic nail material.
Note: Confirmati can be replaced with regular screws, but the connection is not as secure.
Step 3: Use a corner clamp to secure the cabinet. Secure the drawer slides with screws.
Step four. Bring a table. Secure the cabinet and side panel on top. Small chipboard. Cover the back wall with a large sheet. Mount rails and fronts to small boxes.
Step 5: Install the second table in the same way as the second, as in the case of two bollards, longer.
Step 6: Place the table top on the short table. Screw it onto small plates.
Step 7: Glue the work surface to the second table.
Step 8: Attach the fronts to the large drawers and attach handles to them. Glue organic material.
Boards
For them you will need to prepare cardboard templates. You need three of them:
- for the short side;
- for long – from the right corner to the middle pocket;
- and, accordingly, from the left.
Wood without the slightest defects is taken onto the sides. Each part is manufactured strictly according to the drawing. Holes are cut in the workpieces using a Forstner drill.
The cutter makes 2 grooves. One will hold the top decorative strip. Then slats are cut to secure the cloth. Their length corresponds to the size of the selected table. Section – 0.95 by 0.95 cm.
Useful tips
In order for your child to feel comfortable working at a new table, it is necessary to note the following:
The width of a table for a child should be from 60 to 80 cm, the length of the table should be 120 cm. Boys need more space at work than girls. It is recommended to organize the student's workplace near the window. Be sure to install a desk lamp with bright lighting. For right-handed users, the light should fall on the left side, for left-handed users - on the right. The chair should be comfortable, the back should be rigid and curved. An orthopedic chair is a good solution. During operation, the screen should be at an angle of 15-30 degrees below eye level.
The color design of the workplace should be chosen in accordance with the wishes of the child, but it does not have to be too poisonous and poisonous. A living desk can distract a child from homework. It is enough to preserve bright accessories and furniture. Accessories must be creative: and the children's table must have its own charm. The business minimum is not the best option for a child.
Watch the video to learn how to make a table for a schoolchild with your own hands:
Page 4
Sometimes every woman has to sew or sew something, adapt her outfit to her figure or adapt it to fashion requirements.
Some people are so passionate about this event that they devote every free minute to it.
The hostess will delight housewives and surprise guests with beautiful napkins for table setting, original seating furniture or chair covers. And her indispensable assistant is a sewing machine.
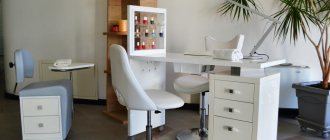
In order for a woman craftswoman to do her favorite job comfortably, it is necessary to provide her with a comfortable and functional workplace.
Making a table for sewing machines with your own hands is not difficult. The most important thing is that it is convenient, compact and visually attractive.
Sewing table design
Every woman will say with confidence that she feels comfortable when sewing when the table is large enough to place fabric, a sewing machine, or an overlocker.
It is good if the table folds and the seamstress can use only half of it if necessary.
It is a huge advantage when there is space on the table for accessories, fabrics and threads. Of course, you will have to deal with such a device, but working at such a table will be very pleasant.
For example, a corner model will be a comfortable workplace for a woman, especially if she has to sew a lot every day. In such a table, the left side folds out and is a continuation of the surface on which the machine stands.
On the right side, the table can be positioned diagonally towards the seamstress. Here you will find not only drawers or a laptop, but also an iron and much more. In such a table, everything will be at hand - cabinets with threaded rollers and fabric, niches for various devices and tools.
If there is not enough space in your apartment or house to install a large sewing table, you can build a bookshelf.
This table will also be very convenient, since two sections are built on revolving doors.
Inside the cabinet there is a special compartment for installing the machine, as well as many shelves for tools, workpieces and materials. The door pockets can accommodate various small items.
Tip: The cabinet can be positioned only when needed and used only when not in use.
Table-Tablet in open form for work.
As a rule, sewing tables can be of various modifications. You can come up with something of your own, and then get an attractive and practical piece of furniture, a reliable seamstress assistant.
Recommendations for care and use
Like many other joinery products, pool tables require regular and proper care.
To extend the life of the equipment, it is advisable to follow the following recommendations:
- In the room where the play structure is installed, it is necessary to maintain a constant humidity level ranging from 40% to 60%. Insufficient or excessive moisture can lead to significant deformation of wood and cloth over time.
- It is strictly forbidden to install the billiard gaming system near any heating devices or under direct exposure to sunlight. Excessive heat can have a detrimental effect on both wooden furniture parts and decorative cloth.
- After installing the table, it is not recommended to move the gaming structure to another location yourself, as this may lead to the tabletop being skewed.
About once a month it is necessary to carry out independent preventive cleaning of furniture. To do this, it is advisable to use a special long-haired brush and specialized polishes designed for cleaning wooden surfaces.
It is highly not recommended to use a vacuum cleaner, since this household appliance, when cleaning cloth, removes not only dust, but also small particles of wool.
Materials and tools
The sewing table can be made of various materials:
ORV chipboard; MDF ovens; Special furniture panels.
If you are using non-laminated chipboard, then after production the tabletop must be varnished and varnished.
It is better to buy ready-made furniture boards that have a finished and smooth surface in various wood tones.
You also need tools:
meter ruler and pencil; Screws and self-tapping screws; screwdriver; special furniture hinges; electric puzzle; Door handles, wheelchair legs; electric drill; Construction level.
Important: Before starting work, you need to draw up a clear plan of action, and most importantly, carefully calculate the dimensions of the future table and create drawings. This is the only way to create a table with the correct dimensions.
Assembly
Having described the previous stages in detail, we must pay attention to this point. The frame must be perfectly level. The accuracy of installation should be carefully checked by level. Installation in an inverted position helps to simplify the work. The joints of the slabs are covered with wax or putty, after which everything is leveled again.
Sewing table drawing
As mentioned, a corner table is the most comfortable table for seamstresses. Therefore, it is best to make just such a table so that a woman can place everything she needs on it.
Drawing a table for a sewing machine.
Please note: the table height shown here includes the wheels. Keep this in mind when cutting parts.
Stages of work
After creating the drawing and determining the dimensions, you can begin cutting the material. Cut out table details. Tighten the panels with special screws for fastening furniture.
Step 1: The first step is to assemble the base unit. In our example, it has a length of 920 mm and a height of 763 mm. The width is 557mm and a further 500mm can be added with an additional table top to make the table more comfortable as it will be possible to place fabric on this part while working.
Step 2: Place the drawer box diagonally to the table to the right of the seamstress. The main part of the cabinet is 845 mm long, 442 mm wide and 763 mm high.
Step 3: Attach the wheel legs to the bottom ends of the side panels using metal feet.
Making boxes with guide elements
Step 1: Cut boxes from pressed plywood panels and attach guides to them. You can remove these items from old furniture or buy new ones from a furniture store.
Step 2: Once the drawers are complete, mark the inside of the drawer. The remaining guide elements are attached instead of markings. Now you can insert the drawers into the table and check their movement on the guides.
Step 3: If everything is in order, the fronts of these drawers should be done. They must be secured from the inside with screws.
Attaching the table top
Step 1: Size the puzzle using an electric puzzle that cuts out the work surface (you can order one from a furniture store). Attach the hob to the body of the structure and hit it. Drill holes in the middle of the tabletop. The diameter of the hole should be equal to the diameter of the wooden pins.
Step 2: Lubricate the pins with glue and insert them into the grooves of the tabletops. Wait for the glue to dry.
Step 3: Apply paint to the pencils and place the work surface on top of the structure. The pigment leaves a mark where the holes should be drilled.
Step 4: Install the countertop. You can use screws instead of wooden handles and hide the attachment points with a trowel on the wood.
This compartment is necessary if you want to use the machine infrequently. To ensure that it does not stand on the table, it can be placed in a special storage space.
You can create a compartment directly below the countertop by cutting the countertops to fit the machine and joining them together in a "P" shape.
The compartment can be attached to the structure using wooden pins and metal corners that can support the weight of the machine.
Additional items
The optional folding tabletop makes it easy to open fabric or install an overlock machine.
The optional tabletop is secured using piano straps. The manufacture of legs is not required, since a stopper between the side wall and the folding element of the table top is sufficient.
The ready-to-use sewing table can be equipped with lighting, additional niches and foams that can be screwed onto the doors. It is also advisable to make a folding ironing board and other elements necessary for the seamstress while working.
Every homeowner can build such a functional and reliable sewing machine table, and a woman who loves sewing will appreciate its work.
The design of the transformer for sewing machines and overlockers, the principle of its unfolding and the location of the storage space for the sewing machine can be seen in this video: