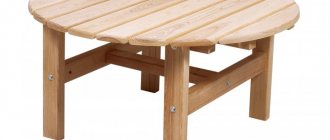
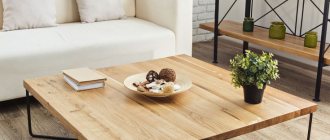
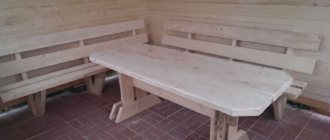
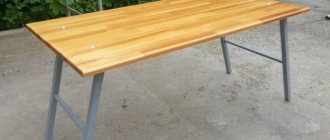
Designing a desk yourself is not as difficult as it seems at first glance. To raise the level of skill, you should first work on creating a simple structure from a table top, two sides and a back wall. An experienced home craftsman can assemble more complex types of tables, for example: classic, built-in, folding, corner, wall-mounted, add-on, folding, with drawers, bureau, window-sill table, with a cabinet.
What types of desks can you make with your own hands at home?
The main criterion that guides the selection of a desk model is the convenience and functionality of the product. The size and shape of the tabletop are calculated based on your needs - everything you need should fit here.
Popular types of desks that you can make yourself:
- classic - rectangular tabletop. Attaches to legs or support. To improve functionality, it is equipped with niches and drawers;
- table top-window sill - an additional plus of the model - full daylight. To place stationery, books, and notebooks, the window openings are equipped with niches, closed cabinets or shelves. It is advisable to install such tables in small rooms to increase the usable area of the room;
- folding tabletop - as an option, it folds out like a book. The tabletop is a working area and is attached to the wall with clamps. The main condition is reliable fastening; it must withstand physical stress. Folding tabletops are extensions of other furniture - for example, they are screwed to the side surface of a cabinet or fixed directly to the wall;
- corner - such designs are distinguished by additional usable area and rationally use the space in the room. This is an ideal solution if there are two schoolchildren in the family or if you need to create a place on the table for a computer;
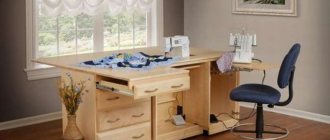
- bureau is a model that combines a chest of drawers and a worktop. To save space, it is placed in a large bedside table.
How to determine the optimal dimensions
The desk must be assembled after its optimal dimensions have been determined. For an adult whose height is above 175 cm, they are: height - 75 cm, width - 50 cm, length - 70 cm. As for children, the parameters are different.
| Height, cm | Width, cm | Height, cm | Length, cm |
| 85 | 60 | 34 | 120 |
| 100 | 60 | 40 | 120 |
| 115 | 60 | 46 | 120 |
| 130 | 60 | 52 | 120 |
| 145 | 60 | 58 | 120 |
| 160 | 60 | 64 | 120 |
| 175 | 60 | 70 | 120 |
If the table is needed as a workstation for a computer, about 40 cm is added to the standard tabletop width. For schoolchildren, the parameters are slightly different. Here the minimum width is 1 m, the depth is from 60 cm. For a child to be able to place his hands normally, a space of 500 × 500 mm is required. The preferred option is a product with adjustable tabletop height and angle.
For adults, a design with a length of 110–140 cm and a width of 50 to 80 cm is suitable for working with documents.
Minimum table parameters for a schoolchild
Optimal table parameters for an adult
How to make a desk with your own hands at home
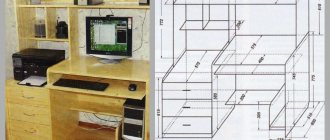
Before you begin the practical steps of making furniture, decide on its design, make a drawing, think over the design and functionality.
Criteria for choosing a product design during manufacturing
If you don't have enough practical experience, don't take on complex models. In the process of work, you will inevitably encounter difficulties and problems that a novice furniture assembler cannot solve alone.
When choosing a specific model, be guided by the following selection criteria:
- types of material - we will consider them in the section below;
- room area;
- room layout;
- ergonomics and functionality;
- the presence of additional structures;
- dimensions of the table and its purpose.
Made of wood (solid wood, timber, boards, etc.)
Natural wood is a popular, environmentally friendly material. Furniture made from wood looks presentable, but is also expensive. Especially when it comes to a tabletop made of solid wood.
The advantage of the material is a large selection of shades and wood textures. To make the product last longer, it is opened in several layers of varnish.
The ideal species are oak, beech, alder, birch, and pine.
Decorating the table - the final stage of work
The final step will be decoration. A piece of furniture should combine both rigor and sophisticated beauty; accordingly, the decoration will be a little limited.
- To give a business style, the tabletop can be treated with drying oil or stain and then varnished. The desk will gain shine.
- To add casualness to the tabletop, you can depict a design using a stencil, draw strict stripes, or use the decoupage technique. Cover the entire surface with glass or plexiglass. The child will definitely love the rainbow tabletop.
- The easiest and most affordable way is to cover it with self-adhesive film, colored electrical tape or old newspapers. The result will be a rather original model.
Subscribe to our Social networks
What decor can be used for homemade desks
This manufacturing stage is different in each specific case. It depends on the overall design of the room, the furniture that is already there, the aesthetic preferences of the owner and the “addressee” - the one who will use the desk.
The following are used as decorative elements:
- varnishing the tabletop;
- a tabletop made of another material - for example - glass;
- painting - in contrasting shades or one color;
- self-adhesive film;
- decoupage;
- painting, drawings with paints.
Advice! If you prefer a consistent style, decorate your desk with external objects - bright stands for stationery items, a stylish photo frame, a homemade organizer.
Product assembly process
The assembly process can be divided into several stages:
- According to the available drawings, all components are cut out with a hacksaw or jigsaw.
- We cut out two rectangular side panels of the table, protruding in the form of legs.
- We drill holes at the ends of the frame - grooves for dowels. Now we firmly place the panels and frame on the dowels, after applying glue into the deep hole. Then we tap the block with a hammer, placing the dowels in the sockets.
- We attach the frame to the side panels. Two partitions are installed in the niche and secured with self-tapping screws. The tabletop will be placed on them.
- To strengthen the structure, we nail the back wall.
- Let's start cutting out the tabletop. We cut out the part with a jigsaw according to the drawings.
IMPORTANT! To avoid chipping, it is better to use a thin jigsaw.
Carefully sand the edges of the tabletop with sandpaper. The edges of the desk are often covered with paper edging, but this does not last long.
The second option is gluing with melamine tape. It is fixed using a heated iron and thick fabric. Excess tape is trimmed with scissors.
The most reliable edge will be PVC; an industrial hair dryer and a respirator are used to glue it. Glues under the influence of high temperatures, about 500 C.
We place the tabletop on the dried frame and secure it with plastic corners and self-tapping screws.
Add a partition leg.
The bottom of the boxes is made of fiberboard, the walls and facade are made of chipboard. We attach one of the guides to the niche under the drawers, and the second on the outside of the drawer. We insert the drawers with guides into place.
IMPORTANT! If there is a heavy load on the box, it is better to install metal guides. Plastic ones are suitable for a school desk.
We fix the handles on the drawers and disguise the fastenings with stickers to match the color of the table. We fasten the table shelves with self-tapping screws.
What is the desk for at home?
The main characteristic of a school desk is that the tabletop is tilted, adapting to the characteristics of the student’s body, which is individual, helping him to develop correctly without health problems in the future, such as, for example, stoop or scoliosis.
The tabletop is mounted on frames at an angle of up to 20°.
Ordinary tables do not have such functionality, so the child is most often in an uncomfortable position, which leads to deterioration of health - disruption of posture and the functioning of internal organs.
A school desk should be ergonomic.
A desk equipped with an additional storage system will also allow you to store educational supplies, freeing you from the need to purchase separate shelves or cabinets.
Desk refers to furniture used as functional orthopedic student furniture.
If the children's room is small and difficulties arise when arranging furniture, a transforming desk, the position of which can be adjusted, or a folding model will suit you.
Assembly instructions
To make a desk with your own hands, follow the following steps in order:
- Cut out all the details of the future product in accordance with the diagram. Round edges and edges of parts to prevent injury to your child. Sand all surfaces of parts to eliminate unevenness;
- Use a pencil to mark the parts according to which you will drill holes for assembly. At this stage, it is important to ensure that the markings are followed so that all the holes correspond in location to each other.
- Connect all the parts using pre-prepared fasteners. First, you need to tighten all the screws three-quarters of their length; when they are tightened, and you can evaluate the fidelity of the design, then complete the adjustment. Screw heads can be hidden using decorative caps;
- Glue the end parts with a special edge tape.
The desk can be made from scrap materials and tools.
Important! The desk top should be larger than the base. This will allow you to place the desk close to the walls, even if there are baseboards.
