How to paint a countertop
Laminated chipboard is one of the most popular materials for making kitchen furniture, including countertops.
Among the advantages in comparison with other materials, it is necessary to highlight strength, maintainability, and long service life. But any furniture sooner or later loses its original appearance. Then all that remains is to either change it or repaint it. If you buy a new headset, you will have to dismantle the existing one and solve problems with removal and disposal. Additional investments and time will be required to visit furniture showrooms or workshops.
The second option does not require any special costs or experience. The main thing is compliance with the technology and preliminary preparation of the necessary materials and equipment. With a little effort, the result will be a unique tabletop. In addition, you can update the color regularly, taking into account your mood, the weather outside or seasonality.
Next, we will consider step by step how and with what to paint the tabletop. All steps are required. It is not recommended to skip them in order to get a perfectly smooth and even surface.
Removing old coating
Furniture made from MDF, chipboard, laminated chipboard is covered on top with a thin layer of plastic (polyvinyl chloride, PVC). It is resistant to water and most solvents. Painting over such a film will not work. Even very expensive and high-quality paint will roll and run off. To prevent this from happening, the old coating is completely removed.
For this you can use:
- chemicals and reagents. When selecting a remover, it is important to take into account the type of old paint or other coating, so as not to completely ruin the countertop and not spend extra money;
- construction hairdryer The household power is not enough for these purposes. First, the coating is softened under a stream of hot air. Then you will have to work with a scraper.
Both options are quite labor intensive. But, if you want to get a new kitchen at minimal expense, you will have to work.
Preparing the base
Just removing the old coating is not enough. In order for the paint to lay perfectly evenly, you need to stock up on dishwashing liquid, sandpaper, a spatula and putty. If you have a sanding machine, don't put it far away. You will also need it. It is better to work with gloves and a protective mask.
Note! Complex structures are pre-assembled. This will make it easier to process surfaces. If the priority is to change the appearance of only the tabletop or facade, you don’t have to waste time on unwinding.
Preliminary preparation involves performing the following actions:
- sanding. First, the work is carried out with sandpaper with coarse grain, then with fine grain. If you have a sander, you can take it. The goal is to improve the adhesion of paint to a wooden base.
Important point! If a machine is used for grinding, it is necessary to work with equal pressure, periodically pouring water on the surface. Otherwise, the tabletop will turn out wavy and unpresentable. Don't forget about the protective mask. The finest dust contains components that negatively affect human health.
- degreasing. Not only chips are removed from the surfaces to be painted, but also possible grease contamination. It is not necessary to buy special medications. Dishwashing liquid and a sponge are enough. After treatment, the soap composition is removed, the countertop or facades are wiped with a clean dry rag and dried under natural conditions or with a hairdryer;
- alignment. Even after grinding, chips, cuts, and deep scratches could remain on the surface. They are carefully and accurately filled with latex or epoxy resin putty. Once the mass has become hard, the grinding process is repeated locally. If there were many defects, you can wash and dry everything again;
- padding. A thin layer of primer improves adhesion, the paint goes on smoothly and does not roll off. There will be no air bubbles, giving the chipboard tabletop a sloppy appearance. The cost of priming is small compared to the effect.
Additional Information! It is not necessary to purchase compounds designed for working with wood. You can use those designed for glass, auto repairs, and tiles. They come in cans and are extremely easy to use.
It is necessary to work in a mask and safety glasses. The primer must be dried. The specific period is indicated by the manufacturer on the label.
This completes the preparatory stage of painting the tabletop. You can proceed to choosing a coloring composition and further work.
What paint to buy to update your kitchen unit
The ideal option for updating laminated chipboard furniture is water-based acrylic paint. You can initially purchase a white composition and add pigments of the desired shade. The advantages of acrylic paints include the fact that they can be used for interior work without any problems. There is no sharp, pungent odor that lasts for weeks. The composition does not contain volatile components that cause allergies or skin rashes. If you don’t want to pick up a brush or roller, immediately purchase spray cans.
In addition to acrylic, thixotropic paint is also used for painting the facades of kitchen countertops. It fits well, the appearance of smudges is practically excluded. Once dry, the surfaces will look like sheets of plastic.
When working with laminated surfaces, buy latex or polyurethane paints, provided that they are intended for interior use. The desired color is obtained by adding pigment to a white base.
Epoxy paint modifications are best left at the store. When finished, they give excellent results. But the drying process takes a long time, and it is better to work outside or in a separate building. The smell will not disappear completely even after a month. It is better not to experiment in an apartment using such compositions.
Necessary tools for varnishing tabletops
Before varnishing the tabletop, you need to take care of a sufficient number of necessary tools for the job. To create the deepest possible color of natural wood, you can use stain - the day before varnishing, the tabletop is painted with a small sponge. To work with the prepared tree you will need:
- brush or roller;
- cotton pads;
- additional lamp;
- fine sandpaper with fine grain.
The varnish is applied with a roller or brush with natural bristles Source privatmebel.ru
The main tool for application will be a brush or roller. In the first case, it is recommended to use a tool with dense natural bristles. The roller should be made of microfiber or fabric with a minimum amount of lint. Cotton pads are used to wipe off fallen drops of varnish from non-working surfaces.
Do-it-yourself repair of countertops made of chipboard and plastic
The most worn element in a kitchen set is the work surface. And this fact is quite understandable. It is on it that all food processing and cooking operations are carried out, it is where it is subjected to significant mechanical stress, and is constantly washed to maintain hygienic cleanliness. Repair of countertops made of chipboard or post-forming in the kitchen may also be required due to technological errors during installation. Namely, after insufficient processing of the ends when inserting a sink or hob to protect against moisture penetration and temperature changes.
Materials used
When you visit a Leroy Merlin store or other online stores, you will find a huge assortment of countertops that are installed in the kitchen and bathroom.
We are talking about products for the kitchen, although similar designs can be used for the bathroom. You decide.
As for materials, there are several options:
- MDF;
- chipboard;
- tree;
- stone;
- granite;
- marble;
- acrylic;
- glass;
- stainless steel
Since some of the presented materials are already resistant to moisture by nature, I propose to focus on countertops based on chipboard, MDF and natural wood. Such designs are quite inexpensive, they can be found in a wide range in St. Petersburg, cities like Moscow, Kyiv, Kharkov, Chelyabinsk and Novosibirsk
Yes, in principle, in every city where there are furniture stores, there will probably be countertops that suit you
Such designs are quite inexpensive, they can be found in a wide range in St. Petersburg, cities like Moscow, Kyiv, Kharkov, Chelyabinsk and Novosibirsk. Yes, in principle, in every city where there are furniture stores, there will probably be countertops that suit you.
4070m dunes union
Chipboard and MDF
In terms of price and quality, laminated chipboard coating is considered one of the best options. To create a laminated surface, the coating is made of moisture-resistant plastic. Good examples of quality production can be seen among the HPL or Egger assortment.
In total, the laminated surface should have 3 layers:
- kraft paper;
- decorative coating;
- protective coating made of acrylic and melamine resin.
The paper is impregnated with synthetic resins, which allows you to create a durable multi-layer structure.
The outer layer provides such countertops with excellent properties in terms of wear resistance, light protection and heat resistance. They do not become deformed if dishes, sharp objects accidentally fall on the countertop, or if powerful detergents are accidentally spilled.
5004/s satin 600 3000 38 1u cedar
But high-quality lamination is not always performed by manufacturers. I would like to note that such products should be green in cross-section. This color is due to the use of special impregnations, which increases the moisture resistance of chipboard and MDF.
If you buy a low-grade design, you cannot count on its long service life. With constant exposure to moisture, gradual swelling occurs.
I accidentally conducted an experiment myself, leaving a section of a chipboard tabletop in water. Nothing actually happened to the material itself. That is, it did not become saturated with moisture and did not swell. But water leaked between the chipboard and the plastic surface used for lamination. Here she was just deformed.
It is unlikely that this could happen in real conditions. Only if the lamination is not completely done, there are rough seams or cuts that will be constantly exposed to moisture.
6402m metropolitan 1200 3000 38 2u union
Tree
Wood countertops are highly valued by designers, although a real housewife will probably tell you that wood is not the best option for a kitchen.
Similar designs are made from solid walnut, cherry and oak. These are the most popular tree species.
Wood is considered extremely sensitive to possible damage and does not like contact with liquids or hot objects, which makes caring for such a tabletop much more difficult.
I would advise you to avoid using wood if you want a truly high-quality, moisture-resistant countertop. It will not last long, and caring for it is too difficult. It is better to buy an excellent dining table made of wood.
230m Niagara oak 600 3000 38.1u union art 73920Alternative options
I will briefly describe several other options that allow you to count on moisture resistance when choosing a countertop from the specified materials.
As you can see, there are worthy options on this list, and there are also those that are better to avoid. What do you think about this? Be sure to write your reviews if you have experience working with such countertops. Explain their strengths and weaknesses using personal example.
Still, the greatest demand among us is for moisture-resistant countertops made on the basis of chipboard and MDF. This is due to the reasonable price and good performance characteristics.
Do-it-yourself repair of a kitchen plastic countertop made of chipboard
Postforming is a budget option for equipping a kitchen unit. Plastic lining gives the working surface sufficient wear resistance characteristics for intensive use. However, even at the installation stage, it is necessary to ensure proper protection of the internal filling of the tabletop (usually chipboard) from moisture penetration and subsequent swelling:
- After cutting into the sink or hob, the bare ends of the sections must be treated with sealant or thoroughly painted.
- Along the junction of the tabletop to the wall you need to install a plinth. It plays not only a decorative role, giving integrity to the working surface. And it not only covers uneven joints if the wall “goes away”. But it also prevents water from entering the back end of the tabletop.
- If the stove is free-standing, special end strips must be attached to the edges of the tabletop near it to protect it from drying out. Docking and connecting strips also play a protective role.
How to remove scratches, chips, cracks from the postforming surface
What typically involves repairing a chipboard kitchen countertop? Usually it is necessary to restore chipped corners and somehow disguise deep scratches and cracks.
You can make “patches” using a mixture of shavings and a two-component composition, similar to the methods described in the restoration of chipboard. If you “tint” the composition to match the color of the countertop, after complete drying, grinding off the excess and then polishing, the “patch” may be practically invisible. And it will slightly increase the service life of the repaired work surface.
What to do if the plastic peels off from the chipboard during postforming
There are often cases when the plastic “moves away” from the base of the chipboard, forming a kind of bubble or peeling. This rarely occurs somewhere in the center of the countertop. Usually on one of the sides adjacent to the sink (due to humidity) or the stove (due to overheating).
If the plastic peels off from the base at the junction with the stove, hob or sink, you can repair the countertop yourself as follows:
- Carefully remove the edge from the end and sand down any irregularities.
- Clean off the dried loose chipboard particles from under the plastic.
- Apply a little glue inside and tighten with clamps through the bar. She will control the overall level of thickness of the countertop being repaired so that there are no differences. It is recommended to remove the clamp only after complete drying.
- The sanded edge of the tabletop can be covered with a wide melamine edge using an iron. If the edge is covered with a metal strip, then it is enough to simply treat it with sealant.
But since the cost of post-forming is inexpensive compared to other kitchen countertop options, it's best to consider a replacement.
Repair or change?
From the very beginning, decide how reasonable your renovation decision will be. Repairing a countertop is not always practical. It’s easier to buy a new table or completely change the front part of the kitchen set. For example:
- Repairing a small crack will not be difficult.
- If it is cracked and goes through the entire surface, the repair is unlikely to be effective, and you will lose a lot of time.
- If a crack runs along the surface of the glass, the gluing seam will be very noticeable, even if you managed to glue the parts together firmly enough. In this case, replacement cannot be avoided.
- Granite, marble. For restoration you will need marble or granite chips. It is enough to mix the crumbs with transparent glue - you get an excellent putty for small cracks. The solution grabs the crack and it does not spread further.
- Chipboard, wood. These are the most repairable materials. But even with them, the complexity of repairs and its effectiveness depend on the extent of the damage.
Restoration of a chipboard tabletop
A tabletop made of chipboard or solid wood can be restored with your own hands.
Important! As a rule, the main cause of furniture damage is exposure to moisture and/or high temperature. Therefore, a very reasonable solution is to preventively treat the seams of kitchen furniture made of chipboard with silicone sealant. The same manipulation will not be superfluous after any furniture repair.
Let's consider repairing a countertop made of laminated chipboard with your own hands from getting wet. When wet, the surface of the table seems to rise, becomes uneven, and the material itself loosens. To restore the original appearance of the kitchen table, proceed in this order:
- Remove sawdust resulting from delamination.
- Dry the surface well.
- Mix sawdust and PVA emulsion to the consistency of a thick paste.
- Fill the resulting voids with the resulting mixture.
- Keep the product under pressure for about a day. This time is enough for the mixture to dry.
- Clean the surface, treat the seams with silicone, and then secure with a strip.
Important! If deep scratches have formed on the chipboard surface, getting rid of them is simple:
- Sand the tabletop in two stages: first with P120 sandpaper, then switch to sandpaper with a lighter grit.
- Perform final sanding with P360.
- Now go over the surface with felt and it will look polished.
Natural wood
If scratches appear during use of solid wood kitchen furniture, they can be easily removed with a special polishing compound. For deeper damage, use a special putty, matched by color. In addition, you will need:
Clean the damaged area from the old coating and apply putty. Then, after complete drying, remove the excess using sandpaper. The final stage is applying oil varnish to the surface. The varnish will dry and the surface will be ready for use again.
Coloring compounds are also used for restoration. To choose the right one, read expert advice:
Important! To avoid troubles during the process, we recommend that you use tips for properly laminating chipboard at home.
Oil wax for Osmo countertops
Osmo oil consumption per 1 m2 is almost two times less than traditional varnish or paint
Treating the surface of a countertop is not a simple matter. After all, it is the one that constantly comes into contact with food products, and therefore should not contain substances hazardous to health. In addition, this part of the table is regularly exposed to mechanical stress, so the top wooden covering must be resistant to abrasion and moisture. Just such a product is a hard wax-based oil from the German company Osmo.
The ideally selected composition of oil and wax components preserves the natural tone of the wood, serves as reliable protection against external factors, and is also completely safe for human health. It can have the effects of wet wood, a silk-matte surface or emphasize the natural grain of the wood. All products are certified and meet European quality standards.
Advantages of using oil - Osmo wax
The countertop surface is an area that is exposed to external factors every day. Food, papers, objects are placed on it, and hot coffee or tea can be spilled. As a result, the coating quickly wears out, cracks and peels. Oils from the German company Osmo are made using hard wax, which penetrates the pores of wood and creates a durable, moisture-repellent coating.
He is not afraid of mechanical stress or hot liquids. Spilled wine or coffee will not leave noticeable stains. And if this happens, then you can revive the damaged area in a few minutes. In addition to the above positive qualities, osmo oils have a couple of more significant advantages.
- Completely protect wood from rotting and deformation.
- Extend the life of the tree by two times.
- They have the highest degree of environmental cleanliness.
- Preserve the structure and highlight the unique grain of the wood.
Oil consumption per 1 m2 is almost two times less than traditional varnish or paint.
Features of using oil for Osmo countertops
Applying topoil 3058 oil suspension to furniture is not particularly difficult. Even a child can cope with this task. It does not need to be diluted, just mixed thoroughly. The oil layer can be applied with a flat brush, microfiber roller or sponge. During the work, a respirator or gauze bandage is not required. The oil is completely safe and does not emit harmful substances.
Procedure step by step:
- Prepare the work surface by final sanding.
- Apply a thin layer of oil mixture along the grain.
- Allow 8-10 hours to dry.
- Apply a second coat of topoil.
- After 7-10 minutes, remove excess.
It is important to note that a wet or frozen surface is considered unsuitable for coating with oil. The wood needs to dry and only then treat it with an oil mixture.
How to restore a countertop made of chipboard or wood? Application of restorative compounds
To get rid of chips, cracks and dents on wood and chipboard surfaces, you can use the following compounds:
- Furniture wax - hard or soft.
- Furniture touch.
Hard furniture wax
Designed for repairing mechanical damage on surfaces subject to moderate to significant loads. Compared to soft wax, the color palette of this material is not rich, but it provides exceptional moisture resistance to the surface.
First, the wax is melted using a lighter or a gas soldering iron, and then applied to the problem area. The wax is cooled for a few seconds and then the residue is scraped off with a knife. If necessary, you can carefully clean the surface.
Soft furniture wax
It is rubbed in with an edge knife or spatula. This material is well suited for filling cracks and small dents, as well as holes from self-tapping screws. After applying the wax, the area is polished with felt.
Important! If wax is used to fill defects in natural wood, you can imitate the wood texture using a felt-tip pen or alcohol marker.
Furniture touch
This is a tool for quickly eliminating small defects. Shake the product and then apply it to the damaged area. The number of layers, depending on the depth of damage, is from 1 to 3. Drying time is from 5 to 8 minutes. Remains of the composition are removed with felt or soft cotton cloth.
Main advantages of varnish
Due to the wide variety of varnish coatings, this method of protecting wood is the most popular compared to oil impregnation. Despite some of the disadvantages mentioned above, this method has many positive aspects:
- Strength and durability, does not require restoration during its service life
- Possibility to choose the desired shade and adjust the color of the wood
- Protects wood from fire and combustion
- Protects wood from moisture
- Gives a perfectly smooth surface
How to repair a kitchen countertop made of plastic?
The main advantage of plastic products is that they do not swell or get wet. But there is also a drawback - fragility. A corner of a plastic tabletop may break off (this damage occurs most often). You can fix the broken piece using special glue. It glues wonderfully, but is quite expensive and requires a special gun for application.
If the thickness of the countertop is small, then you can use compounds such as “Moment” or “Superglue”. Titan glue is also good for working with plastic. To make the repair effective, fix the surface and leave for several hours until completely hardened. To ensure everything goes smoothly, carefully study which glue is best to use for furniture repair.
Important! To make the joint line less noticeable, mix plastic powder with the glue.
What types of oils are there for wooden furniture?
Oil products for furniture are manufactured industrially; they can have a plant, mineral or synthetic base. The drying process can take place differently, depending on the brand. These funds can be divided into two types:
- Dries completely. They form a hard layer on furniture that cannot be washed off with water. The canvas retains its original appearance for a long time;
- Partially drying. This type of oil deeply impregnates the wood, but the top layer can be removed mechanically.
Important! Before applying protection, the table cover should not only be thoroughly dried, cleaned of dirt and, possibly, old paint and varnish. Defects in the table must be smoothed out using a special putty and sanded with sandpaper.
The process of applying the product is extremely simple; this can be done with a brush or cloth that does not leave lint. In both cases, work occurs along the entire length of the fibers. If you are working with a brush, just apply two coats. When using fabric, you will have to make three or four layers. The very first one should dry for at least 12 hours. After the latter has dried, wipe the product with a soft and clean cloth.
Other benefits of the oil composition:
- it does not change the color of the table, but some oils “emphasize” the natural pattern of the board;
- does not delaminate or flow when exposed to high temperatures (unlike many brands of varnish);
- oils that are absorbed into the material preserve the natural exchange of moisture in the wood and prevent the appearance of fungus;
- such substances are environmentally friendly and therefore are not capable of causing harm to humans as a result of their contact with food products;
- the protective coating hides minor scratches, abrasions and stains from dishes;
- you can remove a small area of the coating and reapply it.
It is worth adding that this prevents the wood from drying out and is suitable for working with old materials.
How to repair an artificial stone countertop?
Artificial stone products look great in a modern kitchen interior. Artificial stone retains its attractive appearance for a long time. However, despite their strength, countertops made of artificial stone require careful care, since the surface can easily be damaged by concentrated household chemicals, mechanical impact or hot objects.
Repairing the countertop should be done immediately after a defect is discovered, since the slightest damage over time can result in labor-intensive and expensive repairs.
Important! The maintainability of artificial stone products is high, so there is a chance to restore their original appearance.
Fighting stains
If hard-to-remove stains appear on the surface, you can try to eliminate them with a special polyester composition. Sanding the table top with sandpaper of various grain sizes - from P120 to P400 - helps a lot. After sanding, the problem area is polished with felt.
How to update your kitchen countertops with your own hands?
Kitchen countertops made of any materials sooner or later lose their presentability and need updating. If you can’t afford a new set, you can restore the work surface.
In our article you will learn how to update an old countertop in the kitchen with your own hands, how to completely change its appearance without turning to specialists.
Alternative options
The easiest way to answer the question of how to cover a wooden tabletop is to paint it. That is, you remove all the old coatings, seal surface defects with putty, sand it, and the last stage is applying paint.
You can cover a wooden surface with self-adhesive vinyl film. Fortunately, the options for its decorative design are enormous: the structure of wood, stone, leather, plain films, and so on. The most important thing is that all preliminary operations are carried out using the technology described above. And the sticker process itself is not very complicated.
It is important here that wrinkles and bubbles do not form on the surface of the new table, so you need to carefully smooth out the laid material, using, for example, a plastic spatula or a paint roller. I would like to remind you about this option for finishing an old tabletop, such as decoupage
Essentially, this is an applique that is made either from paper or fabric. Apply drawings to the surface of the table, gluing them with PVA glue or a special compound. And a colorless varnish is applied on top in several layers
I would like to remind you about this option for finishing an old tabletop, such as decoupage. Essentially, this is an applique that is made either from paper or fabric. Apply drawings to the surface of the table, gluing them with PVA glue or a special compound. And a colorless varnish is applied on top in several layers.
As you can see, there are quite a few ways to update kitchen countertops. What material to choose for this is up to everyone to decide for themselves. But, as practice shows, the majority of home craftsmen usually choose varnish. This is a simple application, plus long-term operation of the wooden product itself.
The varnished surface of the table is very aesthetically pleasing, practical, and also functional. A layer of varnish helps protect the surface and also prevents destruction, as it protects the wood well from moisture and other damage. Varnishing is especially important for worktops in the kitchen - wooden countertops are constantly exposed to mechanical stress and moisture. Let's see what varnish is used for a wooden table, how to properly prepare a wooden surface, and also how to apply the varnish correctly.
Kitchen and other furniture is made mainly of wood. The wood can be natural or it can be various materials made from shavings - MDF, chipboard, fiberboard and others. Tables can be without any coating or the surface can be treated with paints and varnishes.
Among the main advantages of wood are high thermal insulation, attractive and aesthetic appearance, a huge number of shapes, and ease of restoration. Along with the advantages, there are also disadvantages - wooden surfaces become dirty very quickly, the material is quite flammable, and is easily scratched due to even minor mechanical damage.
Types of countertops and their defects
Working surfaces are made from different materials:
- A natural stone. It is less susceptible to wear and tear than others. A countertop made of natural granite, for example, is not at all afraid of damage.
- Acrylic is a type of artificial stone. It is not resistant to scratches and cuts.
- Quartz agglomerate is durable like granite, but over time it still loses its appearance.
- Casting stone is a solid thin-layer polymer on a base. Requires careful sanding.
- Plastic is a budget option for countertops. It wears out quickly without the use of cutting boards.
- Wood treated with impregnations and varnishes also requires care to maintain its appearance.
How to update an old countertop made of natural and artificial stones?
The optimal method of restoration is polishing and grinding, because the tabletops have an identical texture throughout their entire thickness. Care must be taken with cast stone applied to the base in a thin layer; it will only withstand 2-3 polishing updates. In the future, it is optimal to improve it in the same way as wood or plastic - by gluing, painting, glazing. The same methods can be used to transform a stone if the set has already become boring.
Before you get tired of the set, scuffs and scratches form on the stone surface, it’s time to sand and polish it. Required tools:
- Sander.
- Polishing machine.
- Polishing paste.
The device for grinding and polishing can be one with different attachments: for the first stage abrasive P120, for the second - up to P1500.
You can update your kitchen table top with your own hands by following these steps:
- Adding water to the surface to reduce the heating of the stone, sand the countertop, leveling the top layer.
- Using polishing attachments from coarse to fine, process the surface to a matte, semi-matte or glossy texture using polishing paste.
Important . Neither the polishing nor the grinding wheel should be dry, they must be moistened.
How to update a kitchen countertop: radical methods
How to update a kitchen countertop with your own hands if its old appearance is no longer satisfactory? There are several options.
Pasting
The easiest way to transform your work surface. What to cover the tabletop with? To do this, you will need a thick vinyl film with a self-adhesive backing; photo wallpaper is also suitable.
- The surface of the tabletop must first be degreased and sanded for leveling. Important . If there are potholes or chips on the surface, they must be filled with repair putty.
- Paste the film. It is important to fix one side correctly so that when rolling, the canvas moves parallel to the edge of the table. During the pasting process, you need to help with a plastic or rubber spatula to force out bubbles and smooth out the coating.
The service life of the film is 3-4 years with careful use.
Painting and glazing
The second easiest way to solve the problem is to update the countertop. Suitable for any type of surface that must first be puttied or sanded for leveling.
How to paint a kitchen countertop:
- Acrylic paint.
- Alkyd enamel.
- Water-based paint.
The coloring composition should be applied to a degreased surface in 2 layers. You can use your imagination and draw something on the tabletop. For those who don’t know how to draw, you can use ready-made templates.
It is advisable to protect the finished coating with tempered glass. It will prevent small chips of paint from getting into food and preserve the color coating from abrasion. Glass can also be used for pasting.
Decoupage under glass
A creative way to update your kitchen table top with your own hands is the decoupage technique. It is characterized by freedom of creativity - you can use any applications, ready-made or homemade, sparkles, memorial cards, etc. They must be glued to a previously degreased surface using PVA, and after drying, covered with 3-4 layers of furniture varnish or glass.
Major update
How to radically update your countertop:
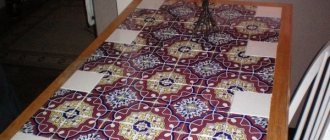
- Cover with tiles.
- Apply mosaic.
- Make a composition with stones, shells and other three-dimensional decor in transparent or colored epoxy resin.
How to update a countertop with your own hands depends mainly on the budget, imagination and capabilities of the kitchen owners. You can use any available restoration and transformation techniques.
Oil, wax or varnish?
Caring for and proper use of a wooden countertop will extend its life.
A high-quality coating with good compounds will give a wooden tabletop a beautiful look and protect it from moisture and aggressive detergents.
In order for the tabletop to last longer and maintain its appearance, do not cut anything directly on the wood and do not test the surface for fire resistance and heat resistance.
How to cover a wooden tabletop so that it lasts as long as possible and at the same time remains beautiful?
- Oil, wax.
- Alkyd coatings.
- Water-dispersed compositions.
Depending on the coating, the same type of wood looks different: polyurethane gel, glossy varnish, wood oil
Ideally impregnated with oil, oil-wax. Oil, nourishing the wood structure, gives it water-repellent properties. When properly treated with good oil and wax, the countertop becomes resistant to household chemicals and detergents, which are often used for washing kitchen utensils.
The ideal option for protecting a wooden tabletop is a bio-impregnation based on natural vegetable oils and beeswax.
Apply the oil coating either with a brush or a rag evenly over the entire surface.
A special oil designed to impregnate wood that comes into contact with food will ensure environmentally friendly processing.
Oils for treating wooden countertops can be vegetable, synthetic or mineral
You can apply colored glaze, stain, and other water-dispersed coatings followed by application of varnish. The properties of the varnish used, its resistance to moisture, and multi-layer coating are important.
The varnish treatment option is better because the wood is coated with a protective layer, which is much stronger than oil protection.
A high-quality coating is carried out in several layers - two or three - regardless of the paint composition. Do not mix alkyd and acrylic coatings. Before covering the countertop with the base compound, it is important to select the appropriate primer.
Preparing a wooden table for varnishing
You can use a primer that matches the natural color of the wood, or a colored primer that matches the color of the varnish that will be used on the wood.
Advice!
For maximum durability, the coating should be renewed one year after application. It takes time for the product to “get used” to the surface at different temperatures. When exposed to external conditions, microcracks appear on the surface of the coatings, which are visually indistinguishable. Therefore, it will be useful to lightly sand the top layer and apply a new layer with the same composition.
Sand the surface and apply a layer of varnish along the wood grain
Beech wood before and after treatment: on the left – untreated beech, in the center – after treatment with white oil, on the right – oil varnish
The quality of the coating can be tested in the following way: apply a few drops of water to the countertop and observe how quickly they are absorbed. A good coating has excellent water-repellent properties.
Exposure to water can only be short-term - otherwise the wood will have to be sanded and waxed again
It is important to consider the drying time of the compositions; it can vary from several hours to several days. Natural oils and acrylic mixtures have a long drying period or accumulate strength gradually over time, so it is important to limit the use of the countertop during the drying period.
It is impossible to protect wood from scratches and mechanical influences with paints and oils, so there is only one way out - treat wooden countertops with the utmost care.
Wooden countertops are an excellent solution for modern kitchens
The slight carelessness of the wooden surface will give the kitchen...humanity. Isn't that what we value most? Humanity... Kitchen? Why not?
A place for wood can be found in a kitchen in any style, it is only important to approach the matter correctly
A wooden countertop in the kitchen is a beautiful and high-quality material that will decorate your kitchen
