Veneer repair on furniture
How to repair veneer on furniture.
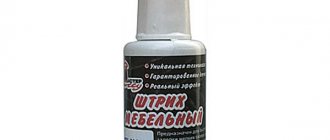
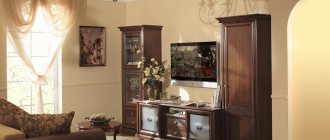
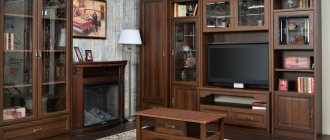
Veneering with valuable wood species is used in almost all price segments in the production of furniture. This can be economical furniture, when veneer is glued to a base made of chipboard, as well as expensive furniture, where parts made from MDF and cheaper types of wood are decorated with veneer of valuable species. All types of furniture can be repaired independently. Cracks, chips, broken pieces of veneer are fairly common cases of damage to veneered furniture. Sometimes this is a consequence of poor quality manufacturing, but most often it is the consequences of long-term use. Veneer is a thin sheet of wood glued to a wooden or other base. If your furniture is not veneered, then you can refresh the varnish, see tabletop repair.
Repair most often consists of re-gluing the loose veneer, or re-gluing the lost fragment. It is very advisable to select veneer for repair of the same type as the main one. At the very least, it should not differ much in texture and color. The rest can be corrected by selecting appropriate primers, stains or varnishes.
Repairing cracks or peeling veneer
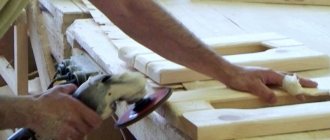
Part of the veneer that has come away from the base, but has not lost its integrity, can be re-glued in place. The same applies to cracks in veneer. First of all, you need to very carefully clean the surface of the veneer and base from old glue. This can be done with sandpaper and a thin sharp cutter. Then we lubricate the joints with glue.
Moreover, it is advisable to coat both the veneer itself and the base underneath it. In some cases, you can use quick-drying adhesives, but it is better to use good carpentry adhesives.
The surfaces to be glued must be pressed with a weight or clamps with wooden spacers. In addition, it will be better if you place a sheet of clean paper between the surface of the veneer and the wooden block, then the spacers will not stick to the part when gluing.
After the glue has dried, remove the clamps and carefully cut off the excess glue at the ends. Usually this is enough, although if you poured glue into cracks, under veneer, you will have to cut off the glue and touch up the repair area with a furniture oil marker or wax pencil in a shade that matches your furniture. On the topic of how to paint over scratches on furniture.
Replacing a piece of veneer
As I already said, to replace part of the broken veneer, it is advisable to select a new fragment of the same species and texture. As a home option, you can trim and break off part of the veneer on your furniture (or some old one), in a place where it is not visible, and use it to repair facade parts.
First you need to level the place you are going to repair. Use a cutter to cut straight lines along the edges of the break. Mark and cut a piece of veneer according to the shape of the missing fragment. If part of the veneer is broken in the middle of the part, then you can make a template by attaching a sheet of paper to the damaged area and drawing the outline with a pencil. The more accurately you cut out the missing part, the less noticeable this place will be after repair. I would like to note that the missing fragment does not have to be cut out in a rectangular shape; it can be a triangle, circle or oval.
Before gluing, clean the surface with sandpaper, apply glue and press. On large surfaces, such as doors or sides, it can be difficult to use clamps. In these cases, the gluing site is pressed with a load of several kilograms. Paper and a flat wooden block are placed under the load.
After gluing, you need to lightly clean the surface with sandpaper and apply a varnish of a suitable color. It will be better if you use water-based varnishes for repairs, so at least you will not damage the rest of the furniture surface. To decorate small areas, use furniture oil markers or wax pencils.
How to glue veneer using an iron
Veneer most often suffers on the edges of countertops, doors, and drawers. If it is impossible to repair the damage or a fragment of veneer is lost, then the old veneer in the damaged area must be replaced with new one.
Replacing the entire surface with damage, that is, veneering large areas, at home, without experience, will not ensure uniform sticking of the veneer, its pressing and drying.
To repair the surface of furniture, choose veneer of a suitable tone; if this is not possible, use the lightest version of veneer, which you can then tint yourself, but when choosing, pay attention to the texture of the wood. Remove the damaged piece of veneer with a sharp knife. First mark the cut line, and then quickly cut a piece of veneer
If the wood or chipboard under the veneer is damaged, putty it and level the surface
First, mark the cut line, and then quickly cut a piece of veneer. If the wood or chipboard under the veneer is damaged, putty it and level the surface
Remove the damaged piece of veneer with a sharp knife. First, mark the cut line, and then quickly cut a piece of veneer. If the wood or chipboard underneath the veneer is damaged, putty it and level the surface.
Before gluing the veneer, prepare the following tools and materials:
- suitable veneer;
- PVA glue (or “Moment” glue, “Liquid nails”);
- sharp knife;
- iron;
- syringe;
- sandpaper, block;
- cotton fabric or cloth;
- paper;
- flute brush.
When repairing furniture at home, follow these instructions to repair damaged veneer:
Apply a small amount of PVA glue to the prepared underlying surface using a flute brush.
When cutting, try to keep the cut line slightly wavy and the piece cut with a slight allowance. Coat the cut piece of veneer with PVA glue.
Place the veneer in place so that the direction of the grain matches. After this, it is advisable to firmly press the veneer with a wooden block.
To speed up the gluing process, use an iron. To do this, place a cloth or sheet of paper between the veneer and the iron and press the iron against the surface for a couple of minutes.
If the original veneer is not damaged, but swelling has occurred, it can be returned to its place by ironing it with a hot iron through a damp cloth.
If the previous method did not help, it means that the adhesive properties of the glue have been lost. Cut the swollen coating and use a regular syringe to inject PVA glue under it. Press down on top with a weight and leave for a day.
Restoring wooden furniture
If wooden furniture is scratched, stains or abrasions appear on its surface, the best option is to contact a specialized furniture repair shop. But if this is not possible, or you want to work with your own hands, you can try to restore the furniture yourself. Our advice will help you with this. So, let's begin!
Before:
After:
To begin restoring furniture coverings, you need to determine its type. What is your furniture made of - solid wood or veneer? Different types of coating require different approaches. Let's consider them sequentially.
When might you need professional help?
In some cases, restoration of old wooden furniture may require replacement of backs, walls, doors, and legs. What to do? Of course, contact experienced craftsmen to make an identical part.
It is not always possible to carry out such a delicate task at home, since you will need machines, cutters, etc.
Restoring oak furniture, as well as furniture made of walnut, ash, and spruce is definitely a worthwhile undertaking; they throw it out only if there is absolutely nothing that can be done.
If using putty and varnish it is not possible to recreate the former beauty of the furniture, you need to restore wooden or complete restoration of Soviet furniture yourself. The work is carried out in stages, the sequence of which must be strictly observed.
If you are unable to completely use up your oil and vinegar solution, you can use the leftovers throughout your home. In addition to furniture, these home remedies can restore most other wooden items, such as kitchen bowls, spoons, cutting boards, wooden toys and tools, and can also improve the appearance of wood floors and stairs. Based on materials from bestolkovyj.narod.ru
The antique furniture restoration workshop specializes in restoring high-quality wooden furniture made from solid wood, veneered with valuable species of mahogany, Karelian birch, walnut, rosewood, and rose. Restores carvings, polishing, shellac, and French polish. Marquetry, mosaics, inlays, all kinds of decoration, gilding.
As well as musical instruments, unique interior items, and household items.
Probably everyone is familiar with this problem: there is old and fairly good furniture in the house, but it has lost its original luster or is simply tired. It would be a pity to throw away such a thing, and it would be unreasonable, considering that the quality of many modern products, to put it mildly, leaves much to be desired. Self-restoration of wooden furniture will solve this problem.
At no extra cost, you will purchase a beautiful, original and durable product with a unique design.
Restoration of wooden furniture is suitable for high-quality products. Masters put their souls into such things. Saving an old thing and bringing it back to life is a matter of honor for today’s craftsman.
Do-it-yourself restoration of solid wood furniture
Removing scratches
Minor scratches on unpainted wooden surfaces can be masked using a nail file or fine sandpaper. Using gentle circular movements, polish the area with scratches or burrs, then wipe with a soft cloth.
Bringing back the shine
Wooden furniture that has lost its luster can be treated with a sponge and any furniture product that contains orange essential oil. The sponge needs to be heated in the microwave, spray the surface, and quickly wipe the entire wood with a hot sponge. Enjoy the aroma of orange and the result. Wipe the surface after sponging with a dry soft cloth to rub the substance with oil into the wood as much as possible. Compare the untreated surface and the already treated one: the difference is obvious!
Removing stains
Stains on the surface of wooden furniture are not a problem. A regular banana peel will help remove them. Using the inside, gently wipe the surface, lightly touching the stains without pressing on the peel. Afterwards, do not forget to thoroughly clean the surface of any remaining peel and rub with a cloth.
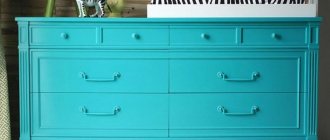
How to paint a veneer cabinet with your own hands?
There is an old veneered wardrobe in the hallway - it’s still good, comfortable, but the surface is slightly faded, there are cracks and chips. Can I paint it myself or should I call a professional?
Old furniture is made to last and cabinets, for example, are more spacious than modern ones and they are made of natural material. The right decision is if you give an old cabinet a second life, the unpresentable appearance can always be corrected using decoupage, re-covered with valuable wood veneer and then varnished or simply painted or varnished. You can do everything yourself.
First, disassemble the cabinet (if its design allows). Remove handles, metal hinges, cabinet doors, empty drawers, partitions, hangers, mirrors.
The surface must be cleaned of old paint and varnish. The veneer layer is thin, it is already cracked, carefully remove the old paint using sandpaper. Afterwards, go through it again with fine sandpaper (zero sandpaper), polish it, the surface should be smooth. Using a soft brush, remove sawdust and dust from clogging in crevices and cracks. Inspect the surface of the cabinet again; if there are chips or deep cracks, repair it with putty, but before doing this, treat the cabinet with a thin layer of primer. When the primer layer has dried, fill in all defects; when the putty has dried, sand with fine sandpaper and apply a thin layer of primer again. Afterwards you can start painting the cabinet. It is better to choose acrylic-based paint, it is durable and non-toxic. You can paint with a roller or a brush to ensure high quality. It is advisable to have brushes of different sizes in order to paint well the corners of the frame and small details of the cabinet decor. The walls, interior surfaces of the cabinet and the cabinet can be painted or covered with self-adhesive film.
You can paint not with one color, but use several, for example, like this:
Source
Do-it-yourself restoration of veneered furniture
Masking moisture damage
Veneer often suffers from moisture. The production technology is such that this material suffers noticeably from drops - blisters, swellings, and unaesthetic marks from smudges appear. What should I do? Take PVA glue, a syringe for 10 cubes, make a puncture in the swelling and fill in the required amount of PVA glue. To ensure the result is fixed, place a weight on top. If it is a door, it will need to be removed. If the surface is not quite the correct shape, use a thick fabric bag filled with heated sand. Thanks to its streamlined shape, the bag will help even out bloating.
Veneer that has moved out of place using alcohol glue can be returned to its place by heating it with an iron at medium heat, after first placing a dry cloth on the surface. If this option does not help, wet the cloth and wring it out. Repeat the procedure, using glue for more reliable fixation.
Removing scratches
Veneer that has scratches on the surface needs to be sanded and treated with a restoration marker of a suitable shade. The main task is not to cause harm, since veneer is a delicate material; it can become stained and blistered if handled carelessly or hastily restored.
How to restore veneer
Veneered furniture requires a special approach. The means are basically the same, the methods are different. For example, if after getting hit the veneer is swollen, fill a disposable syringe with PVA glue, pierce the bubble, and inject glue into the cavity. Place a piece of thick fabric on top and place a weight. If the surface is uneven (convex or concave), use a thick fabric bag with heated sand as a load.
Such veneer damage is restored in two stages. First, the swelling is eliminated, then the scratch is painted over and the coating is restored.
If the veneer is glued with alcohol glue, you can return the swollen part to its place by ironing it through a rag with a hot iron. But do not overheat the iron: the veneer may stretch. Heating level is medium.
If ironing with a dry cloth does not help, try repeating the operation with a damp cloth (wet it and wring it out well). There is a chance that the wood will swell and become more elastic. To reliably fix the swelling, you can introduce PVA there and then heat it with an iron.
If the swelling is cracked, you can also try to seal it with heating (through a rag). If it doesn’t work, tear off the peeled piece. You don’t cut it, but rather break it off: on veneer, breaks after restoration are less noticeable than cuts. Therefore, you break off the lagging piece. Remove the old glue from the damaged area and the piece of veneer (with sandpaper or a nail file, depending on the size). Next, the repair of veneer on furniture is standard: spread it with PVA glue, lay it down, aligning the fault lines, lay a thick fabric on top and place a weight until it dries.
Such veneer peeling can most likely be eliminated simply by ironing it with an iron.
Scratches and traces of restoration on veneer are removed in the same way as on wood: they are painted over with a furniture marker of a suitable shade. If the scratch is deep, a little melted furniture restoration wax is applied to it (with a spatula). After drying, the wax is ground, and if necessary, fine-grain sandpaper is used, but after this treatment, the restored piece is covered with a layer of varnish.
Do-it-yourself furniture restoration requires patience and accuracy. You have to act gradually and methodically: smear it, wait for it to dry, level it, smear it again, etc. Sometimes you have to try several methods: damage varies, as do the materials used in production (glue, varnish, etc.). But as a result, the furniture will look much better.
Time can make things unusable. Doors are also among those objects that sooner or later will have to be restored with your own hands. Scuffs, blisters and serious household damage all require attention. Restoration of veneer doors is carried out in several ways. If the owners of the house have an old, damaged door leaf at their disposal, it can be easily restored.
Before the door restoration process begins, it is carefully examined for damage. You should purchase materials and necessary tools only after this stage. It is often impossible to do without veneer paint. It allows you to quickly and effectively eliminate any abrasions.
Many people cannot understand how to update a product with their own hands, since the task is not considered simple. This requires accuracy and certain skills. Repair of veneer doors begins with preparing the surface with special compounds. Use wood putty, which helps to level the canvas and subsequently produce high-quality painting.
General rules for restoring old furniture with your own hands
- Caution and slowness are the basic rules. There is no point in rushing to quickly coat the surface with glue or wax. The more carefully you carry out the processing, the more aesthetically pleasing the result will be. Restoring furniture coverings should not be rushed.
- Set aside a few days for work. You must wait until the surface is completely dry. In this case, the quality of work will be higher. 1-2 days is the minimum period for drying the area treated with glue.
- Do not use furniture immediately after finishing work. We strongly recommend that you let the furniture dry for three days after the final stage of work and only then use it.
Please note that this material is about household restoration. We strongly do not recommend restoring rare, expensive, antique furniture yourself - the consequences of improper repair can be disastrous for the furniture.
Painting wooden furniture
The photo shows an example of transforming old furniture
Like any painting process, painting furniture parts is divided into several stages.
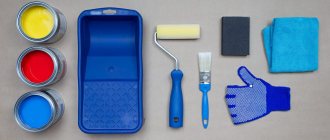
Tools and materials
First, you need to collect everything that may be required for your work, so that in the future you will not be distracted by searching for the necessary tool or purchasing any material.
The list of everything that may be useful to you is as follows:
- Screwdriver;
- Fine to medium grit sandpaper;
- Rollers and brushes of various sizes and (or) a spray gun for painting furniture;
- Masking tape;
- Paint tray;
- Primer;
- Wood putty;
- Putty knife;
- Paint for painting furniture;
- Varnish.
Advice. When buying a primer, you should choose compositions based on the type of material being painted.
Preparatory work
Before you start working directly with acrylic paint or any other paint and varnish material, the following preparatory measures must be taken:
- Furniture is disassembled into parts;
- Each element is processed with coarse sandpaper to remove the old coating from the surface;
- Use a brush to sweep away all the dust;
- Cleaning is done with fine-grain sandpaper;
- Sweep away dust with a brush;
- Furniture elements are wiped with a damp cloth, after which they are allowed to dry;
- If necessary, wood putty can be applied to the parts using a spatula;
- Cleaned, puttied, dried furniture for painting is subjected to a priming process. (See also the article Primer on wood for painting: features.)
Painting instructions in pictures:
Note! Work must be carried out in a clean room. In order to avoid dust getting on the surface during the painting process, before starting work with paints, you should wet clean the room.
We paint old furniture
There are a huge number of dyeing technologies, including decoupage, two-color or multi-color dyeing, antique dyeing, etc. Only you can decide which specific method will be used to paint your furniture.
Antique painting technique
Painting furniture in a single color, for example, white, does not present any difficulties.
The main thing in the process of work is to follow the following set of rules:
- The paint is applied in one direction of brush movement;
- You should not apply a second coat of paint until the first one has completely dried;
- If the furniture is made of veneer, then the paint is distributed in the direction of the wood grain;
- The room in which work is carried out must be dry and clean.
- During long breaks during painting work, brushes should be immersed in a container of clean water so that the tool does not dry out, otherwise they will become unsuitable for further use;
- If you ultimately want to get a result similar in quality to factory coloring, then you should apply the coloring composition in several layers;
- Finally, once you have achieved the desired color, after the paint has dried, apply a final coat of varnish using a sponge;
- After finishing the work, assemble all the furniture parts into a single whole.
The photo shows the paint application process.
If you want to create a two-color or multi-color design on the surface, then first apply a light-colored material to the surface. Wait until it dries and use masking tape to cover the borders of the subsequent color to create a clearer picture and to avoid mistakes, uneven strokes, etc.
Note! To treat metal parts, fittings or, for example, the outside of a kitchen sink, when it comes to painting kitchen furniture, electrically conductive paint Zinga or fire-retardant paints for metal Polistil can be used, which can protect metal surfaces from rust and corrosion.
How to care for wooden furniture so that it lasts longer?
It is quite possible to extend the service life and maintain the aesthetic appearance of furniture. This can be achieved by following simple rules:
- Clean only with products intended for each specific type of surface. Leather requires special care, and the varnished surfaces of cabinets, for example, require special equipment.
- Compliance with temperature and humidity levels. A minimum of 40% humidity is a necessity, without which furniture made of almost any material other than metal will quickly fail - cracks will appear on its surface, the leather will shrink and dry out in just a few years.
- It is advisable to eliminate minor imperfections without waiting for the surface of the furniture to lose its attractiveness.
Stages of complete restoration
If you decide to completely renovate a piece of furniture, then there is a lot of work to do. It takes place in several stages:
- Disassembly. Fittings and upholstery are removed if they require replacement. Keep in mind that antique items have good fastening materials, which can be damaged. If you are remodeling a chair, but the upholstery is intact, then there is a reason to keep it.
- Removing paintwork. The varnish is removed with a grinding machine or sandpaper. Cracked coating can be easily removed with solvents. You can also remove the paint with sandpaper or preheat it with a hair dryer, and then clean off the softened material with a spatula.
- Removing damage. We wrote above about ways to eliminate scratches, stains and cracks; use them to restore the integrity of the surface.
- Preparation for surface painting. Before applying paint, prepare the area. Remove dirt, dust, debris. Then degrease the surfaces to be treated. For better adhesion, apply a primer.
- Applying paint. The paint is applied with a brush or spray gun. To obtain a bright shade, apply 2-3 layers of paint.
- Applying varnish. To get a shiny surface, apply varnish to the dry paint.
- Upholstery. The fabric is attached to the frame with a construction stapler or small nails.
- Assembly. The final stage is the assembly of the structure and installation of fittings.
Restoring furniture completely with your own hands is interesting, but quite troublesome. If you are not ready to spend several days remodeling home furnishings, turn to the professionals.
The Klebor workshop repairs modern, vintage and antique interior items, restoring their functionality and aesthetic appeal. We restore by hand and using professional equipment. Before ordering, please read the price list and examples of work.
Quick restoration of furniture at home with your own hands
Owners of antique furniture evoke sincere envy among lovers of rarities.
Unfortunately, not all lucky people are able to realize the value of old furniture, cabinets, sofas, chests of drawers, dressing tables and other items that seem to have outlived their usefulness.
The advantage is that in the old days there were no such technologies and materials that today make it possible to quickly and cheaply build any element or an entire set.
The furniture was made from valuable wood, covered with varnishes and drying oils from natural ingredients, and forged elements were used for fittings. Modern materials - plastic, MDF, fiberboard and chipboard - do not require special skill.
They are easy and accessible to process, and restoring furniture at home with your own hands should not be a problem.
However, products made from them do not have the same energy, do not give a feeling of warmth and comfort, like those made many years ago by a master by hand, using basic tools or machines.
That is why you should not rush to part with antique furniture, even if it is not the ultimate dream of collectors.
What documents are needed to organize a furniture restoration business?
To legally operate a workshop that provides furniture restoration services, it is enough to issue individual entrepreneur documents. To do this, you need to make photocopies of your TIN and passport, write an application in the prescribed form, pay the state fee and give these documents to the tax inspector. Also, you need to select the OKVED code that corresponds to your line of commercial activity and decide on the optimal tax regime.
In this case, furniture restoration is included in the group - OKVED 95.24. No additional permits or licenses are required to legally operate a workshop. The only thing you need to remember is to obtain papers from the fire inspectorate and Rospotrebnadzor, which confirm that the workshop premises comply with sanitary standards and fire safety requirements.
Registering a legal entity to operate a furniture restoration workshop is an absolutely irrational decision. You will only waste money and create additional problems for yourself.
Preparatory stage
Before you begin restoring furniture at home, it is important to correctly assess the scale of the work ahead.
First you need to determine which defects you will have to deal with. There are several types of furniture damage that you can restore yourself:
- Scratches and abrasions;
- Deep mechanical damage - chips, cracks;
- spots;
- Damage caused by insects;
- Missing or worn-out fittings;
- Broken parts.
Once the extent of the damage has been determined, the restoration process can begin. First, you should clean the surface of dirt, if necessary, rinse it with warm water and detergents, and dry it.
Painting
Before you start painting veneer products with your own hands, you need to prepare the following list of available tools and materials:
- coarse and fine-grained sandpaper;
- primer;
- spray, roller or brush;
- stain (if necessary);
- paint and varnish material (paint, enamel, varnish);
- solvent;
- a brush or scraper to remove old paintwork.
Next, they begin to directly prepare the veneer structure itself. At this stage, the existing fittings, decor and removable parts (handles, fasteners, hinges) are dismantled. If these elements cannot be dismantled for some reason, they should be wrapped in several layers of plastic cling film.
Then the surface of the structure must be thoroughly cleaned of dirt and degreased. For degreasing, universal solvents are most often used. After applying the degreaser, wait until the treated surface is completely dry.
Repainting a veneer product in a different color requires careful removal of the old coating. At this stage it is recommended to use fine-grained sandpaper.
If the coating is applied in several layers, it is better to use coarse sandpaper.
It is advisable to remove the old coating with a metal scraper or a rough brush in extreme cases. Such manipulations must be carried out with the utmost care so as not to damage the fragile veneer surface. Minor damage and chips discovered during work should be treated with a primer and smoothed using wood putty. After the putty has dried, sand the damaged area with sandpaper.
In order to change the color of the veneer (if necessary), it is recommended to use stain. Before use, it is thoroughly mixed and applied to the surface of the veneer in two layers. Do not use stain before treating veneer with enamel or water-based paints.
To apply paint to a veneered surface, it is recommended to use a spray gun (paint sprayer). The layers of paint applied with this tool are thin and even. In addition, using a spray gun allows you to avoid the appearance of drips and the formation of air bubbles. After applying the first coat of paint, you should wait for it to dry completely. Applying a second coat of paint to a surface that is not dry may cause air bubbles and drips.
Removing chips and cracks
Getting rid of chips and cracks in wood is much more difficult than getting rid of surface scratches.
Therefore, if you are not sure that you will be able to carry out repairs at home, it is better to contact a specialist.
If you decide to do it yourself, you need to stock up on the necessary minimum tools:
- White spirit (nail polish remover);
- Stain of the desired shade;
- Wood primer;
- Fine sandpaper (100, 180, 300, 800, 1200 and 3000);
- Wood putty;
- Masking tape;
- Roller or brush.
If the restoration does not require complete disassembly into parts, then the remaining surfaces should be protected with masking tape.
Clean the damaged area from the varnish coating using white spirit, treat the wood with a primer, then putty.
After drying, level the putty with the surface using sandpaper. Remove dust with a damp cloth and apply stain to obtain the desired shade.
It is important to apply the stain exclusively to the putty area, without getting it on the wood. Otherwise, the wood will change color, and then major repairs will be impossible.
Tip: You need to make the color a shade lighter, as the stain will darken when varnished.
After complete drying, you can varnish. The varnish should be applied with a brush or roller, depending on the area of the area.
Each new layer can be applied only after the previous one has completely dried and preliminary sanding with sandpaper with a fraction of 600 or 800 units.
The last layer is smoothed over the old polish using the finest grit sandpaper.
First at 1200, and then at 2500 or 3000. When finished, wipe with polish or furniture wax until a glossy surface is obtained.
Applying varnish
If all the preliminary work was done correctly, then there will be nothing difficult in applying the varnish. The main thing is to wait until the paint layer is completely dry.
- The varnish should be applied in two or three layers;
- The layers should be thin;
- Apply the next layer of varnish only after the previous one has completely dried;
- It is better to apply the varnish with a sprayer, roller or special brush.
Removing stains
Often on a polished surface there are stains from spilled coffee, iodine, oil, wine or other unknown coloring liquid. You can deal with them by wiping the stains with gasoline.
If necessary, repeat the procedure several times until it disappears completely. Finally, wipe with a mixture of denatured alcohol and linseed oil, this will restore the polish.
Stains from hot mugs, irons, and kettles are removed using ammonia or regular vodka.
Removing scuffs and scratches
There are many ways to remove scratches on furniture, both professional and popular.
Furniture stores that sell fittings and parts sell a special touch.
It is accessible and easy to use: just shake it well, then apply it with a brush to the damaged area. If necessary, make several layers.
Leave to dry for 15 minutes, then wipe with a flannel or viscose cloth, leveling the surface.
Another remedy is furniture wax. It comes in two types, soft and hard. The soft ones are enough to rub the desired area, the hard ones are first melted, applied, allowed to harden and sanded.
Craftsmen offer equally simple ways to disguise small scratches and abrasions.
Using walnuts, iodine, machine oil, mayonnaise, olive oil and vinegar, children's wax pencils.
The method of application for all options is approximately the same: carefully treat the damaged area, leave to dry and absorb for a few minutes, wipe with a soft cloth.
You can also make your own mastic. For this you will need:
- Turpentine (30g);
- Petrol;
- Alcohol (20g);
- Wax (40g);
- Wool fabric.
Melt the wax in a metal bowl, add turpentine, stir and add alcohol. Dip a cloth soaked in gasoline into the mixture and gently rub the mastic until shiny.
These were methods of removing and masking surface damage on polished wood surfaces.
Now let's look at the possibilities of restoring more serious damage.
Restoration of fittings
If the old fittings are suitable for further use, they can be restored. First you need to remove it from the furniture and completely disassemble it into parts.
Then it needs to be cleaned of dirt, rust and paint.
To facilitate the cleaning process, you can soak the parts in vinegar, citric acid solution or special chemical solutions. If necessary, you can sand it with fine sandpaper and polish it with Goya paste.
After all the manipulations, you need to assemble and attach the parts in place.
It is better to lubricate the canopies - this will protect them from new rust in the future.
Missing or unrepairable fittings can be replaced with new ones. Furniture fittings of any design can be easily found in specialized stores or ordered on special websites.
Partial restoration of the chair
It often happens that it is not necessary to completely restore a chair.
For example, if it has well-preserved fabric or leather upholstery, but the legs are very loose, then a major renovation of such an item is not required - just take care of the legs. Let's look at the most common cases of breakdown of chair components, the restoration of which will give a second life to the entire product.
Leg attachment diagram.
The first case: the legs are very wobbly. The simplest restoration option is to put the legs in their original places with glue. The main disadvantage of this option is the fragility of the glued legs. To eliminate it, it is recommended, in addition to gluing the legs to a horizontal bar, to additionally connect the parts to be fastened, for example, with dowels.
To do this, the entire unit being repaired must be slowly disassembled. It is advisable to replace the spike. In this case, the joints are covered with fresh wood glue, and the tenon is inserted into the seat. For a tight connection, the joint is tightened with a clamp.
Related article: How to replace glass in an interior door
After this, 2-3 holes are drilled in the leg, into which dowels are driven. These auxiliary parts, which are also coated with glue, should be made of hardwood and be slightly larger in diameter than the diameter of the through holes. Holes are drilled on the seat body corresponding to the location of the dowels on the legs. The legs are connected to the rest of the chair, the parts being fastened are tightly pulled together and left in this position until the glue dries.
Stages of attaching upholstery fabric to the chair frame.
Second case: the seat belts are stretched too much. Because of this, an impressive “pit” is formed in the seat. Another defect will have the same effect - the loss of nails that hold the belts in the seat body. If it's all about fastening the belts, it needs to be restored by driving in new nails. If the reason is stretched old belts, then replacing them with new ones is impossible.
When installing new belts, they must be tensioned. This can be done using a wooden block. In this case, one end of the belt is attached to the seat frame, while the other end is tightly tensioned with a block, clamping the belt between the block and the frame of the chair. Keeping the belt taut, nail it to the base.
This must be done so that after this there is a free section of the belt 30-40 mm long. It is bent and nailed for greater reliability. Gaps of up to 100 mm are left between the tensioned seat belts.
How to glue a broken part or peeling veneer
Some broken parts do not need to be replaced; they can be glued together at home.
To do this you need wood glue or PVA. The area to be glued must be cleaned, sanded with coarse sandpaper, treated with an adhesive compound, left for 5 minutes, and then joined by squeezing strongly.
Clamps are useful for this.
It should take at least a day for it to dry completely. After the parts have been glued, the remaining glue should be removed.
It's time to move on to cosmetic restoration - tinting with stain and varnishing.
The peeled veneer is also glued with PVA. If it is not possible to leave it under pressure, an iron will help. You need to apply glue to the joints and let it dry a little, then, pressing firmly, smooth the veneer with a heated iron.
Tip: To protect the veneer from overheating, place a sheet of paper between it and the iron.
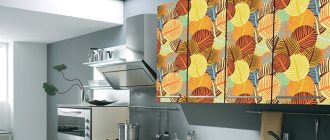
With the help of veneer, you can radically change the appearance of furniture.
An old and fairly worn tabletop will be transformed and become a work of art if it is decorated with veneer mosaics.
How to varnish or paint a veneer door?
If you need to completely renew veneer interior doors, you can coat the door leaf and frame with varnish or paint. In the first case, both shellac varnish and cellulose polish will be useful. There are few differences between them. Painting is more suitable for doors covered with natural veneer.
It is carried out according to this scheme:
- Remove the canvas from the awnings. Before updating a veneered door, you need to prepare paint, brushes for the frame and the end of the door, as well as a roller for painting the main area. It is better not to use brushes on large surfaces, otherwise streaks will be visible.
- If there are deep scratches on the canvas, they need to be cleaned and puttied. If the canvas is repainted in a completely different color, you need to cover it with a layer of primer. If primer coating is not intended, then the surface must be sanded and degreased.
- After the primer has dried, you can begin painting. Only nitro paints are not suitable for veneer; this composition results in a spotty coating. Water-dispersed, hyphthalic or polyurethane can be safely used.
- Painting can be done in one or two layers, but the paint must be completely dry. Depending on its composition, this may take from several hours to 2 days. If you paint in two layers, then one of them is done in a horizontal direction, and the other in a vertical direction. This approach will ensure an even coating without gaps or sagging.
Only after this can the veneered door be hung and used. The finish can be matte or glossy. Painting is an opportunity to completely renew a very old, shabby product and transform the interior beyond recognition. The cost of restoring veneered interior doors using paint is the most affordable option.
Veneer restoration
In everyday life, no one is safe from accidental damage to veneer sheets from sharp and heavy objects. Traces of deep cracks, scratches and chips can only be corrected if experienced craftsmen get to work. Veneer restoration is our specialty, as you can clearly see from the presented photos.
All about painting veneer
Over the years, furniture, doors and other structures made of veneer begin to lose their attractiveness. The least labor-intensive and easiest way to restore the presentable appearance of veneered products involves painting them in a different color. Is it possible to paint veneer products? What paint can be used to perform this procedure? How is veneered surfaces painted?
What is veneer? What are the advantages of using it in finishing?
Veneer is a thin sheet covering obtained by removing longitudinal chips from solid wood. Veneer strips are glued to solid wood and fiberboard products to imitate the natural pattern of natural valuable wood. In addition to its decorative function, veneer is a durable and natural protective coating. With the advent of various technologies for producing veneer, they learned to give it different textures and colors, which expanded the range of decorative designs using it.
Veneer and veneered plywood have become a common finishing material in the production of furniture and wooden accessories. The material is relatively easily attached to flat surfaces using wood glue on an organic or synthetic basis. However, due to the nature of the gluing, the coating is very sensitive to high humidity and high temperature. The veneer is glued in strips and the seams between individual sections may come apart if they were not sufficiently lubricated with glue or squeezed out during drying. The reason for veneer restoration is most often a swollen and peeling decorative coating.
Restoration and repair of furniture veneer
Today, the most common types of furniture used in furniture production are chipboard and MDF; not a single furniture production can do without them. These materials are very durable, unlike natural wood, they do not dry out or deform over time.
All furniture made from chipboard and MDF is covered with veneer ; this is the most reliable and proven facing material. Veneer is a very thin layer of wood (its cut), which is obtained by sawing trees.
Veneer is usually made from rich species such as oak and beech. alder, walnut, etc. Veneered furniture looks as if it was made from natural expensive wood.
The top veneer is usually coated with primer and varnish to provide the necessary protection from damage and also to give the furniture a sophisticated look. The main difference veneer and other facing coatings for furniture is that it is environmentally friendly.
With frequent and careless use of furniture, the veneer is destroyed and peeled, which causes annoyance, but this is easily removable. Our team has developed special rules and advice for you for the proper restoration and repair of furniture veneer .
- Veneer or wood that matches the texture and species of the original material;
- Varnish;
- Steel wool;
- Sandpaper;
- Beeswax;
- Bone or flesh glue;
Tools:
- Scalpel;
- Veneer saw;
- cycle;
- Chisel;
- Soldering iron, iron;
- Plane;
- Screwdriver;
- Varnish brush.
Veneer defects:
As a rule, veneer swelling is caused by incorrect placement of its sheets; then, after gluing, small wave-like swellings are formed, which means that the material used in production was too dry. It is necessary to detect all swelling in time and eliminate them, otherwise it will lead to cracks.
We can correct the swelling with a hot iron. You can use a syringe to inject glue under the bubble, after which you should carefully rub the area with your thumb and then secure it with a clamp. Nowadays, to eliminate swelling of veneer in modern furniture, heating with an iron and a little pressure will be enough.
You can also use a cotton cloth. You need to thoroughly clean the area under the swollen veneer of old glue and inject fresh glue with a syringe. Moisten the veneer and, if necessary, cut crosswise.
If we did not detect the swelling of the veneer in time and it cracked, then it is necessary to apply a patch. To do this, we find a new piece of veneer, similar in texture to ours, and cut out a small area in the area where the crack has formed.
To cut out cracked veneer, as well as to make a new one, you need to hold the knife or scalpel at a slight angle; if you work like this, the “patch” will always have the desired shape.
Make cuts across the grain, sometimes in a zigzag pattern, to avoid splitting the wood. Now the “patch” fits exactly into place. It needs to be fixed with an adhesive paper strip.
Using the wedge-shaped head of a carpenter's hammer, carefully smooth the joints. The transition from the main veneer to the “patch” should be almost imperceptible.
Veneer surface treatment:
The veneer surface can be treated with wax, polish or varnish. Processing with varnish is the simplest. But antique furniture does not like varnish. To coat with varnish or wax, the veneer surface must be sanded and pre-primed.
Polishing should be carried out with continuous smooth sliding movements. Each pass on the surface must be working, that is, leaving the thinnest layer of polish.
After drying, the surface must be sanded well with a horsehair brush to give it a noble “velvet” shine.
How to cover holes:
Often small scratches on veneer can be repaired using furniture polish. Small burnt holes are carefully cleaned out with a scraper and filled with putty or beeswax. After the wax heats up, take small pieces and press them with a knife into the problem area, then wipe the area with a cloth soaked in turpentine. But how to treat deep damage to veneer?
Deep damage, affecting not only the polish layer, but also the veneer, is repaired with shellac putty of a suitable tone.
The filling material is heated until it falls off in thick drops. The wax is then scooped up with a knife and added to the filling material.
What defects can be corrected by restoring veneer furniture?
In everyday life, no one is immune from accidental damage to the canvas by sharp and heavy objects. Traces of deep cracks, scratches and chips can only be corrected by veneer restoration under the guidance of an experienced craftsman.
1) Elimination of chips, burns, cracks and dents
The fact that the veneer is laid on the facing surface in separate strips and segments significantly simplifies the correction of local defects. Restoring chipped veneer is practically easy. It does not matter whether the fragment was cut off at the edge of the canvas or in the center.
Restoring this type of veneer involves gluing in a patch. A control cut is cut around a point defect or chip covering the entire web. A patch of a similar shape is cut out from it, which matches the general background in pattern and color.
1) Elimination of blisters during restoration of veneer furniture
Blistering in the form of irregularities on the surface of furniture in the form of waves and bubbles is a common defect that accompanies the manufacture of veneered products. The veneer may be laid with insufficient glue, which causes it to come off in poorly sealed areas. Veneer restoration to eliminate swelling is carried out locally. Therefore, you should not rush to get rid of a veneered product or reject it because of a few air bubbles.
1) Formation of cracks in the seams
Adjacent seams along which veneer strips are joined are one of the most vulnerable places. If, when cutting and sewing the strips, they are not aligned exactly, then troubles will not be long in coming. The fabric may completely come apart at the seams, causing the product to completely lose its presentability.
When restoring veneer doors and countertops, we encountered this problem more than once. Defects of this kind require replacement of the veneer of the product in the workshop.
Restoration of a swollen surface
Often veneered doors have such a common defect as swelling. It is formed due to the fact that the sheets were placed incorrectly and poorly glued. Repairing the door in this case is simple. The main thing is to be patient.
Restoration of veneered doors should begin with the use of adhesives. In the place where the bubble has formed, we inject glue using a regular syringe. For good adhesion, you should press the veneer tightly with your finger and try to rub the glue over the entire area of the given space. This method allows you to restore the surface of the door literally in minutes.
The veneer was swollen on the doors. What else is effective? If this method is too complicated, it will be much easier to heat the iron and gently rub the area
Press on the surface carefully. You can pre-moisten the surface with a damp cloth to make the material more elastic.
Restoration of veneer furniture in the workshop
The necessary equipment and materials for processing veneered products are at the disposal of the “Private Master” restorers. The principle of veneer restoration in a workshop is reduced to minimal intervention in cases of local damage to the protective layer. Areas where the veneer has been torn off are sealed with separate inserts, with a pattern and color that replicate the damaged fragment.
In cases where the veneer sheet has peeled off but is partially held in place, the problem area is glued back up. A small amount of wood glue is applied into the gap between the veneer and the canvas with a brush. A better result is achieved when using gelatin-based wood glue. When restoring veneer, old glue is not removed - fresh glue will melt it and the gluing will be more reliable. A lining made of a smooth block is placed on top of the restored area and clamped with a portable vice or clamp. Veneer restoration will be successful only if the patch is placed on a dry and grease-free surface.
After the part is removed from the press, it is prepared for varnishing and polishing. This stage of veneer restoration provides the part with additional protection from moisture. The varnish acts as a natural tinting composition; it will give the part a uniform color and shade.
How to restore veneer
Veneered furniture requires a special approach. The means are basically the same, the methods are different. For example, if after getting hit the veneer is swollen, fill a disposable syringe with PVA glue, pierce the bubble, and inject glue into the cavity. Place a piece of thick fabric on top and place a weight. If the surface is uneven (convex or concave), use a thick fabric bag with heated sand as a load.
Such veneer damage is restored in two stages. First, the swelling is eliminated, then the scratch is painted over and the coating is restored.
If the veneer is glued with alcohol glue, you can return the swollen part to its place by ironing it through a rag with a hot iron. But do not overheat the iron: the veneer may stretch. Heating level is medium.
If ironing with a dry cloth does not help, try repeating the operation with a damp cloth (wet it and wring it out well). There is a chance that the wood will swell and become more elastic. To reliably fix the swelling, you can introduce PVA there and then heat it with an iron.
If the swelling is cracked, you can also try to seal it with heating (through a rag). If it doesn’t work, tear off the peeled piece. You don’t cut it, but rather break it off: on veneer, breaks after restoration are less noticeable than cuts. Therefore, you break off the lagging piece. Remove the old glue from the damaged area and the piece of veneer (with sandpaper or a nail file, depending on the size). Next, the repair of veneer on furniture is standard: spread it with PVA glue, lay it down, aligning the fault lines, lay a thick fabric on top and place a weight until it dries.
Such veneer peeling can most likely be eliminated simply by ironing it with an iron.
Scratches and traces of restoration on veneer are removed in the same way as on wood: they are painted over with a furniture marker of a suitable shade. If the scratch is deep, a little melted furniture restoration wax is applied to it (with a spatula). After drying, the wax is ground, and if necessary, fine-grain sandpaper is used, but after this treatment, the restored piece is covered with a layer of varnish.
Do-it-yourself furniture restoration requires patience and accuracy. You have to act gradually and methodically: smear it, wait for it to dry, level it, smear it again, etc. Sometimes you have to try several methods: damage varies, as do the materials used in production (glue, varnish, etc.). But as a result, the furniture will look much better.
Decoration
To decorate furniture, you need to decide on the theme in advance. This solution has many advantages: saving money, creating an individual style, and choosing your own design.
To have an idea of the possibilities of decoration, let’s understand the techniques and consider design ideas:
- A stencil is an excellent option for a children's room - decorating furniture with stencils of butterflies and animals. The idea is very simple to implement and does not require any skill. All you need is to purchase or make a stencil yourself. To achieve a beautiful effect, it is better to use contrasting colors;
- Decoupage - a technique that involves gluing the top layer of a napkin onto a prepared surface. If the chosen plot is made in light colors, it is necessary to paint the furniture white in advance;
- Craquelure - you can reconstruct furniture by giving it an aged effect. For this, craquelure varnish is used, which is applied in 2 approaches after painting the products;
- Mosaic is considered a complex decoration option, but the result will delight everyone. Glass tiles are used for mosaics;
- Appliques or stickers are an affordable and simple decoration method. Such products can be used to seal defects that cannot be restored;
- Painting – after applying the first layer of paint, the furniture is painted to taste. These can be ornaments, landscapes, silhouettes - it all depends on your imagination.
Old furniture restored with your own hands gets a new life. Such a product will serve in the house for a long time, delighting family members with its beautiful appearance.
Stickers
Craquelure
Stencil
Decoupage
Mosaic
Pasting with film
Another simple option for restoring outdated items is to cover the surface with film. This material today is available in various colors, textures, it can be matte or glossy. It is better to choose an option that matches the rest of the color of the furniture in the room.
Let's consider an algorithm on how to properly restore old furniture with your own hands using film:
- All fittings on the product are unscrewed to create empty surfaces for work;
- The entire coating must be clean: first it is better to wash it with vinegar and a cloth, and then treat it with non-abrasive detergents;
- If necessary, the surface of the furniture is cleaned with sandpaper;
- The film should be cut with a margin: take 1 cm more material along each edge;
- Before applying the film, the furniture panel is sprayed with water - this must be done to increase sliding;
- After the protective paper has been removed from the adhesive layer, the film is applied to the furniture. Reconstruction using this method involves the use of a cloth: with its help it is necessary to smooth the film from the center to the edges to remove air bubbles;
- If a bubble suddenly appears, carefully pierce it with a needle to release the air.
After the film has been applied to the furniture, take an iron and iron the shield through the fabric for better adhesion. The final stage is finishing the product and installing new fittings. A photo of furniture restored using film is presented below.
Clean the coating and repair cracks
We prime the coating
Apply the film and remove the air with a roller