The manufacture or restoration of household utensils, furniture and other items made of wood will require the use of various types of basic and auxiliary tools. But not all of them may be at hand, what should you do in this case, run to the store? Not at all necessary. Many craftsmen have long been making the tools they need for their work, with their own hands, from scrap materials, thus saving money.
Ready-made dowels
Making dowels at home
Dowels are used for various methods of joining wooden parts; they can be purchased in a store, or made independently at home. On store shelves there may not be the item you need, the right size or made of a certain wood. So, how to make dowels at home? To be able to produce dowels of various sizes with your own hands, it is worth making a cutter:
- you need to take a piece of steel, the size and thickness can be different, it all depends on the number of holes that will be cut in it;
- then marks are made on the plate about the size of the hole;
- after that they are drilled through.
The carver is all ready, in order to create a dowel from wood you will need:
- take a rectangular block of wood, slightly larger than the hole, to the size of which it will be adjusted;
- after this, the workpieces need to be driven through the selected hole; this can be done by punching it with a mallet.
The advantage of making it yourself is not only savings, but also the ability to produce a part of the size required.
Attention: after the object is passed through the cutter, you should use sandpaper, this will give a smoother shape and remove all splinters.
What types of furniture dowels are there and the rules for choosing them
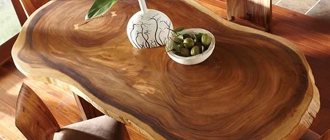
A universal furniture dowel is a special fastening device made of wood, which is used in the manufacture and assembly of furniture. It has a cylindrical elongated shape and has corrugations on the surface. In some cases, a dowel not only replaces metal fasteners, but also works better than them. At the same time, the price of the dowel is more affordable.
Application area
Before describing how to use this fastener, you should understand what a dowel is. The dowel in the design allows you to stabilize and position the parts. It does not prevent disassembly of products if necessary.
The dowel will allow you to accurately connect the elements. During operation of the finished product, such fastening takes on the entire lateral load. This is a universal reliable fastener.
Wooden dowels are actively used for the manufacture and assembly of furniture; their length and diameter are selected in accordance with the thickness of the parts. The diameter should be approximately a third of the wall thickness of the product - this way you can ensure the most reliable assembly while maintaining a high degree of strength. The length is selected individually.
Varieties
In fact, a dowel is a small spike - it is a hidden type of furniture fastener. In appearance, it resembles a cylinder-shaped rod, with slightly rounded or simply truncated ends on both sides. Sometimes, to assemble furniture on dowels, not only wooden elements are used, but also plastic ones. They have slightly different purposes:
- Wooden ones are needed for positioning and connecting furniture parts made of MDF, chipboard, plywood, and solid wood;
- Plastic ones mainly connect parts when installing prefabricated panel furniture.
Wooden
Plastic
There are also metal products. They have improved strength characteristics; they are also called dowels or dowels. But the most commonly used are wooden dowels measuring 30 by 8, that is, the length is 30 mm and the diameter is 8 mm. There is also a smaller diameter - 6 mm. You can purchase different types in construction stores or markets. If you wish, you can make dowels yourself.
There are different grooves on wooden dowels:
- Straight vertical;
- Helical – located at a slight angle to the vertical axis;
- Complex ones - there are transverse and longitudinal recesses - they also allow you to make the adhesive joint stronger;
- Horizontal – help to make the adhesive joint as strong as possible;
- Smooth - do not have corrugation.
Corrugation helps air pass during the installation of dowels, improving the adhesion of the glue with the “glue” method of connecting parts.
Vertical straight lines
Complex
Smooth
Characteristics and dimensions
Dowels may vary in length and diameter. Diameter sizes range from 4 to 30 mm, and lengths from 15 to 200 mm. At the buyer's request, they are manufactured in any variations, where D is the diameter and L is the length of the product.
The dowel is a popular fastener, and therefore professionals try to purchase parts in bulk in advance, so as not to waste time and money on constant purchases. The advantages of fasteners include:
- Corrugation of the surface on the rod - this helps to securely fix the parts, ensuring their strong adhesion;
- Improved appearance of furniture, because the fastenings are completely hidden from view;
- Possibility of selecting the diameter and length required for assembly of the product, in accordance with the design features.
Determining the size of the dowel
Dimensions
Installation and removal methods
Furniture dowels make it possible to significantly increase the strength of connections. But this is not as simple a method as it might seem at first: the connection cannot be secured if any hole is displaced. Depending on the size of the offset, the result will be unsatisfactory.
As a rule, tabletops on dining tables and desks are secured with a dowel. Put them in working position like this:
- The parts are first marked on the end side, and then holes are drilled to the required depth. The same holes are made in the countertops. They must match;
- A cylindrical fastener is installed in the end hole, the upper end protrudes at a distance equal to the depth of the hole in the covering part;
- To strengthen the dowel in the hole, it is generously lubricated with glue, fixing it in the desired position. Sometimes glue is poured into the holes, where the fastener is then inserted - this will completely cover its ribbed surface with glue, improving the adhesion strength of the elements;
- The second part of the design is superimposed on the installed dowel.
Drilling the material
Hammering the dowel
Connect with glue
The work is ready
There are 3 main problems in assembling furniture using dowels:
- It is possible to assemble an edge-to-edge connection, but in this case, the planes of the structural parts do not coincide. Solution: The drill guide holes were not aligned with the center edges of the parts. The device must be constantly aligned with the reference planes of the two parts being fastened. Even in the absence of a central location of holes in the connection, no shifts or sagging are formed;
- Holes in one part do not line up with another. Solution: to align the holes, use special markers designed specifically for connections. Initially, holes are made in one part with a drill. A marker is then inserted into each hole and the two pieces are pressed together as they should be when assembled. This way, the second part will have marks with markers in the places where you should drill;
- The holes are made in the right places, but the installation of the dowels is disrupted: the fasteners do not fit through or, on the contrary, fall out. Solution: It is important to make sure that the diameter of the fasteners matches the diameter of the holes. Factory fasteners are mass produced and may have a diameter slightly larger or smaller than stated. In addition, wood can swell or shrink with changes in humidity. When the diameter is verified and it is identical, then the problem is the wear of the drilling jig and, as a consequence, the deviation of the drill. This leads to deformation. It is enough to change the bushings or purchase a new device.
Making a tap for wood carving with your own hands
To cut carvings in wood, you may need a wood tap; this tool will most likely not be cheap, and it can be quite difficult to find. But don’t be upset, because such a part is quite easy to make yourself. To do this you will need:
- angle grinding machine;
- sharpening machine;
- drill;
- Next, you need to select a bolt or screw that will have the required thread.
When using a bolt, first cut off the hex head, then use a sharpening machine to make a small part for entry, this is done by rotating it by hand or by securing the end in a drill. Next, you will need to grind out 3-4 grooves and clean the threads from any debris that got into it during grinding; this can be done with a nut.
Secure the tap in the chuck and, while the drill is running, make sure that it rotates smoothly along the axis. I did not notice any unevenness left on the chuck from the threads. But if you want to avoid possible damage, grind off the threads at the clamping point.
wood carving tap
Planter Foundation Protective Membrane
In addition, PLANTER
prevent capillary rise of moisture, performing the function of capillary waterproofing under the foundation slab. The technology of using membranes as a replacement for concrete has been approved by specialists from the Research Institute of Concrete and Reinforced Concrete (NIIZhB) and tested at many construction sites in Russia and neighboring countries.
The article will be useful to a person both planning this work for the first time and having the “bitter” experience of labor intensity.
I was faced with a problem - to drill through a thick wall consisting of several layers, namely: a concrete block 200 mm thick, a sleeper 240 mm, plastered with 80 millimeters on each side, plus an “air cushion” of 100 millimeters is provided between the block and the sleeper , not less. I could be wrong with the dimensions somewhere, but having measured the thickness in the doorway, the wall was 730 millimeters.
It’s nothing scary, it’s just work and work, installing a water supply system into the room attached to the house and that’s all, but the difficulty lies in drilling different materials, plus drilling is only possible on one side, from the extension. In fact: plaster, block, sleeper, plaster. In addition to the hammer drill, you will also need a drill with a wood drill bit.
Orders of this kind occur quite rarely, once every five years, so to speak, and accordingly, a rarely used tool will be needed.
DIY Vintelma
A die holder is necessary for working with dies; this tool is quite expensive, but you can make it yourself. For the manufacture of the main part, steel is used, but for the manufacture of dies, high-speed steel R6M5 is required, it contains up to 5% molybdenum. This chemical element increases the wear resistance of parts. Since during operation they are subjected to heavy loads and heat up to 600 degrees Celsius.
To make a universal die holder yourself, you need to prepare the following parts:
- steering rod and end;
- bushing, you can also use a nut;
- bicycle chain;
- M12 nuts, two pieces;
- piston pin.
When all the parts are ready, you need to remove the part of the rod that is screwed into the steering rack. Afterwards, a piston pin is put on the rod, then a metal sleeve (nut) of suitable diameter is put on top, which is fixed by welding. The remaining end from the steering tip should be cut off; this can be done with a grinder. After this, two nuts (M12) are welded onto the steering end, the end is screwed on, then a part of the chain (bicycle) is inserted through the nuts and welded to the piston pin. And the instrument is ready.
Vintelma at work
Possible problems when connecting timber with nails
Why are many people prejudiced against nail connections when building bathhouses made of timber? There are several reasons for this.
Firstly, the metal dowel is susceptible to corrosion. Accordingly, theoretically such a connection cannot last for a long time.
Secondly, during the shrinkage process, the timber decreases in size, and therefore can “hang” on the nails, forming considerable gaps in the walls. This statement also has a right to exist.
Thirdly, metal dowels can split the timber itself, which is also not a desirable result. Unfortunately, such an outcome is quite possible.
However, the problems listed are just probable troubles that can only be encountered if the technology for fixing the timber with nails is violated.
DIY engraving machine (matte)
This equipment is used not only by professionals, but also by home craftsmen. Despite the fact that you can easily buy it in a store, some people prefer to make it themselves. It is quite simple to make such a device, but despite its simplicity, it also successfully performs its functions as those manufactured at the factory. So, an engraver is needed:
- for milling surfaces (flat and shaped), as well as grooves and holes of various configurations;
- drilling and boring holes;
- for cutting sheets;
- cleaning from corrosion and other contaminants;
- grinding and polishing of parts;
- and of course for applying images and inscriptions on surfaces.
The reliability of a homemade engraver will depend on what materials were used. In order to make the device, you will need:
- flexible shaft or drive;
- a nozzle for it in order to fix the instrument (you can use it from a drill or make it yourself);
- a tube with a freely rotating cartridge consisting of two halves fastened with a screw is inserted into the hole of the nozzle;
- a tool is inserted into the chuck, the shank of which should have a diameter of 2 to 5 mm, and if the parts are not homemade, then one is selected that is suitable in diameter.
Attention: as an electric motor, use any motor operating from a 220 volt network, but the most suitable is considered to be one from a sewing machine, since it has a built-in rheostat that allows you to change the speed mode of the machine.
Customer errors
A minor mistake made by builders during the construction of a wooden house can dramatically worsen the thermal characteristics of the house or shorten its life. But customers can also make mistakes. Conscientious builders always dissuade private owners from purchasing log buildings that have stood on the production site for a year or more. As a rule, their lower crowns have already begun to rot or are affected by fungus. To give it a marketable appearance, the log house can be bleached, but this will also have a bad effect on the durability of the wood.
Alexey Galimov
A similar situation can happen if the timber was brought to a construction site, but they did not start cutting it right away, but dumped it on the ground. After some time, the logs begin to turn blue - this starts the process of rotting. The bluing is removed using chlorine-based chemicals, but as a result, such a log may not adhere to the oil that is used to finish a log house. If a large house is being built, then the timber must be brought in as needed, so that it does not lie, but gets onto the walls as quickly as possible.
Another problem with old log houses is that there is a possibility that the cutters who made the box are already working in another place, and the assembly of the log house will be carried out by other people. The hired team will easily shift the blame for poor quality assembly onto unknown cutters. They say they made an open marriage, and it is impossible to collect it qualitatively. The assembly of the log house should be trusted only to those who manufactured it. Otherwise, there will be no one to ask for quality.
By the way, not only chopped logs, but also other materials deteriorate due to improper storage.
Alexander Bunkov
The issue of protecting wood from moisture is especially relevant for the lower crowns of a bathhouse. We recently had a case - we were repairing a bathhouse whose lower logs had rotted. It turned out that the builders had insulated the floors in the steam room and washing department with polystyrene foam. The space under the floor was blocked. The water that got under the floor from the washing room did not dry up. Within six months the lower crowns rotted. We raised the frame on jacks, replaced the crowns and redid the floors. The repairs cost a third of the price of the bathhouse... The floors in the washing compartment and in the steam room must be done without insulation.
Director Alexey Markin talks about another mistake often made by customers.
Alexey Markin
For example, a person decides to build a house from a gun carriage, rounded logs or profiled timber. Log houses from these materials are usually made using special equipment. The customer comes to the enterprise with a project that was prepared for him by a third-party architect, and it turns out that they cannot make the components here as in the project. The equipment is designed for other sizes. As a result, you have to either abandon the selected material or completely redesign the house to suit the technologies available at the enterprise. It happens that reworking a project costs as much as the project itself.
Another piece of advice that protects you from mistakes can be considered naive, but in some cases it will come in handy. Builders strongly advise against contacting companies that promise to build a log or timber house in a month. The construction of a building from wood of natural moisture or even dry wood is always carried out in two stages - the construction of a log house with a roof, and after about a year's break, windows, ceilings, and floors are installed to allow the log house to shrink. Only houses made of laminated veneer lumber do not need shrinkage. Previously, the portal Repair.Divandi talked about the features of wooden construction.
Photo No. 1
– A log house with huge cracks.
Cutting external and internal threads on wood
In order to apply carvings to wood, tools such as a tap (cutter) and a die are used. They are used to apply both internal and external threads. But in order to carry out such work you need:
- take into account the density of wood, since not everyone is suitable for such procedures;
- internal thread requires pre-drilling a hole, the diameter of which should be less than the diameter of the tap;
- after that the hole is cleared of chips;
- For more successful work, you should use oil, for example, linseed, just drop a little of it into the hole, and then insert the tap.
The angle at which the tap is inserted must be straight; under no circumstances should distortions be allowed, otherwise the part will be damaged.
As for external threads, they are applied in approximately the same way:
- the diameter of the workpiece must be equal to the diameter of the die;
- after that oil is applied.
In addition to the die, you can also use a regular nut:
- the oiled workpiece is placed in a vice;
- then slowly screw in the nut using a wrench.
After the required number of grooves have been cut, unscrew it just as carefully.
Advantages of nailing timber joints
The use of wooden dowels was considered an advantage earlier, when these fasteners were not purchased, but were made independently right on the construction site. Naturally, no one wanted to buy any more nails. Now, metal dowels are much easier to manufacture than wooden dowels, and they are also cheaper.
Metal fasteners are much easier to work with. Firstly, because they do not crack when hammered. Secondly, nails always have an exact diameter, while the size of wooden dowels can change during the construction process both from temperature and from changes in humidity. The type of wood from which they are made also matters a lot, and it is quite easy to make a mistake here.
Baths made of timber Frame baths Check out examples of projects of bathhouses made of timber from our catalog. Construction period – from 10 days. Free delivery of house kits to the Ring Road and MKAD. We guarantee our work.
Check out examples of frame bath projects from our catalog. Construction period – from 15 days. Free delivery of house kits to the Ring Road and MKAD. We guarantee our work.
Plugs and heels for chair legs using improvised materials
In order to avoid damage to the floor in the kitchen or in another room, when using wooden chairs, you should insulate those parts that can do this, that is, the legs. To do this, you can go to the store and buy special heels, or you can save money and make them yourself. The following materials are suitable for making heels for table legs:
- an old carpet, parts of it can be cut out to the desired size and glued to the legs;
- rubber, also cut out to the required size and secured with nails or glue;
- felt insoles;
- linoleum;
- leather.
You can also make plugs for the legs; the most common material for their manufacture is wine corks.
When working with wood, most craftsmen have long been making various tools on their own; for their manufacture it is possible to use improvised means. Thus, you can save a lot of money on your family budget.
What are wooden dowels?
First, it’s worth understanding what the dowel itself is. The part is a miniature fragment made to strengthen the walls of a log house made of timber. In this case, it is the diameter of the dowels for the timber that acts as one of the most key characteristics.
Dowel for stairs
The purpose of the dowels may be different. For example, wooden dowels are aimed at fixing log structures. The detail allows you to slow down a variety of negative consequences that invariably accompany the functioning of wooden structures. It could be:
- drying out;
- deformation;
- loosening;
- bias.
Such peculiar pins, installed correctly and correctly, will make the building stable. The beams of the structure will be placed in such a way that they will remain unchanged after a couple of months and after several decades.
3. Universal folding trestles, adjustable in height
Goats are indispensable when building a house. Cut long pieces.
Plan something long.
Or, build a scaffolding by laying a couple of sawhorse boards to stand on.
Goats have a use everywhere. They are usually made from wood. For example, folding trestles.
Or stationary ones that you don’t mind leaving on the street.
And here is a version of a metal goat with retractable legs, from a portal member with the nickname Mikhail Rivshin.
Such sawhorses are suitable when they need to be placed on an uneven surface.
Or increase or decrease the height, depending on the tasks performed.
The goats are welded from a 2.5x2.5 cm profile pipe.
All that remains is to paint the structure.
What do you think of this idea?
Lifting mechanism.
| A manual chain hoist is used as a lifting mechanism. Now you can buy an electric chain hoist. It is much more convenient and safer to work with it. The lifting capacity of the hoist (winch) must be at least 750 kg. |
Transportation device.
| The device for transporting the lifted load consists of a wheel - a pulley and an L - shaped structure from which the hoist is suspended. The wheel-pulley rides along a metal guide beam. The wheel must be on a bearing. My first design (without a bearing) moved along the guide under load with great difficulty. In the photo there is an old water pump from a truck (a durable pulley on a powerful bearing), to the body of which an L-shaped suspension is welded. |
| You can come up with any design, but the main thing is that the wheel has sides that do not allow it to jump off the guide. |
Pillars.
The total length of the pillars is 5m. Above the ground - 4m, dig in -1m. The diameter of the post log is 16 – 18 cm.
| We fill the top of the post with a board, the dimensions of which are: length 40 - 45 cm, width 15 - 20 cm, thickness 5 - 6 cm. The edge of the board should protrude 25-30cm from the log. This is necessary so that our moving device does not cling to the pole when moving. |
| To firmly fix the board, we nail a metal corner structure. |
| Since the beam rests on the edge of the top board, we strengthen it on both sides with spacers that rest on a stop nailed to the post. |
| We dig the holes of the pillars to a depth of at least 1 m. We dig in the pillars, compacting the soil tightly. To make the pillars stand stronger, you can lay stones between the pillar and the walls of the hole. |
| To prevent the post from tilting when lifting a heavy log, we nail a spacer to the post, one end of which is dug into the ground. The spacer is placed on the side to which the beam is shifted. The pillars must be installed so that their tops are in the same horizontal plane. |
Installation sequence
The procedure for working with wooden tenons comes down to the following points: first you need to find the middle on the desired plane and mark the future hole.
- Using a drilling machine, you need to make a recess. A spike will be inserted into it. The diameter of the drill should be the same as that of the dowel. Depth – 1.5 timber.
- If the fastener is too loose in the hole, it will not be able to fully perform its function. If the dowel is too dense and protrudes above the surface, problems may arise as a result of the natural shrinkage of the building.
- When machining a hole, you need to ensure that the angle of the drill is perpendicular to the base. This will help avoid problems when connecting parts. The dowel connects 2 beams or logs, and this must be done in a checkerboard pattern along the perimeter of the log house wall. In this case, the permissible distance between them will be 1000-1500 mm.
- From the combination of bowls and openings it is necessary to make an indent of 300 mm. During installation, the moisture level of the dowels must match the moisture content of the timber itself.
- It is necessary to insert core buttons into the resulting hole, intended for marking the hole on another board. In the absence of such a part, it is quite possible to resort to independent production. To do this, you need to sharpen the rod in the form of a pencil so that there is a needle in the middle. Insert it into the hole.
- Then the two boards are laid on a flat surface and lightly pressed against each other. Thus, markings appear on a clean board for drilling a recess for a tenon.
The dowel must sit tightly and without bevels in the grooves of the timber, otherwise it will not fulfill its function.
For such purposes, you can use a marking thicknesser. Here it is important to correctly find the middle of the desired surfaces.
You need to insert a rod into the resulting holes, treat parts of the boards with glue, connect the workpieces and clamp them into a clamp. Then you need to dry the structure.
Adviсe:
- Holes for dowels should be made correctly. This connection has its own peculiarity: it cannot be changed at the time of assembly.
- A prerequisite is to drill the recesses strictly perpendicularly.
- You should not make too deep holes, this can lead to the dowel coming out of the board. They shouldn't hang around.
Return to contents