There are many types of curtain rods on sale for decorating window and door openings with curtains, but many homeowners want to have something original in their interior, different from consumer goods. Or the status of the room does not impose any special requirements on the interior, and there is no need to spend money on an industrially manufactured accessory - you can build something from available means.
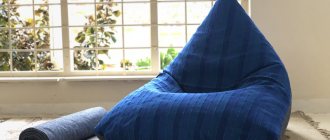
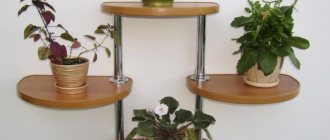
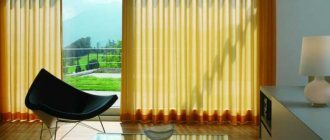
Examples of placing curtains on homemade devices
Let's consider several options on how you can make a cornice with your own hands, depending on a particular situation.
DIY curtain rod in a wooden house
Curtains are an integral attribute when decorating window openings. Most often, such products are purchased as kits formed in production, or a complete installation kit is assembled from individual ready-made elements. However, for wooden houses you can make a cornice with your own hands from scrap materials, since the main building material of the building is wood, which goes well with homemade interior items.
Wall cornice option
It is immediately worth noting that this method is considered more complex due to the complex fastening structure.
To make such a product, you will need a wooden beam with a round cross-section, which will act as a guide. The diameter of such a part should be around 3-5 cm. As for the length of the part, it should be sufficient to close the window opening, and also protrude beyond it by about 15-30 cm on each side. For example, if the window opening is 1 meter long, then the length of the beam should be 1.4 meters.
Color selection
All tones of white, gray, beige and light brown in combination with wood will look ideal. If the walls are brown and green, then light green curtains are an option. Other colors are acceptable if they are present in the interior of the room. But black is strictly contraindicated, since with wooden walls it will make the room gloomy. Bright colors are allowed in moderate doses; they will create a feeling of celebration and draw attention to the window.
The most suitable pattern is floral, especially if the pattern is printed - it promotes unity with nature. Stripes or geometric patterns are not suitable.
Twine cornices.
There are many ways to make an original DIY cornice. For example, using twine:
Take inexpensive jute twine or twine.
Wrap it tightly around the cornice. Carefully fasten the starting and ending threads to the curtain using a heat gun. The winding process is labor intensive. It is better to stock up on two rolls of twine if the cornice is long.
Winding will take a lot of time, but the result will exceed all expectations.
Complete your new decor with white striped curtains.
Options for large and small windows
Wooden houses, the rooms inside of which are lined with profiled timber, can have both large and small window openings. Each of them has its own nuances for decorating curtains.
When decorating a window almost one floor high, you can use tulle with a lifting mechanism or roller blinds. Long curtains with good density can be hung on cornices as functional textiles. Such models are secured at the slopes with ribbons or chic voluminous bows.
Square-shaped windows are often hidden behind translucent tulle. It is hung on wall curtains, forming voluminous vertical waves. To close such openings at night, you can use curtains with a dense texture. Such models are fixed strictly on one side of the window, thus forming a lambrequin.
They try to decorate panoramic windows in a wooden house or openings that are located around the room with long light tulle. Together with night curtains, it can be hung on wall curtain rods. If the room is lined with light-colored wood, then they try to choose curtains with a pattern on a floral theme.
Chic curtains for large bedrooms with retaining rings differ in texture, design and fabric density. If the window in such a room is triangular, then a separate lambrequin is arranged for its upper corner, attached to an individual curtain. They try to use both textiles in the same style.
On a note! Triangular windows are very unusual, so choosing curtains for them can be difficult. A convenient option is to use beveled tulles and veils.
If the room, in addition to panoramic windows, also has narrow ones, then roller blinds or Roman blinds in the same design as night curtains are used for the latter. Tulle or blinds are used as a daytime decor option.
What structures can be assembled and what is required
The simplest version of the curtain will be a round wooden guide mounted on brackets. This way you can assemble a standard single-row cornice. If two or more rows of curtain rods are needed, then you can use another design - string or tire.
For both of the latter options, you will need to prepare additional details. For string curtain rods, this will be the string itself, the steel corners on which it will be held and a decorative overlay that hides the guides for curtains with hooks.
Tire models of curtain hangers involve purchasing a ready-made plastic tire of the required size and preparing it in the same way as in the previous version of the decorative strip. In addition, you will need special hooks that will be secured in the tire guides.
In addition to the materials for making curtains, you will need to prepare the following tools:
- Roulette
- Hacksaw for wood or metal
- Screwdriver
- Drill
You may also need a few other tools, such as a wrench or pliers. They may be needed for assembling metal structures and fastening the string system.
What might happen
In order to have an idea of what designs can be assembled without purchasing ready-made kits and using a little imagination, below are several photos of examples of cornices assembled with your own hands.
As you can see, all the curtain options presented above will look very good. Some of them are suitable only for traditionally decorated interiors, while others can be used when decorating rooms in modern styles.
Mounting methods
Attaching the curtain depends on whether there is a door or not, as well as on the shape of the opening.
So, there are these types of fastenings: Installation on trims - suitable for hanging curtains. Curtains are installed on the door leaf in cases where they want to hide from the sun or prying eyes. Roman blinds are usually installed on such a mount. The curtain rod is installed above the passage on the wall. In this case, the curtain is fixed with loops, rings, and a drawstring. It is worth noting that the latter option is only appropriate if the structure is stationary.
Soft rings form soft folds. Curtains can be decorated with tassels, lambrequins, and eyelets. If you want the curtain to drape, then sew curtain braid to its upper edge. Each detail must correspond to the general concept of the interior style in color, shape and texture. Choose materials that are in harmony with the design of the room.
Requirements for cornices
Despite the small list of functions performed and the seemingly insignificant role in the interior, the basic requirements for curtain rod devices are quite serious:
- strength - destruction of the device can cause injury to a person or (if it falls on a heating device) a fire from the curtains catching fire;
- safety – absence of harmful emissions;
- aesthetics - due to the visual accessibility of the location of the accessory.
When assembling the accessory yourself, it is necessary to take these requirements into account, as do curtain rod manufacturers who manufacture products industrially.
What is the difference between curtains and drapes?
Scheme of methods for fastening rail cornices.
There are differences in the terminology of such curtains as curtains, curtains, drapes. It is possible that for a person who does not understand design issues, such terms mean one thing - a curtain on the window. However, this terminology implies a difference not only in names, but also in sewing and processing.
If you master the work of sewing curtains well, this will help replenish the family budget. There will always be people who want to have custom curtains for their windows. Many people like to arrange their premises in a non-standard way.
What is meant by curtains? This is a curtain for a window opening, which is made of transparent, thin fabric. For such products, tulle, organza, and translucent types of material of different densities are used. The fabric itself can be different: linen, silk, cotton. Sometimes the fabric is mixed. Viscose has been used successfully. Synthetics are practical and economical.
By drapes we mean curtains that are sewn from thick fabric. And curtains are the common name for curtains or curtains, which is used in everyday life for simplicity.
Scheme of the side lambrequin.
Curtains and drapes are usually combined together. Other options are also possible. Only curtains can be hung on the window, and Roman or Austrian curtains are added to protect from sunlight. With this combination, there is a great need to sew the curtain yourself.
Since curtains are made from lightweight fabrics, they are usually hung in small rooms where there is not enough light. Light curtains will give the room a free style.
So, if you need to make curtains with your own hands (for yourself or to order), get ready for work.
Roof cornice of a wooden house: types of material and placement technology
The roof eaves of a wooden house are designed to protect the roof from the influence of external factors and provide an attractive appearance. Hemming of the eaves is carried out after the construction of the rafter structure, but before the sheathing is created to accommodate the roof covering.
Roof cornice of a wooden structure
Stages of work
- When thinking about how to make a roof eaves for a wooden house, it is important to pre-install roof waterproofing and thermal insulation on the attic side.
- The roof overhang is sewn up before the external wall insulation is placed, so that when working with the eaves there is no damage to the wall covering.
- The excess parts of the rafters are sawed off in a straight line, relative to the second part attached to the building.
- Before deciding how to hem the roof eaves in a wooden house, the overhangs are sewn up with the possibility of creating gutters and ventilating the roof pie.
- The finishing of the roof eaves is carried out using edged and planed boards. They must have equal parameters.
Material selection
The eaves overhang involves the use of different materials:
- Linings (from natural solid wood and PVC);
- Soffits (vinyl and aluminum);
- Corrugated sheeting.
Roof cornice for a solid wood house
Edged and planed boards 1.5-2 cm wide are used for hemming, which provides a level of ventilation. The parts are stuffed with a gap of 1-1.5 cm.
- Wooden lining. To ensure performance properties, it is necessary to select high-quality wood of large thickness, which will reduce the likelihood of warping.
- PVC lining. The moisture-resistant material is designed for a long service life. For installation, U-shaped plastic strips are used to finish the ends and corners to fix the joints.
- Soffit. Plates made of aluminum or plastic provide lining for the roof eaves. In terms of external characteristics, the soffit is similar to siding, but it is made from a thick perforated plastic panel. It allows you to provide a given level of ventilation. To carry out installation, soffit slabs are cut along the length of the overhang and placed in a perpendicular position with respect to the wall ceiling.
- Profiled sheeting. A galvanized profile with colored polymer coatings allows for roof lining made of the same material. It has high rigidity, resistance to external factors and extreme temperature conditions. The corrugated sheeting is cut to the size of the eaves overhang. The ventilation hole of the hem corresponds to the wave height of the profile sheet.
Device and functions
The roof eaves are an important element of roofing structures; this term refers to the lower parts of the roof slopes, which are their continuation. Installation of cornices is carried out during the arrangement of the rafter system by increasing the length of the rafters or by installing fillies. On top, the cornice, like the entire area of the slope, is covered with roofing material, and from below it is sewn up using lumber, soffits, and siding. In the roof structure of a house, it performs the following functions:
- Protects the walls of the house from moisture. The eaves overhang of the roof protects the upper part of the external walls from atmospheric moisture and dirt, maintaining their attractive appearance and integrity.
- Prevents the flow of melt and rain water onto the foundation area. The structure of the roof eaves is such that it carries streams of water and blocks of snow sliding off the slope further from the foundation of the house, preventing erosion and destruction of the blind area.
- Gives the roof a finished, neat look. Roof overhangs, being a continuation of the slope, give the structure a more proportional appearance, harmoniously completing the architectural design of the house.
Product length
Selected individually. Depends on the type of room, area, what style and fabric structure is chosen.
For small rooms, use narrow and preferably light-colored curtains, without threads, which will harmoniously fit into the interior. But in large rooms you can use a flight of fancy. In any case, when choosing, the length should be 40-50 cm wider than the window opening. If the window is large, in order to avoid sagging of the wooden cornice due to the gravity and weight of the curtains, use additional fasteners, intermediate holders.
No drapery
The basic principle of the modern method of window design “minimalism” is the absence of folds and gathers. Curtains with loops (patches), which are made from ribbons, braid in a contrasting color or from curtain fabric, look stylish. It doesn't need hooks. The loops can be fastened with buttons, snaps, Velcro, or tied with bows on the curtain rod. If it can be easily removed, the patches can be sewn without unfastening. You should first check how easily the fabric will move along the cornice. The width of the fabric for it should be 1.5 times larger than the window opening. The side sections are processed as stated above, the corner joints are sewn together with a hidden seam. The simplest option is to sew curtains on “blind” loops. Their width and length are chosen arbitrarily. The required allowance is 2 cm. The number of loops is calculated based on the fact that the distance between them should be 2 times their width. The strips for them are folded lengthwise with the right side inward, stitched, turned inside out, ironed and pinned to the top edge of the main fabric turned 2 cm. After this, the loops are adjusted with some kind of braid or fabric facing.
Classification of wooden cornices
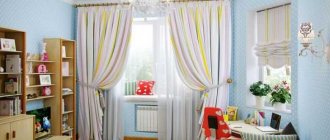
Buying a curtain rod necessarily involves such questions as the specifics of its installation, what fabric you want to hang the curtains from and in how many rows. It is also important to take into account the size of the window opening, the room and its purpose - kitchen, nursery, living room. With a thoughtless approach to window decoration, the room can “shrink”, become dark and uncomfortable.
Their classification will help you choose the right wooden cornices, which is based on:
- installation method - on the wall or ceiling. The ceiling method is good for low walls, but if the ceiling is suspended, you should pay attention to the weight of the product. Wall mounting looks good in tall, spacious rooms if there is enough space between the top of the window and the ceiling line;
- appearance of the product - wooden baguette cornices with an external strip that hides two or more rows of rods, strings and can be decorated with carvings and patterns are very popular. This can be a traditional model with additional decorative elements at the ends of the rods;
Baguette slats hide the steel string
- method of hanging the panel - these can be loops, rings, hooks, eyelets;
- number of rows, with which it is possible to hang curtains and transparent curtains at the same time or create ensembles with lambrequins, for which you will need a three-row cornice;
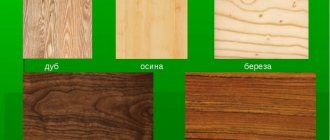
- wood species Hard types of wood - mahogany, beech, larch - are beautiful, but quite heavy and a wooden two-row cornice may require additional fastening. Soft varieties - coniferous, walnut are easy to process and carve.
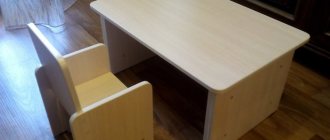
It is worth highlighting homemade cornices separately, and you do not always need to strive to ensure that they exactly copy factory-made products. Rather, on the contrary, a deliberately rough appearance will only be beneficial. As an example, a cornice made from a simple strong tree branch, it looks simply great.
Note! In this example, the curtains must be handled with extreme caution; the fact is that the fabric will not slide over the rough bark, so with a strong tug it may simply tear.
Curtain hung on a branch
Homemade decorative cornices
Those products that are made by professional woodcarvers or blacksmiths can also be called self-made, that is, accessories of high class artistic performance, but made by hand. The cost of such cornices is often several times higher than the price of highly decorative models of industrial production, but at the same time mass-produced. We will consider technologies that do not require professional skills and expensive materials, but allow us to assemble a product of a sufficient level of aesthetics.
Cornice moldings made of metal pipes or rods
The most readily available metal suitable for making cornices in everyday life is water pipes with a diameter of ½ and ¾ inches, both galvanized and black. Most paints adhere even better to zinc coating.
First of all, depending on the size of the span, choose the diameter of the pipe and the number of brackets. For a cornice for a narrow window or door (less than 0.8 m), you can use a half-inch pipe; for a larger span, it is better to take material with a diameter of ¾. If the width of the window opening is more than 1.5 m, then the curtain rod device must be mounted on 3 brackets - at the edges and in the middle.
Cornices made of steel water pipes with connecting fittings
Having retreated 15-20 cm to the sides from the side slopes of the window opening, the total length of the cornice is obtained and the required piece of pipe is cut off. If there are 3 fasteners, then the cut fragment is cut in half. Then, at all ends of the two resulting pieces, threads are cut with a tool (3-4 turns), having first chamfered their outer edges and lubricated with grease.
From the same pipe, pipes 10-15 cm long are cut according to the number of fasteners, and a thread is also cut on one side of each. Then you need to purchase or cut yourself with a grinder from sheet steel 3-5 mm thick, supporting “spots” according to the number of pipes and drill holes in them with a countersink for self-tapping screws. Branch pipes are welded to the snouts strictly perpendicular to their plane - at the end without threads, the welding seam is polished with a grinder, and the cornice can be completely assembled using threaded connections: 2 pipes are connected to the rod with pipe bends of the appropriate diameter, and the third - with a tee.
Option for a homemade cornice made of steel pipes and bends
Important! If a pipe without zinc coating is used to make a cornice, then once the components are ready (before assembly), one of the ways can be to bluing them (blackening), which will give the surface a dark tint and protect it from corrosion.
As a finishing touch, you can use painting in a suitable color - nitro paint from a can or auto enamel using a brush. It is not advisable to use oil paint - the rings do not glide well on such a paint layer.
Watch this video to help describe it:
To make a small span cornice (up to 1.5 m), you can also use a steel rod with a square section of 12x12 mm, which is quite suitable as a cornice rod. To make a barbell decorative, a rod cut to size is marked along the length into several sections, after which, on a lathe or using hand-held mechanical devices, they are twisted through one by an equal number of revolutions. The hexagon rod can also be twisted around its axis, both in sections and over its entire length.
Manual mechanical devices for twisting metal rods
The rod for the cornice can also be made from a round steel rod with a diameter of 15-20 mm. If such an element is subjected to hot forging along its entire length, followed by bluing, then the accessory takes on the appearance of an antique interior element. If the ends of the rod are spilled, they become limiters for the rings, but they can also be decorated with wooden decorative knobs.
Site-mounted curtain rods on wood and metal brackets
For both types of rods, it is not difficult to make brackets - they can be made of wood or metal - forged, bent, turned. You can also find ready-made components of simple designs on sale.
Metal bracket options
There are no questions about fastening the brackets - they are usually mounted with self-tapping screws in holes sealed with nylon holes at the same height from the floor.
Cornices made of polypropylene tubes
PP pipes can also be used to make homemade curtain rod fixtures. The design of the finished baguette will differ from an accessory made from metal pipes only in the assembly method, strength and weight.
The product is assembled from the same components as in the case of metal pipes - a PP pipe with a diameter of 3/4 inch, identical bends and a tee, and support blocks.
Components and components of a homemade cornice made of PP pipes
The assembly of elements is carried out using a special device - an iron, the skills of working with which are acquired after two or three trial connections.
After assembly, the cornice is painted with paint from a spray bottle or can.
Red copper and brass painted PP pipe cornices
The products are durable, resistant to most types of household impact, but due to the flexibility of polypropylene, they are not suitable for placing heavy curtains, and even for light curtains, the distance between the brackets should not be more than 1 m.
Wooden curtain rod devices
Cornice moldings made of wood, like metal ones, are available in various types.
If we consider rod-type devices, their design is no different from metal ones - the same rod with brackets, only made of wood. The rod is turned on a lathe from a block of the required length. The wood can be of any common type, but without knots. After finishing the turning work, the crossbar is sanded with sandpaper, varnished and installed on the wall or ceiling using brackets.
Various designs of wooden curtain rods
The second type of wooden cornice - with a decorative strip - can also be made with your own hands, and it is not necessary to master the art of artistic carving. You need to familiarize yourself with the design of such cornices and make a copy of the accessory, but to decorate the decorative strip, use ready-made carved decor, available for sale in furniture fittings stores.
Important! To decorate the cornice strip, instead of wooden elements of carved decor, you can use a ceiling plinth made of polystyrene, which is glued to the base and decorated in an artistic way - with water-based paints.
A smoothly planed board with processed edges 2-2.5 cm thick is taken, and brackets are mounted to it. Carved decorative elements are attached to the front side of the plank using PVA glue, after which they wait for the adhesive to dry and decorate the decorative strip in an artistic way - cover it with stain and varnish.
A cornice with a decorative strip can have a hidden rod or string-cable for fastening rings in its design.
The second version of this accessory is a design one - installing a strip with brackets (or without them) on the base on top of a string-type cornice device pre-installed there.
Wooden cornices: on the left - with guides in the structure, on the right - overhead placement, without a rod
Bamboo rod curtain rods
Bamboo does not grow in Russia, but currently not only furniture and crafts made from it are imported from China, but also bamboo trunks and rods themselves, both fresh and dry. An original cornice can also be made from an old bamboo shelf or wall shelf, if the length and diameter of the rods allows.
Bamboo stems for curtain rod: fresh and dry annealed
Important! The bending strength of a bamboo rod can be increased if the top layer of bark containing the cambium, a membrane that gives flexibility to the trunk, is removed from the rod.
If you plan to use rings to place curtains, then the transverse thickenings on the bamboo rod are processed with a file, making them streamlined, but it is important not to grind off the excess, so as not to weaken the rod significantly in this place.
Homemade bamboo cornices: double-row and single-row
If, instead of rings, loops made of braid are used that do not move along the bar, then the transverse ring thickenings on the bamboo can be left unchanged and even made more prominent using automotive putty, and then the crossbar can be painted the color of a living trunk - juicy green.
To decorate the rod of bamboo curtain rods, you can also anneal it with a blowtorch and then coat it with colorless varnish.
Homemade rod curtain rods made from dry annealed and painted bamboo
There can be many options for additional decoration of bamboo cornices, depending on the status of the room and the class of its finishing.
Cornice devices made from tree branches
To place curtains, you can also use a natural fragment of a branch that has the required dimensions and original shape. It is only necessary that the wood is dead and does not contain parasitic insects.
The selected branch is cut to size and everything that is peeling and damaged is removed from it. Then the workpiece is dried, protruding knots are removed from it, treated with sandpaper and coated with varnish - preferably semi-matte, which preserves the naturalness of the product.
Depending on the configuration of the accessory, brackets are selected for it and secured in place, after which the curtains are placed on the branch - on rings or loops made of braid.
Homemade cornices from natural tree branches
Important! In wooden houses, it is especially important to treat the branch with an antiseptic against insect-boring insects, for example, “Antizhuk”, which will protect the structure from infestation.
Rope curtain rods
Original devices for placing curtains can be made from high-quality rope, but it should not be impregnated, such as hemp, otherwise there will be an oil smell in the room.
Such a cornice does not have a universal design and can be decorated in a wide variety of ways, but at its ends, naturally, there must be brackets for fastening to the wall or ceiling.
Curtain rods
If desired, you can weave decorative elements into the rope, or paint it in a brighter color.
Combinations of sports equipment
To place curtains, you can use an oar or old golf or hockey sticks, but restored and covered with a protective layer of paint or varnish. This version of cornices is especially appropriate for decorating rooms intended for teenage children.
Rowing oar as a curtain rod
The paddle can be additionally decorated with artificial seaweed. The brackets are made, naturally, in relation to the accessory used.
Cornices made of paired clubs: for golf and hockey
Such a device is distinguished not only by its originality, but also by its durability, moreover, it can be mounted on the wall without damaging equipment, and subsequently dismantled and used for its intended purpose.
Optimal overhang sizes
The width of the overhang depends on its location. Front cornices are produced to a length of about 1 m, but sometimes this size can be increased. When installing a cornice with a projection of more than 300 mm, the beams are placed in increments of 600 mm and nailed at the top to the beam and rafters. According to the requirements of SNiP 11-26-76 (as amended in 2011), for buildings up to 2 floors inclusive, in the absence of an organized drainage system, the eaves extension must be at least 60 cm, and with an organized drainage system - 40 cm or more. When the board is positioned in the transverse direction, it is fixed on both sides, maintaining a gap of 10-15 mm, when longitudinally - every 1 meter of its length.
Is it possible to sew curtains yourself?
Diagram of the ratio of the length and width of the curtain to the length and width of the window.
Sewing curtains is as simple as possible. It is necessary to first sew 2 pieces of fabric or more according to the markings made - it depends on the width of the future curtain.
After this, the resulting seam is ironed, and the folds for future seams along the edges of the fabric are ironed. All edges are processed using a sewing machine, and the seams are ironed again.
The curtain tape is sewn along the top edge, after which special threads are tightened so that the curtain is gathered into neat and beautiful folds.
If fasteners in the form of hooks are used, they must be sewn on before hanging the curtain on the cornice.
When the curtain is ready, it is ironed. If decorations (for example, fringe) will be used, they are sewn on before ironing the fabric.
Romantic style
Light, airy chintz curtains are an excellent solution for decorating a romantic summer style.
If you combine them with transparent curtains, the effect will be truly delicate. Chintz transmits light well, but at the same time softens it. To make a chintz curtain, you will need 3 times more fabric than the size of the opening. This way, you will get beautiful and large folds. To prevent the curtain from fraying at the edges, it needs to be hemmed.
The cornice is a wooden or metal pipe onto which large rings are placed. Otherwise, the technology for making chintz curtains does not differ from the technology for making any fabric curtains. The cornice is usually screwed 5-10 cm higher from the top edge of the opening. If desired, you can install clamps on the walls that allow you to open the curtains slightly, thus letting the coolness of the night into the house.
Pasting the cornice with self-adhesive film
There is a wide range of decorative self-adhesive films for covering surfaces on sale in rolls with all kinds of patterns with different surface textures and widths. Since the width of the cornice is 15 cm, taking into account the edges and the length of the bend, a film with a width of at least 22 cm will be required to cover the cornice. There is no such narrow film on sale, so I had to buy a self-adhesive film 45 cm wide, 70 cm long and glue it to the cornice in two pieces .
On the self-adhesive film, on the back side of the backing, detailed instructions for gluing surfaces are provided and a dimensional grid is applied in 1 cm increments for ease of cutting.
Therefore, I will not dwell on the intricacies of the technology for applying self-adhesive film. I will only note that it is best to roll the film with a wide soft rubber roller. Then air bubbles do not form under the film and it sticks evenly to the surface after one pass of the roller.
After rolling the film onto the plane of the cornice, you need to carefully wrap it around the corners. To do this, you first need to cut the film with scissors along the line of continuation of the corner of the front side of the cornice to the very corner; the photo shows the bottom cut. Next, roll the film to the end of the cornice and cut out a piece of film slightly larger than a right angle along the line of the corner of the end of the back side of the cornice.
Then a narrow piece of film is glued, and then all the other ends of the cornice are covered. As you can see, it turns out to be a pretty neat pasted corner.
As a result of gluing the extended strip of chipboard with decorative self-adhesive film, a beautiful cornice was obtained.
All that remains is to install the fasteners for hanging on the ceiling.
Expert opinion
Practical advice from Diana Smetanina, sales manager at OLEKSDEKO, a manufacturer and seller of window decoration products.
I disagree with the author of the article about the disadvantages of ready-made curtain rods compared to homemade ones. Self-made cornices are popular due to two advantages:
- uniqueness - you can count on the fact that no one else has a second accessory like this;
- price - you can try to save money by spending less money on a product of your own work than on a store purchase.
But in real life, both “bonuses” of homemade cornices turn out to be not at all as attractive as in theory.
Firstly , you can choose a unique design for windows from the market assortment. For example, for forged metal cornices there is a huge variety of decorative tips, pipes of different diameters and shapes, models of ceiling and wall brackets. Not to mention the dozens of color options, the number of which is constantly increasing.
Secondly , the savings when making curtain rods yourself are deceptive. There is only one way to reduce costs to a minimum: place the curtains on the first wooden, plastic or metal rod you come across. But you will have to spend money on a cornice that is comfortable to use and attractive in appearance: high-quality material, equipment, and fittings. As a result, in 9 cases out of 10 you will spend more than on a ready-made mid-price model.
So a homemade cornice can be an interesting creative experiment. For example, when decorating the interior of a country house, where you can give free rein to your imagination. But for placing curtains in rooms that you use constantly, I recommend ready-made designs. They can be selected to suit any conditions and tastes without high costs.
Creating a cornice for Japanese curtains and rules for its installation
The most difficult process in making homemade elements is assembling curtain rods for Japanese curtains. The best option is to purchase a finished product with all the guides to which you can make a frame for the curtains, but if you really want to, you can make the cornice yourself.
The very design of Japanese panels, consisting of stretched fabric sheets, will look attractive only if the guides are correctly installed, the grooves are rigidly fixed and there is no possibility of the elements scrolling around their axis. This is achieved through the use of quality materials and specific additional products.
The curtain rod for Japanese panel curtains can be plastic or aluminum. Each section is intended for a separate curtain and has a base for fixing Velcro, on which the fabric sheets are attached. If you make the design yourself, you can use double-sided fabric with Velcro on both sides. This will allow you to change the appearance of the room depending on your mood.
The master must think about the number of tracks in advance: installing additional parts in such systems is very problematic. There are basic elements that allow you to install not one, but several guides on one track, which will allow you to maintain a small width of the structure and significantly save free space.
To fix the panels of Japanese curtains, there are several options for the arrangement of parts, which provides a variety of decorative solutions, but can significantly complicate the work of a home craftsman. You need to think about how to manage the system in advance. If direct manual control is refused, a special cane is installed. If there is a need for electronics installation, it is recommended to turn to professionals. The slightest inaccuracy in the settings will lead to the fact that any movement of the panels will turn into a complex and painful process.
When producing cornices for Japanese curtains, you cannot use standard systems; in any case, you will have to purchase specific profiles. As practice shows, making such products yourself is not always cheaper than buying a ready-made model and having it professionally installed. It is better to pay once than to later call specialists to dismantle the structure, adjust it and reinstall it.
Related article: How to open the handle of an interior door: step-by-step instructions
Curtain braid
It is also called the Austrian ribbon. It is necessary to tighten the fabric and obtain uniform drapery of the desired pomp. For, and a transparent tape with an allowance on 2 sides of 6-8 cm, a width of 2.5-8 cm is suitable. A short curtain looks more beautiful when using a narrow braid. In any case, the tape should be loose and hold its shape when the laces are pulled together. The wide ribbon has 2 rows of loops, which allows you to change the height, hang the curtain lower or higher. The wider the ribbon, the more options for draperies and folds you can create. How to sew ribbon for curtains with your own hands? The braid allowances are folded inwards and the lace is released. The tape is adjusted from the wrong side, retreating 1-2 mm from the top edge so that it is not visible. And if you want to hide the rings or cornice with a curtain, the braid is lowered 2-5 cm from the edge. The braid is attached first from the top, then from the bottom. If it has more than 2 laces, then lines are also laid along them.
You may also be interested in: How to choose a curtain for curtains - tips on the style and type of curtains
How to assemble a curtain? It is better to tighten the tape on both sides at the same time, moving the fabric from the edge to the middle. The laces must be tied with a loose knot. The curtain is pulled to the desired width, after which the folds are evenly distributed. The laces are not cut, they are untied and the fabric is straightened before washing. To prevent them from hanging down and spoiling the look of the curtains, they are carefully rolled up and attached to the braid with a pin. After this, the curtain can be hung on a cornice, which can be part of the window decor. Often the fastening mechanism is hidden in a niche in a multi-level ceiling or behind a molding. The most popular type of fastening is hooks. They are placed at a distance of 8-12 cm from each other.
Classic style
Not long ago, such a concept as modern classics appeared. For its design, strict draperies with luxurious outlines are used.
These can be straight curtains with large vertical folds. To do this, you can purchase thick textured or smooth fabric. If you want your doorway to look more elegant, then complement the curtain with a light translucent curtain. Often lambrequins with folds are used to decorate the cornice.
The process of sewing such curtains is no different from the technology described above. To make curtains in a modern classic style, use only natural textiles. The lower part of the curtains should not reach the floor by 2-3 cm. Fabrics that shimmer with silver or gold are ideal for making curtains over the opening. If you consider this combination too pretentious, then it is better to make curtains from a plain dense fabric.