The back of the cabinet is designed not only to protect things from dust. It adds stability to the furniture, creates completeness, and also performs a decorative function, complementing the design of the room. It will be useful for home craftsmen to learn about the types of fasteners, materials and secrets of installing the back wall of a cabinet. Experts will express their opinions and answer readers' questions.
Example of fastening the rear wall of an OSB cabinet
Do you need a back wall in your closet?
This part rigidly connects the wardrobe structure, giving it the correct shape and additional stability. But this is not always required for a number of reasons:
- Built-in furniture may not have a back. Such a cabinet is mounted to the wall of the room or inside a niche, and does not require additional support.
- The absence of a back part in cabinet furniture will lead to loss of the original shape and distortions. The front end will also suffer. Swing doors will warp along with the body, and sliding doors will fall out of the guides and slide to one side. This happens because the things inside put an uneven load on the body. In addition, the niches in the walls and the shelves of the wardrobe have different shapes and sizes, which creates additional difficulties for the stability of the entire structure.
- If you buy a partition cabinet that will be used on both sides or as a shelving unit, it will not need an additional wall.
- For a kitchen cabinet, not only stability is important, but also adherence to the wall, so the back is attached using grooves.
Why do you need a back wall in cabinets?
Each closet has a number of shelves, drawers, hooks and hangers that serve as storage for clothes, shoes, accessories, books, dishes, small and large household items. All structural elements of the product experience different mechanical and physical loads. As a result, some shelves on which light things lie retain their shape, while others become deformed or warp under the weight of bulky household belongings.
In classic wardrobes without a back wall, hinged doors sag over time, and in coupe models, the doors move to one side or fall out of the sliding system guides. The backdrop gives the furniture structure additional rigidity and stability, preventing it from skewing and loosening.
A furniture box assembled in compliance with all technological processes will last for many years. The back wall covering the back of the cabinet will not only provide strength and hardness to the product. It will protect the interior of the wardrobe from ubiquitous dust, hide defects in the room walls from view, and give the product a finished look.
What material is it made from?
To dwell on a specific option, let's consider the positive and negative sides of each.
| What is the name of the material | Its advantages | Main disadvantages |
| Chipboard (chipboard) |
|
|
| Fiberboard (Fibreboard) |
|
|
| HDF (High Density Fiberboard) |
| high price |
| Plywood |
| cannot be processed with all types of materials |
| LDSP (Laminated chipboard) |
| high price |
| OSB or OSB (Oriented Strand Board) |
| some manufacturers add glue to the material that contains resins that are harmful to health |
How to secure?
Let's look at the details of self-assembly of the rear part. There are several ways to do this, each of which is suitable in a specific case.
Overlap fastening
The most practical and inexpensive option for this method would be fibreboard (in common parlance “hardboard”). The thickness of the fiberboard should be 3-5 mm. This material is especially suitable for sliding wardrobes. You can also use plywood, OSB and other materials with a flexible structure. You should not use nails for fiberboard or chipboard - fastening with their help is unreliable, and the panel may fall off over time at the slightest impact.
Step-by-step installation instructions:
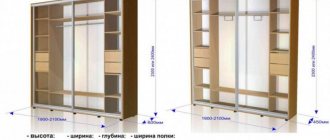
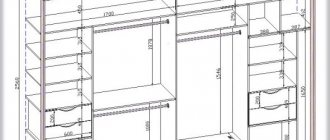
- Assemble the cabinet and open the back according to its size, but 2 mm less on each side. For example, for a structure measuring 1800x700, the fiberboard should be 1798x698 (the base is not taken into account).
- Secure the corners of the sheet to the body. Use screws measuring 3x16, 3.5x16 or 4x16 for this.
- Screw in the screws along the edges of the sheet. Their exact number depends on the size of the cabinet. For greater strength, the distance between the screws should not be more than 10-15 cm. At this stage, to save money, you can nail a small number of nails measuring 1.2×25 or 1.2×20.
Groove mount
Most often this method is used for kitchen wall units. In this case, the recessed wall does not prevent the cabinet from fitting tightly to the wall and is easily adjustable. This method is also suitable for furniture that is in plain sight. The back part inserted into the groove becomes invisible and the cabinet looks beautiful.
Installation in grooves with additional fixation with corners
Step-by-step instruction:
- Pre-make grooves 10 mm deep. in the walls, bottom and roof of the module.
- Now secure the back into the grooves. Assembly starts from the bottom and ends with the roof.
- If the width of the grooves is too small, you can slightly grind the edges of the back wall.
In the form of an internal insert
This method allows you to secure the back part from the inside without moving the cabinet. Most often used for large and heavy furniture. But a fiberboard sheet is not suitable for this. “Orgalite” demonstrates good strength during tensile deformation, but in this case the entire structure will compress the back wall, so it is better to choose laminated chipboard with a thickness of 6-10 mm, which will withstand such a load.
Step-by-step installation instructions:
- Cut the blanks a couple of millimeters smaller than the dimensions of the niches. The remaining clearance will be used for the seal. Do not forget to process the edges of the finished sheets so as not to scratch the inner sides of the walls and shelves;
- Before installing the panel, secure 4-8 metal corners in each niche so that the back side of the corner is flush with the end. This way you will place the wall evenly, and it will not fall out on the back side - the corners will hold it inside.
- After installing each sheet of chipboard, attach it from the inside. You can use rastex, canonical screed, plastic or metal corners. Read more about fastening methods.
The video below shows the homemade production of an inset back wall without the use of professional tools.
Butt-to-butt connection
This option is suitable when you need to install a back wall of several sheets on a two- or three-section cabinet or if the fiberboard sheets are narrow. In this case, the remaining edges of the sheets are screwed overlapping with self-tapping screws (see the first method).
How to install correctly:
- Attach the fiberboard sheets overlapping the edges of the cabinet.
- Use self-tapping screws at the joints. They are screwed between the fiberboard sheets on top of special plates that come with the cabinet, which will firmly press both sheets to the partition.
The plates can be replaced with ordinary metal washers or made independently. Stores also sell plastic connectors specifically for these purposes.
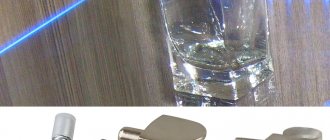
Connecting profile 2 meters long for the rear wall of the cabinet.
Branded fasteners
Furniture hardware companies often offer their own proprietary cabinet designs. They are easy to install, used in finished projects, and sold individually and in packages in hardware stores.
After installing the back wall of the cabinet, if it is placed in the center of the room, think about decor options.
Experts' answers to readers' questions
In the “question-answer” section they often write about the back wall of the cabinet. Experts in the field of furniture production have selected the most popular ones and we publish them here.
There is an unpleasant smell from the back of the cabinet, what should I do?
In this situation, you can try 2 options:
- Treat the entire structure with Smelloff universal odor neutralizer. This product is safe for people and pets.
- If the first option does not help, you should replace the back panel with a new one.
Read about methods to get rid of unpleasant smell in the closet.
How to make a hole in a cabinet wall
Sometimes it becomes necessary to make a hole for an outlet or switch right inside the cabinet. In this case, the advice is:
- Depending on the shape and size of the cutout, you can make a hole using a jigsaw or a fine-toothed wood saw.
- The edges must be covered with a U-shaped edge made of plastic or PVC.
How to make a wall with your own hands?
Choose a material suitable for your design and cut a sheet of the desired shape (if the dimensions exceed the dimensions of the cabinet), or assemble a wall from several small sheets.
How to remove nails from the back wall?
- If the head of the nail sticks out on the surface, you can pull it out using side cutters or a small nail puller.
- If it is deep in the wall, first access the head using a wood punch, and then remove the nail with pliers. This method involves damage to the material and will have to be replaced in the future.
- When the hardboard back wall is overlapped, the best way to remove the nails is to carefully drive a flathead screwdriver between the fiberboard and the cabinet body, using light pressure to push the wall away. The nail heads will be visible and can be pulled out using the first method.
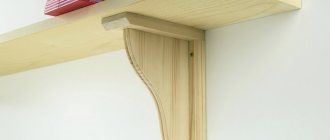
How to strengthen the back wall?
To strengthen the structure, it is enough to attach two narrow planks at the back crosswise, which will cross the entire surface of the cabinet.
There is mold in the closet, what should I do?
If the material is moisture resistant, you have 2 options:
- Use chemicals from the store: ALPA FONGIFLUID, Cillit Bang for black mold, DALI;
- Treat the surface with a folk remedy: brown soda or soda.
Antiseptics
If the material does not have moisture-resistant properties, it is better to replace it.
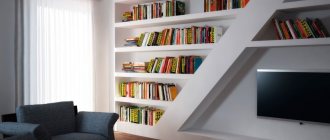
Cabinet wall decor
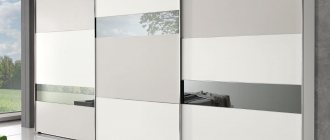
There is no need to decorate the backdrop in ready-made wardrobes, cabinets and chests of drawers - this element is decorated at the stage of furniture production (cutting, assembly). But if desired, the factory design can be changed using a mirror insert, which repeats the visible part of the backdrop in shape and size. This technique was used by Soviet furniture factories, but has not lost its relevance today.
A mirror located inside a china cabinet or cabinet, due to its reflective effect, will create the illusion of depth and help to more advantageously present the items on display. The reflective element can be attached to the backdrop with double-sided tape, liquid nails glue, special clips or thin strips nailed around the perimeter or along 2 opposite sides of the insert.
Other materials are also suitable for a cabinet with open shelves:
- Frosted glass.
- Glass with photo printing.
- Translucent plastic.
- MDF panels (painted, with patterns, textured embossing).
- Sheet panels for wall decoration (wooden, PVC).
- Wallpaper.
The original decor can be made from transparent epoxy resin with the addition of 1 or several color pigments. All these techniques can be used when decorating a free-standing or built-in wardrobe, assembled with your own hands. And additional lighting in open niches and above shelves will help emphasize the individuality and sophistication of the finished product.