Design
The covers are decorated according to the taste of the owners and based on the style of the decor. They can be decorated with bows, lace, zippers, buttons, rhinestones, and beads. But sometimes the cover itself becomes a decoration in the interior, for example, a product with a 3D image or with a mother-of-pearl sheen visually enlarges the chair and makes it an accent among other types of furniture.
To support the design of the room, it is necessary to choose stylized covers for upholstered furniture.
Provence
French country style coverings should be bleached, like faded textiles from grandma's chests. They can have smooth pastel colors or a delicate floral print. Provence loves frills, lace, bows and other decorations.
Minimalism
For minimalism, simple covers with a smooth texture that completely follow the shape of the chair are suitable. They cover all the details of upholstered furniture so much that you don’t immediately understand the presence of the cover itself.
Minimalism
The chair and its protective covering in this style are extremely simple and do not have any special decor. Rough fabric of red or brick color goes well with brickwork, which is usually introduced into such interiors. The only decoration can be considered large zippers, with the help of which the product is removed or put on the chair.
Baroque
Armchairs in the Baroque style are themselves decorated and elaborate, have a complex shape and are decorated with carvings. To put a usual cover on them means to hide all the beauty that they strive to convey. Therefore, for armchairs in the Baroque style, small overhead bedspreads are sewn from expensive fabrics, decorated with buboes, rhinestones and other glitter.
Classicism
A case in a classic style should look rich, but discreet, without ostentation. Often, when decorating an interior, they resort to using identical textiles on covers, curtains or bedspreads.
Test chair cover made from inexpensive fabric
It is very difficult, without experience, to make an accurate pattern for covers. No matter what, something will go wrong. There are so many models of chairs and options for their manufacture that it is simply impossible to give a ready-made universal pattern for sewing chair covers. Each chair model needs its own pattern, which will take into account all the curves of the back and the angles of the legs. The back may have different widths at the top and bottom, not to mention rounding at the top. The front legs can be straight, the hind legs wide apart, etc.
If possible, it is better to entrust this work to professionals, since all the nuances of sewing covers cannot be learned without practice. But if you decide to sew chair covers with your own hands, then before cutting expensive fabric, first sew a prototype from inexpensive fabric. During the fitting process, make adjustments to the pattern. And only after you have achieved an exact copy of the shape of your chair, you can cut out the final version of the details of the covers from the fabric purchased for them. And also, do not sew covers for chairs from fabrics that are too expensive, otherwise you will have to sew covers for them later. Never sew covers end-to-end. Chairs are not a pillow, and if the cover is a little narrow somewhere, it simply won’t fit on it. A supply never hurts, and you can always remove it; besides, some fabrics may “shrink” after washing.
Other articles:
Master class - sewing a bag from leather The atelier technologist gives a short master class on sewing a women's bag with your own hands from genuine leather.
How to sew curtains with your own hands Most often, the desire to sew chair covers with your own hands arises after replacing the curtains in the kitchen or living room. In some cases, you can even use the same fabric for the covers as for the curtains.
Decorative stitching on a difficult area When sewing a chair cover from coarse thick fabric, the sewing machine may make gaps and break the thread. Read this article, it gives recommendations on how to avoid this.
But to sew a quilted bedspread, with padding made of padding polyester, and with a lining, so that it becomes the main decoration of the bedroom, is not easy, and requires the experience and qualifications of a seamstress
How to sew a bedspread It is not difficult to sew a bedspread with your own hands if it is like a cape on a sofa or bed made of tapestry or patchwork fabric. But sewing a quilted bedspread, with padding made of padding polyester, and with a lining, so that it becomes the main decoration of the bedroom, is not easy, and requires the experience and qualifications of a seamstress.
How to sew a sheet with an elastic band Sheets with an elastic band have become very popular. This is primarily due to the fact that many euro-sized beds have appeared using high spring mattresses, which are simply impossible to fill with an ordinary sheet from a standard bedding set, it is too narrow and therefore constantly “strays” during sleep.
How to sew a pillowcase How to sew a pillowcase for sofa cushions or sew a chair cover with your own hands? The question is quite difficult for those who have never sewed pillowcases or covers themselves. You need to accurately create a pattern, calculate the consumption of calico or satin, and most importantly, sew it correctly so that the seams are even and strong, and the pillowcase matches the size of the pillow and the cover matches the size of the armchair or chair.
DIY patchwork quilt Those who sew a lot probably accumulate a lot of leftover pieces of fabric of different colors. You can sew a bedspread or blanket from a variety of colored pieces. The shape of the flaps can be very diverse; it is not necessary to cut out exact geometric shapes.
Options that are easy to use
It's amazing how a simple covering of furniture can radically change the appearance of the entire room, hide a boring color or defects in the upholstery, and add a bright accent to a boring interior. The use of these accessories on chairs in a children's room, kitchen or dining room is especially popular. Sewing covers is much cheaper than changing upholstery or furniture. You can’t do without them during special events, for example, when decorating interiors during holidays and wedding ceremonies.
These covers will decorate your interior
DIY cases
Today you can find furniture covers of various colors and styles in many stores, and order the tailoring of the desired model in any studio. But it’s much more interesting to make them yourself, choosing the right fabric and deciding on the style of the future product. This will also help save money, especially if you are decorating several pieces of furniture at once.
The cases are distinguished by their beauty and possibilities of use, as well as ease of manufacture. Even a not very experienced craftsman can sew such an accessory on his own.
The ability to radically change the appearance of the entire room
Let's consider all the options that you can easily do with your own hands. All the nuances and step-by-step implementation are below.
- After we have measured the height of the back, legs, and width of the chair, we make a pattern of three elements: rectangles covering the sides and the back with the seat. Don't forget to add a couple of centimeters to the seams.
- Transfer the pattern to the fabric. Since we are dealing with rectangular parts, you can use a ruler for greater accuracy.
- Carefully cut out all the details, taking into account the shared thread.
- First of all, we sew the side edges.
- Then we move on to the side and bottom sections of the back of the back. They should be folded and then stitched.
- Sew the side parts to the seat.
- We tuck and stitch the sections of the side and front parts of the product.
- Ready-made covers can be decorated with a bow or other decor on the back of the chair.
Advice Are you sewing for the first time and doubt your abilities? Try making a test piece first from inexpensive fabric, or at least basting it by hand.
Jeans option
The easiest option, which is suitable even for beginners, is a regular stool seat. It's fairly quick to sew.
Step-by-step instruction
- We make a template from cardboard or other material according to the shape of the stool seat;
- using the resulting pattern, we cut out three parts of the same shape and size from the fabric (for the front and back sides of the padding polyester);
- We place the padding polyester between two pieces of fabric and secure it with pins;
- to quilt the future seat, you need to sew even lines parallel to each other;
- we baste the pre-prepared bias tape for edging, leaving the ends as future ties;
- We carefully fold the ties in half and stitch them on a typewriter;
- We sew bias tape on the sides of the product using a machine.
Advice If you plan to sew several identical covers at once, you should cut them all at once. This will save fabric.
Easy to do it yourself
Such an accessory can be sewn even from a small piece of fabric.
Step-by-step instruction
- First, as usual, we make a pattern. In order not to bother with measuring instruments when calculating the diameter, you can simply attach a sheet of cardboard or newspaper to the surface of the stool, then cut it along the contour.
- We transfer the drawing to a new sheet of paper, adding a few centimeters along the contour.
- Based on the resulting template, we cut out the piece from the fabric.
- We put an elastic band on the edge of the fabric, fold the fabric, and stitch it.
- Our cover is ready - all that remains is to put it on the stool.
READ MORE: Do-it-yourself cultivator, how to make it from an angle grinder Tips and instructions for assembling a homemade cultivator from a trimmer or chainsaw
Tip To add softness, you can sew foam rubber or padding polyester into the seat.
Provence style
A knitted cover can be an interesting option for decorating a room. Crocheting will take more time than sewing a simple pattern, but the result will be a special and original item. Crocheted furniture will look especially cozy in winter, as it creates an atmosphere of comfort and warmth.
- We make the upper part from rows of lush columns, separated by short chains of air loops.
- We make the hem by knitting several rows in stitches without adding. This way they will form an even side (for greater stability we make the side higher).
- In the last row we knit air loops - at the end you can insert a fixing elastic band or cord into them to secure the product to the stool.
An interesting option for decorating a room
Using various knitting patterns, you can knit absolutely any model with your own hands. For example, the so-called flower cover or models crocheted from motifs (they can also be decorated with crocheted flower appliqués).
Advice There is no need to be shy in choosing bright, rich colors. Multi-colored knitting threads can add originality and enliven the interior.
If knitting is not your thing, but the beauty and comfort of knitted covers haunt you, try making them from an old sweater. Any item of the desired size and color, knitted with knitting needles, large or medium knit, is suitable for this.
The edges of the sweater must be carefully processed so that the resulting item does not unravel in the future.
The pillow will add comfort when sitting
Depending on the size of the sweater, you can sew a cape only on the seat or on the back, or you can get a whole accessory, for example, by using several old products. Large volumetric patterns in delicate bed colors look especially atmospheric.
Tip Knitted items can stretch, so it is better to make them 1-2 cm smaller in width or diameter.
You can also sew models not only from knitwear, but also from other old things in good condition. For example, from jeans or coats that have become too small. The main thing is that the style of the resulting product matches the interior of the room.
On a children's chair
Chair covers in a children's room are more relevant than anywhere else. Bright, elegant fabrics can decorate the interior of a nursery and interest little fidgets. In addition, they are indispensable in protecting furniture from dirty handprints, spilled drinks or traces of children's creativity.
When sewing such accessories for the nursery, you can give free rein to your imagination: images of cartoon characters, funny animals, flowers, cars, princesses - everything that the child will be incredibly happy about.
The product is sewn according to a standard pattern, as for a regular stool. All measurements are taken in advance. Very often, for children's furniture, capes are sewn only on the back: two rectangular pieces are cut out and sewn in three places. At the end, you can apply a design or decorate it with fabric, sew on “bunny ears” or, for example, design it in the shape of a snowman.
In the interior of a children's room
Tip From the inside out, so that the cover does not slip, you can sew decorative laces that will be tied behind the legs of the stool. You can also use buttons, ribbons or elastic.
Covers made of easily washable fabric on children's high chairs are irreplaceable. They can make life much easier for young parents, since keeping a baby’s chair clean is almost impossible. In addition, the cover will provide additional protection for the child from slipping and, as a result, bruises.
If you decide to sew yourself, you need to carefully choose the fabric: it should not cause irritation to the baby. The best choice is thick cotton for the inner part, softer cotton or lawn for the outer part and padding polyester as a small layer.
READ MORE: Panels in the Provence style, types of wall panels, how to make a beautiful panel on the wall with your own hands
For the bride and groom
- The pattern can be made by removing the pattern from the old cover, or use a ready-made pattern for a standard high chair.
- Having cut out all three parts of the product according to the pattern, we put it together (wrong side to each other), make a basting, and then sew it on a typewriter.
- Turn it right side out, fold the unstitched edges inward, then stitch again. We also sew on pockets, ties or straps, if necessary.
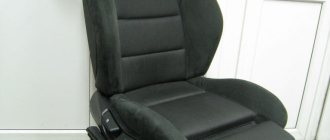
On an office chair
A computer chair can very quickly lose its appearance due to scuffs on the seat. Using a cover, you can update a worn-out chair, make it more convenient, comfortable, or simply liven up your office by decorating an inconspicuous chair with bright decor.
Products with buttons
- We apply transparent tracing paper to the parts of the chair (seat and back), and trace along the outline with a pencil.
- Add seam allowances to the resulting patterns (2 cm for the back, 5 cm for the seat to hem the edge and insert elastic there), cut out and cut the fabric.
- For the back, we cut 2 identical parts, which are then sewn on three sides (except for the bottom).
- For sitting, you can sew a cover with a skirt that will cover the legs. Or with an elastic band that will fit the seat tightly. This model is suitable for an office chair on wheels.
Simple and stylish option
Patchwork style
Patchwork (or sewing from scraps) can be a great idea when you need to sew a chair cover and have a large amount of small scraps of fabric collected at home. In this case, it does not matter at all what color they are or how similar the pattern is. The peculiarity of this type of needlework is that you can combine pieces of fabric of different texture and color.
To make a patchwork style accessory, you will need to prepare blocks - squares or rectangles of the same size cut out of fabric. Their size and quantity will depend on the size of our future product.
You can use decorative pillows
- Before sewing all the parts together, you need to lay them out to create the desired composition. Here everything depends only on our imagination; for example, we can try to convey a gradient or simply leave a haphazard drawing.
- Then the parts are folded right side inward and stitched together on a typewriter. The fabric is carefully ironed.
This way you can sew a stylish cover for the stool seat. To make it softer and more comfortable, you can add padding polyester inside.
Accessories in the patchwork style will suit the interior in country, Provence, boho styles, and will also decorate a children's bedroom or playroom.
Foot covers
Step-by-step instructions for reupholstering a chair with your own hands
Reupholstery of upholstered furniture begins with complete disassembly of the product and inspection of existing damage. Afterwards, the soft filler and fabric are measured, cut, and secured. The structure is assembled and decorated at your own discretion. Before starting work, it is recommended to read the instructions on how to disassemble and upholster the chair step by step.
Disassembly
Most old chairs are made of wood or from materials such as chipboard, and the fastenings are made on a tongue-and-groove basis, using steel corners, self-tapping screws, and wood glue. To disassemble the product, place it on its back, unscrew the legs and armrests. Next, disassemble the bottom, removing staples and other fasteners from it. Then the upholstery is removed as carefully as possible, which needs to be detached without damaging it, since it will be needed to cut out a new cover.
Assessment, damage correction
When the product is completely disassembled, all parts are disconnected, the fabric is removed, a thorough examination is carried out for cracks, chips, and joint defects. If such are found, they are dealt with first - broken parts are replaced with similar, homemade ones, loose connections are replaced. You also need to evaluate the condition of the padding - when the soft surface has serious unevenness, the material is torn or crumbles, it is removed, and a new one is nailed into the vacant space with staples. To make the edges look aesthetically pleasing, the corners of the foam rubber are cut off and something like a chamfer is made along the edge.
Cutting and attaching new fabric
The chair must be covered with properly cut material. Its quantity is calculated based on the perimeter of the back, seat, height of the filler, a few centimeters of hem on the back side of the structure. After measuring the product, a piece of fabric of the required size is selected. The standard fabric width is 140-150 cm, the length depends on the size of the chair, the height of the backrest, and the number of parts. If the structure is folding, a small allowance for unfolding is also necessary.
The standard set of elements is something like this:
- the front part of the backrest and seat are sometimes made in the form of a single piece;
- back surface of the back;
- armrests – internal, external parts;
- a narrow strip along the bottom;
- Some designs require the presence of side parts for armrests and backrest.
All fabric parts are pinned together, tried on a chair, and if necessary, the patterns are slightly adjusted. Next, the elements are sewn down on a sewing machine, the finished cover is put on the chair, pulled tightly, and secured with staples in inconspicuous places. If the work is done manually, use a “sail” or “denim” seam. If you have an overlocker, all seams are sewn over it - this will make the upholstery denser and prevent the joints from unraveling.
Assembly, decor of the updated product
The most difficult thing to assemble is a folding chair, since you will have to carefully fasten the moving mechanisms without losing the bolts or putting the part upside down. If the mechanism creaks or jams, lubricate it with machine oil. At the same stage, wooden parts are processed - they are sanded, tinted with stain, and varnished. The legs and wooden armrests are screwed in at the very end.
Pillows are most often used as decoration. They are sewn from the same fabric as the upholstery, made contrasting, decorated with embroidery and appliqué. If a product has many wooden parts, they are hand-painted and patinated.
Sewing stages
This section contains step-by-step instructions on how to sew a chair cover with your own hands. It will be useful for both beginners and experienced needlewomen. Furniture can have different configurations, so to sew a cape in each individual case, you need to take measurements of all its elements. Patterns for sewing a chair cover are also required. They are drawn by the craftswoman herself in accordance with the measurements received.
Pattern creation and cutting
It is necessary to measure all parts of the chair: the back, armrests, seat and cushion. First you need to determine where the seams will be. They can be marked directly on the rough fabric. If the cover has a design different from the shape of the furniture, then the seams need to be drawn directly on the upholstery, so that they can then be transferred to the material. At this stage, you need to take into account the inserts for contour alignment, bends, and thickness.
In order not to confuse the sizes, you can write them on the wrong side of the cut parts. When cutting, you need to take into account the darts that allow the cover to fit perfectly around the chair without any bumps. Don’t forget about tucks, folds, frills and hems.
A simple pattern for a chair cover with armrests is made so that, in addition to the seam allowances, there is still 20 cm of fabric left for adjusting the product, bends and overlaps. If some pieces of furniture have an unusual shape, then the pattern is drawn like this: a thin fabric is applied to the fragment and crimped on all sides. After the measurements have been made, you need to make patterns on graph paper. Next, the patterns are laid out on the material so that as little waste as possible remains. The patterns need to be outlined with chalk or pencil, taking into account the allowances.
Measure the chair
Make a pattern
Cut out the details on the fabric
Iron the cut pieces
Pattern option for a simple case
Fit
For the armrests you need to make 2 patterns: outer and inner. Both fragments should be sewn together. In this case, the fabric is folded in half, and seam lines and grain threads are drawn onto it with a pencil.
To fit the resulting patterns, you need to attach them to the chair and pin them with pins. In this case, all folds are tucked in, and seam lines are marked on the material. All excess fabric fragments must be eliminated and darts formed.
Since there will be tucks on the armrests, you need to wrap them on the outside under the curve. There will be a lot of excess fabric in this place that needs to be cut off. The tucks are secured with pins. The seat pattern must be placed on the chair and combined with the rest of the parts. At this stage the darts are sewn together. The cutting of the frills is done last.
Try on the details
Tack
Attach patterns for the front parts of the armrest, try on and baste
Sewing
If the pattern for the chair seat cover is ready, you can start sewing all the fragments together. The presented work consists of the following stages:
- Sewing darts and frills. The seam must be strictly along the mark, otherwise the material may warp, causing the cover to lie with folds.
- Sweeping all parts of the armrest. This work must be done on the wrong side so as not to damage the front. After this, the product must be turned out, and small cuts must be made in the corners.
- Connecting the armrests to the seat.
- Stitching the lower part of the inner part of the backrest to the far edge of the seat. At the same stage, the outer part of the product is attached.
- Basting hem details. Immediately you need to lay all the assemblies evenly.
- Installation of lightning. It is better to do this at the side seam.
After sewing all the parts, the cover needs to be turned right side out and put on the chair. In this position, the product is adjusted to the ideal. If it sits well on the furniture and there are no folds, you can sew it on a machine. The last step is to decorate the cover with ribbons or additional elements. If you have any questions, we recommend watching a video on how to sew a chair cover yourself.
Since sewing a cover for a computer chair with your own hands is not difficult, every craftswoman can easily update the interior of a room and refresh the appearance of the furniture. If the product turns out well from rough fabric, then the entire sewing process is made from expensive material. All work will take 1-2 days.
Sew the front part to the seat, trim the seam with braid
Process details with edging
Sew on a machine
Ready case
Cover-cape
Sewing a cover for a computer chair of this type is very easy; even a beginner can handle the job. The model is suitable for rectangular office chairs, where the back is connected to the seat. The cape will turn out to be one piece, which greatly simplifies the sewing and processing of the product.
To calculate the amount of fabric, you need to take two back lengths, one and a half seat lengths and add 2 cm for the hem. When measuring the width, it is necessary to take into account the thickness of the chair.
A piece of fabric is laid out inside out on a computer chair, folded over the back of the backrest and under the seat. The material is fixed to the upholstery with pins so that it does not move, and is swept or chipped directly on the chair, taking into account the bends. Next, the cover is removed and the seams are sewn. The edges are processed.
To prevent the fabric on the back of the back and under the seat from puffing up, but lying tightly, an elastic band is sewn along the edge.
The cover for the computer chair is ready. Now you can put it on and admire your handiwork.
Chair covers
Necessary for sewing a cover
To do this you will need:
- approximately two and a half meters of fabric, depending on the size of the product;
- sewing machine;
- threads and scissors;
- pins;
- items for decor and decoration (at your discretion).
Here are some more tips:
- The pattern of a chair cover begins with its full measurement using a lingering centimeter. It should be stretched well so that the result is the most suitable size. The seats are measured with a slight overlap. Using photos and videos, draw an approximate pattern for each part; it is advisable to do this on graph paper. Experts advise trying to sew a chair cover with your own hands from old materials, especially for beginners.
- To simplify the work, make the front part of the product one-piece and then sewing chair covers will be much easier. Using paper patterns, we make sketches on the fabric, adding three centimeters from each edge, for reserve during sewing. After this, we sew all the parts into the finished product with quick stitches and put on the covers for preliminary verification. You need to put on the eurocover not only to check the dimensions, but also to smooth out unevenness and mark the grooves on the bulges and depressions.
- Before knitting all the parts on the machine, carefully smooth them out with an iron. The hooked cover for the chair is sewn quite simply, because there are no small stitches. We make neat seams on the inside and turn the product right side out.
After that, you just have to put the new clothes on your chairs. If there is a problem with tension, then small cuts can be made in the corners, about 0.5 centimeters. Knowing how to sew covers for a sofa and armchairs with your own hands, photos of which can be easily found on the Internet, you can regularly update your interior!
What to sew from
First of all, what you shouldn’t use to sew a cover for upholstered furniture:
- Any cotton fabric is cheap, but fragile and short-lived. A cover made of cotton, even industrially decatified, for example. jeans, doesn’t hold its shape, easily creeps and wrinkles. And most importantly, cotton fabrics freely allow moisture to pass through, and dirt, grease and grease are transferred to the original upholstery, as they were specially invented for this purpose. This is not bad in clothes, but it brings dirt and skin secretions outside, but not into the chair.
- Wool fabrics are allergenic. Their close contact with the body is unacceptable; At present, woolen underwear is not produced. Wool readily absorbs moisture and grease, which is why it seems difficult to get dirty. But, as you know, wet or simply worn woolen clothes need to be dried. Dry particles of dirt are pushed out of the wool - it has the property of self-cleaning. However, if a woolen cover covers the chair, then at least half of the accumulated dirt will be given to it.
- Velvet and velor accumulate dust, dirt, and grease and transfer it to the chair. Poorly cleaned and washed. They wear out quickly from regular cleaning and washing.
- Silk, satin, scallop are slippery, the cover tends to slide off. Squeezed folds quickly cake and are difficult to straighten. They get wet and leave grease on the chair, which is only slightly worse than cotton. They accumulate static.
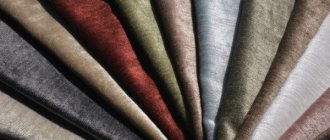
The chair cover needs to be sewn from:
- Protective technical – the best material is linen canvas. Even better is a painted canvas. If it is impregnated with a water-polymer emulsion, the cover will become waterproof. In second place are synthetic dress fabrics for outerwear. The advantage is the variety of colors, but they adhere less well to the original upholstery. On the third, for the chairs outside, there is hemp (made from hemp fibers) or propylene matting. On the last one there is a homespun (hemp cloth).
- Bright colorful decorative - from any furniture upholstery fabric.
- Decorative prestigious - jacquard, chinille and other traditional dense upholstery fabrics. But the best option is modern semi-synthetic upholstery, like for a computer or office chair, see below.
DIY computer chair cover |
At the moment, sewing covers for computer chairs is being popularized. This attribute is very fashionable and decorates the interior quite well. Using a cover you can not only keep your computer chair clean, but also wash it if it gets dirty. Most often, owners of computer chair covers claim that these types of covers help to simply and economically decorate the interior and diversify life.
A fairly commonplace reason for sewing a cover for a computer chair is to protect it from the claws of pets. It's no secret that cats and dogs love to scratch everything that gets in their way. If trimming the claws is not possible, then the only reasonable option is a cover.
The advantage of a computer chair cover is its cost. It is several times less than the cost of upholstering or reupholstering a chair.
The cost of sewing a cover for a computer chair
If you decide to sew a cover yourself, then most likely you need to stock up on 1.5-2 meters of fabric, and then proceed to the correct pattern. Experts note that sewing a cover does not take much time and effort. The fabric for the cover can be chosen inexpensively
Pay attention to whether the fabric is easy to wash and iron.
In addition, it is very important that the fabric is strong and dense, because the cover will be subject to constant stress
How to correctly take measurements for sewing a cover
The pattern for a computer chair cover will be better if you take the measurements exactly
It is very important to pay attention to the legs, because they tend to widen towards the bottom. Therefore, you need to measure the chairs several times and depict this on the diagram, and only then proceed to pattern the cover for the computer chair. It is necessary to detect all wide and narrow areas, and then transfer them to the drawing
It is necessary to discover all the wide and narrow areas, and then transfer them to the drawing.
Now you need to put the paper to the back with the seat of the chair, and then trace the outline with a pencil. Now let's start cutting out these parts using stationery scissors. Now let’s adjust the paper pattern by attaching it to the back with the seat. The resulting patterns need to be taken as a base in order to further build other parts of the pattern of the cover for the computer chair. These parts need to be made using some calculations.
What is important to know for sewing a cover
Sewing such a cover is quite simple, especially if you have a sewing machine at home. When sewing, you don’t have to worry about processing the cut edges of the fabric if you don’t have an overlocker
It is very important to make the pattern correctly and cut the fabric with high precision, taking into account seam allowances with hemmed edges. With some experience, it will not be difficult to calculate the details of the back with the seat on the paper base, and then transfer everything directly onto the fabric base
Be aware of seam allowances, back curves, back thickness and many other issues, such as fabric shrinkage during washing.
The simplest and most reliable way to create a cover pattern is the dummy method. It involves using tracing paper or newspaper to cover parts of the chair and then cutting them with scissors, thus obtaining a paper cover.
If you have never sewn covers for a computer chair yourself, then it is best to make a test cover using inexpensive fabric, and only then sew the cover that you will use.
Very often, covers tend to shrink over time, but to prevent this from happening, it is necessary to sew fastenings in the form of ties in the corners, tying them to the legs that are located under the chair.
There is no need to sew covers that fit right next to each other.
Measurements and pattern
In order for the pattern to be accurate and the product to fit well, you must first take measurements.
1Take measurements. Depending on the model of the cover, you need to measure the height and width of the seat and back, as well as the estimated length of the product. Pay special attention to the measurements of the chair legs, as in some models they may widen downwards. In this case, you need to take several measurements at the top and then at the base of the chair. We mark the widest and narrowest areas in our drawing.
2Drawing. Before transferring the measurements taken to the pattern, we draw a drawing on
READ MORE: Correct installation of a shower tray with your own hands
paper
, we note all the measurements taken there. The simplest pattern is for a one-piece cover: it simplifies sewing, but requires a little more fabric than cutting all the parts separately.
3Pattern. After that, we proceed directly to the full-size pattern. It can be built on tracing paper, newspaper or scraps
wallpaper
, having repeated the schematic drawing.
4Checking the pattern. To be completely sure that the pattern is correct, apply it to the chair and secure it with tape. This way we can see all possible inaccuracies made when constructing the drawing and correct them before sewing begins.
5Final option. Then we build the final version of the pattern - with seam allowances (about 2 cm on each side).
Before sewing, you should first take measurements
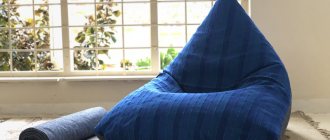
How to sew a bean bag chair with your own hands?
Despite the fact that the bean bag chair has a rather non-standard shape, it is quite possible to make it at home. But first it’s worth deciding on some nuances. The first thing you should choose is the fabric for the cover.
It is very important that it is durable and easy to clean. After all, you will have to wash the cover often
Particular attention should be paid to the appearance of the material. It depends on this how appropriate such a chair will be in the interior.
The most commonly used fabrics are oxford, microcorduroy or flock. If desired, you can make a chair from eco-leather. Such products look very beautiful and at the same time fit well into different types of interior.
It is also worth choosing the material for the inner cover.
It is very important that it has small holes that provide ventilation. Often such fabric has a low cost
In addition, you will definitely need the following:
- sewing machine;
- threads;
- pencil;
- centimeter;
- scissors;
- paper;
- lightning;
- filler.
Please note that the simplest and most popular filler option is polystyrene. It is considered harmless and also hypoallergenic
This is very important, especially if there are children in the house. If all the necessary materials have been selected, then it’s time to start working.
To do this, draw a pattern on paper. It can be absolutely anyone. It all depends on what kind of chair you plan to make
If all the necessary materials have been selected, then it’s time to get to work. To do this, draw a pattern on paper. It can be absolutely anyone. It all depends on what kind of chair you plan to make.
Transfer all the pattern pieces onto the fabric and carefully cut out. Connect two pieces of the same shape using pins and only after that you can sew them on a sewing machine.
We sew a zipper on one side of the workpiece.
Using the same principle, we make the inner cover from a thinner fabric.
If desired, you can sew the handle to the outside of the main case.
When both blanks are sewn, fill the inner cover with polystyrene. This must be done very carefully so that it does not crumble. The material is highly electrified and assembling it will be quite problematic. Then simply put the main cover on such a blank and that’s it, the bean bag chair can be used.
Children's bean bag chair
In a children's room, a bean bag chair will always be appropriate. You just need to adapt it when sewing and make it a little smaller.
You will need the following materials:
- fabric in two shades;
- sewing machine;
- threads;
- scissors;
- lightning;
- polystyrene
First, decide on the size of the chair and cut two pieces of fabric. After which they need to be sewn along the lines marked in the photo.
Fold the workpiece in half, matching the sewn parts. Cut a piece of fabric in the shape of a semicircle from the corner.
Sew the workpiece as noted in the photo.
The next thing to do is sew on the zipper.
If necessary, the edges can be secured with pins.
Fill the cover with polystyrene and that’s it, the original bean bag chair is ready!
Unusual bean bag chair
For those who have old or unnecessary jeans, we suggest making a very original chair. Rest assured, it will definitely not go unnoticed.
Necessary materials:
- jeans;
- scissors;
- pins;
- sewing machine;
- threads;
- thin cover with polystyrene.
First you need to cut out small pieces without seams from all the jeans.
Place them on the work surface in random order, based on the desired size of the chair.
Secure them with a pin and only after that you can sew them on a typewriter.
At this stage, you can iron the workpiece.
Place the thin polystyrene cover into the main cover and stitch the last edge.
The result is an original bean bag chair.
Useful tips
If you are not an experienced seamstress and are not comfortable with pins and threads, we recommend taking note of a couple of practical tips. They will help you learn the intricacies of how to quickly make a chair cover with your own hands that is no worse than those sold in specialty stores.
Making a pattern is not the easiest thing, so if you have never made one before, it is best to be confident in its execution. For this:
- Transfer the pattern to some unnecessary fabric - for example, an old bedspread.
- Trim off any leftovers and sweep the pieces together.
- Place the resulting cape on the chair. If everything is fine, you can safely start working with the purchased material.
When making a cover for the first time, it is also better to avoid materials with patterns and checkered patterns, since it will be very difficult to fit them. When choosing a material, you should also focus on the presence of water-repellent properties and resistance to direct sunlight. This will allow you to extend the life of the created product.
The purchased fabric can be washed first in the recommended cycle. This way you can check whether it will “sit down”. And make sure what size indentations to make when cutting. If you purchased material that frays, it is better to initially process it with an overlocker or a simple stitch.
Tips for use
Caring for frameless furniture is easy. A chair cushion filled with polystyrene foam may decrease in volume over time as the foam filling gradually loses air due to stress. The problem can be solved by simply adding padding. It is better to place frameless furniture filled with bulk materials away from heating devices, and also not to keep it in the sun for a long time, since due to the gradual evaporation of moisture, the filling will decrease in volume and the contours will be deformed.
If you decide to sew a bean bag chair for your children as a comfortable high chair, then it is important to wash the outer cover correctly, especially if it is multi-colored. For regular cleaning of the surface, you can use special wet wipes
Gentle substances without chlorine are used as laundry detergents, preferably with a liquid consistency.
A variety of options and shapes of a bean bag chair can bring comfort and mood into everyday life. Those who love new experiences just need to sew several outer covers for one pouf and change them according to their mood. Frameless furniture is a great way to decorate your interior.
Place away from heating appliances
Wash with gentle powders
Wet wipes for furniture