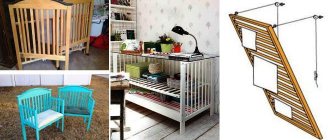
Do it yourself
One day my favorite chair broke. I didn’t bother to repair it, since it was inexpensive and had become completely loose over the years of service. A trip to the furniture store and the market left me in a discouraging state: “Are the chairs definitely not made of gold?” Models in the lower price category are not so shocking with their prices, but it would be a stretch to call them ergonomic. But a really good thing costs as much as half a sofa.
Without further ado, I decided to make the chair myself from a car seat. I saw the idea on the Internet. Fortunately, living in a private house, it is possible to equip a primitive workshop. At first, the operation did not seem very difficult, but in fact there was a lot of fuss. But that’s the beauty of making something yourself and being proud of it for the rest of your life.
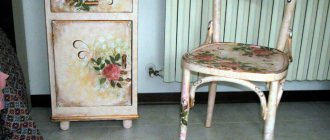
Office chair reupholstery
Office chairs are very comfortable and durable. But even they require updating over time. That is why reupholstering such chairs is an opportunity to update furniture and give it a second life.
Artificial leather and thin fabrics can be used as materials for upholstery. If necessary, the frame, base, and filler are replaced.
Of the necessary tools you need to prepare the following set:
- — Stapler;
- - Scissors;
- — Screwdriver;
- - And also the fabric itself.
Before reupholstering, the chair must be disassembled. When measuring fabric for covers, you must not forget about the allowances; they should be enough for the covering. The remaining allowances after work must be carefully trimmed with scissors.
When disassembling the frame, do not lose the screws, as they will be needed for reassembly, and the absence of some of them will delay this process.
All chairs are welcome to visit us
So there were a few important things to do. 1st – find a suitable car seat. By the way, the idea of using a seat from a vehicle is quite sound. It is very comfortable and offers a wide range of adjustments. You can set it up to work close to the monitor, and you can comfortably lean back on your feet to watch a movie.
Timati personally invited the first participant to “Bachelor”: this is Dasha Pogadayeva
KamAZ celebrates the 45th anniversary of the release of the first truck in the series
Scientists have created a robotic glove with artificial intelligence
After several idle attempts to search the car market, a front seat from a Volkswagen Golf of the 2000s turned up in good condition. I don’t remember the exact amount, but it cost me a third of the cost of a good office chair. Not cheap - I was counting on big savings.
An important detail: the seat had a built-in airbag. It is not safe to use the seat with it! I asked it to be dismantled at a car repair shop for a modest fee.
The 2nd thing is to find the lower cross with wheels. I didn’t find anything useful in the advertisements or at the flea market, so I decided to remove it from my old broken chair. After all, the only function of the crossbar is to support the car seat and move the wheels back and forth.
We disassemble the cross
After preliminary fitting, it turned out that if you combine a hedgehog and a sperm whale, the structure will be too high due to the large thickness of the lower part of the car seat. There is no way I can shorten the car seat. I had to dodge and reduce the height of the stand.
As you know, an office chair is height adjustable. It turns out that a pneumatic cylinder (at least in my case) under pressure is responsible for this. That is, it is unsafe to disassemble it, you never know - it will explode. I looked for a solution on the Internet. It turns out that you can bleed off the gas if you drill through the steel wall in the upper part of the cylinder with a thin drill. To get it out, I disassembled the base of the chair.
How to sharpen scissors: unexpected uses for ordinary aluminum foil
Doesn't change over the years. What Ilona Bronevitskaya looks like at 60 years old (new photos)
Snow fence: an ice wall has appeared in the UK (photo)
How to take measurements and how much fabric to buy?
We have already figured out the correct type and quality of fabric. The amount of fabric can be measured in several ways.
The fabric will be attached from the inside, this requires allowances.
This can be difficult since the upholstery is tightly stapled to the frame pieces.
Then you should measure the finished darts, adding allowances for using foam rubber.
Shortening the structure
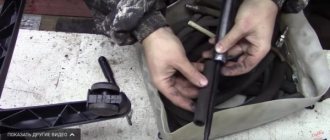
Now you need to cut the cylinder by 15 cm. To do this, clamp its lower part, where the rod comes out, in a vice. Using a grinder, I carefully cut off the wall of the structure in a circle and removed the rod. I do not need him.
Then, using the same grinder, I cut off the plastic pipe of the office chair, which housed the pneumatic cylinder, almost to the crosspiece with wheels. Inside the cut part there is a cylinder guide. I knocked it out with a hammer and a piece of wooden slats and hammered it into the hole in the crosspiece. The cylinder should fit into the guide without interference.
Fabric selection
When choosing fabric for upholstery, you must remember that the fabric must be dense and quite durable
It is important that the material is easy to clean and, if possible, impregnated with a special water-repellent solution. In addition, the conditions in which the chair will be used are immediately thought through.
For example, if there are pets in the apartment, then it is better to purchase anti-vandal material, for example, flock. Such a coating will not break through the claws of cats or dogs and will not even become covered with snags.
For a chair in a children's room, chenille or matting is more suitable, which do not wear out from everyday use, but are easily cleaned from stains and other consequences of children's games. The advantages of these materials include:
- density;
- naturalness;
- long service life.
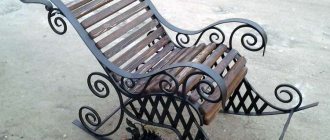
An armchair in the living room should look impressive, so it is better to give preference to materials such as:
- jacquard;
- tapestry;
- leather.
It is better to choose fabrics with a distinct pattern that demonstrates the good taste of the owners.
Cylinder fixation
What happened? There is a cylinder, in the upper part of which there is a fastening to the chair. I cut off the lower part and shortened it. It needs to be secured to the crosspiece somehow. I decided to make a plug with a fairly long mounting screw attached to it. The easiest way to turn it is on a lathe. I asked a relative who works at the factory to do this.
Celebrities who post very strange things on their Instagram
Abandoned children for whom he does not pay child support. Who was Anastasia Makeeva's fiancé?
Teaching children to help their neighbors: qualities that help a student’s success
The diameter is such that a plug 1-2 cm high is inserted into the hollow cylinder quite tightly, without dangling, but without tension. In the center of the plug you need to drill a hole for a double-sided M8 screw.
So, I inserted the plug inside the piston from the cut end side along with the screw. To prevent it from moving, I drilled a hole on the side for an M5 bolt. You can do this all the way through, or you can do it to the middle. I cut the thread and secured the linkage with a bolt. It is important that the stopper not only secures the cylinder and plug, but also the screw.
Next is a matter of technology. The lower part of the cylinder was inserted into the cross along the previously installed guide. Place a large washer on the back side of the screw and tighten it with a nut. The shortened base - the base with wheels - is ready. Now you need to mount the car seat to it.
What happened? The base has become much shorter. The design retained the ability to rotate around its axis. The disassembled cylinder no longer allows changing the height position. But this is not critical - the car seat has a similar function.
How to sheathe it yourself?
The process of upholstering a chair is slightly different from reupholstering, although in many ways it is very similar to it. This operation involves covering the chair with fabric. For such purposes, only furniture is used that was not originally equipped with fabric upholstery.
Upholstery technology involves performing several sequential operations:
Before upholstering a chair at home, you should stock up on some tools and materials. To perform such operations you will need fabric. Products made from bamboo, cotton and other natural materials can be used as this substance.
It is important that the fabric can withstand constant loads and retain its properties for a long time. You will also need a construction stapler, scissors, etc.
d.
At this stage you need to disassemble the chair into separate parts. This will significantly speed up the sheathing process. At the same time, try to remember in what order the elements were dismantled, so that in the future it is easy to assemble the structure back.
After this, fabric blanks are made. They are cut out in accordance with the dimensions of the individual element of the chair. Try to use substances with a small margin in order to be able to adjust the location of the material on the surface. If you are planning to make an upholstered chair, foam rubber is placed inside it. This substance also takes up a certain volume, which should be taken into account when forming a fabric blank.
The final stage is sheathing. They start with small parts, such as the armrest. The plating algorithm is quite simple. Initially, the fabric is placed on the surface of the product and stretched a little so that it is level. It is advisable to do this with an assistant, which will significantly speed up the process. When everything is in place, the material is nailed to the frame from the inside. It is important to constantly monitor the tension to prevent distortion.
Shortening the guides
The car seat has its own guides along which it moves back and forth. These are metal slides with steel balls inside, like bearings. The structure slides along them.
They are afraid to use it: Europe is reluctant to use the AstraZeneca vaccine
Got “beauty injections”: how Bozhena Rynska’s face changed after the procedure
What does Konstantin Solovyov’s wife look like, for whom he left his children and wife
The guides are long, and people and furniture will cling to them. I cut them with a grinder 10 cm from the back. In the process, some balls spilled out. But those who were in front remained. In principle, the adjustment continues to work, but it is not really needed for an office chair - it’s easier to roll back a couple of centimeters on the wheels than to change the longitudinal position of the car seat seat.
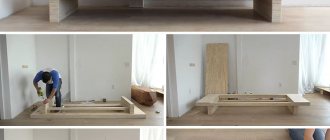
We combine two chairs
Now you need to make a bracket to connect the office chair and the car seat rails. The latter are spaced wide apart and do not fit with the short base of the high chair.
To do this, I made a simple lattice structure. I cut 2 pieces of 15 mm pipe with a square profile and welded metal plates with pre-drilled holes for fasteners along the edges (can be bolted). The size is selected in such a way as to screw them to the car seat guides. They act as a longitudinal fastening.
I also welded 2 pipes across these square pipes (you can use bolts) (I took a 10×30 mm profile). Moreover, I secured them closer to the rear wall, since the center of gravity of the car seat is shifted due to the large backrest. I adjusted the distance so that the base of the office chair could be screwed to the crossbars.
That is, due to the fact that the bracket is attached to the Ford seat guides, and the guides themselves move back and forth, you can adjust the center of gravity of the entire structure to the weight and posture of the person.
DIY Office Chair MAKEOVER
DIY Office Chair Makeover / DIY Office Chair MAKEOVER Video
00:01 [music] 00:07 hello everyone, how are you my new 00:10 screensaver I’m starting this master class without 00:13 any hopes and expectations of success 00:15 because I haven’t seen anything 00: 17 similar and I’m not sure of the correctness 00:19 of my actions 00:21 but this idea has been haunting me since 00:23 the moment I came up with it, so I 00:25 simply have to share it with you everything 00:28 that I found on the Internet regarding 00:30 the remodeling of the office chair was limited 00:32 only to painting the legs and reupholstering 00:34 today I decided to break this 00:37 system and make a stylish one with you 00:40 Gates chair based on pottery barn 00:43 just let's you and I will agree that 00:45 you will not count how much money I 00:47 spent 1 materials for this alteration 00:50 and what kind of chair I could buy for this amount 00:52 I will tell you all the numbers myself at 00:55 at the end of the video, everything I will show you today 00:57 this is a master class 00:58 for the sake of the master class this is an experiment 01:01 the implementation of an annoying idea that 01:04 maybe it will push you to some 01:05 interesting thoughts and inspire redo 01:08 something of our own, let's go, so here we go 01:12 he's a hero of our time, although he's not a hero 01:15 and not modern, and our house isn't suitable for an office 01:17 in general, it's been a long time coming, this is that office chair 01:19 on my son went through a remodel and finally 01:22 his time has come, first of all I want 01:24 to repaint these disgusting chrome 01:26 legs which, in my opinion, are not appropriate anywhere except 01:29 for an office, for this you need to 01:31 thoroughly wipe with a damp cloth 01:33 removing smudges and stuck oatmeal 01:36 yes, sometimes children sat on it then 01:38 degrease it with nail polish remover 01:45 I will coat it first with a primer 01:47 then with dark gray paint from a can 01:50 I’m very I'm worried that the paint will 01:52 scratch off the legs, so I decided 01:54 to first apply three thin layers 01:56 of primer and then cover them with three 01:59 thin layers of paint after each 02:02 layer of whatever it was naturally 02 :04 let it dry and close the door before 02:06 and I really wanted to show you 02:08 how I paint why I had to supplement it 02:13 filming work with general cleaning 02:18 what we have at this stage is now the essence 02: 20 meaning the red thread of this project is his 02:23 Majesty the hula hoop 02:24 it’s plastic but very hard it’s 02:27 good because I can drill it at 02:29 without any problems and it will hold its shape 02:31 perfectly by the way mine hula hoop with them 02:34 the diameter is 72 centimeters and for this 02:37 office chair it fits perfectly 02:39 we’ll better screw it on 02:41 with the help of brackets for guides 02:44 drywall 02:45 my husband came up with this on just thought of it like this 02:47 we screw it on, but first we need to bend them 02:50 in half like this so that later we can 02:52 put them on a chair with a hoop 02:54 [music] 02:57 we drill a complicated hole and 03:00 we insert a bolt from the reverse side 03:02 we press it with a nut 03:04 like a man it happens something like this 03:08 from below we drill the hula hoop itself together with 03:11 the chair and fasten them with the same bolts with 03:14 nuts but without metal brackets and 03:16 attention further, my husband also came up with a nut 03:19 we screw it under into the foam rubber and upholstery 03:22 so that in the end it ends up inside 03:23 in general the whole chair 03:25 [music] 03:33 so the frame is finally ready it came out much stronger 03:36 than I imagined 03:38 I can even easily carry the entire chair 03:40 holding it by the hoop, everything is attached to 03:42 conscience and to the metal brackets we 03:45 bent a little so that nothing will happen to anyone 03: 48 pricked although after three centimeters 03:49 a farallon for this would have been quite good anyway 03:51 fantastic upholstery finally for her 03:55 I chose foam rubber 3 centimeters thick and 03:58 for the seat I’ll most likely take 04:00 centimeters 5 but it’s not accurate to wrap the chair 04:04 I’ll fold the chair like this 04:06 I hug the chair in half and measure out the approximate length 04:09 04:11 [music] 04:13 cut it off, put the foam where it should be 04:17 and stitch it with a thick needle 04:20 and with a strong thread right under the hula hoop am 04:23 as if going around it from the inside 04:26 [music] 04:28 we’ll make darts from foam rubber on the side 04:32 but first we’ll shoot this one to the seat 04:34 side 04:37 I pinch the dart and stitch it from the inside too 04:39 hello Kamasutra diaiwai cheek the same 04:44 we do the same on the other side 04:49 next I want to connect two layers of paralon 04:52 outer and inner 04:53 I do it again I stitch through both layers with a needle 04:56 through the layers 04:57 [music] 05:00 you do the rhymes chaotically here it’s more important 05:03 strength rather than accuracy is small 05:06 a digression about the foam rubber if you 05:07 you tighten it too much, otherwise the foam rubber 05:10 maybe tear and the stitch will be 05:12 useless, plus it may form 05:15 a very deep depression which can be taken into account under the 05:17 upholstery under the covering 05:20 what I advise you to do is tighten the foam rubber 05:23 exactly until the moment when it 05:25 only - the indentation just begins to appear 05:26 and stop there and 05:29 by the way, the wider the stitches, the less 05:32 the likelihood that the foam will tear 05:34 well, the sides are ready and at the back 05:36 we’re going to see what we’re going to cut now 05:40 live and model the foam rubber layer 05:42 right on the chair we make one large cut 05:45 cut in the middle and 2 on the sides when you 05:48 apply the foam rubber to the back 05:50 you will understand where 05:51 we cut the foam rubber until until the joint 05:54 of the two parts lie on the same line 05:58 we sew, continue the same thing until we do it 06:03 we sew up all the cuts on the back wall 06:13 in the end we should get something like this 06:15 let’s imagine Frankenstein’s monster grandpa I 06:19 I decided to cut it out of foam rubber of the same thickness 06:21 I don’t see the need to make it 06:23 I cut the corners thicker and remove it a little 06:26 the thickness 06:27 [music] 06:30 I leave it at startup so that I can sew it on 06:32 going around the bottom of the hula hoop after all 06:35 this chair is an egg and the circle should be taken into account as clearly as possible 06:40 the space between the back and the seat 06:42 leaving it unsewn on the sides sewing 06:45 the seat right through 06:47 I’ll shoot it from below straight to the plastic 06:49 of the chair with a furniture gun, in general, here's 06:52 how the body of our chair came out, time 06:55 for upholstery, I chose this upholstery 06:57 mustard-colored fabric now we need 07:00 to fit it as tightly as possible on the chair 07 :03 here, of course, you can’t do without darts, and 07:05 since my chair turned out pretty good 07:06 I’ll model the darts symmetrical 07:08 we cover it right from the inside out and start 07:13 pinning the fabric with pins 07:15 [music] 07:20 basting it by hand logically should 07:25 come out with 4 darts along the side fold 07:28 turn it over, check if everything fits 07:30 and sew the darts on a machine 07:33 at first I planned to fold the fabric 07:36 as is, but then I still thought that 07:38 it makes sense to hide the covering from two 07:41 parts so that it fits more 07:43 organically and tightly, so I will trim 07:46 the fabric in a circle leaving a seam allowance 07:48 centimeters two or three between the backrest 07:52 the seat we make a line for which 07:54 we created ki and a couple of ribbons so that 07:56 we can 07:57 deepen the part specially left 07:59 a hole by pulling ribbons into it and 08:02 I tie them where we can’t reach 08:04 improvisation we’ll measure everything according to back 08:13 the maximum width required 08:16 for a normal hem in front 08:17 the minimum at the same time and go around the chair 08:20 to know the length of the future part since 08:23 I suspect that we will need to sew it 08:25 from two parts 08 :30 it will be difficult for me to explain to you how 08:33 exactly to cut out the side part, so 08:35 I decided to draw you an approximate diagram 08:37 so that you have something to rely on 08:39 we sew the sections together to loop the part and 08:42 we pin it in a circle to first detail 08:44 by the way, during the fitting process 08:46 2 more darts were formed on the sides 08:50 I mark where they will cut for the legs 08:53 [music] 08:56 I stitch on the machine and make a finishing line 08:58 to emphasize circle and strengthen 09:02 all side seams 09:03 I process the slots for the legs like this 09:06 I additionally make a corner at the corner 09:08 at the top before shooting the cover at 09:11 at the bottom of the chair we carefully pull it onto 09:13 the chair and pin it with pins 09:22 draped beautifully, excess fabric here 09:25 no science, complete improvisation 09:37 aims at the bottom plastic 09:39 with a chair they stretch the fabric as much as possible 09:41 chair 09:50 when everything is as neat on the inside as it is on the outside 09:53 on the outside my inner perfectionist 09:55 rejoices 10:00 [music] 10:25 Well, the chair is finally ready, it wasn’t 10:28 the easiest master class, but honestly 10:30 to tell you, it took me more time not on the process itself 10:32 to think about the process because 10:35 I couldn’t find analogues of such a master class 10:37 anywhere and I had to 10:39 model, design and adjust 10:42 in size myself, but if you suddenly want 10:44 to repeat my feat you will already have 10:46 times easier, I’m very glad that a fundamentally new way has appeared on YouTube 10:49 10:51 redesigning an office chair that I 10:54 will most likely even include in my playlist 10:56 hackney brand because it turned out very 11:00 a good analogue of a reborn chair 11:03 write to me, would you risk repeating 11:05 such a master class and did you have any experience at all 11:07 experience in remaking chairs, tell me how 11:10 you remade them there, definitely 11:12 write did you like our new 11:14 screensaver we are still in the process of finalizing 11:16 therefore we are open to any wishes and 11:19 suggestions we will meet you in 11:21 comments I will answer each one in the first 11:23 days after the publication of the video but for now 11 :26 bye 11:27 [music]
Related:
“BACK TO THE OLD AGAIN?!” with Bubi * RENOVATION OF OLD FURNITURE * Part 2 BED MATTER