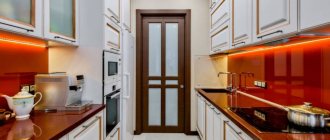
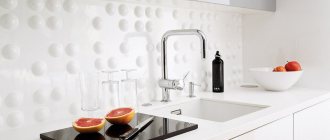
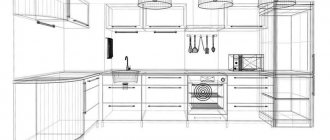
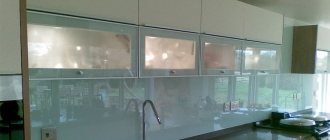
When choosing plastic to decorate the apron area, you are choosing a universal material. Firstly, such panels will reliably protect the walls from grease and will be easy to wash and clean. Secondly, you can install the apron in one day, and you won’t have to study installation technology or acquire special skills.
By the way, advice: for the work area it is best to choose sheet products that can “survive” high temperatures.
Look at the product packaging: if it states that plastic panels are resistant to temperatures up to +250 degrees, you can safely choose them. Now let's move on to the installation. You can attach the wall panel in several ways: using a frame, glue or simply self-tapping screws. Let's take a closer look at all the mounting options.
What should an apron be like?
An apron, as an interior element, not only decorates the space between kitchen cabinets.
It is designed to protect walls from liquid, grease, dirt and soot. In order for the coating to fulfill its function, it must be made practical, easy to clean, resistant to high temperatures and chemical detergents. The wall cladding near the work surface should have a pleasant appearance.
Nowadays, aprons are made of ceramic tiles, mosaics or glass. For those who want to make a renovation that will last forever, cladding made of natural stone, metal or brick is suitable.
What requirements must a kitchen apron meet?
A kitchen apron is an integral part of the interior of the kitchen. This part of the design must have several basic qualities:
- Practicality.
- Resistant to chemicals and any cleaning agents. When washing dishes, a cleaning solution gets onto the surface of the kitchen unit. If the apron is not protected, it will lose its attractive appearance after just a few months of use.
- Resistance to humidity and temperature changes. Furniture and accessories without a protective coating will deteriorate in a short time.
- Long service life. Since the apron is mounted to the wall, it is inconvenient to often change the structure to a new one, especially if holes for fastening are drilled in the wall.
The requirements are due to the fact that the element is located in the working part of the kitchen - near the stove, sink and countertop. Food is prepared in this area, so the main task of the apron is to protect against all kinds of splashes, food particles and any kind of contamination.
How to secure a plastic apron in the kitchen with dowels: instructions
Installation using the mentioned fasteners should not cause any problems. This installation method is best used on panels that have a pattern on them, as the same adhesive may cause some damage to the image. It is not necessary to move the furniture set during the work. Installation should be carried out according to the following plan:
- Use a drill or hammer drill to make holes in the wall and apron for the dowels. At this stage, a building level will be useful, with which you can make accurate markings.
- Clean the surface from any dust that has formed.
- Place the prepared apron against the wall and secure it with dowels.
- Mask the caps with furniture plugs, the color of which should match the plastic.
An apron installed in this way can be easily dismantled: to do this, you need to unscrew the dowels and carefully remove the product. In addition, dowels (concrete screws) or anchor bolts can be used for fastening.
Varieties
The following materials are used in the manufacture of plastic aprons:
- PVC panels, the standard width of which is 25 cm and thickness - 0.8–1.2 cm. They are produced in lengths from 2.6 to 3 m. Their main feature is the presence of special locking fasteners on glossy or matte parts for seamless connections. Therefore, with proper installation, you can independently make a kitchen apron for the kitchen on the wall in the form of a monolithic surface from individual elements. The main thing is that there are no cracks, otherwise water and debris will get into them. PVC is used to make plain, thermo-film-coated or varnished aprons.
- ABS sheets are single-layer plastic materials decorated with photo printing or designs. A finished kitchen apron made of ABS plastic is usually produced in dimensions of 200 x 60 x 0.15 cm. Its main advantage is its high resistance to mechanical damage and the absence of deformation during bending. Aprons made of sheet plastic are produced in a wide variety of designs, since high-quality images are applied to the surface of the product. In addition, you can order an apron with an original design.
- Cast polycarbonate is a refractory plastic material that looks like ordinary glass. The surface can be glossy or matte. Kitchen aprons made from this material are sold ready-made. Images imitating tiles, decorative stone, brick and other materials are applied to the inner polycarbonate coating. In addition, such an apron can be equipped with lighting elements (for example, LEDs) that will highlight the product.
Taking into account the size of the kitchen wall that needs to be tiled, you need to calculate and select the appropriate model.
Preparation of plastic panels, layout and cutting
The most important stage of installing a plastic apron is the creation of blanks from which the working wall will be formed in the future.
To begin with, measurements are taken of the desired final product, taking into account the method of fastening, the presence of overhangs of furniture or the exact fit between the desktop and hanging cabinets.
The easiest way is to use OSB sheets. Their height completely fills the working wall; you only need to cut off part of the required length.
When using panels and lining, it is best to mount the pieces vertically, using short, narrow pieces. Before you start attaching the pieces to the wall, you need to stack them on the floor. This is a check that will allow you to see the finished dimensions and the size of possible miscalculations.
For cutting, use a fine-toothed hacksaw or carpenter's knife and a long metal ruler.
Wall mounting methods
The method of fastening will largely depend on the weight of the apron or its individual elements. Here are the different possible options:
Glue
One of the most popular is liquid nails. Liquid nails can be used to glue plastic, fiberboard, lightweight MDF panels, ceramic tiles and mosaics, artificial stone, and mirrors to a flat, grease-free wall. The main thing is accuracy: the glue should not be applied too close to the edge of the panel.
Installation of sheathing
This method is used when there is concern that the panel may fall due to its own gravity. The second reason is that the wall is too uneven. Third, it is much easier to dismantle and replace with another apron using sheathing rather than liquid nails. Both fiberboard and PVC panels can be mounted on the sheathing. But one of the heaviest materials is a thick MDF board.
Using lathing, you can install panels in several ways:
- installation of wooden beams to the wall (using self-tapping screws or glue), fastening panels to the timber with glue;
- fastening the panels to the timber using self-tapping screws or dowels;
- installation of an aluminum profile as a beam, fastening the panels to the profile with self-tapping screws.
Let's take a step-by-step look at how to install an MDF model with your own hands using self-tapping screws.
- Before starting work, the furniture must be moved away and the wall carefully leveled.
- A frame made of timber and metal profiles is mounted according to the level. The thickness of the timber should be no more than 0.5 cm so that the apron fits behind the tabletop.
- The wooden beams are treated with bioprotection.
- The apron is applied to the wall and markings are made for the holes. Holes are drilled on the MDF board - blanks for self-tapping screws.
- Only after this the apron is again applied to the wall and tightened with self-tapping screws. They begin to screw in the screws little by little: first in the corners, then closer to the center.
- For aesthetics, you can install caps on the screws.
Standard fasteners
Suitable for not too heavy panels. Loops are glued onto their reverse side using a suitable method (available in different versions). Markings are made on the wall where the hooks will be screwed under these loops. Using a drill, holes are drilled into which dowels with hooks are inserted. After which the panel is hung.
If hooks are made only along the top edge, then the panels will hang at different levels from the wall - the gap will be larger at the top, and the bottom will fit snugly against the wall. Not very beautiful, but easier to install the apron. Hooks in two rows will make the appearance more harmonious and attractive.
Using furniture glass holders
There are a great variety of them sold: in metal, plastic. To attach the entire apron you will need a large number of holders. In addition, it is worth considering that they will not withstand heavy material (thick glass or MDF) and will be visible after installation. But this is not a problem at all: nice mounts do not attract unnecessary attention. But the mounting method is simple - the holders are fixed on the wall (with glue or screws), and the apron is inserted into the holders.
Metal U-profiles or U-profiles
Such profiles are installed at the top and bottom of the apron, after which the wall panel is simply inserted and pushed forward, like a wardrobe door. In this method, the main thing is a clear calculation, otherwise the light canvas will warp, and the heavy one simply will not fit into the grooves.
Laying tiles and mosaics with cement mortar
The method is considered outdated, but properly installed tiles will last for decades. This method is chosen mainly because the cement itself is cheap compared to glue.
To learn how to install an MDF apron in the kitchen, see the following video.
Preparing the work area before hanging the kitchen apron - step by step
Once you have made all the measurements, you can purchase an MDF panel. Now it’s time to prepare the working area and all the materials you need for installation.
Although the panel is attached to an uneven wall surface, it is better to remove strongly protruding defects.
To protect yourself from the growth of various fungi on the wall after installing the apron, it is advisable to first clean the surface of the wall, removing all old materials, such as wallpaper.
Removing old wallpaper
Then treat with special means . But this is at the discretion of the owner.
Wall treatment with special means
To ensure uniform fastening of the apron, it is necessary to install a special strip. For these purposes, you can buy a special one or simply install a rail; it is removed after installing the panel.
What can you attach to?
How to attach an apron for the kitchen from MDF, or rather, what to hang it on? For these purposes you can use:
- adhesive composition ( liquid nails) ;
Liquid Nails
- aluminum frame;
- dowels
Depending on the method you choose, you will need to buy related materials.
MDF apron: installation methods, advantages and disadvantages
An MDF apron is usually made to match the color of the furniture or countertop.
As a rule, such aprons are made to match the kitchen furniture or worktop, thus creating an imitation of a single surface. No one excludes the possibility of purchasing panels that contrast the tone of the furniture. Using photo printing, MDF panels can be decorated with various designs and patterns.
The main factor that influences the choice of this option is the low cost of such aprons in comparison with tiles, tempered glass, and porcelain stoneware. In terms of its performance properties, MDF is not inferior to natural wood, and in terms of strength it even surpasses it. In addition, MDF boards are protected from the effects of fungus and mold. Also, the advantages of such an apron in the kitchen include the simplicity of installation work and the absence of the need to use special tools. MDF panels can be mounted on any surface; there is no need to make the walls perfectly flat. In addition, such an apron is easy to replace.
https://kuhnyamoya.ru/youtu.be/PriooPaTp6Y
The disadvantages of such aprons include:
- instability to chemicals and water, which over time will negatively affect the appearance of the apron;
- frequent separation and sagging of panels;
- MDF is not a fire-resistant material, so it can catch fire, releasing toxic substances.
Installation of MDF panels on the surface is done using “liquid nails” or self-tapping screws. Before this, it is necessary to carry out work on marking the surface. Finally, you should install shaped skirting boards that will cover the outer and inner corners.
Disadvantages of MDF
Before you start purchasing and installing an MDF apron in the kitchen, you should consider its shortcomings.
Perhaps they will become an obstacle to purchase. So:
- Negligence in care will affect the MDF board. She will be led or bent. The same applies to high humidity - you cannot mount MDF panels directly near the sink - it is better to install tiles there. The stoves must be equipped with hoods to prevent drops of condensation from settling on the surface of the apron.
- Material is flammable. This is important if the owners are planning to completely cover the wall from the edge of the set to the edge. Mandatory external control is required if a heat supply source is mounted on the wall - a gas boiler, for example.
The disadvantages are serious and should not be neglected. If, nevertheless, there are no prerequisites for future damage, then it is worth trying to create something new in the interior.
Dark furniture with an original pattern on the apron looks beautiful
How to glue a plastic kitchen apron with your own hands
The installation process itself is not difficult, but requires care.
At the marking stage, you should take several horizontal measurements, since walls are not always perfectly level.
How to properly glue an apron?
The process consists of several successive stages:
- Surface preparation. If there is wallpaper on the walls, it should be removed. The wall is cleaned of peeling plaster and various contaminants and covered with a primer. It is better to choose an acrylic primer for rooms with high humidity - it contains antibacterial and antifungal additives.
- Applying glue. Liquid nails LIQUID NAILS and any others are applied using a special gun only to a dry, grease-free surface. This should not be done in a continuous layer, but dotted or in a snake pattern.
- Gluing. The surfaces to be glued are pressed tightly against each other and immediately separated to ensure that there is enough glue. After 3-5 minutes, final gluing is carried out, pressing the panel tightly against the wall. The adhesive sets almost instantly, but the greatest adhesive strength is achieved within a day.
VIDEO INSTRUCTION
We glue an MDF apron in the kitchen
This procedure differs little from working with a plastic panel; it also consists of three stages:
- Surface preparation. The wall is cleaned and, if necessary, leveled. Highly absorbent surfaces are treated with a primer.
- Application of liquid nails. The workpiece is tried on in place and cut to the required size. A layer of glue is applied pointwise or in a snake pattern to the MDF panel.
- Gluing. The panel is applied to the wall and pressed lightly, after which it is removed and a technological pause is maintained (3-5 minutes). Then the panel is finally glued. For greater reliability, a heavy apron can be supported in several places with slats; after the glue has completely dried, they are removed.
VIDEO INSTRUCTION
Useful tips
Do not try to glue a plastic panel or MDF apron the first time, as this is not always possible. Place the panel against the wall, then lightly tap it and remove it.
After pausing for a few minutes, you can begin the final gluing. In most cases, it is enough to firmly press the surfaces at the joints once to achieve rapid setting of the adhesive.
Visible parts of the edge of the apron should be additionally refined with MDF corners of a suitable color.
Installing the apron yourself
Although the process of installing a kitchen backsplash is quite simple, there are several problems that a novice worker may encounter. First of all, you need to decide on the placement of the facing covering and the method of its fastening. Everything else depends on the type of kitchen apron itself.
Working with sheet plastic
When installing a plastic apron, you need to decide in which direction the panels will be located. If the plastic sheet is wide enough, it is better to place it horizontally so that there are fewer seams on the apron. Narrow panels should be cut into pieces and mounted vertically.
The plastic cladding is attached to the wall using liquid nails. For greater reliability, self-tapping screws are screwed into the edges of the apron. Sharp sections of plastic are covered with decorative skirting boards or starting strips. The joints should be masked with strips of a suitable color.
Using chipboard
Chipboard (chipboard) is a material that is often used to cover the walls of the kitchen work area. The chipboard apron is mounted only on a flat surface using glue. Before installation, the slab is cut into pieces of the required size. Large and heavy chipboard sheets should be additionally secured using self-tapping screws with decorative caps.
Application of ceramic and mosaic tiles
When covering the walls in the kitchen with ceramic tiles or mosaics, you must first prepare a special adhesive solution. The mixture is applied to the wall with a narrow spatula and distributed evenly over its surface. The tiles are installed with slight pressure.
The tiles are laid evenly and neatly in horizontal rows from bottom to top. When attaching each row, check the horizontal position using a level. The mosaic should not be laid individually, but in matrices. Each forms a slab measuring 30x30 cm, containing several dozen elements. Otherwise, installation is similar to tiles.
Glass requires care
Glass splashbacks are mounted to the wall using supporting clamps or adhesive. The supporting fasteners prevent the glass from fitting tightly to the countertop and cabinets. A gap forms between the wall and the glass panel. The advantage of this type of fastening is that it does not require drilling holes in the glass that compromise the strength of the structure.
Installation with glue is only possible if the glass apron is made of triplex. Since glue is a chemically active substance, it will most likely corrode any simple glass over time. To attach glass panels made of artistic triplex, glue-sealant for mirrors is used.
Stone apron originality and practicality
An apron made of monolithic artificial stone is pre-cut to the required dimensions. Its installation should include fastening not only with an adhesive solution, but also with anchor connections. To screw them in, you need to make holes in the wall about 10 cm deep. This will allow you to securely fasten the massive structure.
Using an uneven spatula, apply an adhesive solution to the back surface of the slab. With a gentle tap of the mallet, the apron is pressed against the wall. After this, anchoring begins.
The anchors take their place and are carefully twisted. Do not over-tighten the fasteners as this may damage the structure of the stone slab. After tightening the anchors, the holes in the slab can be closed using special pads.
What to look for when choosing
A kitchen apron made of plastic has many advantages, but they are only relevant if high-quality products are initially selected.
The modern building materials market is full of fakes and low-quality goods, so when choosing high-quality plastic, you should definitely take into account the following nuances:
- Thickness. The larger this parameter, the stronger and more durable the material.
- View of the front surface. The color of the plastic product should be uniform without blurry spots or streaks.
- Availability of quality certificates. It is best to purchase products only from trusted manufacturers, since well-known companies usually value their reputation and are unlikely to produce products of poor quality. Uncertified facing materials may contain a large number of toxic and hazardous components to human health.
In the interior of any kitchen, an apron not only performs very important protective functions, but also plays a unique decorative role. Therefore, when choosing a plastic coating, it is necessary to take into account not only its operational and technical characteristics, but also its decorative and aesthetic properties.
As a rule, the facing material for the kitchen work area is selected to match the color of the countertop or kitchen unit, but if you wish and have good taste, you can experiment a little and choose a more non-standard solution.
How to install an apron in the kitchen from MDF
There are several ways to install an MDF apron yourself, especially if the kitchen furniture is already installed.
When installing on a clean wall, you must follow the tips below step by step:
- Clean the wall, remove rough irregularities, treat with antiseptic and primer.
- Determine the exact location of the apron, align the horizontal bottom and top lines using a building level.
- Apply clearly visible markings to the wall.
- Under the bottom line, screw a mounting strip to the wall, which will serve as both a support and a reference point.
Using glue during installation
The easiest way is to install the apron using mounting adhesive. In this case, there is no need to drill holes, but dismantling will be labor-intensive. It will not be possible to reuse the removed apron.
The glue is applied directly to the MDF sheet around the entire perimeter. The central part is covered with horizontal or vertical stripes every 10-15 cm. The treated apron is applied to the desired location and pressed. The approximate drying time for the glue is 14 hours.
Fastening with dowels and screws
In order to secure the apron using self-tapping screws, you first need to drill holes on the panel itself at the fastening points. To seal the material in the holes, silicone liners and metal inserts with threads for screwing in decorative chrome caps are used.
Then the panel is applied to the wall and marks are applied. Drill holes and install dowels. At the end, the MDF apron is attached with self-tapping screws. The attachment points are hidden with caps.
Aluminum profile fastening
When kitchen cabinets are installed, installation of a kitchen apron can be done using aluminum profiles, which are thoughtfully equipped with silicone seals to firmly hold the MDF panel.
First, a lower profile is attached to the wall using self-tapping screws, into which parts of the apron are inserted. Then the panel is tilted slightly, the top profile is put on, pressed against the wall and screwed to the cabinets.
The ends of the planks are hidden with decorative overlays. If necessary, a special plinth is attached directly to the profile.
Prefabricated Panel Installation
Sometimes the panel is created from several parts equipped with special grooves for reliable connection with each other. Before installing a prefabricated apron, a sheathing is assembled on the wall with a jumper spacing corresponding to the size of the component elements. To attach these elements to the bars, clamps are used - special metal parts that are placed on the internal groove of the panel and screwed to the sheathing.
How to perform installation correctly
If you decide to install an MDF apron yourself, follow the following procedure:
- Before starting installation, prepare the building materials and tools necessary for the work;
- the panels are assembled together and cut to the required dimensions;
- fix the apron to the wall;
- final finishing.
Preparation of materials and tools
Preparing materials and tools before installing the apron is necessary to speed up the process. If you don't do this, it will take you a lot of extra time to find this or that thing.
Profiles
Profiles are purchased at the store in advance and attached to the end of the panel to make it look attractive. The profile should be selected to match the color of the panel or so that it matches other details of the kitchen interior.
Wooden blocks
They will be needed if you are attaching an MDF apron to self-tapping screws. In this case, the sheathing of their timber is first created, to which the main material is subsequently attached.
See also
Step-by-step instructions on how to install a bathtub and attach it to the wall
Self-tapping screws
Necessary for fixing MDF panels. It is better to buy self-tapping screws with a reserve, as they will always come in handy around the house.
Screwdriver
Not a required device. It greatly simplifies the installation process, but if it is not there, a regular screwdriver will do. Yes, installing the panels will not be so convenient, but this will not affect the final result much.
Note! If possible, it is worth purchasing a screwdriver for permanent use, as it will come in handy more than once in the future improvement of the apartment.
Dowels
Another element of fastening, which cannot be avoided when attaching plastic panels to a lathing made of wooden blocks.
Building level
An important tool with which you will align the panels, placing them in the same plane. Assembly without using a level is fraught with noticeable distortion of the slabs, which will affect the overall appearance of the room.
Glue or liquid nails
An excellent substitute for wooden sheathing, allowing you to:
- reduce the cost of the installation process;
- reduce the amount of waste remaining after renovation.
Keep in mind that if the wall has many irregularities, fixing the panel with glue will be extremely problematic.
Ruler or tape measure
An indispensable tool for repairs, especially if you have to deal with an all-sheet structure. Without them, it is impossible to carefully trim the material so that the apron blends harmoniously with the decor surrounding the kitchen.
Pencil
Required for applying markings to plastic. It is not recommended to use a marker as it will be difficult to remove from the work surface.
Hammer
It will help you out in situations when you need to slightly knock down a panel that is difficult to install or drive a dowel into a hole drilled for it.
How to attach
Fastening the panels to the kitchen wall is carried out in one of the following ways:
- using guides;
- using self-tapping screws;
- on the sheathing;
- on glue.
Mounting on guides
Fastening the apron to the guides makes it possible to speed up the installation process, since the wall does not have to be leveled much. In addition, the guides make it possible to avoid drilling out the panels themselves, which has a positive effect on the integrity and security of the structure.
The disadvantage of this method is the need for additional costs.
Self-tapping screws
Fastening the panels to the wall with self-tapping screws is carried out according to the following algorithm:
- we remove the furniture from the kitchen, as it will interfere with the installation process;
- we drill holes in the wall at the required height and hammer dowels into them;
- We make preliminary holes at the junction of the slab and the wall. The diameter of the hole should be a couple of millimeters smaller than the diameter of the screw.
- screw in the screws.
On the sheathing
Installation on a wooden beam sheathing is convenient if the wall is too uneven and there is no time to level it. The process is similar to conventional fixation using self-tapping screws, only the panels are mounted not on the wall, but on a wooden beam, previously fixed in the place where the apron is installed.
See also
Instructions on how to properly cover a door with self-adhesive film
On glue
If you have smooth walls in the kitchen, the panel can simply be glued to liquid nails or special glue. To do this, just smear the wall and the MDF board around the perimeter, and then press them tightly against each other. The disadvantage of this method is the difficulty of dismantling the outdated apron in the future.
Layout and cutting of panels
Builders recommend fitting and configuring the panels in advance to simplify the final assembly process. MDF panels are cut using:
- hacksaws for metal or wood;
- electric jigsaw;
- Bulgarians.
It is necessary to press the blade tightly against the MDF board, and then make a deep cut. Next, the slab is cracked, after which the film covering the material is trimmed.
Final finishing
The final finishing involves eliminating the gaps that form between the top and bottom of the splashback. They are closed using decorative corners and baseboards, which should be purchased in advance at a hardware store.
Choosing an apron: useful tips
Before purchasing or ordering a product, you need to consider a few points:
- The edges of the apron should extend beyond the kitchen unit, so you need to take all the measurements first.
- To prevent water flowing from the countertop from getting under the product, it is recommended to install a border for the joints, the purpose of which is to prevent the penetration of moisture.
- For small rooms, the best choice would be a white kitchen apron that matches the overall design of the kitchen. You can choose a light-colored product decorated with a discreet pattern.
- Covering a wall with a small backsplash with an image printed by the manufacturer using heat printing is a bad idea because it will not be noticeable.
Advantages
A kitchen apron for the kitchen on the wall made of plastic has the following positive qualities:
- quick and easy installation, which you can do yourself;
- in the event of a breakdown, replacing the damaged part is a simple task;
- relatively low cost (average price per 1 m2 of ABS plastic product is 1300 rubles);
- protection against condensation and various deposits;
- You can hide electrical wires behind the surface;
- undemanding in cleaning (sometimes you need to wipe the surface with a damp sponge to remove dirty marks and greasy stains);
- environmental friendliness;
- does not absorb odors;
- moisture resistance;
- high heat resistance (withstands up to 80 ° C);
- light weight.
Manufacturers make models that imitate various materials. For example, a brick kitchen apron will fit perfectly into the interior. In addition, there are products decorated with photo printing, which is applied to the surface using high-tech equipment. Thanks to this, there are unlimited possibilities for decorating the apron.
Types of decorative coating for MDF panels
MDF is made by pressing wood chips with an adhesive composition. The resulting slab is subjected to further decorative finishing using various technologies. The result is: laminated, painted, laminated, veneered MDF boards.
Laminated coating is made by treating panels with PVC film or melamine paper. Laminated MDF panels can withstand various adverse influences without damage. They are used in furniture production, including for making kitchen facades.
MDF panels are also painted. And then they make furniture for bathrooms or kitchens. However, painted panels have a significant drawback: such a coating does not withstand temperature and mechanical factors.
Gluing plastic to a panel is called laminating. Such a panel becomes more moisture-resistant, wear-resistant and temperature-resistant. Due to their practicality, such panels are often used to make kitchen splashbacks and other kitchen elements.
By veneering MDF panels, they acquire the appearance of natural wood.
There is another way to decorate MDF panels. This is the application of various drawings and photographs to the surface using photo printing. Such panels are called skinali. Initially they were made of glass. Skinals are very popular and are used to decorate kitchen aprons.
Decoration options
Decorate the apron using:
- paintings;
- photo wallpaper;
- decorative film.
Decorative painting
The simplest and at the same time creative way of decoration is to paint panels with special paints. You can do it yourself or with the help of professional artists.
The use of this method opens up wide scope for imagination and does not limit apartment owners in self-expression.
Photo wallpaper
If you are not good at drawing, try applying photo wallpaper to the panels. They are presented in a wide variety of designs and colors, among which everyone will find a suitable option. Photo wallpapers are applied faster than painting.
Film
A fairly common decor option for the kitchen is the use of MDF panels covered with a special PVC film. Advantages of the option:
- price;
- the coating is easy to clean;
- easy to install.
Calculation of the width and height of the apron
The width of the apron depends on the size of the kitchen space. With height the situation is somewhat more complicated. This parameter is influenced by the following factors:
- the distance between the lower and upper tier of the headset. The height of this gap is most often no more than 112 cm;
- the presence of a domed independent hood - in this place the apron is laid out at a higher height, and if a skinali is used, the hood itself should be placed at a lower height;
- design features of the upper cabinets - if the facades are equipped with lifting mechanisms, a low apron with dimensions of 45-55 cm looks great.
Cost of a plastic apron
How much does a plastic apron cost? The exact price always depends on the material and decorative design of the apron. For example, polycarbonate is cheaper than polyvinyl chloride; a panel with a uniform texture will be cheaper than a panel made to look like marble or wood.
See also: Installation of interior doors
On average, the cost of a plastic apron is about 1,500 rubles. When choosing a panel, it is not recommended to consider overly cheap models - they may turn out to be of lower quality and durability.
What is the difference between chipboard and analogues
It is necessary to distinguish chipboard from fiberboard - wood-fiber board, which has low mechanical stability, is fragile, breaks easily and is a dense cardboard of varying thickness. On one side, the fiberboard sheet has a flat and smooth structure, and on the other, it has a rough, loose and corrugated surface, with notches applied. Not used as a decorative material.
Boards made from chipboard, MDF and HDF are similar to each other both in production method and in quality characteristics. However there are a few differences:
- The chipboard structure is less dense than MDF and HDF;
- Chipboard boards are more susceptible to moisture than MDF and HDF;
- Chipboard boards are cheaper.
A common disadvantage of the products is poor resistance to high temperatures and susceptibility to fire.
Preparatory work
The wall is being dismantled. They operate with a hammer drill, spatulas, nail pullers - depending on the interfering elements
It is important to leave it absolutely clean, otherwise you will not be able to attach the wall panel for the kitchen. After dismantling, the wall is washed and impregnated with a primer for future plaster.
If the surface requires significant repairs - a large number of chips, whole pieces falling off, then sealing alone will not do - you will have to completely level the walls, that is, do the entire cycle of plastering work, including laying reinforcing mesh and placing beacons.
A beautiful apron made of flowers looks fabulous with light furniture
When the wall is ready - dry, soaked in antiseptic - a starting profile is attached to it. This is an ordinary wooden lath or aluminum profile for drywall. The guide is placed according to the level, otherwise the entire apron will become skewed. Subsequently, if it interferes with the tight connection of the headset to the wall, it is removed. Further:
Fastener selection
The following types are used for work: liquid nails for plastic, wood or self-tapping screws. Advantages of the first option:
- Ease of operation. Even a child can use a liquid nail gun.
- Speed. There is no need to drill holes for self-tapping screws or maintain the required level - after fixing, it is possible to immediately level the slab with the liquid composition. Liquid nails dry from 20 to 40 minutes, the total setting time is 24 hours.
- Ease of use. A liquid nail gun is the same device that installers use when sealing cracks with polymer foam. All that remains is to press on the handle and close the hole as unnecessary.
The use of self-tapping screws is not without its own advantages. In particular, the home master is confident in their strength and the fastening of the wall panel in the kitchen is reliable. However, the appearance of MDF will be spoiled by microchips. Deciding whether liquid nails are better or self-tapping screws can only be done experimentally.
Beautiful furniture goes well with an apron made from nature
Decorating a plastic apron
Before installing a plastic apron, you need to decide on a color or pattern and calculate how it will fit into the style of the interior. You can order the application of the selected image. For those who like to create interior items with their own hands, there is the opportunity to purchase a transparent plastic apron, which at home and in the hands of a craftsman will turn into an original decoration of the kitchen wall.
Decorative painting
The most common method of decorating a plastic apron is painting: drawings and patterns of various themes are applied to the back of the finished product, either by hand or using stencils. The kitchen will be decorated with a full-fledged painting or a stylistic panel, which just needs to be attached to the right place. To avoid fading in the sun or under the influence of temperature, it is better to use oil or acrylic paints for drawing.
To emphasize the uniqueness of such an apron, it can be secured with eye-catching fasteners or special frames purchased at a furniture store.
Photo wallpaper
An easier way to decorate a plastic apron is by gluing photo wallpaper. As a result, the working wall will be decorated with a seascape, a forest clearing, a view from a window, or a fruit and vegetable still life.
Before gluing, you should make sure that the surface of the plastic is clean, since even the slightest specks of dust will form an air bubble and deform the overall pattern. For gluing, use special silicone transparent glue in jars or a spray, which is applied to the front surface of the picture, then carefully attached to the back of the panel, and the photo appears under the plastic.
Film
A common decoration method is the use of self-adhesive film. Depending on your preferences, you can use ready-made colors and a variety of patterns, or you can order photo printing to order. Gluing the film requires care and patience. The protective paper is removed gradually and the surface is carefully smoothed. For convenience, the surface of the plastic is sprayed with water, which will be removed during smoothing.
The big advantage of this method is that with the help of film you can update the facade of the kitchen, creating a single composition.
Useful tips
- To make the cladding look neat, cover the edge of the kitchen apron with special slatted plugs or corners.
- You can close the gaps between the working surface of the table top and the adjacent wall with decorative skirting boards.
- After securing all the screen parts, treat the joints and corners with transparent sealant.
- Start laying elements from the corner.
- Sockets and switches are installed after all installation work is completed.
- When cleaning your kitchen apron daily, avoid using powders or hard sponges. Abrasive materials scratch and damage plastic panels.
We recommend watching the video instructions:
Preparatory work and installation of the apron
Taking measurements
Before installing the apron, of course, it is necessary to measure the area that it should cover. Some prefer to cover the entire wall with panels from the floor to the wall cabinets or behind them. Others only cover the space between the countertop and cabinets. Decide which option suits you best. And measure the height of the kitchen apron.
Count the number of sockets that are in the apron area. You will need to cut holes for them. Please note that where the hood hangs, the height of the apron will be greater. The length of the panels will be the same as the length of the working area.
If your kitchen set is corner or U-shaped, then it makes sense to cover the wall adjacent to the work wall with an apron.
Preparing the surface
Once you have decided on the dimensions and purchased the material, you can begin preparing the surface. The main thing to do is to level the wall. Perhaps a perfectly flat surface is not needed. But, if there were tiles on the wall and after dismantling it there were pieces of mortar left, this needs to be removed.
You also need to remove protruding screws and nails. Fill holes, cracks, chips. Go over the surface with putty and, when it dries, apply an antiseptic. This kind of wall preparation does not require very much time.
For ease of installation, you can install an auxiliary rail as a support for the apron using self-tapping screws. After its installation, the rail is removed.
Installation of an MDF apron
Installation of a kitchen apron to the wall can be done in different ways:
- With the help of clamps. That is, “ears” are attached to the back side of the panel and simply hung on the wall. The same technology is used here as when hanging cabinets. The wall should not have large differences.
- On construction staples using a construction stapler.
- On an aluminum profile. A profile structure is attached along the entire perimeter of the panels and MDF is inserted into it.
But probably the most common methods are: fastening with self-tapping screws or “liquid” nails. Let's take a closer look at them.
To secure the kitchen apron with self-tapping screws, you need to make a frame of wooden slats on the wall. The slats are attached to the wall with dowels and aligned in the desired position. Don’t forget that they, like a wall, need to be treated with an antiseptic. After this, you can attach the MDF apron to the screws.
To hide the screws, put decorative caps on them to match the panels. Correctly selected hats are almost invisible on their surface.
Also common is the method of attaching panels to “liquid” nails. In this case, a more even wall is needed, since differences will be noticeable. If the apron will go behind the cabinets, then you need to install it first, and then hang the cabinets. If the height is up to the cabinets, then it doesn't matter what you hang first.
So, “liquid” nails are applied to the entire surface of the MDF panel. First along the perimeter, and then in stripes in the center at intervals of 30 cm. After application, press the panel against the wall. This method is even simpler than fixing it with self-tapping screws. The main thing is to close the joints where moisture can get under the panel. As you can see, installing a kitchen apron is not that difficult.
But some experts say that over time, due to the composition of the “liquid” nails, the panels may become deformed. Therefore, choose your product carefully.
How to care for an MDF apron
MDF panels are not a capricious material, but there are still some nuances in care. It is strictly forbidden to wash an MDF apron so that water flows over it. Be especially careful around the edges. Moisture getting under the panel can lead to peeling (if secured with “liquid” nails) or deformation (if secured with self-tapping screws). And the surface itself can absorb moisture. Therefore, only a slightly damp cloth.
Do not use coarse abrasives. Over time, they will erase the top decorative layer. Also exclude any acids or alkalis. They can delaminate the panel, then only replacement will save you.
And lastly, try to place hot household appliances away from the apron. Constant exposure to high temperatures leads to damage to the panels.
If you follow the rules of care, your kitchen apron will last you a long time.
Kitchen apron: functions and features
The kitchen apron is a vulnerable section of the wall, which is located on the “advanced” line of the kitchen front: between the countertop, sink, stove and the bottom of the cabinets. For this reason, this part of the room meekly accepts all the “blows of fate.”
Purpose of the element
During the cooking process, this area is “attacked” by pieces of food, meat juice and fruit, the material is attacked by boiling fat, broth, etc. Salvation has appeared: to prevent the wall decoration from getting dirty, a protective screen made of practical, but nice materials.
The main task of this interior element is to reliably protect the wall located near the sink, stove or work surface. However, this is not the only function of this device: an apron can become a bright accent if the kitchen set, as well as other interior elements, are consistent. An important condition is the harmony of the screen with the environment.
Basic requirements for it
It is possible that the owners who are interested in how to install an apron in the kitchen are still unfamiliar with wall panels, and have not even had time to select and purchase the product. Therefore, we first need to consider the requirements that the protective screen must meet. For such a simple element there are quite a lot of them.
- Resistant to temperature changes. It is a necessary condition when the apron is “forced” to exist opposite the stove built into the set. Induction appliances do not heat up, so there seems to be no big problem, but in this case the threat remains hot steam, drops of liquid and hot fat flying from boiling pots and “sizzling” pans.
- Hygiene. This is a mandatory condition, since any dirt remaining on the apron turns into a favorable environment for mold and bacteria. Therefore, the material must have sufficient density; the best option is a high-quality moisture-resistant coating.
- Maximum ease of maintenance is a requirement that follows from the previous one. The screen surface cannot create obstacles to remove any type of dirt. Cleaning should be hassle-free; the apron must be resistant to household chemicals.
- Moisture resistance, as well as a high level of fire resistance. The latter is vital if the wall panel will be located in close proximity to the burners of the gas stove.
“The last, but not the last” component is attractiveness, since the protective screen, with all its important qualities, must fit the set and ideally match the design of the kitchen. The long service life of the apron completes this list. Since the element is securely attached to the wall, often with the help of holes, many owners are not ready to change these devices too often.
Varieties
Today, there are a large number of varieties of kitchen aprons made from a variety of materials. They expand the possibilities for renovation, allowing you to bring bold design solutions to life.
PVC panels
PVC panels used to install a splashback in the kitchen have the following competitive advantages:
- easy to install;
- affordable for any family;
- they are easy to care for;
- high moisture resistance;
- nice appearance.
Flaws:
- the area of the apron located in close proximity to the stove needs additional protection;
- During use, scratches and abrasions quickly appear on the surface of the apron.
ABS
Advantages of using an ABS apron:
- a wide variety of colors and patterns;
- low weight of material;
- resistance to moisture;
- hygiene.
Flaws:
- poor protection from mechanical damage;
- poor fire resistance;
- with prolonged exposure to sunlight, the material begins to fade;
- quickly deteriorates with constant contact with aggressive detergents.
Polycarbonate
Polycarbonate is an inexpensive material, thanks to which apartment owners can decorate their kitchen without spending large sums from the family budget. Despite its apparent fragility, polycarbonate is resistant to various types of damage. The polycarbonate surface is easy to clean from dirt, and its water resistance allows you not to worry about the safety of the repair during the operation of the room.
All-sheet
Kitchen aprons made from a single sheet of plastic are more practical than their competitors, as they do not have connecting seams. You will get a smooth, uniform surface that is easy to clean. Disadvantages include large dimensions, as well as the need to cut out recesses for various kitchen decor elements before direct installation.
MDF
By choosing MDF as the main material for the apron, you get:
- material resistant to mechanical damage;
- high protection against high humidity;
- quick and easy installation;
- the material is cheap, which saves money.
Note! It is not recommended to install an MDF apron behind the stove, as under the influence of high temperatures the material begins to deform
Chipboard
Chipboard has a denser material structure, in contrast to panels made from MDF. They are very cheap, but they are not exposed to moisture. The material also reacts poorly to high temperatures, easily flammable during prolonged contact with fire.
Glass
A glass splashback is considered the best choice for any modern kitchen, and its only serious drawback is its high price. Otherwise, the material has a large number of advantages, expressed in:
- quick installation;
- ease of operation;
- beautiful appearance;
- a wide range of possibilities open to the interior designer.
Pros and cons of using plastic panels
The advantages of using aprons made of plastic include:
- acceptable, adequate price;
- protection from moisture;
- easy to install;
- easy to operate;
- most modifications of panels have high-quality protection against damage;
- a wide range of models, allowing you to choose a pattern and color to suit every taste;
- good protection against mold.
Flaws:
- deformed under the influence of high temperatures;
- the ends of the panels will have to be covered with a special profile;
- Even high-quality panels do not look 100% natural, and the synthetic component of the material is felt.
Mounting methods
It is not necessary to involve specialists to install the apron. This process is quite simple, so you can do it yourself. There are various ways to install an apron. The choice of a specific technology and the complexity of the work depends on the specific material.
On slats
Alternatively, the apron can be mounted on a wooden frame made of slats. The lathing will allow you to ignore even significant unevenness of the walls. For work you will need wooden planks with a section of 10x40 mm. The slats are mounted every 40 cm. It is necessary to ensure that the frame elements do not protrude forward and that their surface is in the same plane. The apron is attached to the slats using self-tapping screws. As an alternative to slats, you can use a metal profile. Almost any materials can be attached to the lathing - MDF or chipboard boards, sheets and panels made of plastic, metal options.
To the kitchen baseboard
The easiest way is to secure the apron using a plinth. The element is built between the apron and the work surface, as well as between the upper cabinets and the apron, closing the gaps and turning the structure into a single whole. It prevents moisture and dirt from penetrating into the gap between the wall and the countertop. Installation of the apron is carried out after installing the headset. It is temporarily fixed, after which the baseboards are installed. These elements are fastened to adjacent surfaces using self-tapping screws, which are subsequently closed with decorative plugs.
For liquid nails
This fastening method is suitable provided there is a perfectly flat base. If the previous apron was made of tiles and the elements of the old covering do not fall off, you can glue the new material directly onto it.
At the preliminary stage, you should prepare the wall. You can remove dust and strengthen the surface using a primer.
In order to secure the apron, you need to apply liquid nails to it or to the wall, then attach the finishing element to the base and hold for a few seconds. It is more convenient to apply the adhesive to a horizontal apron rather than to the wall.
If the size of the panel is larger than the planned distance between the countertop and the upper cabinets, then it must be secured before installing the set. To do this, liquid nails are distributed on the back side of the panel and glued to the wall. To prevent the panel from sliding, you need to make a support from a metal profile or wooden slats.
If the apron is smaller, install the cabinets first. After gluing the apron, you need to install the baseboards. They will protect the joints from moisture penetration into the material. If there is no skirting board of the desired color on sale, you can choose a contrasting option.
Options for work wall
Plain
MDF aprons are incredibly varied in their color scheme. Single-color options are produced in a wide range and are suitable for both light and black interiors, bright and pastel, matte and glossy. You can choose a panel that exactly matches the kitchen unit, opt for a contrasting solution, or purchase an apron that is just 1-2 shades lighter/darker than the existing furniture. Read our tips on how to choose an apron for a white kitchen at this link.
Colored
A one-color solution is not for you? Pay attention to the colored aprons. Panels with imitation wood, cork, stone, parquet boards, ceramic tiles... The range is limitless
At the same time, there is no point in choosing a panel according to the principle “dark colors show less dirt,” because the MDF surface of any shade can be easily washed with water.
Photo printing or artistic drawing
This option is suitable for connoisseurs of non-standard solutions. A real painting will appear in the kitchen area, a canvas that will become a bright accent. You can choose panels with floral patterns, panoramas of metropolises, still life, picturesque landscapes of mountainous areas, or one of hundreds of thousands of other options. Read how to choose an apron for a white kitchen with a black countertop in this material.
For an interior decorated in red and black shades, a Japanese-style panel, options with imitation animal skins, black and white panels, white panels with large photographs of red berries, etc. would be acceptable.
For a kitchen in soft colors and with floral wallpaper, panels depicting fruits, a spring meadow, and bright butterflies would be appropriate.
