Advantages and disadvantages
Glass kitchen aprons have many advantages:
- Environmentally friendly. Glass is produced from quartz sand by melting it and then cooling the resulting mass.
- Hygiene. Fungus and mold will never appear on the glass, since the surface of the glass is smooth and has no pores.
- Practicality. Glass aprons are not afraid of water, they do not absorb odors and are easily washed from dirt and grease.
- A wide variety of designs makes it possible to make your kitchen design truly unique and original.
- With the help of a correctly selected glass apron design, you can visually increase the space.
- Possibility of additional illumination of the working area.
- Easy to install.
There are also disadvantages, but they are much smaller:
- Changing the size of the apron and the location of the mortise elements (sockets, rails) is impossible after its manufacture.
- High price. But the price of a glass apron depends on many parameters:
- apron size;
- number of glass panels;
- type of glass used;
- presence of an image;
- presence of backlight;
- number of mortise elements;
- type of fastening.
Therefore, you can easily choose an option to suit the wishes and capabilities of the consumer.
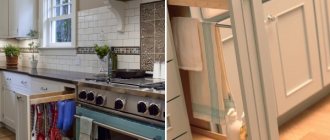
How to fix glass kitchen wall panels with glue
In order to fix the glass apron to the wall, you can use glue or liquid nails. But in this case, it is extremely important to pay due attention to the issue of preparing the base, since the wall must be smooth, plastered and dry. On the one hand, this method is considered simpler, since there is no need to drill the wall, but at the same time, fixation using this method is considered less reliable.
The technology for installing an apron with glue is extremely simple - the main thing during the work process is to accurately align all the elements and align the joints of adjacent panels as much as possible.
Panels for the kitchen: decorative wall panels for the apron (read more)
The joint between the glued panel and the table top must be closed using a special wall bolt. If the surface is large and the apron consists of several parts, it is important to position them as closely as possible to each other so that there are no gaps. To ensure tightness, all joints are treated with a sealant that prevents the appearance of fungus and mold.
Note! To ensure that the layer of sealant applied to the front side of the apron is not noticeable, it is necessary to ensure in advance that the composition is transparent. In addition, it must be applied in a very thin layer.
The process of installing glass panels is quite simple and does not take much time from an experienced craftsman.
Of course, if you want to save yourself the extra hassle, you can contact a special company that will install a glass apron. The price of this procedure is acceptable, however, before placing an order, you need to know that services such as preparation of the base, as well as installation of accessories, are not included in the price. They will have to be paid separately, and it is better to ask in advance how much all the work will cost in total.
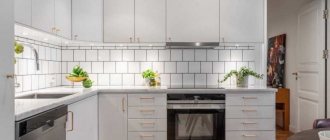
Types of glass used
The strength, durability and appearance of the product depend on the type of glass from which the kitchen apron is made.
- Regular or hardened. Tempered glass is much stronger than regular glass; it is not afraid of accidental impacts and temperature changes. An apron made of tempered glass can be safely placed behind the stove. It can only be damaged by a targeted blow, for example, with a hammer. But even in this case, it will break up into fragments with blunt edges, which are almost impossible to injure. Glass acquires all these properties during the process of tempering - heat treatment of the material in order to increase its strength. This process is comparable to hardening a metal.
- Lightened (Optiwhite) or unbleached. Uncleared glass has a slight greenish or “bottle” tint. This is reflected in the color rendering of the selected image or the color of the wall, which is covered with transparent glass. The thicker the glass, the more noticeable the greenish tint. But unbleached glass can be used for glass splashbacks in dark colors. Lightened glass or Optiwhite allows you to maintain the original color of the image or wall. Lightened glass is recommended for glass splashbacks in white and other light shades.
Selection principle
When choosing the color of the skin, the following features of color perception are taken into account:
- Pastel and neutral shades are a must for a small or windowless kitchen. The best solution would be a combination of a glossy finish and LED illumination of the work area.
- If the room design has enough bright, saturated colors (walls, textiles, countertops, cabinet fronts), a light apron will help balance the palette. A monochrome pattern can also serve as balance.
- You should be careful with patterns in acid colors, although in some styles (high-tech) it looks organic. A bright color diluted with white is acceptable for a modern interior, provided it is supported by details: dishes, textiles, fittings.
Contrast solution Source vachtamkinhhagia.com
Transparent glass apron
A clear glass apron is the best option for protecting a wall finished with decorative plaster or beautiful wallpaper.
After all, in this case the finishing will not have to be hidden. You can buy a transparent glass apron inexpensively, but you should keep in mind that any inaccuracies in the finishing will be noticeable.
General characteristics of the material
For arranging a kitchen apron, glass with a thickness of 6-8 mm is most often chosen. It must be hardened to provide reliable protection for the walls and last for a long time. In addition, tempered glass is safer: it will not crack or break at the most inopportune moment.
A glass apron made of stalinite is not afraid of proximity to a hot stove, since it is completely unaffected by elevated temperatures. Ordinary glass does not have such quality characteristics and its service life can be significantly shorter.
As for plexiglass, it is not suitable for installation near the hob, since this material is afraid of temperature changes. In addition, plexiglass is easy to scratch, it is difficult to clean and quickly becomes dull. Therefore, the ideal solution for finishing a kitchen apron is tempered glass.
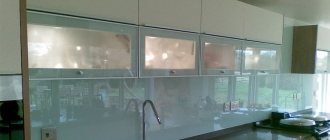
Glass apron with photo printing
A glass apron with photo printing looks impressive and original in the kitchen. The following technologies are used to print images on glass:
- Film printing. The image is printed on film, which is then attached to the back of the product. This method is inexpensive, but not practical. The product is afraid of moisture and temperature changes.
- UV printing. The image is applied directly to the back of the glass using special inks, which are then hardened by exposure to ultraviolet light. It is almost impossible to damage such an image. He is not afraid of temperature changes, chemicals, or moisture. The drawing is distinguished by high clarity, brightness and color saturation.
What influences the determination of the height of the apron
So, having decided on the design of the working part of the kitchen, you can start choosing the size of the apron. The height will be affected by the following parameters:
- Dimensions of floor cabinets. Standard models have a height of 85 to 91 centimeters. But here it is important to determine the degree of convenience. The wardrobe should be located just above the waist. If you are one of the tall people and everyone in your family is “giants”, you should pay attention to the height of the products about 95 cm.
- Location of wall cabinets. As a rule, they are installed at a distance of 135-150 cm from the floor. The space between the table top and wall cabinets will be about 45-60 cm. In this case, the standard height of the apron itself will be a maximum of 65 cm. This parameter includes additional centimeters that will “go” under the table top and wall cabinets. If you look at the photos of the interiors, you will notice that the size of the kitchen apron directly depends on the location of the wall cabinets.
- Slab height. If the stove “falls out” from the overall style of the set and is large in size, all furniture must be selected based on the technical parameters. In this case, the height of the apron in the kitchen is determined by the distance from the lowest floor cabinet (if they have a stove of different sizes). Here the standard may be different. For example, both the stove and the set are selected according to the same indicator of 95 cm. The minimum distance to the wall cabinets will be 45 cm. Let’s add 2 centimeters that will go behind the countertop. We get a distance from the floor to the hanging elements of 1.52 meters. From this distance, the height of the apron will be 47 centimeters.
The number of household appliances also influences the determination of sizes. For example, you plan to place a washing machine under the countertop. In this case, you need to select the optimal height of the floor cabinets, and it may be larger than the standard one.
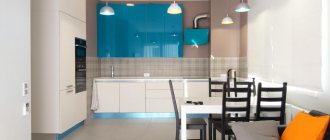
Glass splashback lighting
In a kitchen with a glass apron, you can easily organize additional lighting for the work area by installing backlight lighting. It will also visually enlarge the space and make the colors of the image more saturated and deeper.
The backlight can be:
- Tortsevoy. The LED strip is inserted into a special profile, which is then installed along one or two (bottom and top) sides of the texture. This profile hides the attachment of the apron to the wall, but has a high cost.
- Rear. The LED strip is attached to the back of the glass panel. In this case, the price of the apron will be cheaper, but the surface will be illuminated unevenly.
Profile mounting
In this case, as in the previous one, there are no holes for fastening on the panels themselves.
Apron installation diagram
To install the apron, you need to use self-tapping screws to secure the mounting profiles designed for fixing the glass to the wall (top and bottom).
After this, the panel can be installed.
- To do this, its lower edge is moved slightly away from the wall, and the upper edge is inserted into the profile.
- The bottom of the glass is brought to the profile and is also inserted into it (you have to press a little on the product).
- If several panels are installed, it is necessary to ensure that the gap between them is as small as possible. A rubber mallet is used for this, but the tool should be used with caution.
The importance of measuring
Measuring is an important step in the manufacture of a glass apron. Since it is impossible to change the size of the apron and the location of the mortise elements (sockets, roof rails) after the apron has been manufactured.
Measurements are taken after installing the upper and lower kitchen drawers and countertops. In this case, it is recommended to install the added edge of the tabletop after installing the apron, because in this case the attached edge will close any technical gap.
How to choose?
We have already mentioned a couple of important points above: when choosing a glass apron, pay attention to its thickness, as well as whether the glass is tempered and bleached.
If you want to entrust all the worries to the manufacturing company , but not overpay, carefully study the sections with prices. Many companies have a very detailed price list, describing even such little things as the price for each hole for fasteners and the fee for purchasing an image for printing. For others, the calculator allows you to set only basic parameters: dimensions, type of wall and print, the need for measurement and installation services. In the latter case, it is better to clarify whether, for example, you need to pay separately for cutouts for sockets.
If you want to save as much as possible , try simply ordering the glass or mirror of the desired size from a company that does not specialize in skinning. They will most likely make a transparent apron no worse than fashionable firms. Glass itself is quite cheap, but you will need to remember that to its price you will have to add the cost of processing edges and corners, drilling holes, etc. By the way, professionals do not recommend experimenting with drilling holes at home: it is very difficult to drill ordinary glass without loss difficult, but hardened is completely impossible.
Care instructions
The main advantages of a glass apron for the kitchen are strength and wear resistance. To maintain all these advantages, as well as the original and aesthetic appearance of the product, it is enough to follow a few simple recommendations:
- For cleaning, use only special soft cloths, soap solution or special products for the care of mirrors and glass.
- Do not use abrasives or metal brushes!
- Do not remove dirt and grease from a hot panel with a damp cloth. A sharp temperature change can lead to the appearance of microcracks.
What is required for self-installation
Installation of a kitchen apron can be done in several ways. Cladding made of polymer materials is easy to process, so it can be drilled. It is advisable to fasten such a structure using screws with decorative plugs. As a rule, such an apron is mounted at a certain distance from the wall (2-4 mm), so the quality of the base does not play a significant role. If desired, this lining can be quickly replaced with a new one. Decorative plugs that mask screws not only do not spoil the appearance, but can also become decorative elements.
Apron fastened with screws and decorative plugs
Hanging fasteners. In this case, the fastening materials will be minimally noticeable; these are small steel plates that are screwed to the wall. It is most advisable to use them if the apron is assembled from several small elements.
Hanging fasteners with silicone washers
Aprons made of triplex or tempered glass are usually installed with liquid nails or another type of adhesive mixture. To do this, you need to prepare the surface of the base - carefully level it. This method of fastening is best left to professionals, since after installation it will be extremely difficult to fix anything.