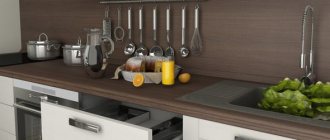
When the question arises about choosing a material for decorating a kitchen apron, many potential buyers opt for plastic panels. The advantages of this material are obvious. Firstly, PVC (polyvinyl chloride) panels allow you to refresh the kitchen interior as quickly as possible and without large financial costs. Secondly, this material opens up great opportunities for designers.
A plastic kitchen apron is also good because it is very easy to install and unpretentious to use.
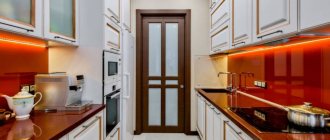
Kitchen apron made of plastic: DIY installation methods and types of material
When the question arises about choosing a material for decorating a kitchen apron, many potential buyers opt for plastic panels. The advantages of this material are obvious. Firstly, PVC (polyvinyl chloride) panels allow you to refresh the kitchen interior as quickly as possible and without large financial costs. Secondly, this material opens up great opportunities for designers.
A plastic kitchen apron is also good because it is very easy to install and unpretentious to use.
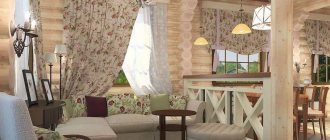
Kitchen apron made of plastic: photo catalog of ready-made solutions design
You can buy a kitchen apron made of plastic with any image. When choosing, you need to adhere to the basic rules of interior design. There should be only one accent in the room. If the apron has a bright image, all other surfaces should be kept in a calm tone. You can choose a panel to match the countertop or walls.
In small kitchens, a wall with imitation brickwork or a plain surface would look good.
In general, choosing a backsplash design is an individual decision. If you like the unusual design and feel comfortable in such an environment, feel free to purchase it.
Landscapes
Beautiful natural compositions will create a romantic mood at a family dinner. It is appropriate to decorate the interior in this style with beautiful textiles.
Source
Features of a plastic apron
Depending on the type of coating, the service life of a plastic apron is usually no more than 3-5 years. You can find different types of products on sale, but to decorate the kitchen work area, it is best to choose monolithic polycarbonate sheets.
Of all types of plastic, polycarbonate is the most wear-resistant. In appearance it resembles glass, however, despite its visual fragility, it is the strongest of all polymers existing on the world market.
Design
The catalogs of modern manufacturers present both plain products and panels with fairly high-quality stylization of wood structure, brick or natural stone.
A huge variety of patterns and shades allows you to create truly beautiful and original interiors even with a very limited and modest budget. Although, in terms of decorative qualities, plastic products are slightly inferior to more expensive materials.
Benefits of use
In addition to the fact that plastic is one of the most budget-friendly materials, it also has some other undeniable advantages.
Among them we can especially highlight:
- light weight;
- hygiene;
- moisture resistance;
- wide range of decorative patterns and colors.
An undoubted advantage is also the ability to apply your own unique image to the surface of the selected material.
Flaws
In order not to be disappointed in the purchase, you must also carefully consider the main disadvantages of the plastic coating.
These include, first of all,:
- low resistance to scratches and mechanical damage;
- tendency to fade, especially with prolonged exposure to direct sunlight;
- low fire resistance;
- high sensitivity to aggressive detergents.
We must also not forget that panels made on the basis of polyvinyl chloride are an artificial material, so before purchasing you must pay attention to the availability of certificates. Products of dubious quality may contain components hazardous to health.
Rules for installing a PVC apron
Installation of a plastic apron in the kitchen is carried out after preparing the wall panels, which are cleaned of dust and dirt, leveled using primer, putty and plastering. When gluing thick plastic, you don’t have to perform complex repair work, because... the material will hide the deformations. After the repair is completed, the apron parts are fixed using self-tapping screws to minimize damage to the kitchen set.
Materials and tools
The PVC apron can be attached using the following tools and building materials:
- metal profiles;
- screwdriver;
- wood blocks;
- self-tapping screws;
- construction level;
- dowels for creating sheathing;
- ruler;
- special glue;
- yardstick;
- pencil or chalk;
- hammer.
Mounting methods
A plastic kitchen apron can be attached to the wall on:
- liquid Nails;
- self-tapping screws;
- lathing;
- special profiles;
Special profiles for guides
Fixing the apron on guide profiles is a budget-friendly and practical method. The installation technology allows you to change panels if you need to change the design without lengthy installation work. Guides are metal slats that are attached to the surface of the wall panel in a horizontal direction using self-tapping screws or construction staples. The cracks are hidden with sealant.
Self-tapping screws
When installing an apron at the stage of repair work when planning a design for a long period, it is recommended to use self-tapping screws. Plastic elements need to be drilled to create openings for fastenings. To implement this method, the surfaces of the wall panels should be leveled.
Traces from self-tapping screws on the facade are subsequently masked with plastic overlays in the same color scheme. The panels should not be tightly adjacent to the wall, so electrical wiring and other communication lines can be hidden under the facade. The fastening technology, if necessary, provides for dismantling and repair.
On the sheathing
You can attach the apron to the sheathing using timber beams, thin slats, PVC guides or a galvanized profile. The technology is optimal for hiding gas pipes and water supply structures under the facade of the electrical wiring network. A small distance is left between the wall panel and the set. Wall surfaces must be treated with antiseptic compounds and antifungal impregnations. When using wooden beams, you need to lubricate the materials with a hydrophobic compound.
The beams for the sheathing, depending on the design of the project, are arranged horizontally or vertically. For sufficient structural strength there must be at least 3 pieces. The pitch of the lamellas in a horizontal arrangement is 200-400 mm. The elements are fixed using dowels, which are installed in increments of 250 mm. The beams must be symmetrically located, so a building level is used in the work.
On glue
You can glue the apron using special liquid nails. The wall must be smooth, without deformations. The installation method is characterized by high speed, ease of execution, and does not require the use of special equipment. If there is old wallpaper or putty on the walls, the materials are cleaned off. They also remove residual grease, dust and other contaminants. Then the surfaces are coated with a primer for rooms with high humidity, which has antifungal properties.
It is recommended to apply glue liberally to securely fix the materials. You need to install a bottle of glue in the gun and distribute the composition over the surfaces in zigzag strokes. The apron elements treated with glue are applied to the wall panel, pressed down, and left for some time until the adhesive base dries. For installation, it is recommended to choose sheets of standard sizes with a width of 600 mm and a length of 1000-3000 mm. The cutting of parts is also carried out according to the author's design project.
Panel preparation, layout, cutting
Before fixing the facade, the elements are prepared: the parts are assembled, the panels are cut. Wide panels are placed horizontally to reduce the number of joints. Narrow fabrics need to be cut and secured at vertical seams. The material is cut with a knife, scissors or a hacksaw. Work can be ordered from professional workshops that perform laser cutting.
Final finishing
The finishing stage involves closing the space between the apron and the work table with borders. The constructive solution will prevent moisture and dust from entering the cracks; will allow correction of work defects. The border can be flat, figured, triangular, rectangular in shape; it adds additional decorative value to the façade of the set. The elements are attached to an adhesive base. The finished look of the façade is given by corner overlays.
Decorating an apron
When planning a project, it is important to determine the design and techniques for decorating the backsplash in accordance with the color and stylistic scheme of the kitchen. For a small room, it is not recommended to use dark colors, which visually make the room smaller. It is recommended to purchase canvases in light shades or transparent panels with a printed pattern. The list of popular techniques for decorating panels includes painting, photo wallpaper, and films.
Decorative painting
Decorative painting in the design of an apron is effective. Acrylic paints, a sketch from a catalog or prepared according to an author's design will be useful for the work. Complex compositions are not recommended due to difficulties in execution and overloaded design of the typeface.
Before decorating, the coating is cleaned and degreased. Then the main tone is applied, and a drawing is made on top. The paint should be applied in a thin layer. The image is placed in the center of the apron or a repeating geometric or floral pattern is made.
A universal base tone can be a coating of the following colors:
- white;
- cream;
- grey;
- beige;
- olive;
- Ivory;
- metal;
- soft peach.
Painting is done with matte or glossy paints. The optimal solution for the kitchen is a small ornament that hides chips and scratches. Light colors allow you to visually enlarge the space; You can create accent areas using rich tones.
Photo wallpaper
A simple and effective method of decorating plastic facades is pasting with photo wallpaper. The material is applied to a dust-free surface. The adhesive base is smeared onto the photo image from the reverse side, then the coating is pressed against the apron. After the elements have dried, the apron is fixed to the wall.
Photo wallpapers are selected to match the style of the room and the texture of the room decoration.
Coverings can be:
- vinyl;
- non-woven;
- washable;
- acrylic;
- metal, etc.
Washable photo wallpapers are inexpensive and easy to clean. The materials are dense, waterproof, and smooth; presented in a wide range of shades. The canvases are attached to the leveled surfaces of the apron, because do not hide deformations.
Non-woven materials are produced with a special protective moisture-resistant coating. They are resistant to direct sunlight, dust, and can be easily cleaned. Pigmentation remains intact during use without damage.
Vinyl materials for photo wallpaper are durable, retain a rich tone, are easy to care for, and are resistant to moisture and household detergents. The sheets are dense, so they hide the unevenness of the walls. Materials are available matte or glossy, textured or embossed. The textures of wood, stone, Provençal ornaments, and original designs are reproduced on the coatings.
Film
Self-adhesive film allows you to quickly decorate the facade of your kitchen unit. Manufacturers offer a wide palette of shades, the ability to order photo printing with original prints of landscapes and paintings. The film is applied to a clean and flat surface. To improve adhesion qualities, the plastic is moistened with water and the location of the film is adjusted. It is necessary to remove the air under the coating.
When choosing a material, you need to take into account the colors of the kitchen. Saturated shades and contrasting combinations are optimal; for loft, Provence, and minimalist styles, light neutrals (brown, green, ocher, soft pink) are used. For a country-style kitchen, the optimal films are wood texture, imitation brickwork, stone.
Types of plastic aprons
Modern panels based on polyvinyl chloride are presented in a very rich assortment. They are classified both according to external indicators and operational characteristics.
PVC apron
As a rule, classic PVC panels belong to the lowest price segment. Typically, this material is sold in the form of small rectangular sheets or lining, and the thickness of the products can vary from 5 to 10 mm. Naturally, the greater the thickness of the plastic, the higher its resistance to various mechanical damage.
The front surface of this material can be very diverse. The number of color variations and shades has virtually no limits.
In general, a PVC apron cannot be called practical, since it is characterized by rapid abrasion of the pattern, especially with frequent use of detergents or with direct exposure to bright sunny colors.
ABS apron
In terms of cost, a kitchen apron made of ABS (impact-resistant technical thermoplastic resin) is on the same level as ceramic tiles. In terms of its technical and operational characteristics, this polymer is in many ways superior to PVC panels. In particular, it has increased resistance to various mechanical influences and better protection from negative environmental factors.
If we talk about the features of this type of plastic coating, then it is characterized by a slight yellowish tint, which, however, does not interfere with applying almost any highly realistic images and colors to its surface.
As a rule, an apron made of ABS plastic is also quite resistant to household chemicals, but when cleaning it is still recommended to use more gentle detergents.
Polycarbonate apron
Monolithic, or cast, polycarbonate is a structurally integral polymer material that, in appearance, resembles colored or transparent silicate glass. Despite the external resemblance to ordinary glass, this material is extremely impact-resistant. In this regard, carbonate is several dozen times superior to glass.
In addition to record impact resistance, a polycarbonate kitchen apron has other obvious advantages:
- light weight (any polycarbonate product is almost twice as light as glass);
- high resistance to many chemically active environments (the material is not affected by various food acids, fats, alcohols and aggressive household chemicals);
- good fire resistance (carbonate belongs to the group of self-extinguishing polymers, so even in the event of a strong fire it does not emit a lot of smoke);
- high light transmittance (transparent material transmits up to 88% of light).
The main disadvantage of a polycarbonate kitchen apron is its rather high cost compared to other types of plastic.
Solid sheet plastic
This type of plastic is produced in the form of large monolithic sheets. Thanks to its truly impressive size, a kitchen apron made from solid sheet plastic always turns out perfectly smooth and seamless.
As a rule, this is its main advantage, since in the absence of joints the risk of mold and various other fungal infections is significantly reduced.
In addition, a single, seamless surface usually looks more attractive, especially if a large, realistic image was chosen to decorate the kitchen work area.
Installation of single-sheet plastic is most often carried out using a special adhesive composition, which is applied in a single uniform layer to the entire surface of the plastic product.
Composite materials (MDF, chipboard)
Recently, various composite materials have become very popular. To decorate the kitchen work area, MDF (medium density fiberboard) or chipboard (chipboard) is most often used, but in exceptional cases some other varieties can be used.
Main advantages of MDF:
- high resistance to moisture;
- resistance to mechanical damage;
- a huge variety of drawings and images;
- the ability to imitate various natural surfaces and almost all types of finishes.
Other undoubted advantages also include easy maintenance and high resistance to mold and mildew.
Among the negative characteristics of MDF, one can note its low thermal stability and the need for mandatory protection of the ends of the panels with a high-quality aluminum or plastic profile.
Advantages and disadvantages of plastic panels
Compared to tiles and other materials, plastic (with the exception of PVC) has a number of advantages. Here are the main ones:
- reasonable price,
- moisture resistance,
- the ability to withstand elevated temperatures, the negative effects of household chemicals, food acids, fats,
- resistance to mold growth (if installation was carried out correctly),
- light weight of material,
- tight fit to the wall,
- possibility of installation by yourself,
- Possibility of adjusting height and length.
Due to the low price and cost of work in comparison with tiles, which should be installed only if you have experience, a plastic apron can be changed more often - this will not cause a “hole” in the budget. When replacing the apron, you don't even have to move the furniture.
The material also has disadvantages. You should not glue it next to a gas stove - any type of plastic will deform over time, even the most fire-resistant, because exposure to heat will be frequent and prolonged. Plastic should not be scrubbed with hard brushes.
Polycarbonate will not withstand intensive processing either - small scratches will still appear. Only some types of design will smooth out this drawback: if the surface is decorated with relief images, made to look like aged stone or brick, minor flaws will be invisible.
What to look for when choosing
A kitchen apron made of plastic has many advantages, but they are only relevant if high-quality products are initially selected.
The modern building materials market is full of fakes and low-quality goods, so when choosing high-quality plastic, you should definitely take into account the following nuances:
- Thickness. The larger this parameter, the stronger and more durable the material.
- View of the front surface. The color of the plastic product should be uniform without blurry spots or streaks.
- Availability of quality certificates. It is best to purchase products only from trusted manufacturers, since well-known companies usually value their reputation and are unlikely to produce products of poor quality. Uncertified facing materials may contain a large number of toxic and hazardous components to human health.
How much does a plastic apron cost for the kitchen?
There is no single price for all materials. Prices vary according to quality, manufacturer, material, etc. If all criteria are at the highest level, then the price will be higher. And if not everything is good, for example, with quality, then the price will be much lower.
When choosing a panel for your kitchen, you should not focus only on expensive, branded materials. It is not a fact that branded material will last for many years. Over time, you will still have to replace the plastic apron, no matter what it is (expensive or cheap). Therefore, there is no point in wasting money. But the cheapest materials are also not worth taking. Otherwise, you will have to change it many times more often, money will go down the drain, and you don’t want to go through the hassle of installing it every time. A good option is to take something that matches the parameters and your preferences. In this case, you will be satisfied.
DIY installation methods
Currently, there are several main methods of fixing plastic covering to the wall.
Depending on the characteristics of the kitchen work area, installation can be carried out in three different ways:
- The first method involves attaching plastic to a wooden or metal frame. As a rule, this type of installation is carried out only if the wall is uneven or has any other significant defects or flaws.
- If the wall does not have significant flaws, then the material is usually fixed using specialized adhesives. In this case, the glue is evenly applied to the entire surface of the material, after which the plastic is pressed tightly against the wall.
- The third installation option involves attaching the apron to self-tapping screws. As a rule, such an apron is very easy to dismantle, but after its installation it is necessary to mask the caps from the screws with plugs of a matching color.
When installing the apron on the frame, you need to take into account that in this case the plastic coating will be more vulnerable, since there is a significant gap between the wall and the facing material.
How to glue with glue yourself
The only one of all the above methods that imposes the most stringent requirements for the evenness of the wall. The surface on which you need to glue the plastic kitchen apron must be as smooth and clean as possible. It is not advisable to use gypsum-based finishing putties for leveling - part of such putty may come off along with the glue. It is best to use acrylic-based plaster mixtures or putties. To check the evenness of the walls, you can apply the “rule” (emphasis on the “and”) - a obviously even wooden or metal strip, the length of which must be at least 70% of the length of the wall being tested.
Checking the evenness of the wall using the rule
Working with the rule is as follows: apply it to the wall without pressing hard, look from the side at the place where the wall and the tool touch - in places of dips or unevenness, a loose fit of the rule will be visible. Places of failures are marked with chalk or a marker and leveled, after which the test is repeated - the presence of voids with a total area of less than 30% of the entire length of the rule is considered acceptable quality. The permissible depth of failures is no more than 1 mm.
Before you start gluing a plastic apron in the kitchen, prepare everything you need.
Tools and materials
To glue a plastic apron to a prepared wall, you need the following tools:
- Gun for assembly glue;
- Assembly adhesive;
- Yardstick;
- Construction meter;
- Angle ruler;
- Construction level;
- Assembly knife or hacksaw with fine teeth;
- Chalk or marker.
If an apron made of polycarbonate (acrylic glass) is used for gluing, then to cut it you need to choose a fine-toothed hacksaw; other types can be easily cut with a mounting knife. When choosing glue, it is advisable to give preference to well-known, well-proven brands.
Important! When using ABS plastic, you need to take into account one of its features: it is based on polystyrene, a polymer that is easily dissolved with acetone. When installing it, you cannot use adhesives that contain acetone or substances based on it. Acetone can dissolve the panel until holes appear.
Preparation
After preparing the walls, you need to check the panels. It is advisable to apply them “dry” to the place of gluing and check the size and tightness of the fit, and also mark on them the places of cutouts for switches and sockets.
Fitting
After this, the apron is laid on a flat surface face down. The reverse side is marked and cutouts are made.
Marking cutouts
Installing panels using glue
After purchasing the type of plastic you like, you can begin installing it. If the installation will be carried out independently, you need to take into account that it is necessary to glue the apron in the kitchen made of plastic only with specialized adhesives without aggressive organic solvents.
The installation process itself is quite simple, but it requires the presence of an ideally leveled and dust-free working surface.
Typically, when installing a plastic apron, the following algorithm of actions is followed:
- First of all, surface preparation is carried out. The wall is thoroughly cleaned of the old coating and, if necessary, leveled.
- Before attaching the facing material to the wall, you should think about where the sockets, roof rails and possible lighting will be located. Any technological holes in the plastic are cut out before gluing it to the wall.
- It is necessary to glue the plastic apron to the wall only on a dry and grease-free surface. The adhesive composition is usually applied to the back of the material or to the entire working surface of the wall. In both cases, the glue consumption is approximately 300-350 g per 1 m 2.
The adhesive composition usually sets almost instantly, but complete drying occurs after at least 24 hours.
Methods for fixing wall panels
Now you need to find out how to attach an apron in the kitchen. The option depends on the screen material, so installation can be different: as simple as possible, or more complex. But in any case, anyone who prefers to live by the “do it yourself” principle can cope with it on their own.
Help from skirting boards for aprons
Such products are produced in two types - plastic and aluminum. This method is suitable for most materials, and it ensures the absence of any gaps. For the same reason, some craftsmen add another step - treating the gap between the countertop and the wall with sealant.
First, baseboards are installed at the junction of the countertop and the panel. To put it very briefly, installation consists of fixing the mounting rail and then installing a decorative strip, which simply snaps into place. The skirting boards are fixed to the tabletop with self-tapping screws, their pitch is about 300 mm. The last stage is the installation of the apron and installation of decorative elements.
Installation with liquid nails
This is the simplest and fastest option, but mounting adhesive is not suitable for everyone, since it is better to attach an apron in the kitchen using this method only in one case: if the structure is light in weight or size. Liquid nails are used to fix aprons made of chipboard, MDF and plastic. But in this case, it is necessary to ensure one condition - a perfectly flat surface. A base covered with firmly adhering tiles is also considered suitable.
First of all, the walls are prepared - degreased, dusted with a primer, at the same time ensuring good adhesion (adhesion). Then glue is applied to the apron (more often, because it is more convenient) or to the base, the element is applied, and fixed in this position for several minutes. To prevent the screen from sliding down, it is recommended to prepare supports in advance. Stands are made from slats or profiles.
Installing the screen on slats
This technology allows you to avoid labor-intensive work if the base is very far from being ideal. This lathing is suitable for aprons made of chipboard, MDF, panels, plastic sheets or stainless steel screens. Wooden frame - slats 100x400 mm or 200x400 mm, but there is an alternative - a metal profile.
The guides are fixed to the wall with self-tapping screws and dowels. In this case, it is important to check the sheathing: it is necessary that all elements are in the same plane, so testing with a level (plumb line) is mandatory. The screen is attached to the frame with self-tapping screws, which are then hidden, covered with small decorative elements.
Care instructions
Everyone knows that careful care extends the life of any product, and a plastic kitchen apron is no exception.
To ensure that the coating lasts as long as possible, you must follow these recommendations:
- If possible, try to promptly remove drops of fat and any other persistent contaminants formed during the cooking process from the surface. Removing old grease stains can sometimes be problematic.
- To clean the surface, use only gentle detergents without aggressive chemical components and hard abrasive particles. If you use too aggressive household chemicals, the decorative pattern on the surface of the material may be damaged or scratched.
- When cleaning the apron, do not allow it to be over-wetted. Due to excess moisture, panels made of MDF or chipboard can swell and become deformed.
Also, during operation, you should remember that plastic is very susceptible to strong pinpoint impacts and the impact of any sharp objects. In addition, he is afraid of too high temperatures, so you need to try to treat the material carefully and not place any hot objects near its surface.
How to mount it on the wall?
It is quite possible to install a kitchen apron yourself. Let's take a look at several ways to secure this finish.
On the guides
As mentioned above, a plastic kitchen apron is inexpensive. That is why such finishing is often replaced as soon as the old one becomes boring. If you assume that over time you will want to install new plastic parts, then you should install them on the wall using guides, which are metal slats.
The guides must be attached to the walls using self-tapping screws. Plastic panels are simply attached to these guides like rails. If necessary, they can be pulled out and new elements installed.
Self-tapping screws
If you want to install a plastic kitchen apron thoroughly and do not intend to replace it in the near future, then you should turn to securing it with self-tapping screws. You can drill right through the plastic without any problems. But you need to take into account that for this installation method you will need to prepare the walls - they must be perfectly smooth, without potholes or drops. Do not be afraid of marks from self-tapping screws that appear on plastic decorative coverings. If desired, they can be easily and quickly closed using special color-matched plugs.
With this method of fastening, the plastic apron will not fit tightly to the wall base. There will be a small free space behind this part. Many craftsmen hide unattractive electrical wiring there, making the interior more aesthetically pleasing and neat. In addition, the apron installed on self-tapping screws can also be easily removed whenever you want.
What you need for self-installation
An apron is an integral part of the kitchen interior. This element can make the design of the room more stylish and practical, but it can also radically change it for the worse.
It is important to treat this part of the wall with maximum attention. How the apron will fit into the interior depends not only on its style and color scheme, but also on the quality of installation
When installing an apron in the kitchen with your own hands, prepare in advance for this creative and responsible process. Choose a material that suits the color and style, make markings, acquire the necessary tools and study the installation process.
Before proceeding with the points listed above, prepare the wall on which you will install the apron. Its appearance will largely depend on this.
Preparing the wall for installation:
- Remove old trim from the wall. Old tiles, wallpaper and plastic panels under the new finishing material will worsen its appearance and reduce its service life.
- Apply a special primer to the surface. It will increase the quality of adhesion to the wall of subsequent layers. If there was mold and mildew on the old finish, use antifungal compounds.
- If necessary, apply a new layer of plaster compound. The condition for high-quality fastening to the wall of some types of material is a flat base surface.
Only after the surface preparation work has been completed can the apron itself be installed directly. Otherwise, the repairs will soon have to start again.
Preparing tools for work
Installing a kitchen apron is impossible without special tools. The list of required items may vary depending on the material chosen and the method of its installation.
| Apron type | Installation method | Materials and tools |
| Sheet plastic | Liquid glue | Glue, for example, “liquid nails”. |
| Self-tapping screws | Decorative plugs, screws, screwdriver, drill. | |
| MDF | Lathing | Wooden slats, at least 2 cm thick, decorative self-adhesive tape, a protective agent for processing slats, a screwdriver, drill, jigsaw or hacksaw. |
| Glue | Decorative self-adhesive tape, liquid nails. | |
| Self-tapping screws | Self-tapping screws with butterfly dowels, decorative plinth, decorative plugs (optional), screwdriver, drill, jigsaw or hacksaw. . | |
| Plastic panels | Lathing | L-profile made of metal or wooden slats, screwdriver, drill, decorative plinth. |
| Self-tapping screws | Self-tapping screws or staples, decorative plugs, screwdriver, drill, decorative plinth. | |
| Glue | Liquid nails, decorative plinth. | |
| Tiles and mosaics | Installation with special glue | Tile cutting tool, tile adhesive, grout, notched trowel, smooth trowel for tile adhesive, rubber grout trowel, glue mixer (optional). |
| Glass | Self-tapping screws | Self-tapping screws with elastic dowels and decorative plugs, screwdriver, hammer drill. |
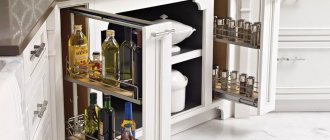
| Decorative rock | Special glue | Special glue (tiles are suitable), a protective composition for processing the finished apron. Mixer for mixing glue, notched spatula, smooth spatula, grinder. We are developing a plan for installing the future apronBefore attaching the kitchen apron to the wall, you need to draw up an installation plan and make markings. To do this, a kitchen interior design is prepared in advance, taking into account the size and installation location of the set. The marking is carried out taking into account the parameters of the kitchen unit. It is usually done both on the project and on the wall. What is included in the marking of a kitchen apron:
|
Choosing the right option
Buying a protective plastic covering is very simple. Any hardware store is ready to provide you with many options. All of them are panels made of polyvinyl chloride. They are divided into groups depending on the size of the product.
Plastic lining is made of a single-color material. Its length is 3 m, and its width varies between 10 and 12.5 cm. A more common option is a plastic panel. Its length is also 3 m, and its width is 15-50 cm, although the most common panels are 3 m by 25 cm. It is more convenient to use the panel because during its installation there will be no such seams as when installing several linings. The width of the plastic sheet is 0.8-2.03 m, its length is 1.5-4.5 m. The sheets also differ in width, it ranges from 1-30 mm.
Plastic kitchen aprons
The latest materials have firmly established themselves in our lives. They are actively used by all existing industries, their characteristics are constantly being improved and new opportunities appear. A plastic apron is inexpensive, and the appearance of this part of the kitchen is not inferior to other types of decoration.
Plexiglas, also called acrylic, will successfully replace glass panels. It has no pores, therefore it does not absorb moisture and does not contribute to the growth of bacteria.
It is important that when hit, such glass does not break, but simply deforms; its relatively low weight simplifies installation. Polycarbonate has less transparency, but the material’s strength indicators are impressive. It is almost impossible to break such a plastic kitchen apron.
When choosing a pattern, you will have to take into account that the colors will be slightly darker. An interesting solution is a tandem of MDF and acrylic. An image is applied to the slab, and then a layer of acrylic is poured. As a result, the design does not fade and is protected on both sides. Plastic laminate is an original solution and justified for a small kitchen. It's inexpensive and fast.
Kitchen aprons made of plastic with photo printing
Applying a design to an MDF panel is not the only photo printing option. There are several more interesting and affordable ways to get a bright, original apron with any images.
- A quick, easy and cheap way is to place wallpaper on the wall behind a clear plastic panel.
- The image can be applied to PVC film. It is glued to the wall behind the plastic screen or to the plastic itself.
- With a large format printer, UV printing applies the image directly to the plastic. When exposed to sunlight, the print does not fade, the image is strong and durable. However, such plastic kitchen aprons with photo printing will cost more than others.
Plastic tiles for kitchen backsplash
Ceramic tiles will require careful surface preparation, calculations and a competent specialist. The plastic apron is loyal, but imitates the surface reliably. With the development of this niche of finishing materials, polymer has reached a new level, and many original options have appeared.
- Classic white tiles with imitation brickwork are made in the form of panels. Ease of installation and speed allow you to make an apron in a matter of hours.
- From plastic tiles you can create an unusual panel, bright and stylish.
- A tandem of a transparent plastic screen and a PVC pattern can replace the tiles.
- An apron made of ABC sheets, when plastic under the tiles covers large areas, is a simple and inexpensive solution. The sheets are attached with liquid nails.
- The apron will become the highlight of the kitchen interior if you use modern, original colors and shapes.
Plastic mosaic apron
An excellent alternative to tiles or ceramic mosaics are ABC plastic panels. Under the influence of heat and after some time of use, the surface will deteriorate faster than a tiled wall, but this can also be considered an advantage.
- Installation and dismantling of the panels is simple and does not require the involvement of a specialist. The apron parts are fixed with liquid nails or with screw cutters to the frame.
- The cost is much lower than tiles. The design can be changed frequently without any large-scale renovation work.
- A wall apron for the kitchen made of plastic is not afraid of moisture and household chemicals, therefore it is able to maintain its appearance and pleasantly surprise.
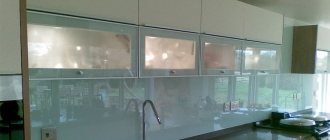
Transparent plastic kitchen apron
Transparent panels made of polycarbonate and acrylic glass open up wide scope for design ideas. If you choose a plastic panel for the kitchen, the apron will be durable. However, the disadvantages of such material will also have to be taken into account.
- Acrylic glass will begin to deform already at 120°C, polycarbonate will resist up to 160°C, but will gradually begin to turn yellow and acquire characteristic stains. Acrylic glass is practically non-flammable, but when burned it will begin to release harmful substances.
- You can wash such a surface without fear, but clean polycarbonate with gentle household chemicals, as it may become cloudy.
DIY installation of a plastic apron
You can install an apron in the kitchen yourself or turn to professionals for help. For installation you will need a minimum set of tools and consumables.
The first thing you need to do is choose the type of plastic and its color. Having selected the material to suit the design of your kitchen, you can begin taking measurements.
Advice. In order to correctly measure the area of the canvas, it is necessary to carry out measurements with a margin. Part of the apron, approximately 20 cm, should extend beyond the wall cabinets and countertop. This way you can achieve maximum wall protection.
After selecting and purchasing plastic, you can begin its installation. Before starting work, you should treat the surface of the wall with a primer and let it dry a little. There is no need to level the wall before work. Installation is carried out in several ways:
- attaching the apron to waterproof glue;
- fastening the canvas using self-tapping screws;
- installation of plastic on a pre-prepared structure.
The first method is the simplest - strips of glue are applied to the wall. First, the glue is applied around the perimeter, and then in horizontal stripes with an interval of 15 cm. Then pre-degreased plastic is applied to the wall. This installation method is the fastest, but has a drawback - it will not be possible to remove the plastic sheet without deformation.
Attaching the apron using self-tapping screws is also not difficult. For reliable fastening, four self-tapping screws are sufficient, which are located around the perimeter of the canvas.
If the kitchen wall is uneven, a plastic apron can be attached to an aluminum profile. In this case, aluminum or wooden slats are first attached to the wall, and then an apron is mounted on them.
After installation is complete, holes are cut out on the apron for sockets, wires and pipes.
Thus, a plastic apron is an economical and easy way to decorate your kitchen.
First installation option
If you become the happy owner of a kitchen with smooth walls, then installing an apron with your own hands will not be difficult for you, because you can simply glue it on. It is very important to thoroughly clean the wall before starting the procedure: remove all old paint, prime the surface (it is better to use a deep penetration primer solution), and use gypsum plaster to seal all cracks and crevices. After this, it is necessary to cover the entire wall with plaster for interior work and prime it again.
When the preparatory procedures are completed, apply a special mounting adhesive to the inside of the protective coating. The glue must be applied both around the perimeter of the apron and over its entire area. The distance between the adhesive strips should not exceed 15 cm. After applying the mounting adhesive, attach the apron to the wall and secure it with spacers. This will be quite enough for the protective coating to adhere well, but if you still don’t trust the glue 100%, additionally secure the apron in the corners with self-tapping screws.
Related article: How to calculate the consumption of materials for high-quality plastering of walls
Installing an MDF kitchen apron yourself
Many may think that this process is quite simple. This is actually true, but it is necessary to take into account some nuances that determine the quality of the installation work carried out. Therefore, first of all, you need to accurately calculate everything in order to install an MDF kitchen apron.
This mainly applies to MDF sheets, which will have to be precisely cut to the required dimensions.
- Firstly, the distance from the floor to the apron itself is calculated. Basically, this is the height of the tabletop, and its usual standard size is 85 centimeters.
- Secondly, this is the height of the apron itself. which is determined by the distance from the countertop to the hanging cabinets. This size varies between 55-65 centimeters.
- Thirdly, it is necessary to take into account the fact that a hood is installed above the stove. and the distance from the tabletop to it has a standard size of 75 centimeters.
- Fourthly, it is necessary to take into account that three or four sockets will be installed on the wall above the tabletop. for which holes are cut in the sheet.
The length is determined by the length of the working area, which necessarily includes the length of the wall against which all kitchen work furniture is installed. As well as part of the adjacent walls the width of the furniture. All this is clearly shown in the bottom photo.
Apron installation diagram
Preparatory work
If a complete kitchen renovation has been carried out, this means that the wall is completely ready for installing an apron. If the issue is only a replacement, then it is necessary to prepare the wall area.
Old finishing materials, protruding nails, screws, etc. are completely removed, surface defects (cracks, chips and gouges) are repaired, the wall is partially leveled with putty and, after complete drying, treated with an antiseptic solution.
Advice! Be sure to install a mounting strip under the future apron. This can be a regular wooden lath or a metal profile for drywall. It is attached with self-tapping screws to the wall under the lower edge of the apron. A prerequisite is the horizontal position of the profile.
This mounting strip is both a support on which the MDF is installed and a reference point for installation. After installation is complete, this strip can be dismantled.
Installation of an MDF apron
Liquid nails for fastening
Installation of a kitchen apron made of MDF is most often done using liquid nails. This is a convenient option.
First, there is no need to level the walls to the maximum level, because with the help of this type of fastener you can hide small differences in the wall surface.
The second is simplicity. There is no need to drill holes for another type of fastener.
Third is ease of installation.
It is very important to apply the adhesive material correctly here. Mandatory around the entire perimeter
But the inner area of the panel can be treated with vertical or horizontal layers, the distance between which is determined by the size of 20-40 centimeters. It all depends on the size of the sheet used in each individual case.
Self-tapping screws for fastening
This type of fastener is used in the frame method of fastening panels. That is, wooden slats measuring 10x40 or 20x40 millimeters are pre-installed on the wall in a horizontal position, which are attached to the wall with dowels. They must be aligned in the same vertical plane.
The installation of the lower and upper slats from the edges of the panels is carried out at a distance of 10 centimeters, while the distance between the slats is 40-45 centimeters.
Attention! The slats, like the wall, must be treated with an antiseptic solution.
Now the panels can be installed, securing them to the frame with self-tapping screws. To ensure that the fastener caps do not stand out, they must be covered with special decorative plugs, which are selected by color.
MDF kitchen apron
“Kitchen aprons with photo printing - beautiful and practical” href=”https://jkuhnya.ru/steni/fartuck/53-kuxonnye-fartuki-s-fotopechatyu”>Kitchen aprons” width=”640″ allowfullscreen=”” frameborder=” 0″>
Installation on the sheathing is a reliable option
This option is suitable for a kitchen that has already undergone several renovations and cannot boast of perfectly smooth walls. In this case, the lathing will become a frame that will hold the kitchen apron. Why is such a frame needed?
The plastic panel is very light, which means it can be deformed under the influence of steam or moisture. The lathing will eliminate such problems. It will also be possible to install lighting under the panels - the apron will acquire a spectacular appearance.
To install the wall panel onto the sheathing, you will need the following tools:
- wooden blocks (20-30 cm wide) or metal profile;
- drill;
- screwdriver;
- stapler with staples;
- screws and dowels (for the frame);
- self-tapping screws (for panels) with a press washer;
- building level;
- pencil or marker, tape measure.
The first thing you need to do is make room for work. We move the furniture in the apron area. Now we make markings and “try on” the plastic sheets to the wall. You need to determine where the bottom panel will be (usually it is placed below the countertop) and where the kitchen splashback will end (it can hide under the cabinets or rest against them). Next, we proceed to install the sheathing.
- First we need to secure the bars or profiles around the perimeter of the apron. We take the block and place it on the lower level (where the bottom panel will be located). We drill holes using a drill and fasten the block with self-tapping screws.
- Now we install the top bar at the level of the top panel. It is clear that the block should be equal to the width of the apron.
- For reliability, we also attach two bars to the sides and secure them with self-tapping screws. You have a frame. Depending on the size of the kitchen and the apron, you can attach several more bars - in the center or at a distance of 30 centimeters from each other.
- The next step is to decide on the location of the roof rails, knife holders and various hanging elements that will be located in the apron area. Mark these places with a pencil and attach the bars here.
- Next we will install plastic panels. Everything is simple here. The products are fixed with self-tapping screws with a press washer or a stapler (if the panel groove allows).
- The products are installed in the following sequence: first, the starting panel (bottom) is attached, the next one is inserted into its groove, and so on.
The photo shows how to attach the apron to the profiles.
Now your kitchen apron is ready.
Another installation point is the seams. To disguise them, you can choose special strips in the same or contrasting color with the plastic sheets.
And one more trick for getting perfect seams: when you attach the panels, tap them with a hammer to push them tightly together. At the stage of installing the sheathing, a video can help you, where you will examine in detail each installation process.
What is required for installation?
Repair work must be carried out very carefully. The installer will need some tools:
- A building level will help you avoid mistakes during installation, measure everything correctly and secure the wall panel evenly and neatly;
- Using a hand saw, the installer will be able to saw off the required amount of measured material; if possible, it is better to get a jigsaw or circular saw. When using these tools, the cut edge will be smoother and neater;
- It is desirable to have a hammer drill, but an ordinary drill is also suitable, which should be accompanied by the appropriate components (drills);
- To make mixing plaster or glue easier, you will need a special mixer attachment. It fits onto the drill, it is quite simple to use, it will not cause any difficulty even for a beginner;
- A construction knife is distinguished by its sharpness, so when using this tool you should not forget about safety precautions;
- A tape measure will help you make accurate measurements, which will protect the material from deformation during installation;
- If you need to work with ceramics, then you need to get a special tile cutter;
- You should purchase two types of spatulas: serrated and smooth options.
Purchasing the listed tools will not be an expensive pleasure for the consumer. A man may already have a lot in his arsenal. When using construction tools, you should remember safety precautions and work carefully.