Step 1. Dismantling the old mixer and preparing for installation
Before installing a faucet in the kitchen, you need to turn off the water (there is no need to turn off the riser) and, just in case, put a rag on the bottom of the sink so that small parts do not fall into it, and large parts do not damage it.
Of course, replacing a kitchen faucet requires dismantling the old faucet. To do this you need:
- First, disconnect the old hoses from the cold and hot water pipes by hand or with an open-end wrench. Do not forget to place a basin under them and drain all the remaining water, after which the threads of the pipes must be wiped clean.
- Then, using a tubular wrench, you need to unscrew the clamping nut on the stud (or two studs), which secures the faucet to the sink (right under it). When you unscrew this nut, the metal half washer will also come off.
- Now you need to pull out the mixer along with the hoses from the sink hole. Well, that's all, you can proceed to the next step.
How to choose and install a mixer correctly
When choosing a mixer model, you need to consider;
- sink dimensions;
- distance between the wall and the bowl;
- location of tap holes.
The most common taps are divided by type;
- electronic;
- axle crane;
- single lever.
Crane-axle types are considered the most reliable.
It can be replaced if it fails. Crane axle boxes are usually sold separately and are divided into two types;
- ceramic,
- worm-type
Ceramic axle boxes regulate the flow of water by rotating ceramic plates that have a hole in them. Worm drives lift and lower the rod along the thread, thereby regulating the flow of water. A single lever kitchen faucet is convenient because it has only one lever, which controls the flow of cold and hot water. It consists of a cartridge similar to a crane axle box.
Single lever mixer
The body of such models is stationary and rotating around an axis. Electronic faucets provide water flow at a constant temperature. There are also those that turn on from a sensor at a distance. They are very complex in design, so their cost is much higher. The kitchen faucet is installed either on the countertop or on the bowl of the sink itself.
Let's prepare a working tool for installing the mixer. We will need:
- Adjustable wrench.
- Pliers.
- Water container.
- Screwdriver.
- Flashlight(required)
Don’t forget about a rag, as water leaks cannot be avoided. It is necessary to prepare the necessary materials such as;
- kit that comes with the mixer;
- fum tape for sealing joints;
- silicone sealant.
You will also need hoses for the liner. They are reinforced and bellows. You need to choose the length that is necessary so that the hose does not stretch or break. Bellows liners are made of stainless steel. Of course, they are reliable, but very expensive. The most common hoses are reinforced. They have enough reliability and the price is not scary.
What will be needed during the installation of the mixer?
In order to install the mixer, you will need to prepare some devices, materials and components.
If you have already purchased a mixer, then you need to pay attention to the components. After all, not in all cases the length of the hoses (pipes) included in the kit is sufficient. Most often, their standard length is 30 centimeters, but this is not enough. In addition, if this faucet is from a dubious manufacturer, then in most cases the quality of the flexible hoses included is unsatisfactory, so it is better to replace them immediately.
The length of the eyeliner in a metal braid is not always enough
When purchasing such flexible hoses, it is necessary to take into account that their fittings should have different lengths, which will make the structure easier to assemble - because the hexagons will not abut each other.
In addition, you should pay attention to the threaded connection to the water supply. This applies not only to the size of the threaded part, but also to its type (internal or external). Of course, in most cases, hoses with internal connections are used to connect to the pipe. However, another option is also possible if the ball valve already has an outlet with an internal connection.
When choosing liners, it is necessary to take into account the size and type of threaded part
It is important to achieve optimal hose tension. So, the eyeliners should not be under strong tension or, on the contrary, dangle excessively. Indeed, as a result of the constant opening and closing of the valves, the hoses will move, and this, in turn, will lead to wear of the rubber tube that is located inside it. A hole may form in it, causing the liner to leak.
External and internal structure of flexible braided liner
Video - Features of flexible eyeliners
In this case, it is better to purchase a flexible stainless steel corrugation. Of course, such hoses are more expensive and are not so easy to install. However, they will definitely last you for several years because they have good rigidity.
Stainless steel corrugation has good wear resistance
In some cases, it is possible to completely eliminate the installation of such connections, because you can supply water to the mixer using a metal-plastic pipe. To do this, you should buy a set of fittings with press fittings suitable for these pipes.
Fittings with press fittings look like this:
Of course, this method of eyeliner is a little more complicated. However, you won’t have to change the fittings for many years to come.
Option for supplying pipes
In addition, before installing the mixer, we will need to prepare the following tools:
- Wrenches for tightening nuts of different diameters. If it becomes necessary to secure the faucet to the sink with a nut that is too large, it is better to take a universal adjustable wrench.
- Set of different screwdrivers.
- Pliers.
- Pipe wrench (may only be required in some cases).
- If you are installing a faucet on a new sink that does not have a hole for the faucet, then you need to prepare an electric drill with special attachments with a diameter of at least 3.5 centimeters.
- It is important to clearly see all connections during installation, so it is recommended to have a portable flashlight with you.
It is better to change the faucet during daylight hours so that the space under the sink is illuminated
During the work you will need the following materials:
- Sealant for threaded connections or fum tape. Seals will be required only in cases where there is a need to install additional adapters on pipes. For such purposes, it is recommended to purchase a special plumbing tape or use a special sealing paste, so that the connection will definitely not leak.
- If you will be disconnecting the sink, you should purchase silicone sealant.
- If you are replacing an old faucet, some connections may be difficult to unscrew. You can cope with this problem using universal aerosol lubricant WD-40.
Installation of the mixer requires a minimum of tools
When all the devices are ready, you need to start working.
How to install a faucet yourself
There are several ways to install the faucet;
- using a nut;
- on a stiletto heel.
A threaded pin along its entire length is screwed into the valve body. Now you need to put the gasket on and carefully press it into place. Then we insert the hoses into the sink through the hole and put the mixer in place. We put the gasket on the bottom of the product mixer. Then the pressure plate is put on and the nut is screwed onto the stud from above. Tighten tightly, but carefully so as not to damage the thread. At the next stage, we fix the sink on the cabinet.
Attaching the mixer to the nut is done a little differently. The design of such taps has a wide part in the form of a cylinder with a thread at the base; a nut for fastening is tightly screwed onto it. In this case, it is much easier to connect the eyeliner than with a hairpin. Therefore, the connections are connected after the faucet is installed on the sink. At the same time, it doesn’t hurt to think again about which mixer is best to choose.
Installation
- We install gaskets under the base of the mixer.
- We insert the threaded part into the hole in the sink bowl.
At the same time, we control the position of the gasket. Place another rubber gasket from the included kit on the bottom of the sink.
The bottom gasket has a different shape from the top. The top one is a thin round rubber ring, and the bottom one is wide and flat.
Screw on the water supply hose
First you need to install a hose with a short fitting, then with a long one. The fittings already have gaskets, so there is no need to seal them additionally. Finally, we install the sink on the cabinet itself.
We install coarse filters
Water purification filters
Filters are needed to prevent debris brought by water from getting into the cartridge and aerator.
Question for a plumber
Where is the best place to install filters?
The filter should be installed where it is easy to reach. So that it can be easily cleaned if necessary.
The position of the filter pipe should be tilted downwards. The arrow in the direction of water movement must coincide with the direction of flow.
Completion of installation
After all work has been completed, it is necessary to check the operation of the crane. Are there any water leaks? Open the taps on the main riser on the mixer. We release the air and wait for a while to see if water appears at the joints.
If a leak appears, fix it with a broach. If this does not help, you will have to disassemble the connections and re-apply fum tape, wrapping it around the threads of the fitting. This will be enough to eliminate leaks. Now you can use our kitchen faucet for a long time.
You can watch the video on how to install a faucet in the kitchen.
Selecting a water distribution unit
Before changing the mixer, you must select a new device. In order for the faucet to serve for a long time and not tire you with constant problems, treat your purchase responsibly.
Manufacturers who value their reputation produce the unit from brass or bronze. It is not difficult to recognize such a device - its insides are yellow. The gray filling “speaks” of a product made of silumin. This material is completely unreliable and is subject to rapid corrosion processes.
The seals must be rubber.
A split spout spacer ring to prevent the faucet from wobbling and leaking.
Lever shut-off valves are preferable to valve valves in all respects:
- saves water because it does not require constant adjustment;
- Convenient to open and close with dirty hands. This is especially true in the kitchen.
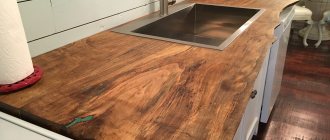
Installing a faucet into a countertop
For this method, in addition to the devices described above, you will need the following:
- electric jigsaw;
- drill;
- set of drills.
The installation method is practically no different from the previous one. Only in this case there is no need to dismantle the sink. Installing a faucet into a countertop requires making a hole in the countertop itself.
To install it in the countertop, you need to make a hole of suitable size. Externally, it should look like a similar hole in sinks
The choice of location for the hole should be based on practical recommendations:
- water should not fall on the countertop while using the mixer;
- the valves/lever should be comfortable to use;
- The spout should be positioned relative to the sink according to the recommendations presented at the beginning of the article.
First you need to make markings along the contour of the base of the mixer using a pencil. Using a drill, drill four holes in the corners of the drawn perimeter.
Then use a jigsaw to cut a hole through which you can pull the liner and insert the threaded pins. The cut needs to be cleared of sawdust and the edges cleaned with sandpaper.
It is important not to make the hole too large. Otherwise, the size of the clamping ring may not be enough to cover the entire hole. Further, the sequence of actions remains the same as when installing the mixer on the sink.
What only a wall sink faucet can do
- Maintain the set temperature.
Thermostatic mixers are usually built-in. Traditional models are not equipped with a temperature regulator, so that a child or an elderly person with poor eyesight does not accidentally get burned. The built-in mixer easily copes with this task.
Thermostatic faucets operate at a preset temperature, but it can be easily adjusted when needed.
- Combine aesthetics and convenience.
By using a concealed faucet - more compact than a traditional one - you do not risk accidentally hitting the spout. Such faucets are installed, just like any other plumbing fixtures, so that they are convenient to use.
- Visually lighten the space.
Concealed faucets are mainly used by those who are adherents of similar styles such as purism and minimalism, which are characterized by practicality, functionality and the use of only the most modern technological solutions in the interior.
- Save space in a small bathroom.
Built-in faucets save space, which means they solve the problem of cramped space in a small bathroom.
- Create fewer cleaning problems.
A minimum of chrome fittings means less time to remove calcium stains from the surface of plumbing fixtures.
Read material on the topic: Mixer with nut: types and functions
Preparatory work
Before you begin to solve the problem of how to connect the kitchen faucet to the water supply, you must definitely turn off the water supply to your house or apartment. Otherwise, you may encounter serious troubles when installing the mixer. In addition, it is necessary to open the tap at the water collection point to drain the remaining liquid.
Then you can begin to prepare the necessary tools and materials. In most cases, the working set for solving the problem of how to install a faucet in the kitchen consists of the following:
- Screwdrivers of different types. Most often, the work requires a Phillips and flat-head screwdriver.
- A set of socket wrenches and an adjustable wrench.
- A self-contained lighting device, such as a flashlight.
- Sandpaper.
- Flexible hoses.
- Tow.
- A special composition WD-40, which is used to treat stuck compounds
Before assembling the faucet in the kitchen, you need to take care of the new connection to the mixer, this will ensure the tightness and durability of the connections.
Installing a kitchen faucet
You have already sewed the sink into the countertop and installed the water pipes in the walls, it’s time to start installing the faucet in the kitchen.
The whole process includes 3 stages:
- Preparatory work
- Mixer installation
- Commissioning works
Preparatory work
Before installing the crane, prepare a set of tools and necessary components.
You will need tools such as:
- adjustable wrench,
- screwdriver,
- pliers,
- wrenches 9/11 and 10/12,
- FUM tape.
Prepare your workplace:
a) When performing any plumbing work, first make sure that the water is turned off. To do this, check the valve located in front of the water meter, try opening the hot and cold water taps.
b) Proceed to dismantle the worn mixer. For convenience, the sink is slightly moved away from the adjacent wall. Armed with an adjustable wrench, unscrew the nuts of the flexible hose from the water pipes, placing a container underneath in advance. Next, unscrew the pins that secure the faucet to the surface of the sink and remove the worn-out device.
c) If necessary, use cleaning products to clean the seat on the surface of the sink and begin installing a new faucet.
Mixer installation
You have prepared all the tools and the mixer kit, and carefully checked its serviceability. You can start installing it.
a) First, pack the flexible hoses with fumlente. Carefully wrap the threads of both inlet fittings with several turns of foam. This will eliminate possible leakage during operation of the mixer. After passing the hoses into the washing hole, screw them into the new device using a 10-mm wrench. Don’t forget to fit a high-strength rubber O-ring into the special groove on the bottom of the faucet. It will serve to create a seal at the base of your sink.
b) Using a screwdriver or pliers, screw the pins tightly into the faucet hole. Their number is determined by one or another modification of the crane.
c) Any faucet set includes 2 parts resembling a horseshoe: a thick gasket made of durable rubber and a metal plate.
First, firmly place the gasket on the stud, place the plate on top and press it against the sink. Holding both the new faucet and the gaskets with your hand, carefully screw the bronze nut onto the stud using a 10/11 wrench (depending on the manufacturer of the device). After making sure that the mixer is mounted level, tighten the nut until it stops. The device is considered installed.
d) Start connecting flexible hoses to the pipes. To do this you will need 1/2 inch union nuts with rubber gaskets inside. Screw them tightly and, armed with an adjustable wrench, tighten them all the way, but do not overdo it - you cannot twist them! Otherwise, there is a high risk of damage to the gaskets and leakage of the connection. Now you can check the operation for leaks.
Commissioning works
After installing a new faucet in the kitchen, wipe the connection areas dry. The inlet valve can now be opened and finally try to let the water flow. Carefully inspect all nuts and hose fittings. If the connections are sealed and moisture does not appear, then we can say that the complex of work on installing the faucet in the kitchen was completed “excellently”. We put all the tools away on the workbench and enjoy the work of the water tap!
Installing a mixer in a countertop
To install the faucet on the countertop, in addition to the tools described above, you also need:
- jigsaw;
- drill;
- set of drills
The installation method is practically no different from installation on a sink. Only in this case, plumbing fixtures are installed on the countertop, for which they make a hole in it. The choice of place for it should be based on practical advice:
- during operation of the tap, water should not fall on the countertop;
- It is important that the spout is located in the center of the sink;
- use of the lever or valves should be comfortable.
Do you want to know how to assemble a faucet for installation on a countertop? First, you need to make marks with a pencil along the contour of the base of the faucet, then use a drill to drill four holes in the corners of the picture and cut out a hole with a jigsaw. Through it, you can later connect the hoses and insert threaded pins. The resulting cut along the perimeter should be cleared of sawdust and cleaned with sandpaper.
It is important not to make the hole in the countertop too large, as the pressure ring may not cover the entire hole. The further sequence of actions is no different from the method of installing the faucet on the sink.

