Even showing the process of assembling one chair from this material would require a lot of time and text. So let's start with the introductory material.
I propose to discuss the profile pipes themselves, as well as their strengths and weaknesses. And I will give a number of examples of what can be done with this material at your disposal.
Brief introduction
Before making furniture from a profile pipe with your own hands, you need to get acquainted with the material.
A profile pipe is a hollow metal product that can have different types of cross-sections, except round. The main materials of manufacture are low-alloy and carbon steel. Stainless steel is used much less frequently.
All kinds of crafts and full-fledged structures are assembled from it, which are subject to serious loads.
The shape, as well as the properties of metal pipes, have allowed the material to gain enormous popularity in the construction industry and beyond. This pipe is ideal for performing a large number of tasks. You can get a variety of designs from it.
The main types of sections are:
- square;
- rectangular;
- oval;
- triangular;
- hexagonal;
- flat oval, etc.
Products with right angles in cross-section are in great demand. Oval and flat-oval are less common. And non-standard forms are even used in individual projects.
Do-it-yourself table: we make wooden and folding options by studying the drawings and step-by-step instructions
A table with your own hands can easily be made even by a home craftsman who does not have any accumulated experience in carpentry. Of course, this will become possible if the design of the table is quite simple and understandable.
DIY table
For example, it is not always possible to find a suitable ready-made table model for a kitchen that is extremely small in size. Purchasing custom-made solid wood furniture is quite expensive. Therefore, sometimes you have to take up the tools and construct your own “work” yourself, starting from the specific dimensions of the place where you plan to install the table.
In addition, there is often a desire to show one’s creative abilities in a summer cottage, especially since there is always a desire to beautifully arrange a veranda or gazebo in a suburban area. If you have suitable materials and tools at hand, then you can either sit down to draw up a drawing of the future table, or use a ready-made project, and then get to work.
To figure out which type of table you can build with your own hands, it is advisable to consider several options for this piece of furniture.
Tools for work
Before starting work, you need to prepare the appropriate tools that will be required to make any wooden table. The amount of material for each model will be different.
Set of basic carpenter tools
You can use regular, traditional hand tools that carpenters have always used. This list usually includes:
- A plane used to level wood and cut parts to the required size.
- Chisels for selecting various holes and grooves, removing small protrusions.
- Saws of various sizes and modifications, which are used to cut thick boards or make small cuts.
- Pencil, tape measure, corner and ruler.
- Screwdriver Set.
- Clamps for temporary fixation of glued parts.
- Sandpaper for sanding.
Many of the tools can be replaced with more modern and convenient devices:
- An electric jigsaw will do all the work that the various saws mentioned above were previously used for.
A jigsaw will allow you to quickly produce the necessary workpieces
Rating of jigsaws
- A sanding machine will help make surfaces smooth and polish them to a shine, eliminating the very tedious procedure of manual sandpaper.
A sander eliminates the tedious process of sanding and polishing by hand.
- Milling machine with a set of cutters. This device will help round sharp corners, drill shaped grooves for furniture hinges, and if you need it and have some experience, you can use it to decorate a table with a relief pattern.
A manual milling machine will bring the shape of parts to perfection
- A screwdriver will significantly speed up the work, since you won’t have to spend several minutes tightening each screw. In addition, during certain operations it is possible to install one of the milling cutters or ordinary drills into it, for example, in order to process an edge or make a perfectly even large or small hole (groove).
A cordless screwdriver will simplify installation operations
- The construction level will help make the product even and neat, as it will show all possible irregularities and distortions.
To prevent the finished furniture from being “crooked”, the assembly is controlled by level
An easy-to-make table for a summer cottage
Anyone can make a table like this
Necessary materials
For such a country table, which has a tabletop size of 1680x850 mm, you will not need too many wooden blanks. You need to prepare the following:
- Beam, cross-section - 750×100×50 mm - 4 pcs. (table legs).
- Self-tapping screws, bolts and possibly metal corners.
- Wood glue.
- Board size:
- 1680×100×25 mm – 4 pcs. (longitudinal frame elements);
- 850×100×25 mm – 2 pcs. (transverse frame parts);
- 1580×100×25 mm – 2 pcs. (cladding boards for the side elements of the frame);
- 950×100×25 mm – 17 pcs. (boards for tabletops).
Expert opinion: Afanasyev E.V.
Chief editor of the Stroyday.ru project. Engineer.
All wooden elements must be treated with antiseptic compounds and have a prepared smooth surface. If you plan to “darken” the wood, then it is covered with stain, and to reveal the textured pattern, the top is carefully sanded with a sanding machine. Fine-grit sandpaper will remove the stained, raised parts of the wood grain, making them lighter than the depressions.
Installation of a garden table
When all the parts for the frame are prepared, you can proceed to assembly.
Frame or “box” of the table
- The first step is the details of the tabletop frame - four longitudinal boards measuring 1680x100x25 mm and two end boards 850x100x25 mm, laid out on a large table or on the floor. The location of the internal and external boards is marked on the end boards. Using a ruler, based on the drawing, the required distances are measured and marked with a pencil. It is imperative to accurately mark the width of the longitudinal board at the junction with the end board, especially if the connection will be made using the tie-in method.
The elements can be connected in different ways:
Connection with a choice of “quarters” and using metal corners
- using a steel angle - this is the simplest and most reliable way;
- the insertion method is a more complex method, since it requires precise dimensions not only in the width and length of the connecting elements, but also in the depth of the board;
Several types of joints based on the tongue-and-groove principle
- “groove-tenon”, shown in the second figure a), b), c), d) and e) such a connection is also quite difficult for novice craftsmen with no experience;
- connection with dowels is shown in fragment e) - this method also requires perfect accuracy when marking and drilling holes in the parts to be connected.
- All connections are usually made using glue. The only exception is the fastening of parts end-to-end with a metal corner.
- The frame must have perfectly aligned right angles, so after connecting all the elements, you need to carry out control using a construction angle and measuring and comparing the lengths of the diagonals.
- If parts are secured with glue, they must be fixed in clamps and left until it dries completely, otherwise they will not be connected securely.
To ensure reliability of glued joints, parts are clamped into clamps
- When the glue dries and the frame acquires a certain rigidity, facing boards measuring 1580 × 100 × 25 mm are attached to the outer longitudinal sides. The place of their attachment also needs to be marked, since there should be a distance along their edges for mounting the legs. The facing boards are also installed with glue and fixed with self-tapping screws, the heads of which should be recessed into the wood by 1.5 ÷ 2.0 mm.
Installation of facing side boards
- The next stage is the transverse cladding of the tabletop with boards 950×100×25 mm. The place where they are attached must also first be marked, starting from the middle of the frame, since they must be installed at a distance of 5 mm from each other. The protrusion of the tabletop above the frame should be 25 mm on all four sides.
- Next, each of the boards is fixed in four places to the longitudinal elements of the table “box,” and the outer boards are also attached to the end sides. In order for the heads of the self-tapping screws to be recessed, recesses with a diameter of 8 mm are drilled into the boards to a depth of 2–3 mm, then, in the center of these recesses, through holes are drilled with a drill of a smaller diameter (usually 3 mm), into which the self-tapping screws will be screwed. To avoid cracking of the boards during installation work, through holes must be drilled.
Installation of tabletop boards
- After this, legs made of timber with a cross-section of 750×100×50 mm are attached to the edges of the longitudinal boards; they must exactly match the width of the tabletop.
The next step is installing the legs
- The legs can be secured to the frame with self-tapping screws, but it is better to fix each of them with two bolts, placing them diagonally at the connection point. Through holes are drilled for the bolts, and the nuts are tightened on them from inside the frame using a wrench.
- The final stage of manufacturing is sealing the heads of the screws with a mixture made from carpentry or epoxy glue and sawdust. Use this homemade putty to fill the recesses above the caps and level them well. After the glue has dried, the entire tabletop, and especially the areas covered with “plugs” of glue, must be sanded well.
This is what should happen in the end
- After this, the table can be covered with varnish or water-based paint. After waiting for the decorative or protective layer to dry, the product can be installed in a country gazebo, on a veranda or terrace in a recreation area.
If desired, it will be easy to make stools or a bench to accompany the table.
Small folding table for the kitchen
This transforming table is suitable for both the kitchen and a small room.
This small folding table is perfect for a small kitchen or a very small room.
- Its design is designed in such a way that the tabletop cannot fold on its own if the table leg is accidentally touched, so the table is quite safe for installation in a children's room.
- The presence of a spacious double-sided bedside table will allow you to store various small items and small toys in it.
- The table is equipped with a tabletop of sufficient size so that the child can do homework while sitting at it.
- In addition, there is room on the tabletop for a laptop or books necessary for study.
- If necessary, this small table can easily replace an ironing board if you lay a soft cloth on its surface.
Considering all of the above, the table can be called multifunctional, despite its very compact size.
Find out how to make a folding table for a balcony with your own hands, and also check out several models with detailed instructions in a special article on our portal.
Necessary materials and parts for a folding table
To assemble such a convenient piece of furniture, you need to prepare all the parts that make it up. The list of necessary blanks is given in the table below, and how to make them will be described and shown below:
Diagram of the table with the numbers of assembly parts marked (the illustration is clickable - click to enlarge)
| Part number on the drawing | the name of detail | Quantity, pcs. | Part size, mm | Material of manufacture, thickness, mm |
| 1 | Folding part of the table top. | 1 | 600×600 | Multilayer plywood 25 mm thick |
| 2 | Fixed table top of the cabinet. | 1 | 600×475 | Multilayer plywood 25 mm thick |
| 3 | Groove element for leg movement on a folding table top. | 2 | 530×30 | Multilayer plywood 18 mm thick |
| 4 | A groove element for the movement of the leg on the tabletop of the cabinet. | 2 | 120×30 | Multilayer plywood 18 mm thick |
| 5 | The upper end part of the groove that limits the movement of the leg. | 1 | 122×30 | Multilayer plywood 18 mm thick |
| 6 | Groove element for leg movement on a folding table top. | 2 | 530×20 | Multilayer plywood 18 mm thick |
| 7 | A groove element for the movement of the leg on the tabletop of the cabinet. | 2 | 120×20 | Multilayer plywood 18 mm thick |
| 8 | The lower end part of the groove that limits the movement of the leg. | 1 | 122×20 | Multilayer plywood 18 mm thick |
| 9 | Side walls of the table cabinet. | 2 | 720×520 | MDF 19 mm |
| 10 | Horizontal parts of the cabinet forming shelves. | 3 | 520×312 | MDF 19 mm |
| 11 | The lower vertical part of the internal partition of the cabinet. | 1 | 418×312 | MDF 19 mm |
| 12 | The upper vertical part of the inner partition of the cabinet. | 1 | 312×184 | MDF 19 mm |
| 13 | The middle horizontal part of the cabinet. | 1 | 310×250 | MDF 19 mm |
| 14 | Cabinet door. | 1 | 477×346 | MDF 19 mm |
| 15 | Cabinet shelf. | 1 | 310×250 | MDF 19 mm |
| 16 | Cabinet drawer front panel. | 1 | 346×209 | MDF 19 mm |
| 17 | The front panel of the drawer (located behind the front panel). | 1 | 418×312 | MDF 19 mm |
| 18 | Drawer side panels. | 2 | 341×250 | MDF 19 mm |
| 19 | Back panel of the drawer. | 1 | 272×120 | MDF 19 mm |
| 20 | Drawer bottom panel. | 1 | 341×272 | MDF 19 mm |
| Handles for drawers and cabinet doors. | 2 | Ø 30 mm | Wood | |
| Upper leg element. | 1 | 80×80×18 | Multilayer plywood 18 mm thick | |
| Mobile table leg. | 1 | Ø top 55, bottom 30, height 702 | Wood | |
| Furniture hinges for connecting two parts of the tabletop. | 2 | Ø 50 mm | Metal | |
| Furniture door hinges. | 2 | The size depends on the shape. | Metal | |
| Bottom end panels covering the gap under the cabinet. | 2 | 20×300×5 | Plywood 5 mm |
The drawings show a drawing of a table that can be relied upon in the process of manufacturing and assembling elements into a single structure.
Main dimensions of the table (illustration is clickable - click to enlarge)
Separate components of the table - a drawer and a guide channel for moving the legs (the illustration is clickable - click to enlarge)
To manufacture all the parts listed in the table, you will need modern electric tools that can bring the workpiece to professional perfection.
Find out how to make a coffee table-shelf with your own hands with photos and descriptions in a special article on our portal.
Installation of a folding table-cabinet
You should start making a table with the most important and largest part of it - the table top. Since the table is folding, this element will consist of two parts - stationary and “mobile”, that is, one that can be folded down if necessary. When folded, this table can easily serve as a regular compact cabinet.
| Illustration | Brief description of the operation performed |
| The first step is to cut out blanks for the tabletop, measuring 600×600 and 600×475 mm, from plywood 25 mm thick, using a jigsaw or circular saw. | |
| Next, markings are made on the larger panel - a semicircle is drawn, since the front of the table should be rounded. In order to achieve the correct shape of a semicircle, you can use a large construction compass, or make one yourself - from a nail, pencil and rope. | |
| Then, along the marked line, the tabletop is rounded. This can be done using a jigsaw or circular saw, installing the appropriate compass attachment on it. | |
| Next, a cutter of the desired configuration is installed on the milling machine, which will make the edges of the tabletop smooth, or, if desired, even or rounded. | |
| The semicircular part of the panel is processed with a milling cutter, leaving the side that will join the second part of the tabletop flat. Then its edges are processed in the same way. | |
| The next step is to place the two processed parts of the tabletop on a flat table at a distance of 5 mm from each other. Markings are made for installing furniture hinges. They must be placed at a distance of 100-120 mm from the edge of the tabletop. Furniture hinges can have different shapes, so they should be laid in the marked place and outlined with a simple pencil. Then, using a router, special shaped grooves are made in the plywood, the depth of which should be equal to the thickness of the furniture hinges. The hinges are fixed into the finished holes using self-tapping screws. | |
| After connecting the two parts of the tabletop with hinges, in the middle of the panels, markings are made on their lower side to secure the parts that will form a closed channel for the movement of the moving table leg. The guides should be fixed at a distance of 30 mm from the junction of the two parts of the tabletop. For the manufacture of parts, plywood with a thickness of 18 mm is taken. Then, 10 elements are cut out of it and processed with a milling cutter: 530×30 mm in size - 2 pieces, 530×20 mm - 2 pieces, 120×30 mm - 2 pieces, 122×30 mm - 1 piece, 120× 20 mm - 2 pcs., 122×20 mm -1 pc. It is important to remember here that long slats should have 45˚ cuts on one edge, and short elements on both sides, so that when joined, they form a right angle. In addition, the upper long and short parts, fixed on top of the lower rails of the guides, are cut off from the ends, also at an angle of 45˚. These cuts are necessary so that their angles do not interfere with the movement of the leg along the formed channel. Then, the parts are glued with wood glue to the marked area of the rounded, and then to the rectangular part of the tabletop. First, the longest slats measuring 530×20 mm are fixed with glue and then screwed with self-tapping screws; then a piece of 122×20 mm covers the channel. On top of the long and short fixed slats, second ones are glued, having the same length, but greater width; they are also additionally screwed with self-tapping screws. Thus, an even channel is formed between the table top and the top rail, along which the leg will move. It is very important to calculate the location of the places where the screws are screwed in so that the top ones do not collide with those that secure the bottom slats. Four parts are fastened to the rectangular part of the tabletop in the same way. All elements must be processed until smooth and perfectly evenly fastened to each other, otherwise the leg will bump into obstacles and jam when moving. | |
| The leg is usually made on a lathe. If it is not there, then you can order it from a master or purchase it ready-made. As a last resort, you can make it square by processing the timber of the required height until smooth. Then, using a dowel and glue, a square plywood guide plate measuring 80x80x18 mm is attached to the upper end of the leg using a dowel and glue. | |
| Next, after the glue has dried, the leg can be installed in the channel intended for it and tested for its free movement, without jamming. If necessary, minor adjustments and modifications can be made. | |
| The finished tabletop is painted or coated with water-based varnish - if the goal is to preserve the textured pattern of the plywood. After this, the finished tabletop is put aside and proceed to the manufacture of the cabinet. | |
| The elements of the cabinet do not have complex configurations, therefore, to make them, it is enough to accurately transfer the dimensions of the parts indicated in the table on an MDF panel or thick plywood and carefully cut them out using a jigsaw or saw. After the parts are made, their end parts must be processed smoothly with a milling cutter, otherwise they will look sloppy. | |
| If you plan to cover the visible end parts of the cabinet parts with a special laminated edge tape, then this process is carried out using a regular iron. The tape on its inner side has a layer of glue, which heats up under the influence of heat and ensures reliable fixation of the edge on the surface of the end parts of the MDF panels. | |
| The next step in the cabinet door panel is to make shaped grooves into which furniture hinges will be installed and secured. The holes are made in the same way as in the countertop using a router, but in this case the cutter can also be installed in a screwdriver, since MDF has a lower density than plywood and is easier to process without chipping the material. The hinges should be placed at a distance of 100 mm from the edges of the door - before starting drilling, be sure to carry out careful markings. A similar procedure is carried out with the wall of the cabinet on which the door will be attached. Then the walls and doors are joined together to check the correct installation and to mark holes for the screws. | |
| In addition to the hinges, you can immediately screw the prepared handle to the door. To do this, step back 50 mm from the edge of the panel and find a convenient height position, mark a point through which a through hole is drilled to secure the handle. | |
| All manufactured parts of the cabinet are painted with paint of the selected color using a roller and brush. Paint will not only make the product aesthetically attractive, but will also protect the material from the negative influence of a specific kitchen humid environment. | |
| Next, you can proceed to assembling the bedside table. Professionals carry out this process using special tools, but they can be easily replaced with improvised devices. For example, you can carry out the assembly on a flat table, and for ease of installation of the cabinet, it is additionally installed on flat bars. Mutual fastening of parts can be done using wooden dowels, metal furniture corners or self-tapping screws - the latter option is the simplest, but also the most unreliable. In addition, the screw heads will have to be masked with various compounds after assembly. The assembly process is as follows: — The bottom panel is placed on the stands. — One of the side panels is leveled on it and using a construction angle, and its location is marked with a pencil. -The location of the fastening parts is immediately marked on the horizontal and vertical panels. — Exactly the same procedure is carried out with the second side and dividing middle wall. - Then holes are drilled at the marked points on the bottom and the end sides of the side panels for installing dowels. - After this, before gluing the parts together, places for installing shelves are determined on the side walls. Then, shelf support brackets are mounted in the marked places, for which holes are also drilled. - Next, dowels coated with glue are installed in the holes drilled in the bottom, and the side walls are put on their upper, protruding part. — Fixed shelves-lintels are mounted in the same way, simultaneously with the side walls. | |
| Before continuing work, you need to make sure that the glue in the assembled structure has dried well. To make the cabinet stand more rigidly, it is laid on its side and pressed with clamps while it dries. | |
| While the glue dries, you can start assembling the drawer. Since it will be completely assembled from MDF, the installation of the box can also be carried out using dowels. The sides are attached to the bottom of the box, and a line is drawn along them with a pencil, and then marks are made of the places where the dowels will be installed. Then, the sidewalls are removed, and at the marked places, holes are drilled in their end for installing fasteners. The same is done on the bottom panel. Next, the dowels are coated with glue and carefully inserted into the holes, connecting the sides to the bottom. | |
| The sidewalls are screwed together using self-tapping screws, the heads of which are recommended to be recessed into the wood, and the holes to be sealed with a mixture of epoxy glue and sawdust. Another fastening option can be furniture corners, which are screwed from the inside to the sides with self-tapping screws. Each side will require two corners. | |
| When assembling the box, it is necessary to control the evenness of its corners using a construction angle and changing the diagonals, otherwise a skew may occur. | |
| If you plan to install metal roller guides for easy movement of the drawer, then first, the location of their attachment is determined on the sides of the drawers and on the inner walls of the cabinet. To do this, using a pencil and a ruler, draw a line along which the guides will be fixed. | |
| Next, a front panel is installed to the front of the drawer. It is screwed from the inside of the box, through pre-marked and drilled holes. In addition to self-tapping screws, it is recommended to use glue to fasten the panel: it is applied to the front panel, and then the front panel is pressed against it, and they are tightened with four or five self-tapping screws. After the glue dries, a hole is drilled in the center of the facade panel, through which the handle is screwed. | |
| Finally, the long-awaited moment comes - connecting the cabinet and tabletop. It is recommended to first glue the stationary part of the tabletop to the surface of the cabinet, and then secure it with screws that are screwed in from the inside of the lower cabinets. But first, the tabletop needs to be positioned correctly. Part of the channel located on the permanently installed tabletop panel should rest against the side of the cabinet - it will serve as a stopper for the movement of the leg towards the table. The tabletop should extend beyond the edges of the cabinet on the drawer side by 50 mm, open shelves by 30 mm, and on the leg side by 120 mm. | |
| Having secured the tabletop, they proceed to the final installation and screwing the bedside table door onto the screws. Then the drawer is inserted, and the shelves are installed on the shelf supports. | |
| When closed, the table is compact, so it does not take up much space and looks quite aesthetically pleasing. If desired, you can choose other colors to decorate it, which will better harmonize with the interior of a particular room. | |
| When open, the table also does not take up much space and fits perfectly into one of the corners of the room. Thanks to its “light” design, it does not weigh down the interior, and the shape of the tabletop makes it safe for children. Therefore, this table option can be considered ideal for small apartments with small kitchens and rooms. |
If there is a need to save money, or you simply have a great desire to express yourself in carpentry, then you should not put off making your own. Moreover, the assembly will become not only an interesting and useful activity, but also very enjoyable, especially at the moment when the work is successfully completed.
For those who are confident in their abilities, we offer another interesting option for a round table, which can easily serve both at home and on the site.
Video: example of assembling a round table
And one more idea for a kitchen table, which, if not true, would also be within the power of a skilled owner to implement:
Video: lightweight kitchen table with collapsible design
Advantages and disadvantages
To characterize future possible furniture made from a profile pipe with your own hands, it is worth looking at the strengths and weaknesses of the material.
Benefits include:
- thin-walled material is light in weight;
- stiffening ribs provide high strength indicators;
- withstand heavy loads at a smaller size than wood or timber;
- square and rectangular sections provide compact storage and convenient transportation;
- corners create a perfect fit to other elements;
- the stability of structures increases;
- the price is relatively low;
- there are no difficulties during installation and assembly;
- not afraid of wear, temperature changes, precipitation, etc.;
- can be used outdoors;
- pipes have a long service life.
Now it’s easy to buy the material and make furniture from a profile pipe with your own hands.
But you need to take into account the disadvantages.
The main disadvantage is the tendency to corrosion. But this disadvantage can be minimized through special processing, as well as painting.
Another weak point is the difficulty of creating a bend. Let me start by saying that not all drawings require bending pipes. Plus it can be done. You just need to fill the cavity with sand, and then set the desired bending angle on the machine.
Color solution
As a rule, the color of the legs is matched to the tone of the tabletop, however, the use of shades is also actively practiced:
- several levels darker;
- more contrasting.
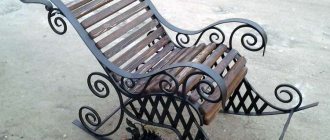
For example, metal legs are often installed on a table with a wooden tabletop; they are often forged, and contrast with the wood with a shade of refined externally metal.
Dining table with black legs
Often the legs are specially coated with paint in the following shades:
- silver;
- bronze;
- gold.
Legs made of natural wood or painted to resemble wood, stone, or simply light and pure white look very expensive.
Black legs are most often mounted on office tables, since this color is considered an integral element of business style, and their coating can be done:
- glossy;
- matte.
Black office desk
What do you need for work?
If your goal is furniture made from a profile pipe with your own hands, then you will need to prepare tools.
The main set includes the following components:
- circular saw for cutting;
- hand saw with blade for metal;
- welding machine;
- electric drill;
- metal drills;
- hammer;
- roulette;
- bit;
- screwdriver or screwdriver;
- sandpaper.
A rust converter, metal primer, as well as paint or varnishes will not hurt.
For those who are going to make furniture with curves, a profile pipe bender will also be useful.
What can you collect
See also
Acrylic facades for the kitchen - what are they, pros and cons, customer reviews
Now let's get down to manufacturing. What kind of furniture you will assemble from a profile pipe with your own hands depends on you.
You can look at photos, as well as videos, highlight interesting ideas and original solutions for yourself.
Since we have a furniture site, the main emphasis will be on furniture for an apartment, house or cottage. We have already made a chair from plywood. Now you can try out profile pipes in action.
The following options are possible:
- table;
- chair;
- armchair;
- stool;
- couch;
- banquette;
- bar stool;
- massage table, etc.
Obviously, the profile pipe will not be used as the only material. Otherwise, it will be impossible to sit on such furniture.
Usually this is a combination of metal and wood, foam rubber, upholstery materials, etc.
Basically, the profile pipe is used as a base or frame for furniture. Next, it is decorated and sheathed to create a complete composition.
Also, profile pipes are excellent for tasks such as garden furniture and garden structures:
- sunbeds;
- tables and chairs;
- gazebos;
- greenhouses;
- greenhouses;
- grills and barbecues;
- awnings;
- Garden swing;
- summer shower, etc.
Yes, I agree. Not all of the above is furniture. But the fact remains a fact. Profile pipe is a universal material with wide application possibilities.
Drawing up or searching for a drawing
Before you thoroughly get acquainted with the answer to the question of how to make a computer desk, you need to find or create a drawing of furniture that will fit perfectly into the space intended for it. However, first you need to choose the optimal dimensions of the future object.
The first important parameter is the height of the structure. 750 mm is considered the standard, but it is suitable for people of average height. For tall owners, it is recommended to use the formula: height is multiplied by 75, and then divided by 175. For example, with a height of 185 cm, the result will be: 185x75/175 = 79 cm, or 790 mm.
The standard depth is 650-700 mm, length - 800-1500 mm. However, future users choose these values independently, focusing on the diagonal of the monitor, the set and relative position of all the equipment used. Therefore, you first need to make a complete list of devices, and then choose the optimal location for them. As an example, here is a short list of potential design elements that will simplify the “settlement” task. Such devices include:
- pull-out shelf for keyboard;
- small shelf for small accessories;
- area (on an elevated platform) intended for the monitor;
- a cabinet with drawers for storing documents, papers and personal belongings;
- lower compartment (shelf) for installing a system unit, subwoofer;
- upper shelves for installing a speaker system, necessary books, stationery, flowerpots, etc.
If they are, then you need to allocate space in advance for the location of external devices (optical drives, hard drives, solid-state drives). In this case, the main task when drawing up (searching for) the ideal is to take into account all the components and large additional “conveniences”. If something relatively large is not included in this “must have” list, then it is quite possible that a computer desk will not be able to become “perfection”. The dimensions of the remaining compartments are chosen after determining the dimensions of the main element - the countertop.
How to assemble
See also
: How to remove grease from kitchen furniture without harming it: the best ways
To assemble furniture from a profile pipe with your own hands, you do not have to be a qualified specialist in this field.
The manufacturing process involves several stages. Moreover, this is true for any type of furniture, as well as other products.
Step by step it looks like this:
- study the drawing, or draw up your own plan with detailed dimensions;
- mark the pipes and make a cut;
- remove all burrs;
- drill holes for bolted connections;
- if necessary, bend the elements;
- perform the welding step to connect the parts;
- supplement the welded joints with a tie of bolts and nuts;
- prepare and install fittings;
- complement the product with components made of plastic, wood and other materials;
- Finish the job with primer, paint or topcoat.
I can't say it's incredibly difficult. It all depends on what kind of furniture design you decide to create. All in your hands.
Table from postforming tabletop in 5 stages
Tabletop postforming
Such a table can be completed in the shortest possible period of time. To do this, you will need to first collect all the necessary material and tools. You will need:
- pencil,
- postforming tabletop,
- jigsaw,
- jigsaw file,
- Sander,
- edging,
- cutter,
- silicone sealant,
- rubber mallet,
- sharp knife,
- clamps,
- metal legs with holder,
- hex wrench.
From postforming tabletop
All work can be completed in 5 successive steps.
Stage 1
Apply markings on the front side of the tabletop with a pencil. The markings will correspond to your drawing. Each rounding is made with a radius of at least 60 mm. This will prevent the edging from changing color in sharp bends.
Stage 2
Now you need to give the tabletop the appropriate shape. To do this, use a jigsaw. When cutting, it is recommended to leave a small gap of 2-3 mm. Pay attention to the direction of the jigsaw blade. It should have a reverse direction of the teeth. This will avoid chipping the plastic coating. Although they may be partially hidden by the edging. To accurately fine-tune the dimensions and shape of the tabletop, you need to work on the ends with a belt-type sander.
Stage 3
Milling a groove
In the third step, it's time to mill the groove. Milling is always performed strictly in the center of the end. And this is even regardless of whether the edging exactly matches the thickness of the tabletop or is large. If you do not have a cutter with the exact dimensions of the edge groove, then you can go through it several times with a cutter that has a smaller tooth height.
Stage 4
T-edge
When the groove is ready, you can start filling the edging. To do this, the end is first coated with silicone sealant. This will prevent water penetration. The sealant is applied to the upper edge of the edge. The edging itself is filled with a rubber mallet. The joint should be formed in the most inconspicuous place. When the padding is completed, it is important to make an accurate joining of the edge. There is no way to do this without a sharp knife. After this, you will need to remove the excess sealant that was formed when driving in the edging along the entire perimeter of the tabletop.
When securing tabletops using clamps, it is important to use special spacers. They are installed on the protruding edges of the edge and prevent their damage.
Stage 5
Installing the feet
At the final stage, the legs are secured. To do this, you should attach the molded holders to the underside of the tabletop. To ensure that they are at the same distance, mark with a pencil. The leg should be at a distance of up to 10 cm from the edge. This holder is secured with 2.5 cm long self-tapping screws with a countersunk head. Now all that remains is to make the final touch: secure the legs in the holder with a hex key. The dining table for the kitchen is ready!
As you can see, a table made from a postforming tabletop is very simple and, most importantly, is available for homemade production at home. To do this you need to have basic carpentry tools. But here we should also remember the dangers. If handled carelessly, there is a risk of breaking the holder, which is made of fragile material. But if you use this table carefully, it will last for many years.
