Furniture restoration. What does it mean?
Restoration will help save the situation. The word is familiar to many, but people associated with culture and art understand it best. However, isn’t it an art to give old chairs and stools their former beautiful appearance, to tidy up a sideboard or closet? Carry out a few simple procedures and make them look as if you just bought them in a store.
Moreover, if you think about a new purchase, then even with the most conservative calculations it will be quite a decent amount. So is it worth spending money if you just use inexpensive materials and spend very little time restoring furniture with your own hands?
As a result, you can become the owner of exclusive, original furniture that fits perfectly with the new design of your room or kitchen.
There is an exit
There is no need to rush to throw away things that can still be saved; if you plan to leave the design as is, there are several ways to do this.
Before you start, you should familiarize yourself with the information on this matter and carefully consider the algorithm of actions. Thanks to a meticulous approach to work, you can not only tidy up the surface, but also refresh the color quite well.
Preparation as the basis of work
Any business requires careful preparation; this is necessary for a high-quality result. This also applies to furniture restoration. Before finishing, you always need to prepare the surface.
Since the body is often made of wood, the following steps are carried out during preparation:
- Carefully inspect the surface to identify various large and small defects.
- Warmly wash away contaminants using detergents. Dry the surface.
- They dismantle the furniture. This greatly facilitates the further process and preserves intact the elements that are not subject to alteration.
- If the part that needs to be corrected does not come off, then everything else is covered with film and sealed with tape. After this, the remaining part can be safely restored without fear of ruining the rest.
- Restoring upholstered furniture requires a more careful approach. The upholstery is removed very carefully. A pattern is then made from it using new material. The packing is also removed and replaced.
Independent work
If the restoration of upholstered furniture concerns antique pieces, then it is worth thinking carefully about this in order to make the right decision. Some models are best left to real professionals who have a wealth of knowledge and experience in working with such things.
Note!
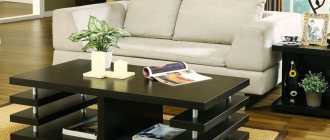
Coffee table: rules for choosing the best table models and their use in interior design- Leather sofa in a modern interior: ideas for placement and combination
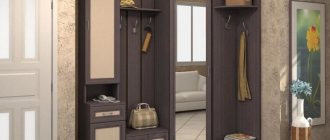
- Closet for the toilet - basic cabinet options and rules for the location of toilet cabinets (photos of the best ideas)
If self-confidence is as high as possible, then you can call relatives or friends for help and try to carry out such a complex process yourself.
The owner will be personally responsible for the result of the work, so it is better to think through all the small nuances carefully or practice them on cheaper designs.
Removing the polishing layer
If there is polishing that needs to be removed, you need to:
- Use a special liquid composition.
- Use paper towels or napkins;
- Work with a brush made of natural bristles;
- Use steel wool, coarse sandpaper and a spatula.
During the work itself, the binder composition is poured into a mug or into a container with a wide neck. Apply a thick layer to the surface with a brush containing the mixture. After some time it softens and is removed. Use a spatula to carefully scrape off the residue, always along the wood fibers.
The procedure is repeated until the entire surface is completely cleaned. In this case, additionally use steel wool and sandpaper. At such a moment, it is better to have rubber gloves on your hands, and to avoid inhaling harmful fumes and not clogging your respiratory tract with fine dust, wear a respirator.
Detected cracks are masked with soft wax, selected according to the shade, rubbing it into the surface. To smooth out chips and gaps, putty is used; after complete drying, the surface is sanded with sandpaper. The varnish is applied only after the entire structure has been carefully processed and primed.
If a beginner has to do the work, it is best to use visual aids on a specific topic. Carefully study all aspects, view photos of the restoration of old furniture.
Scratches and scuffs
In order to remove unpleasant flaws from the surface of varnished products, you can use special products for caring for furniture of this type. Using a sponge, gently rub the liquid into the parts and heat it in the microwave for 30 seconds before use.
To protect your hands from exposure to the product, wear rubber gloves for washing dishes. The content of orange oil in the liquid will significantly speed up the effect of application and give things shine and attractiveness.
Basic techniques
At the last stage of decoration at the time of restoration, they resort to not only painting compounds and varnishes. Currently, many professional designers and furniture makers like to use various technical techniques in this matter.
With their help, they sometimes manage to produce absolutely vintage and exclusive elements from completely nondescript items. The following methods are distinguished:
Preparing for coloring
First, the furniture needs to be prepared for painting. First of all, you need to remove the old coating. There are paint and varnish removers for this purpose.
They can be found at your local hardware store, as well as all the other tools we will need to update the furniture.
This product will remove old paint in a few minutes. But, when working with it, do not forget about safety precautions: use a respirator and ventilate the room well.
Now you will need a metal spatula to remove the dissolved old coating from a flat surface and a brush to make it easier to work in hard-to-reach places.
The second way to get rid of shabby coating on furniture is to use a sanding machine.
After removing the old paint, the furniture to be renewed must be thoroughly wiped with a rag to remove the layer of dust, otherwise during the painting process you will encounter complications in applying a new coating.
Painting with paints
The most accessible and simple method. In other words, painting with paints and varnishes. The color is selected to match the general background of the room in which the restored object or a certain decorative element will be located.
A thin layer of paint composition is applied to the prepared surface. The work uses a stencil with a specific pattern or design. After drawing the contours, the stencil is removed and the drawing is painted.
Small defects and partial restoration - ways to eliminate them
A simple, fragmented restoration, including fighting stains, replacing coatings, strengthening joints, can be handled by anyone, even without professional skills. The process consists of certain stages, some of which can be omitted, depending on the type of defect:
- Visual inspection – assessment of the condition of the damaged area, determination of the plan and scope of work.
- Disassembly – necessary for large items; it involves removing drawers, shelves, and handles.
- Cleaning – removing dust, wet cleaning, degreasing the surface.
- Minor repairs - refinishing, repairing cracks, chips, working with breakages.
- Decoration – gluing veneer, applying patterns, painting, painting.
Stains and dirt
Any stain spoils the appearance of furniture products. Under the influence of substances that have turned into pollution, the surface of a particular object deteriorates. Therefore, it is very important to clean things from plaque, stains, and blots in a timely manner. But even experienced housewives cannot boast of knowing how to deal with a dirty place. Let's consider the possible options:
For all surfaces:
- Cleaners. Before restoring an element, it is necessary to check the effect of the selected cleaner on the coating in an inconspicuous area. If a trace remains, you will have to choose another method.
- Table vinegar. Used to remove strong, long-standing stains.
- Sauerkraut brine. It has a similar effect to the previous substance.
Natural wood:
- Baby soap. The raw materials are crushed, diluted in heated water, and applied to the dirt using soft textiles.
- A mixture of lemon essential oil and water at the rate of a teaspoon per glass.
- Lemon juice. The squeezed fruit is mixed half and half with water. Used to remove stains.
- Ammonia and water at a ratio of 1:6. Used for most types of stains.
Polished furniture:
- Raw potatoes. Used to remove iodine drops from wooden surfaces, as well as fingerprints from lacquered furniture.
- Laundry soap. It will help restore the coating after streaks from spilled liquids.
- A mixture of table vinegar and olive oil.
- Vegetable oil. Used for difficult stains.
- Baby powder for grease removal.
- Wax dissolved in boiling beer.
It is prohibited to use acetone or alcohol to clean polished surfaces. Upon contact with these substances, the top layer may become pale and cloudy.
Cushioned furniture:
- Gasoline is used to remove grease stains.
- Methyl alcohol is used when necessary to remove traces of chewing gum.
- A solution of ammonia and acetic acid is applied to the dirt formed from vegetables and fruits.
- Laundry soap to remove coffee and chocolate stains.
- Table salt helps against red wine, ice against white wine.
- Saline solution for all types of contaminants.
Removing scratches
Scratches often appear on a smooth surface, which spoil the façade of the furniture set. Therefore they need to be eliminated. There are several ways to solve the problem. Let's look at the most common ones:
Special means:
- Pencil. Helps paint over damaged surfaces
- Hatch. It is poured into potholes and paints them over.
- Wax for wood. Divided into soft and hard. It is used for cosmetic purposes and for the restoration of chips.
- Stain. It will help remove any abrasions.
Traditional methods:
- Walnut kernel. When rubbed on the surface, the cracks are filled with grains of raw materials and become invisible.
- Mayonnaise. Used for natural wood. It is poured into the groove, after a few days the area is sanded.
- Flax oil. Mix with alcohol and apply to scratches.
- Tea leaves and iodine. Used only for painting and masking.
- A solution of table vinegar with vegetable oil.
- Mastic. A mixed solution of wax, turpentine and alcohol at a ratio of 4:3:1 is applied to the damaged area.
Chipped wood surface
Getting rid of a chip is a more difficult task than eliminating a regular scratch; there are fewer materials to solve this problem. But anyone can cope with it at home. The work can be done using the following materials:
- Visual camouflage. Stopgap measure. In the absence of funds to purchase the necessary coatings, the damage is simply painted over using improvised means, for example, iodine or tea leaves.
- Decorative corners, protective profile, corners. In some cases, you can simply close the defective area using special elements, which are often sold in specialized stores.
- Putty for furniture. Not suitable for frequently used items, be it a table top or a pull-out element, except for expensive polyester options.
- Hard furniture wax. The substance melted with a soldering iron or lighter is applied to the damaged area in excess. Afterwards the surface is leveled, sanded and varnished.
- Furniture edge. There are many types from paper to plastic. It allows you to replace the old coating without traces of repair.
Damage to paintwork
It is quite difficult to eliminate defects in paintwork at home. First you need to determine the type of varnish with which the product is coated. To identify this, you should do the following:
- Apply a drop of 10% alkaline solution to an inconspicuous area. If after a few minutes the substance dissolves, then an alcohol-based varnish is applied to the surface.
- To determine nitro varnish, acetone is used.
- If the top layer does not dissolve under the action of a solvent, then the product is coated with a polyester, alkyd substance.
After determining the type of coating used, a substance corresponding in composition and color is purchased. Areas that do not require restoration work are covered with paper or Vaseline. Old material is removed using solvent or sandpaper. Then new raw materials are applied in several layers.
Veneering/veneering
By covering the surface of a product with veneer, you can significantly transform old furniture and give it the appearance of expensive wood. A large selection of colors and natural patterns will allow you to turn a tattered item into an integral part of the interior, matching any style. There are several veneering methods:
- Hot. The veneer is glued to the object using an adhesive solution.
- Cold. The material is pressed onto the base using special equipment.
- Membrane. An industrial method for vacuum bonding materials with complex surfaces.
At home, only the first option is used. The process looks like this:
- Preparing the base. Includes removing fittings, removing the old layer of cladding, eliminating possible defects, leveling the surface with putty to a perfectly smooth state, and sanding with sandpaper.
- Veneer preparation. The roll is unwound, the material is moistened with a damp sponge, covered with cloth or wrapping paper, and laid between two flat sheets of plywood or fiberboard boards. Once dry it becomes straight.
- Veneering. On the one hand, a thin layer of glue is applied to the object and the veneer; usually the manufacturer indicates the required brand, but PVA-based glue is suitable. After the first layer has dried, apply the second. The sheet is applied to the product using an iron heated to 50 °C and smoothed through the paper. Then it is leveled with a wooden block. Each subsequent part is overlapped by 3-4 cm.
Decoupage
A very simple and interesting method of restoring furniture, which even children will be interested in doing. Drawings and ornaments cut out of fabric and paper are pasted onto the products and covered with varnish. There are several types of decoupage:
- Standard. Pictures are glued to the front side of the item and varnished.
- Reverse. Suitable only for glass surfaces, for example, a coffee table. The image is pasted under the glass.
- Volumetric. Individual elements are highlighted in the overall picture. To do this, some identical fragments are glued in several layers.
- Artistic. A single image is created on the entire plane, simulating a real painting. At the same time, no boundaries are visible between the background of the object and the picture.
- Decopatch. Using paper and napkins, torn into pieces, the entire front side of the product is filled.
Craquelure
Many people use the crackle technique to restore furniture. After the paint dries, it cracks, giving the furniture an antique effect. To get cracks, special varnishes are used, which are divided by type of composition: one-step and two-step. This division is conditional; for each subtype the number of stages is greater.
- Single-phase craquelure. The coating has the appearance of cracked paint, with the base layer or wood visible underneath the cracks. The effect is achieved due to the different drying speeds of the first and second layers. However, a base paint is not always used; sometimes only a paint coating is sufficient. Craquelure varnish is applied to the surface and not completely dried for half an hour. Afterwards the finishing layer of acrylic paint is applied using a brush or roller. The size of the cracks will depend on the thickness of the composition.
- Two-phase. It is not the paint that is cracking here, but the varnish applied over the finished image. This technique gives the maximum resemblance to antiquity. It consists of the following: the first base layer of varnish is applied to the prepared base, which is dried until “tack-free”. Then everything is covered with a second layer, after it dries, the cracks are rubbed with powder and pigments. The workpiece is washed under running water and completely dried. At the final stage it is covered with a layer of varnish.
Furniture patina
Plaque on a wooden base indicates its damage by microorganisms, but on oak surfaces it is a sign of antiquity. It is very difficult to obtain patina naturally, so modern ideas are used - the artificial patina method. The construction market offers several types of compositions: thick paste, liquid, beveled varnish. Regardless of the substance used, the technology is almost the same, it is as follows:
- Preparing the base. It is rubbed with a metal brush and degreased.
- Padding. After drying, it is rubbed with sandpaper.
- Varnishing. The composition must dry completely.
- Application of a patating composition. Do not dry until completely dry; excess is removed with a sponge.
- The product is covered with a second layer of patina and left to dry.
- To fix the result, a transparent varnish is used.
Varnishing and polishing
Varnishing is a fairly popular type of cladding for furniture. Transparent coatings protect the surface of the product from moisture and dirt, giving it shine and contrast. For these purposes, oil, alcohol, and nitro varnishes are used. A new finish may be needed if scratches appear or the coating loses its original appearance. To do this, the old layer is completely removed, the base is sanded, primed, and varnish is applied.
The final stage of work will be finishing with polishing paste. For repainting, you can use furniture paint, but many people prefer automotive paint. The work consists of rubbing a special composition using felt over a varnished surface. To speed up the process, you can use a grinder. After these steps, the furniture has a mirrored, shiny finish.
Inlay
One of the oldest techniques for decorating furniture, known since Ancient Egypt. The application of a shaped image by wood on wood is called intarsia. It is quite difficult to make this type of mosaic at home. The wooden plates that make up the overall picture are tightly fitted to each other and glued together. The front side is smoothed, varnished, and polished.
Due to the fact that inlay is a free technique, block mosaic can be diluted with glass, stone, and plastic elements. The work uses complex parts that crash into each other. The texture of individual components may vary. The surface is painted in different colors using stains, varnishes, and dyes.
Craquelure
Here there is a combination of two methods at once: decoupage and varnishing. Furniture is thus finished in an antique style. To do this, apply a varnish layer and leave it until completely dry, then apply craquelure varnish on top.
After drying, small cracks form, very similar to antique ones. At the last stage they can be gilded with gold paint.
What tools and materials will be needed
In each case they will be individual, so we will provide a list of what is used more often:
- sandpaper with different levels of grain;
- spatula, paints, brushes;
- orbital sander;
- screwdriver;
- jigsaw;
- vacuum cleaner.
You should only buy something from the list if you plan to remake more than 2 items. Otherwise, it’s easier to take the chest of drawers to a workshop, where they will bring it back to normal for less than the cost of the equipment. The result will be much neater and more professional.
Consumables you will need:
- remover for paint and varnish coatings;
- substances for filling scratches, chips, cracks;
- furniture wax, edging and sealant;
- putty;
- self-tapping screws;
- metal washers;
- impregnation, oil.
Veneering
The name of this technology comes from the main material – veneer. These are thin wood sheets from different species. From them, according to preliminary measurements, elements are cut out.
Using simple PVA office glue, they are glued to a surface that has been prepared and primed. A hot iron is used to smooth the surface.
Expert Tips
Tips and instructions for restoring furniture:
- You need to approach the work carefully, having previously examined and identified all the shortcomings.
- When dismantling furniture, all old fasteners should be replaced with new ones.
- Each external coating should be applied with a soft brush.
- When replacing the upholstery of upholstered furniture, you should inspect the springs and, first of all, replace the damaged ones.
Patching
This method allows you to give old furniture nobility. The birthplace of this concept is Italy. It is based on the formation of a specific plaque, similar to formations after the oxidation process on bronze and copper objects.
- Curtains for the kitchen - 120 real photos of new designs. Options for the ideal combination of modern curtains in the kitchen interior
- How to diversify your home interior: DIY decor and beautiful design ideas
- How to hang curtains - step-by-step instructions with photo examples and recommendations. Exclusive curtain design solutions from experienced craftswomen
Currently, the main colors used to give wood furniture a distressed look are gold, silver and copper.
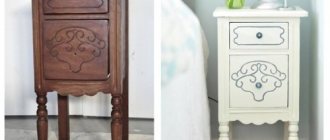
Decoration method
A good design technique is to use the method of decorating surfaces when restoring old furniture. This will require an individual approach for each subject. First, you should choose the appropriate color scheme for applying the pattern.
An ornament or floral design is applied to the surface of the furniture using a special stencil. Wall-mounted kitchen cabinets or chests of drawers work well for this method. Typically, such furniture is made from treated waste from wood processing plants.
Restoration items
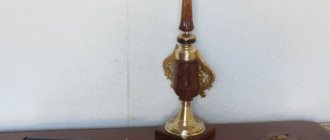
For the most part, restoration includes old sideboards, chests of drawers, cabinets, tables, high-back chairs, stools and all other items whose lifespan is estimated in decades. It is not surprising that over time they become unusable. Having studied all the restoration techniques, many people come to the aid of their “mute household members”
The old sideboard is cleaned of peeling varnish, freed from all defects and, after carrying out the already familiar operations, returns to a new life. Since the surface is very wide, in such work they sometimes use not only brushes of various widths, but also a roller. The main thing is to ensure that there are no leaks or small bubbles.
More about the process
Having dared to take the first steps, you need to remember that restoring furniture at home is quite a painstaking task and you should be patient. When starting work, you must make sure that you have a suitable and working tool for this.
In the process of fitting the elements, any person will immediately understand that the work of creating something new is quite exciting, and can be an excellent option for demonstrating one’s abilities. The creative process will require the use of not only physical strength, but also creativity in all the small nuances.
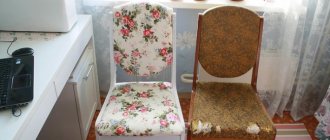
Restoration of chairs and stools
Everyone knows that kitchen furniture wears out the fastest, since this is where many people like to spend most of their time. Here, unfortunately, sometimes you don’t need to wait several decades to understand that upholstered furniture requires repair.
And if you try hard, she can regain her attractiveness. Moreover, it still performs its functions perfectly.
To tidy up a stool with a soft seat, you need to very carefully remove the upholstery from it. If the furniture upholstery is good enough, then you can leave it and, proceeding as described above (protect all elements of the stool that are not subject to restoration), begin restoring the legs.
- Curtain tiebacks - 150 photos of new exclusive designs
Do-it-yourself tulle - step-by-step instructions on how to sew beautiful tulle. Photos of ready-made ideas and modern design
- Curtains for gray wallpaper - options for the ideal combination of curtains in a gray interior (TOP-150 photos of new designs)
In the event that the old fabric or leather of the seat is no longer suitable for use, patterns are cut out of them in similar sizes. Also, a piece of foam rubber is cut to the size of the seat, which is then attached to it with small nails.
Finally, the furniture is reupholstered with either prepared fabric or leather. The result is an updated kitchen and, most importantly, without any costs.
Suitable surfaces
When it comes to workrooms, the restoration of kitchen furniture requires care and precision. Wooden chairs can be classified as hard surfaces, and a corner for relaxing and receiving guests can be classified as soft. Both types of accessories can be easily brought into proper condition without much difficulty or problems.
You can choose the appropriate material from the huge number of options offered on the market; there is a component for every taste and color. It’s also worth purchasing accessories and tools in construction supermarkets that will facilitate the creative process.
Photos of the restoration process of old furniture
Did you like the article? Share

0