To better understand how to make a frame for a mirror, masters advise first drawing a plan, taking into account the location of the backlight, indicating the dimensions of the wall, and the reflective canvas itself.
Photo: Instagram kutuzovatvorit
Photo: Instagram beloderevo
Photo: Instagram gostevaninel
Please note that the edges at the back will extend beyond the edging by about half its width. Don't forget about this nuance in the drawing.
If you have little carpentry skills, choose the simplest model in shape - square or rectangular. This will make it easier to solve the problem of how to make a frame for a mirror with your own hands.
Photo: Instagram beloderevo
Photo: Instagram wellwood.furniture
What you need to make a frame for a mirror
First of all, to make a frame you need an idea. Depending on it, the material for work is selected. You also need the mirror itself, since the frame will have to be adjusted to its shape and size.
To make a frame you need an idea, material and the mirror itself.
In addition to the idea and materials, you also need to know the requirements for mirror framing, which differ depending on the room and location in which it will be located:
- There is always moisture in the bathroom. Here, the optimal frame is made of moisture-resistant materials: plastic, polyurethane, foam. If metal is selected, then only stainless alloy or galvanized steel. It is better not to use wood for framing. As a last resort, hardwood, well-impregnated with an antiseptic, is suitable.
- Near radiators and other heating devices, opposite the window where sunlight enters, hang a frame made of materials that do not respond to thermal expansion. Plastic will not work here.
- If the frame is opposite the window, its material must be resistant to UV rays. You can apply staining with a special protective composition.
- Dust constantly accumulates on the frame. The framing material should be easy to care for and allow cleaning with a damp or dry cloth.
The frame must fit into the interior of the room and be harmoniously combined with the design style.
Styles
The interior in a classic style with a predominance of natural shades will be decorated with a wooden frame. As a decoration, you can make a carved and veneered design. The color of the frame can vary from natural to classic white and black.
The baroque room will be decorated with a frame with plaster molding. An abundance of openwork details can be achieved with the help of wood carving, but this requires special skill.
Frame color – gold, bronze or silver.
Romantic Provence or ethno style welcomes frames made of natural wood with crossed slats. A floral print around the perimeter of the product is an appropriate decoration. Choose the color of the craft from among the bed tones, and it is not recommended to use flashy or too dark colors.
Also, these styles involve decorating frames with beads, embroidery, and herbarium.
Experts recommend using frames with mosaics or pieces of slabs in rooms with natural styles. Fusion and art deco trends suggest a more daring decor.
You can decorate a mirror using old disks, clothespins, plastic spoons and even eggshells.
Decorate frames in Art Nouveau style with glass, rhinestones, coins or beads, and for country style, select burlap and food supplies (coffee, cinnamon, curly pasta, plant roots).
Have you chosen a retro style? Then we make an antique frame. There are many ways to do this. You can use special tools, paint the product with golden paints, or destroy the top layer of varnish. An aged wooden frame is also suitable for Provence style.
What can you use to make a frame for a mirror?
The choice of materials is extensive. In principle, anything that can be processed will do. To create a beautiful frame for a mirror with your own hands, elements of finishing materials are often used. For example, ceiling skirting boards have a pattern. A mirror in such a frame will look rich. The following types of materials are considered the most in demand:
- Polyurethane is a lightweight, durable, moisture-resistant material. He looks beautiful. When you get tired of the frame color, you can repaint it. Polyurethane is flexible and moisture resistant
- A metal frame is chic if it is embossed or forged. You can make a frame in a modern style from aluminum baguette. Chasing or forging will give the interior a rich look
- A mirror framed with mirror glass is now at the peak of popularity. The frame is assembled from many small mirrors and glass elements with multi-colored coating. Framing with mirror glass will give the product a modern style
- Leather frames are similarly at the peak of popularity. They are made voluminous by filling them with foam rubber or padding polyester. You can use not only natural, but also artificial leather
- Rope is an original and cheap decorative element. For wet rooms, frames are made of artificial rope. Framing with linen rope is suitable for a dry room. The rope is laid in rows or braided
- Polyurethane foam is considered a weak frame material. It is used as a decorative frame. Most often, small details are glued onto the foam, for example, shells, stars, beads. Framing made of polyurethane foam does not withstand exposure to sunlight
- Wood is a classic material. Modern impregnations and paints make it possible to turn a wooden frame into a work of art. The beautiful texture of wood is emphasized by coloring impregnations
- Gypsum itself is fragile. It is rarely used as the main material for a frame, but it makes an excellent decoration. All sorts of curls are poured from plaster and glued onto a rigid frame. There are molds that allow you to pour frames entirely, but the product is heavy. Gypsum stucco molding is painted with colored or clear varnish
There are many other materials that can be used for crafts, such as popsicle sticks, matches, toothpicks, bottle caps.
Advice! It is optimal to cast a plaster frame for a floor-mounted mirror. Due to its heavy weight, the structure can fall off the wall.
Shape selection
There are four classic frame shapes: circle, oval, square and rectangle. Such products are truly universal. Making a standard mirror frame is easy, and it will fit perfectly into any interior style. True, it is not at all necessary to limit yourself to such a set of forms. Geometry offers many interesting options.
For example, you can make a frame in the form of a polygon or parallelepiped.
Create a cloud-shaped frame and place several round mirrors there. Products in the shape of animals will amaze your guests. You can place such a mirror in plain sight. You should choose an animal either among your favorites or among those that are easier to make.
Frames in the shape of flowers also look great.
The design for the mirror can have abstract shapes. Wavy edges or monograms in different directions will add originality to the product, and will also make the mirror one of the central elements of the decor.
If you use branches in making, then simply do not cut them to one line - this will give you a unique shape.
How to make a frame for a mirror with your own hands
The process of making any frame begins with a design. First a sketch is created. It will help you visually assess whether such a frame will suit the mirror. After solving all the nuances, they calculate how much material is needed and what tools are needed for the work.
How to make a mirror frame from wood
Using lumber is not always convenient, since you need a tool for further processing. If you have the idea of assembling a frame for a wall mirror with your own hands, then it is better to take a wooden plinth, platband, or lining element. The workpieces have already been processed on the machine. They just need to be connected into a frame. If the frame will hang in a room where the interior is decorated in a rustic or Mediterranean style, the blanks are taken from old ones, for example, from a picket fence or a disassembled door.
Wooden frames are easier to make for a rectangular mirror
If there are no old pieces, the new wood will have to be artificially aged. Alternatively, you can simply open it with colored varnish or stain. The patterns on the frame are made using the decoupage method. The frame is covered with laminated paper napkins and opened with transparent varnish.
It is better to assemble a wooden frame in a rectangular shape. The blanks are cut to the required length, cuts are made, and they are placed on wood glue. Reinforce the joints with self-tapping screws, but in such a way as to hide the caps. The finished product is subjected to grinding and finishing.
How to make a frame for an oval mirror
It is difficult to make a circle and an oval from wood. A mirror of this shape is framed according to a different principle. You will need a rigid base made of thick cardboard, but it is better to take fiberboard, MDF or thin plywood. A fragment in the shape of a mirror, only larger in size, is cut out of a sheet with a jigsaw. The sides protruding beyond the borders will serve as the basis of the frame, where all the beauty will be glued.
Advice! The blank can be cut not just oval, but shaped with curls.
The mirror is glued with a hot gun onto a plywood base.
The next stage of assembling a frame for a round or oval mirror with your own hands is to make a hinge. It is glued with a hot gun to the back of the plywood. The product will be hung on the wall with a loop. Now comes the important marking process. The mirror is placed on a plywood blank. They are positioned so that protrusions of the same width are obtained on all sides. It is outlined with a pencil and removed. Press glue from a hot glue gun onto the plywood. Adhering to the markings, glue the mirror to the base.
The sides protruding along the perimeter will act as a frame. For decoration, stick on rope, beads, and shells. Old jewelry and any small trinkets will do.
How to make a carved frame for a mirror
Wood carving is a complex art. You will need skill and a set of appropriate tools. Each master makes carved frames in his own way. For an idea, you can take a master class on creating a prefabricated structure:
- 8 blanks are cut from processed lumber: 4 for the base of the frame and 4 for the carved ornament. From four processed slats, a frame for a rectangular mirror is assembled with your own hands, fastening the corners with wood glue and wooden dowels.
- All angles must be strictly 90°. Each dowel is driven into a through hole, and the excess is sawed off with a hacksaw.
- On the other four blanks intended for ornamentation, patterns are cut out with chisels. Each carved element is attached to the end of the frame. For fixing, glue and dowels are used in the same way, only the holes for them are drilled non-through.
- If desired, the carved pattern can be carved on the front side of the rectangular base. A loop for hanging is attached to the back with self-tapping screws. The carved frame is opened with varnish and a mirror is inserted. On the back side it can be fixed with plywood strips secured with self-tapping screws to a wooden base
How to make a frame for a mirror from a baguette
The advantage of baguette as a material for a frame is the presence of a pattern. You will get a beautiful frame, but only rectangular.
A rectangular frame is made from a baguette
The length of the blanks is marked on the surface of the baguette. To get right corners of the frame, the baguette is placed in a miter box and cut at an angle of 45 degrees. The blanks are connected to each other. Check that each corner of the frame is 90 degrees. All parts are glued together with a hot gun and glued to the mirror. The cracks are sealed with putty and the frame is painted.
Advice! When using a metal baguette, the frame blanks are connected with special steel corners.
DIY frame for floor mirror
A large mirror will require a strong frame. It is better to make it from wood. To process lumber, you will need a router, plane, and sander.
Technology:
- Assembling a frame for a large mirror with your own hands begins with cutting the blanks to size. The slats are processed with a plane and polished. Find a perfectly smooth, knot-free surface that will go on the front side of the frame.
- Using a milling cutter, select a groove along the ends of the bars. The mirror should fit freely into it, but not dangle. The blanks with grooves are placed in a miter box. The corners are cut off according to the markings. The parts are assembled into a frame, a mirror is inserted, the joints are glued, and connected with dowels. While the glue hardens, the frame is clamped with clamps.
- The legs are attached to the end of the lower element of the frame made of blocks with self-tapping screws. The frame is opened with stain and clear varnish.
DIY illuminated mirror frame
The process of creating a backlit frame:
- To make such a design, you will need mirror glass, where the reflective coating has been removed along the edges in the form of some kind of pattern. It is in these places that the illumination will be illuminated through the clean glass.
- On the back side of the mirror glass, two frames are assembled from aluminum blanks. For edging the first level, use a corner. It forms the body. The second level edging is made with a profile for the LED strip. All aluminum parts are glued to the back of the mirror glass with sealant or a hot gun.
- Make your own hanging loops. Two pieces 2-3 cm long are cut from the corner, and a hole is drilled in one side shelf. The parts are glued with a hot gun to the first level frame.
- The LED strip is cut to the length of each profile. Wires are soldered to live contacts. The LED strip is glued inside the profile. Wires connect it to the power supply, which is similarly located on the back side of the structure.
- To make it convenient to turn on the backlight, a hole is drilled in one of the first-level frame elements and a push-button switch is inserted.
- The mirror is hung on the wall. The connection to the electrical network can be made hidden or the cord and plug can be simply removed.
After applying voltage, bright illumination will appear from the side transparent edging of the mirror glass.
Important! For illumination, it is optimal to use a white LED strip.
DIY plaster frame for a mirror
There are two options for making edging. In the first case, the frame can be cast from plaster as a whole. However, it will be difficult to find a mold of a suitable size for the existing mirror glass.
A solid plaster frame is poured into a special mold
It's easier to resort to another method. In the second option, you make your own frame for the hallway mirror using stamps. First, plywood or fiberboard is cut for the base. Mirror glass is glued onto the sheet. Along the perimeter of the wooden protruding edging, strips of plaster in the form of rocking chairs are laid. Taking a stamp or any object with a textured surface, squeeze out patterns. After hardening, the gypsum frame is painted with acrylic paint and opened with varnish.
How to make a frame for a mirror from platbands
Door trims have a finished surface. There is no need to carry out any additional actions with them. The platbands are simply cut to fit the sides of the rectangular mirror. The frame is formed exactly as from a regular tree.
You can join the platbands with even cuts or make cuts at an angle of 45o
If the platbands are made of MDF or plastic, then it is better to glue them together. You can place an overhead square on the back side of each corner and secure it with self-tapping screws.
How to make a frame for a mirror from plinth
Depending on the material used to make the baseboards, there are wooden, plastic and foam. According to the place of application - floor and ceiling. Each of them will serve as good material for a frame.
The plinth patterns highlighted with golden paint look gorgeous against a white background.
If the wooden plinth is thick, grooves for the mirror are cut out at the ends using a router. The frame assembly technology is similar to the floor model discussed above. Plastic and foam are not able to support mirror glass if hung from such a frame. Skirting boards are simply used for decorative framing. The blanks are glued along the edges of the mirror.
DIY forged mirror frame
Forging always looks beautiful, even if it is a mirror frame. However, such elements can only be made in a forge. Forged frames are usually ordered. When making a frame yourself, you purchase individual elements. Usually these are forged curls, leaves, and bunches of berries.
Forged frames can be made independently from individual elements
First, the base is welded from a profile or corner. The existing forging elements are placed on it. They are similarly fixed by welding. The metal frame is treated with an anti-corrosion primer and spray painted.
DIY polyurethane mirror frame
Polyurethane finishing elements are perfect for the frame if it will hang in a damp room or on a balcony. The advantage of the material is its flexibility, thanks to which the product can be given a creative shape with bends. In the traditional rectangular design, the frame is assembled in exactly the same way as from a foam or plastic baseboard. The blanks are simply glued onto a mirror or plywood base.
Acrylic paints are used to paint the frame.
It is optimal to decorate the frame with at least two color shades: the general background and highlight the pattern. Silver and golden sparkles will add originality. The final layer is applied with transparent varnish.
How to make a frame for a mirror from cardboard
For a dry room, you can come up with a cardboard frame for the mirror. They make it voluminous. Roll 4 tubes from cardboard and glue them together. When the glue has hardened, the workpieces are slightly flattened, but done smoothly to avoid creases. The tubes will take on a flat slatted shape. All that remains is to trim the corners and glue the rectangle.
You can decorate the cardboard frame with cereals
The finished frame is painted and covered with wallpaper or adhesive film. The grain decor looks beautiful. The front surface of the frame is smeared with glue and sprinkled with grains of different colors, for example, mustard and buckwheat.
DIY tile mirror frame
The bathroom will have a beautiful frame made of glass mosaic tiles. It is better to take the material on a paper basis. Such tiles are more difficult to work with than their analogues, which have a mesh base, but they are cheaper. In addition, the mesh will be visible through the transparent decorative layer.
Work algorithm:
- First, prepare the base from an MDF board. Draw the contours of the mirror and frame. Cut tile fragments.
- The adhesive backing is glued according to the markings. Cut pieces of tiles are glued onto it.
- Three wooden strips are selected, identical in thickness to the tiles. The blanks are glued at the same distance from each other onto an MDF board in the center of the resulting mirror glass window. A strip of special glue for mirrors is applied along the inner edge of the tile frame. The thickness of the adhesive layer is small so that it does not spread. A mirror is glued to the frame. The structure is left to harden for at least a day.
- The next day, the product is given a vertical position. A loop is attached to the MDF board. The structure is hung on the wall.
Step-by-step instruction
When starting work, you must remember that you must strictly follow the prepared drawing. To do this, you need to connect the four slats with the front area on a strong, flat board.
- After this, the most difficult moment in the whole work will come - cutting the planks. In order for them to fit tightly to the wall, it is necessary that the recess be carefully prepared. It also needs to be equal to its thickness.
- Then the craftsmen begin sawing off the excess area of the board. In each step, you must remember to use a ruler. In such situations, it is always necessary to apply it to the surface at an angle of 45 degrees. Using it as a guide, you need to cut off even corners and then sand it with sandpaper.
Each of the slats may in practice be slightly larger than the area of the framed surface. To make the design even more reliable, it is necessary to construct small holes at the ends of the shorter elements, provided under the oblique screw.
After this, you need to start inserting the mirror, placing it on the adhesive. For even greater beauty, it can be decorated with additional elements.
DIY mirror frame design
You can frame anything you can get your hands on. Popsicle sticks, plastic spoons, ropes, and other small things are used. When choosing a material, it is important to think about it so that it does not turn out to be bad taste.
In a bright room you can hang a mirror decorated in French style
When designing, pay attention to the following nuances:
- The color is selected so that the frame harmoniously combines with the interior design palette of the room.
- The width of the framing elements should be directly proportional to the size of the mirror. The larger it is, the more beautiful the wide slats look.
- The design style of the frame and the room must match. Let it be classic, modern or something else, but united.
- It is better to use the same materials for one frame. The combination does not always give good results.
You need to experiment with design and look for a creative approach. The result will be positive when the color and type of frame matches the style of the interior of the room.
Colors
You need to choose the color carefully. Assess the overall color scheme of the room and choose either a similar or contrasting color. Black and white frames are considered classics. Such universal colors will fit into any interior. A great option if you don't want to focus on the mirror.
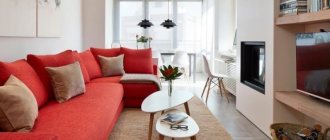
Decorate your living room with a bronze or gold frame.
So, you will focus on the mirror. This product looks rich and elegant. Feng Shui advises making frames in such a way that they attract attention. It is believed that a mirror with this design brings good luck and also attracts positive energy.
An interesting option is a colored frame. This product is suitable for any room and will add brightness to the interior. You need to choose colors carefully so that they do not clash with the overall design.
You can use not only a colored base, but also colorful decor on a white background.
Interior functions of this item
In fact, such an ordinary and seemingly uncomplicated household item has a lot of properties that can improve the overall appearance of the room. With its help, you can expand the space and visually double a small room. This function is best accomplished with a full-wall mirror.
A mirror can make a room brighter if placed in the right place - opposite a lamp or window. It is important to choose the right place to install this important piece of the interior.
If you don’t have the best view outside the window, it is advisable to avoid its reflection in the glass. Mirrors can be a great way to decorate cabinet doors, walls and even the ceiling. Mirror decorations will look very stylish if you use them wisely in decorating your space, and a baguette is a good solution if you have ideas for placing it in your cozy world.
Decor options
To decorate the finished product, you can use various methods and techniques of decoration from scrap materials. The most popular techniques are decoration with cords or twigs, plaster, stencils, and scrapbooking.
A variety of patterns and ornaments also look good.
| Variety of decor | Step-by-step description of the work |
| Cord | Weave a flat braid. Glue the mirror decor onto the plywood backing using liquid nails. Place rope around the perimeter. Add decoration - knots. Make a pendant. A white cord or any other light shade looks best |
| Decoupage | Cut out bright color or black and white pictures from newspapers, magazines, old children's or adult books. Arrange the drawings on the mirror frame made from the ceiling plinth so that they make an interesting collage. Fix the finished pattern with glue. Treat the finished product with colorless varnish to make it more resistant to external influences. In order to use the decoupage technique, you must have impeccable artistic taste and a sense of composition, otherwise the finished decor may turn out rough and tacky |
| Decor from twigs | Cover the glass with masking tape to prevent it from getting dirty while working. Make markings on the back of the mirror frame with your own hands. Use a glue gun to secure it to the back of the decoration. The composition of the branches depends on the tastes and preferences of the master. Next, the product is painted. This frame decor looks very elegant and resembles an elegant cobweb. The branches should be thin, with a beautiful color and shape. |
| Gypsum | Dilute gypsum powder and pour it into pre-prepared non-standard molds for making stucco molding. If you don’t want to do this, you can purchase ready-made decorative elements at a hardware store. Make a sketch on the working surface of the wooden frame, laying out the parts on it, but without gluing them. If the location suits you, you can begin fixing. The final stage is painting, but white bas-reliefs also look impressive |
One of the easiest ways to decorate is to use stencils. They are attached with masking tape, and paint is sprayed on top. Finished mirror frames are varnished.
If the drawing was applied inaccurately, the errors are carefully erased using acetone or any other solvent.
The decor should be harmoniously combined with the overall appearance of the finished product and the interior design. Scrapbooking and decoupage will look strange in a room decorated in a high-tech style, and decor in the form of branches will only suit an interior in the Provence trend.
Before you start making a frame for decorating mirrors, you need to evaluate the interior with a critical eye and choose exactly the configuration of the product that will fit well into it; a new item should not look like a foreign element.
You should also pay attention to the correct processing of the material, then the hand-made item will last a long time without losing its spectacular appearance.
Stages of work taking into account the material
The easiest way to make a frame is from wooden planks. Experienced craftsmen recommend using parts from old window casings; this design is original. You can purchase ceiling plinths at any hardware store.
The choice of material depends on the shape of the mirror. For a product with sharp corners, you should choose wood; for a circle or oval, you should choose a ceiling plinth.
Tree
To work with wood you will need the following tools:
- hacksaw;
- hammer;
- sandpaper;
- ruler;
- pencil for measurements.
If you want to make an object with a complex configuration, you should stock up on cutters and a file. Step-by-step algorithm of actions:
- Divide the window frame into components.
- Select four parts, cut to the desired size.
- Impregnate with a special composition that prevents the development of fungus.
- Assemble, clean and sand. The wooden frame is ready.
- Paint or coat the surface with clear varnish. You can also use self-adhesive vinyl film for finishing.
Next, a plywood backing is made. A mirror in a wooden frame is hung on it. A glazing bead is usually used to secure the product.
To fasten the frame parts to each other, glue and screws are used. The plywood backdrop is cut out with a jigsaw. Grooves are formed in the finished product, into which fittings in the form of loops can then be inserted.
Ceiling plinth
This option looks good on a mirror that does not have sharp corners (oval or round shape). Polyurethane for a DIY bathroom product is easy to process and is resistant to external influences.
Unlike wood, it is not destroyed by humidity and does not crack if the air in the room is dry.
Required tools:
- hammer;
- hacksaw;
- accessories;
- glue;
- ruler;
- pencil;
- breadboard knife
Step-by-step algorithm of actions:
- Select round ceiling moldings of suitable sizes (they are often used as central parts for a chandelier).
- Make a cutout in the future frame 2 cm smaller than the diameter of the glass.
- Place masking tape on the mirror so as not to stain its surface with paint.
- Use glue or fittings to secure the product to the plywood backing.
- Fix the frame from the ceiling plinth on top. Next it is painted. Additionally, you can decorate it.
For coloring to decorate a bathroom mirror, most often they use one color, but you can also take two contrasting ones. Noble shades look impressive: gold, silver, bronze. You can create the effect of artificial patination, antique. The best option is to decorate the entire surface.
If you want to leave certain areas white, they are temporarily sealed with masking tape; after the paint has dried, the adhesive tape is removed.
Required materials and tools
You should start working with the selection of materials. There is little choice here. The most popular ones when creating a frame for a mirror on your own are:
- Tree.
- Polyurethane (ceiling plinth).
- Metal (but it is used less often because it requires special equipment and skills. Welding and cleaning of seams will be required).
- Thick construction cardboard, plywood (if the frame for the mirror will be completely decorated as a base).
The first three options are better suited for a large mirror, the fourth - for a medium size and very small ones. It is best to make the frame for the bathroom from ceiling plinth, because it is beautiful, and polyurethane has significant resistance to contact with water and high air humidity.
It will also be necessary to decorate the product using different decorative techniques and make a backing.
It will be used with second-rate materials - chipboard or fiberboard. You should stock up on fasteners in advance; these can be hooks, hooks or loops. Accessories are purchased in specialized stores with a reserve, because small elements are easily lost.
The tools you will definitely need are a hammer, a hacksaw, a file and a drill. To connect frame parts together and update an old mirror, you need nails and screws. A special glue is suitable for fastening wooden planks.
The preferred mounting method depends on the material of the wall on which the mirror frame will hang.
If it is wooden or brick, you can simply drive a nail with a hammer or screw a screw inside. When working with concrete, a hole is made with a hammer drill, and then a dowel is placed into it.
The backing must be strong enough to hold a massive mirror on the wall. The best option is plywood. But it’s not worth making the frame itself from it because of its unpresentable appearance. Or you need to additionally decorate the mirror.
Peculiarities
Homemade mirror frames have their own characteristics and advantages.
Among the majority, the following are worth noting:
- You can choose the material yourself. So, you can create an environmentally friendly frame. Manufacturers often treat products with chemicals that can harm you. In the case of self-production, this property is excluded.
- Budget product. Making a frame will require less financial investment than purchasing it.
- Uniqueness. You are free in your imagination and can create a unique product. Additional decor can be very diverse, from ribbons to wood carvings. This point is especially important for those who love original solutions.