DIY wardrobe installation
We prepare all the elements of the cabinet and begin its installation.
It is assumed that you constantly use a level and an angle to accurately install the parts of the wardrobe. Very often, cabinet parts are connected using confirmations (in the picture) and closed with plastic plugs. But, sometimes fastenings on furniture corners are used. Assembly on confirmats is a slightly more complex process, but when installed on corners, they will interfere with your further use of the wardrobe.
Then the installation process itself begins. Carefully, with a pencil, mark the location of the shelves on the side and central racks, drill mounting holes, both in the racks and in the shelves (from the end) part. We secure the fiberboard using a stapler or nails, and do not forget about the corner, especially when securing the fiberboard sheet. Sliding wardrobes can be installed on legs. Then we take their height into account when calculating the height of the cabinet. The legs are attached from inside the cabinet and adjusted with a hexagon. Then the legs are covered with a false chipboard panel.
Installation of a sliding door system
The upper guide rails are installed flush with the rack (top).
The bottom rail is attached to the bottom of the cabinet, 10-15 mm away from the edge.
Having strengthened the guides, we begin to install the doors. As a rule, with a support roller at the bottom of the door and a groove for its movement in the guide.
The doors are inserted with their maximum upward motion, and the installation of the lower roller and guide groove.
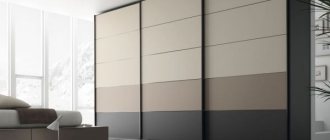
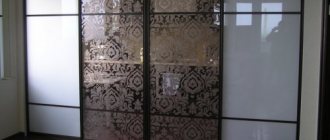
The smoothness of the doors is regulated by adjusting screws and a hexagon. The doors are installed in guides. In our case there are two doors. One overlaps the other. The total width of each door is 1200 mm. The wardrobe is installed and you can use it. This was just a special case of one of the sliding wardrobe options, in which we showed you possible options for installing individual parts. Now I would like to give a specific example.
General rules for assembling a cabinet
To assemble the furniture you buy, you need to strictly adhere to the instructions; if you ignore it, then in the end you won’t succeed and you will experience discomfort during assembly. Few people believe, but even when assembling a cabinet there are certain rules, by following them you can get a good result, namely, high-quality assembly of the furniture you purchased.
- — You should never remove all the components from the packaging at once and mix them.
- — You need to take out all the components one by one and lay them out separately from each other for further comfortable assembly.
- — Read the instructions so that you don’t have to redo everything again later.
- — Make sure that all major and additional parts are in place. Otherwise, the furniture will not be completely assembled.
- — Check that all the colors of the furniture match the products you purchased.
- — Collect everything in order, one section at a time. Starting from the bottom of the cabinet and smoothly moving to the walls.
- — Mirrors, glass and other glass parts are installed at the very end to avoid damage during assembly.
Door fastening
Today, the consumer market offers various systems for fastening furniture doors. Each element has its own specific purpose, which depends on how the cabinet is opened.
Swing
Hinged doors are the most common type of furniture design. It consists of a wooden canvas and fastening equipment. The number of panels for a cabinet depends on the number of internal sections. As a rule, if the cabinet has one common section, two doors will be required. If the furniture consists of one narrow and one wide section, three doors will be required. The doors are fastened to the side walls of the cabinet using the following hinges:
- detachable - such a mount is installed on the inside of the cabinet wall;
- universal - these products can be installed regardless of the sides of the cabinet. The hinges are attached simultaneously to the body and doors of the furniture.
After the hinges are attached to the product box, the doors are hung on them.
Hole preparation
Alignment and installation of hinges
Coupe
Compartment doors are a sliding system where, when the closet is opened, one door overlaps another. Installation of such a design requires certain knowledge and skills, so before installing a sliding wardrobe made of plywood with your own hands, you first need to familiarize yourself with the names of the components and their location.
The accessories set includes:
- special wheels for moving doors, installed in their upper and lower parts;
- upper hanging structure for guiding the canvases;
- a lower guide structure along which the door wheels will move in the grooves;
- cassettes for installing wooden panels;
- locks and closers for easy door opening.
This design is intended for cabinet furniture with a threshold. If a built-in wardrobe is installed, it will be possible not to install lower guide elements on the floor.
Installation of a classic cabinet model
Assembling the cabinet is a relatively simple task. The master will need a minimum of skills and strict adherence to instructions.
The entire installation process can be divided into several successive stages of cabinet assembly:
- Preliminary stage (preparatory work).
- Marking surfaces and parts.
- Installation of supporting structures.
- Installation of cabinet walls.
- Installation of the top and rear walls.
- Installation of facades and doors.
If each stage is followed correctly, assembly will take minimal time, and the process itself will not cause difficulties for the master.
Note!
Sofa with drawers - TOP-130 photos of sofa options with drawers. Design advantages. Types of transformable sofas. DIY making- Modern sofas: types of designs and frames. Stylistics of modern sofas. Shapes and sizes of sofas. Photo and video reviews
Wardrobe in the corridor: TOP-160 photos and videos of wardrobes in the corridor. Features of types of cabinets. Nuances of closed and open cabinets for the corridor
Assembly
Assembling the structure
To assemble the cabinet you will need:
- Pencil and rectangle.
- Drill and drill bits 5 and 8 mm.
- Roulette.
Tools
Instructions:
- To assemble parts into one complete structure, purchased confirmats are used. First, we look at our project and mark the attachment points.
- When all the parts are marked, we begin the drilling process. For holes in the plane we use a drill with a diameter of 8 mm. The hole must be through. The depth of the hole at the ends is no more than 60 mm, and the diameter is 5 mm. In the places where the floor supports are installed, we make holes at several levels. When the cabinet is ready, you can safely move your shelves to the desired level.
- To assemble the structure you will need the help of one person. The work will go faster and the build quality will be better. We connect all the parts of the cabinet and install it in place. We level the cabinet using a level.
- Now you can begin installing the facade. We screw the upper guides along the edge of the cabinet lid. We retreat from the edge of the bottom of the cabinet a maximum of 10 mm and secure the lower guides. Before tightening the screws, insert the stoppers into the roller track.
- Now the two of you can install the facade in place. One person moves the upper part of the facade into the guide, and the other sets the wheels in the desired track. A hex wrench is used to adjust the front. The adjustment screws are located at the bottom of the façade end. By raising or lowering the lower roller, we set the façade to the desired position.
Completing of the work
When the wardrobe is loaded with things, the adjustment will need to be repeated. The work on installing the wardrobe has now been completed. Now you can proudly consider yourself a master and try to assemble a more complex structure. We already have experience, which means the assembly will be much faster and of better quality.
Do you want to share with us your experience assembling a wardrobe? Leave comments on the article. Our readers will be interested to know the secrets of your successful cabinet assembly.
Preparing for assembly
As has already been described, cutting parts with your own hands in an apartment is not the best option, but it is quite possible to glue the edges yourself. It should be applied with the decorative side up to the end and pressed along its entire length with an iron heated to three-quarters of the power. The steam mode on the iron should be turned off.
The heated glue will “set”, then the heated edge should be pressed and ironed with a dry and clean cloth. Excess glue must be collected or cut with a blunt knife (so as not to scratch the laminate), and the edges must be treated with fine-grained sandpaper.
The sliding wardrobe needs to be assembled to confirm, for this reason it is worth arming yourself with knowledge and special tools. All planes are drilled through with a drill with a diameter of 8 millimeters, all ends with a 5-mm drill, to a depth of approximately 60 millimeters.
Source: delajmebel.ru
What are wardrobe doors made of?
A sliding system usually consists of the following components:
- door frame (side posts + horizontal strips);
- filling – door leaf;
- lower and upper rollers;
- buffer tape;
- guide tracks.
For further understanding of the terms and the entire assembly process, in the table you will find a detailed description of each component.
| Door frame | |
| Side racks | The aluminum racks have longitudinal grooves into which the canvas is inserted. On the outside, the profile is made in the form of a bend, which serves as a handle. The cross-section of the racks may be different, but they all hide the longitudinal groove with a bend. Some side planks are made solid, and separate handles in the form of shaped plates are attached to them in the middle. |
| Cross bars | Cross members connect the vertical posts into a single structure - the frame. A pair of vertical rollers are installed inside the lower cross member. The cross-section of the horizontal strip and the height of the sides of the rail track completely hide the rollers. |
| If the filling consists of several fragments, then middle strips are inserted into the frame. They have double-sided grooves into which sheets of canvas fit from the top and bottom. Find out more complete information about the profiles for the sliding wardrobe. Austrian products are worthy of attention. | |
| Buffer tape | A fleecy strip with a self-adhesive backing (also called Schlegel) is designed to perform two functions. The soft structure of the tape dampens the sound from the door connecting to the side wall of the cabinet body. The pile prevents the penetration of dust into the wardrobe. Vertical grooves are made on the uprights on the outside of the frame for the buffer tape. |
| You can assemble a door frame based on the principle of a window frame made of wooden beams. In it, as in a metal frame, longitudinal grooves are made with a milling cutter along the inner perimeter of the frame. The width of the gap should be equal to the thickness of the filling material. | |
| Guide tracks | They have different sections. In cross-section, both strips resemble the letter “Ш”. The lower track is made with low longitudinal grooves. This is enough to keep the wheels from moving laterally. The upper profile has high sides (40 mm) in order to keep the upper roller devices, and with them the entire door, from tipping over. You can learn more about sliding wardrobe guides here |
| Filling the door leaf | |
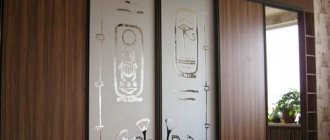
| Mirror | Mirrored wardrobe doors create a beautiful furniture façade, visually expand the space and improve room lighting. You can use clear and tinted mirrors in silver, bronze, matte and different colors. A film is glued to their back side, which holds the fragments in the event of destruction of the door filling. Three decoration technologies are used to decorate mirrors:
|
| MDF and chipboard | You can make the complete filling of sliding systems from MDF. For compartment doors, use slabs with a thickness of 6 to 10 mm. On their surface, upon request, beautiful patterns will be made for you using a laser machine. The material is also covered with colored PVC film with patterns. Laminated chipboard sheets are cheaper than MDF boards. On the building materials market you can find laminated chipboards with matte and glossy facades that imitate leather and valuable wood species. |
| Laminate | Laminated parquet slats can fully replace expensive material for filling sliding doors. There are boards in light and dark tones that imitate valuable types of wood. The 10 mm thick parquet fits precisely into the aluminum door frame. |
| Plywood | For a budget-friendly façade assembly, use laminated plywood. The material is easy to saw and cut with a hacksaw and jigsaw. The filling is made both homogeneous and combined. You can insert fragments of the correct geometric shape or make shaped combinations of parts from MDF or laminated chipboard with a mirror. Aluminum profiles have grooves 10 mm wide. If the filling material is less than this size thick, a sealant will need to be installed. |
| Bottom and top rollers | |
| Bottom rollers | They are fastened with self-tapping screws on both sides inside the profile of the horizontal rail of the door frame. The wheels are made of polymer, which ensures silent door movement. The moving units are made in such a way that when installing the door, they are pressed against the bottom strip using springs. This allows the top of the frame to fit into the guide rail. |
| Top rollers | Installed on frame posts on both sides of the door. Unlike the lower ones, the wheels rotate in a horizontal plane and are completely hidden by the high crossbar profile. |
Design options
Built-in option
If you want to install a wardrobe in an apartment or house, you need to make accurate measurements of the intended installation location of the furniture item and place an order from a company that manufactures cabinets. The second option would be to measure the installation site, design the structure yourself, order cutting parts and install the wardrobe.
Corner cupboard
You have a choice - built-in structures, corner cabinets and models of separate walk-through structures. Once you have made your choice, you can begin to assemble it yourself.
Walk-through cabinet
In many apartment projects, the hallway was made small in the shape of a rectangle. If you install an ordinary wardrobe with a swing door, there is absolutely no space left. The sliding wardrobe with a sliding door became a real salvation. Its height basically goes up to the ceiling, which gives maximum use of the area. Mirrored door panels visually increase the space.
Household repair No. 1
Choose reliable craftsmen without intermediaries and save up to 40%!
- Fill out the application
- Receive offers with prices from masters
- Select performers by price and reviews
Post a task and find out prices
Modern interior designs most often include the use of built-in appliances and furniture (cabinets, beds, tables, etc.). This solution helps to significantly save space even in the smallest apartment or house. Built-in wardrobes of various models, made from natural and artificial materials (plastic with a metal frame, real wood), are very popular in interior design. If you are renovating an apartment/house yourself, then you just need to know how to properly assemble a wardrobe yourself, without involving specialists. After reading the article, you will learn how to assemble a wardrobe with your own hands (video and written step-by-step instructions), the advantages of this type of furniture, as well as some of the features of placing cabinets in a room.
Housing Installation
In order to be able to secure the frame the first time, it is recommended to watch the video instructions, which clearly demonstrate the nuances of installation. For built-in wardrobes, the frame functions are performed by the floor, ceiling, walls and frame for attaching the compartment guide parts.
Laminate or wood board inserts are used to level the surface. The correct geometry is checked with a level. The frame with auxiliary strips is built into the wall using self-tapping screws.
Assembly nuances
The ceiling-height frame must be assembled in a vertical position. If you combine elements on the floor, when the body is raised, the length of the side diagonal will exceed the distance from floor to ceiling. The finished structure cannot be lifted and built into a niche.
The order of work with a suspended ceiling
The combination of a high wardrobe with a suspended ceiling is carried out in the following ways:
- Stretch ceiling above the closet. A wooden beam is screwed to the ceiling to the level of the main body. Next, the door device guide is attached to the mounting strip. A decorative chipboard panel is mounted on the side, on which a baguette is placed under the tension fabric. The body with shelves is assembled. Before installing the sashes, the suspended ceiling is fixed.
- Extension of the tension covering inside the wardrobe. A beam or chipboard insert is screwed onto the surface of the ceiling. The bottom edge of the embed must be thoroughly cleaned from chips to prevent damage to the film. The place where the ceiling comes into contact with the timber is covered with a PVC plate, and the film is stretched. The sliding system bar is fixed to the embedded beam and hidden behind the ceiling plinth. After completing the lighting work inside the wardrobe, door blocks are installed.
- Placing the ceiling around the perimeter of the wardrobe. Markings are made along the contour of the structure to fix the wooden planks, and sections of the required sizes are formed. Holes for fixing elements are drilled through the boards in the ceiling. A baguette is screwed to the ceiling from the back of the fragments, and the profile joints are adjusted. The base for the sliding device is screwed to the floor slab. The profiles on the walls under the panel are joined to the blank on the beams. Film installation is completed.
- Installation without embedding timber. If the film was placed earlier, the top of the wardrobe is covered with a lid. Leave a few centimeters between the top edge and the ceiling film. The work is carried out as carefully as possible so as not to damage the panel. The remaining gap is masked using decorative ceiling skirting boards.
The choice of a specific technology depends on the condition of the repair and the skills of the performer.
Installation of hardware
Responsible furniture manufacturers prepare all holes for hardware during production.
On the bottom bar, you need to pre-drill several holes and insert anchors on which the rack bars will be attached.
The specific set depends on the model and manufacturer, but for most cabinets you need to have hex keys and a set of screwdrivers, including ones for Eurobolts.
The first step is to install the side planks; if there is a middle post, it is installed after.
The top bar is fastened with corners and self-tapping screws or confirmations.
Advice. It is better to assemble the cabinet in a standing position, since fitting the parts while lying down is problematic. To install the roof, a minimum of 10 cm must be left.
Each hardware has its own technical parameters and requires special fixation technology.
Facing
In most cases, the façade is decorated with mirror inserts, drawings, and a combination of overlays of different textures.
An interesting option for doors is louvered. A non-standard façade is made to individual measurements. For production, inexpensive solid pine with a beautiful texture and high strength is used. Surface treatment is simple and suitable for painting.
The finished wardrobe must be inspected for defects, protruding chips, and open screws. It is necessary to eliminate all defects that could damage the items stored inside.
Installation of the top and rear walls
To carry out this work, it is better to hire an assistant who will support and guide the installation of prefabricated panels.
The panels are placed on the prepared frame, fastening is carried out by tightening the screws. For additional fastening, you can use metal corners.
Assembly order
The base (bottom sheet of laminated chipboard) is screwed with euroscrews (confirmats) to two longitudinal legs made of laminated chipboard. The supporting part must have an edge so that the material does not swell from moisture while standing on the floor. You can immediately nail the thrust bearings - 3 pieces per strip.
The work takes place on the floor and therefore the box is assembled face down
.
You need to attach the middle post to the base of the Basya cabinet and then the side ones, and in order not to return to the bottom again, put plugs in the holes of the Euroscrews. Don't forget to install heel supports on the side racks of the cabinet.
The next step is to tighten the top lid of the cabinet and install the plugs. To give rigidity to the box, install shelves that are tightened with Euroscrews between the sections (in some configurations such shelves are not available).
We measure the diagonal and nail the back wall
Before nailing the back wall, make sure that the wardrobe is rectangular in shape. This is done with a square, placing it on the corner of the cabinet, or using a tape measure to measure the diagonals. You can use two options at once to make it more accurate. All angles should be equal to 90º, and the diagonal of the two sides should be the same. In case of unevenness, it is necessary to level the housing by moving it to a smaller direction.
If the box has the exact shape and details, then you can nail the back wall of the cabinet. The reinforcement wall is attached not only around the perimeter, but also to the shelves.
Now the structure should be rigid and can be installed in a vertical position.
Installation and configuration of doors
Two running rollers are screwed to the top of each door. It happens that mirrors come attached to the middle door of Basya's closet, but if the manufacturer did not glue it, then you will have to do it. To do this, you need to attach a mirror and outline it in a circle. Then plant it on liquid nails.
Now you need to install the lower guides and upper rails for the rollers. Stepping back 2 cm from the edge, screw the guide at the bottom and the rail at the top in the same way.
Then carefully insert the doors into the grooves of the profile. The motion of the rollers should be soft, and the doors should fit well and not touch or cling to anything. In case of poor running, the rollers can be adjusted. After this, screw the rollers with a fixing screw. We screw the guides onto the lower parts of the doors. Now we install the top front strip and install shelves and a rod for dresses. The Basya cabinet is ready for use.
Self-assembly of furniture helps to significantly save money. It’s good if a person has simple skills in assembling objects. It will be useful for beginners to learn how to assemble a wardrobe themselves. Step-by-step installation steps for each element of the product will allow for quick installation.
Among all types of clothing storage products, the leading place today is occupied by the wardrobe. It is multifunctional, spacious, comes in different shapes and sizes, and does not require additional space to open the doors. That is why most people, when choosing between a wardrobe and a sliding wardrobe, prefer the latter option.
Assembling a sliding wardrobe with your own hands in the video presented is not at all difficult - all you need to do is have the necessary tools in your apartment and be familiar with the design of the product. Often, when ordering a cabinet without the services of assemblers, the company sends a document that contains a drawing of the product. This also lists all the component parts, which are numbered in order. By looking at the drawing and comparing the elements of the cabinet, you can intuitively assemble the product.
To work according to the sliding wardrobe assembly diagram, you will need the following tools:
- building level - to check the levelness of the installation parallel to the floor;
- corner;
- rubber and regular hammer;
- straight and Phillips screwdriver;
- roulette;
- pencil and ruler;
- screwdriver;
- wood drill - to make holes;
- metal drill – for installing an aluminum base.
Additional tools for assembling furniture yourself include a jigsaw, drill and sandpaper. It is also necessary to prepare all the details of the cabinet, which means checking the diagram to ensure that the number of items matches
Pay attention to fittings and mechanisms: if there are drawers in the closet, ball guides should be included
Tools
Assembly steps
To know where to start, it’s worth familiarizing yourself with its stages. Most sliding wardrobes are assembled according to the following algorithm:
- base;
- frame;
- installation of the rear wall;
- installation of shelves and guides;
- installation of compartment doors.
After the completed stages, the implementation of internal additional elements is carried out. These include pull-out baskets, drawers, rods, hanging hooks and pantographs. Let's consider the installation of each cabinet element separately.
Assembly steps
Base
The assembly of sliding wardrobes, the video of which is presented below, begins from the bottom part, which bears the entire load during operation. We find a part that will perform this function and place it in front of us. In order for the process to proceed correctly, we use tools such as screwdrivers or a screwdriver, a hexagon, a pencil and a tape measure for marking. Also check the package for the presence of self-tapping screws and special masking plugs.
The algorithm of actions looks like this:
- on the part for the bottom, the place for installing the base is marked;
- sometimes, instead of base strips, adjustable legs are used, the place for which also needs to be marked;
- drill holes for fasteners;
- we attach the bottom to the slats using confirmata (corners) - for this we use self-tapping screws and a screwdriver;
- We assemble the transverse supports of the plinth, designed for stability.
Some products, such as the Phoenix coupe model, require installation using adjustable legs. This is easy to do: the plastic plugs are cut off with a knife, and the legs themselves are screwed into holes prepared at the bottom with a diameter of 10 mm.
Depending on the size of the assembled wardrobe, the number of legs will be adjusted. So, for large planes more than 6 support elements will be required.
Preliminary marking of the cabinet base The easiest way to assemble the base is on furniture metal corners
Installing the legs Finished plinth with legs
Frame
Before disassembling and assembling sliding wardrobes from scratch, it is important to familiarize yourself with the general structure of the existing product. Study the diagram carefully, because assembling the housing must ensure safe operation of the cabinet. The stability of the internal elements will depend on how securely it is installed.
In order for the furniture assembly to be accurate, you should additionally check the floor surface for evenness. Use a building level: if there are differences on the floor, tighten the adjustable legs. Only after this assemble the product box.
To ensure quality installation of the housing, follow these steps:
- It is better to assemble the product while standing, because it is very difficult to install a perfectly fitted cabinet in a lying position. But it is important to remember that for complete assembly it is necessary to leave at least 100 mm for the installation of the roof;
- in the part that is responsible for the bottom, you must first drill several holes and insert anchors. Rack strips will be mounted on the installed fasteners;
- Installation of stand-up panels is carried out by two people: in order not to get confused, you can view the instructions for assembling the sliding wardrobe presented in the video. The left side panel is inserted first, one person holds it while the second person inserts the right side panel;
- at the next stage, the middle stand is installed, if present. After its installation, the roof is installed. If the cabinet is assembled in a standing position, then this part will be properly secured to the corners or confirmations.
It is a little more difficult to assemble a maestro model sliding wardrobe, which has many functions. Its installation is carried out slowly, preferably by several people.
Fastening occurs using euroscrews
Installing the side and interior walls of the cabinet
The base is connected to the body using confirmat corners
Rear wall installation
To assemble the coupe yourself, in particular to attach the back wall of the product, you need to wisely select consumables - fasteners. Often, assemblers use incorrectly selected consumables, which is why, over time, the fiberboard panel comes away from the furniture product. In Soviet times, hardboard was assembled onto the back wall using nails, which is undesirable to do today.
For greater reliability, attach the fiberboard wall to the cabinet using self-tapping screws. This is how the product will not be damaged during operation.
When assembling furniture for yourself, it is important to carry out high-quality assembly of the sliding wardrobe with your own hands: the video presented below clearly shows all the complex nuances. Perform the following manipulations:
- place a hardboard panel behind the cabinet;
- Holding the sheet with your hands, use short self-tapping screws and use a screwdriver or screwdriver to screw them in at a distance of 10-20 cm.
If the cabinet has several back walls at once, they must be secured end-to-end. Use special tightening fasteners, and then screw the screws into the back of the middle bar.
Fiberboard
Rear wall mounting
Installation of shelves and guides
To avoid having to disassemble the product and redo your work, check the reliability and stability of the frame, and then proceed to fill it with internal elements: shelves, rods, drawers and guides. You can independently assemble a wardrobe using the video at the bottom of the article. It clearly provides information about all the important points of the process.
You should pay attention to the following nuances:
- The shelves can be secured using corners and self-tapping screws. To do this, the parts themselves already have drilled holes. First, we note the distance between the shelves and attach them to the sidewalls and the central stand bar;
- First, the upper door rails are installed, after which the lower rails are installed. It is worth emphasizing that the installation of these elements must be carried out strictly in a straight line - the correct movement of the doors will depend on this;
- The rod is installed on special flanges that come with it. If necessary, the length of the pipe is cut with a hacksaw. If you are assembling a Fortune model cabinet, you should pay attention to a large number of elements and not confuse them;
- drawers and pull-out baskets are inserted into the product after attaching the mechanisms for their operation.
Before installing the internal contents yourself, check the availability of all fittings and consumables.
Guide sliding system
Preparing holes on the guides
Before installing the guides, the stopper must be positioned correctly
Door installation
Installation of compartment doors is considered the final stage of work. A correctly assembled cabinet assumes that the upper rails are fixed level with the front edge of the sidewalls, and the lower rails are slightly 8-15 mm away from them.
Answering the question of how to assemble a sliding wardrobe with your own hands, an important place is devoted to the installation of doors. First, the sash that will run on the rear rail is installed. Please note that a mirror door is expensive and will be unpleasant if it falls out due to improper installation.
The end is the installation of stoppers for the door, which do not allow it to jump off the sliding system. Dismantling a sliding wardrobe is possible if you plan to move or transport furniture. Then the wardrobe is dismantled: the product can be disassembled and assembled according to the instructions specified in the article.
Door with rollers
Brush bumper for wardrobe
What to assemble a wardrobe from
You can choose different materials to make furniture. But this must be done before design, since the assembly process may vary slightly.
Natural wood
This is a traditional material used to make furniture. In this case, not the best choice. The boards for assembling the cabinet must be thoroughly dried and soaked in special solutions: water-based polymer emulsion or hot drying oil. In addition, their surface must be free of any defects: knots, cracks, etc. Considering that the wooden surface is hygroscopic, it is not recommended to use it for the manufacture of built-in furniture. The wood will warp due to changes in humidity inside the niche.
Photo: Instagram almaty.mebel.kz
Lining
You can use various options: MDF, PVC or wood. It should be taken into account that the slats that make up the sash are inserted into a wooden frame. The wood from which the frame is assembled is selected only when it is dry and without defects. The lining is adjusted to size, the boards are glued together. This complicates the assembly process somewhat. In general, this solution is quite appropriate, but only for cabinet doors. It is often used for built-in structures.
Photo: Instagram alyance_naydi_kzn
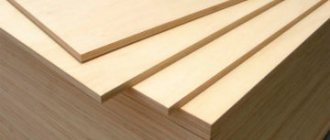
Wood panels: MDF, chipboard, fiberboard
Perhaps the best choice for DIY cabinet installation. The materials have all the advantages of wood, but are completely insensitive to changes in humidity. High and medium density slabs are chosen for work; they are best suited for this. It is enough to simply cut the slabs into pieces of the required size. It is optimal to use cutting services for this.
Photo: Instagram good_wood_shop
Plywood
You can use standard or laminated sheets. The latter have an attractive appearance and are considered more environmentally friendly. The material is available in the form of slabs of various thicknesses. When working, you should take into account some softness of the sheets; when installing self-tapping screws, the plywood may be deformed. Therefore, it is recommended to use special gaskets.
Tools required for work
Before starting work, you need to prepare the tools to assemble the cabinet. To install a classic wooden model you will need the following kit:
- Straight and Phillips screwdrivers.
- Stationery knife.
- Construction pencil for marking.
- Screws and screwdriver.
- Roulette.
- Drill.
- Glue.
- Hammer.
For additional decorative finishing, sandpaper may be needed to smooth the edge surfaces.
Design and drawing development
Before you take on cabinet drawings, you need to understand how to take measurements correctly. The niche in which you plan to install a wardrobe will not always have the correct geometric shape. That is why measurements in a niche must be carried out according to the following rules:
- first, measurements are taken along the back wall: at the top, at the middle level, at the bottom;
- then we also measure the “front part” with an indentation;
- height measurement also occurs in three positions from the “rear” and from the “front”.
Installing a built-in wardrobe without such measurements can lead to the fact that the body, made without taking into account errors and differences, either will not fit, or when trying to assemble the structure, serious gaps will be discovered. It will be a shame if the cut shelf turns out to be smaller than the required size and simply falls through. Before installing, carefully calculate all errors in order to leave allowance for installation. Sometimes it happens that the end drawing of the shelves resembles a trapezoid rather than the expected rectangle. It all depends on the quality of the walls, the density of the plaster on the inner corners of the niche.
Next we move on to the drawing. If you do not have drawing skills, it is better to contact a designer. Based on your data and wishes regarding the material, they will make a drawing of your future wardrobe in a niche. In such work, you need to remember to take into account the thickness of the material, the edges, if you want to thoroughly cover the cut points, and the margin for the mechanism of the compartment itself, which also needs to be about 10 cm.
Having detailed diagrams on hand, you can be sure that the manufacture of cabinet parts will be more accurate. Allowances left when taking into account wall errors will make the installation more accurate.
Now, as for the design of the future cabinet: without much experience in drawing up drawings and installation, give up complex radial facade designs. Here you need not just skills, but good professional experience in order to calculate and then competently assemble such a structure. Limit yourself to a simpler cabinet option that you are guaranteed to be able to control during assembly. Order all decorative elements strictly in accordance with the drawing.
Required Tools
Often complete with confirmations there is a hexagon with which furniture is assembled. But this key is not all that you may need. After all, control measurements need to be carried out with something, and the structural elements need to be tapped so that they fit tightly to each other at the points of connection with dowels. In order not to waste time searching for the necessary tools later, you need to prepare:
- roulette;
- level;
- drill;
- rubber and regular hammers;
- flat and Phillips screwdrivers;
- L-shaped hexagon.
The drill will be useful at least when installing the rod. Using a rubber hammer, you can adjust structural elements without fear of damaging their outer coating. If you don’t have such a tool, you can use a regular one. But in this case, you will need a shock-absorbing lining to prevent metal contact with the laminate.
It’s better to forget about a screwdriver while assembling large-sized furniture: it’s easy to “miss” with it by screwing in a screw deeper than necessary. And this can lead to a decrease in the strength of the entire structure due to weakening of the attachment points.
What tools are needed to make a wardrobe
Taking into account the fact that the cutting of laminated chipboard sheets will be ordered from a third-party company, the following tools will be needed to independently manufacture and assemble a sliding wardrobe:
- A good electric drill with a set of drills, which must contain several pieces designed for working on wood (to create seats for confirmations) and the material of the selected sliding system profile. There should be several identical drills so that the work does not stall if one of them breaks.
- Hex screwdriver for tightening furniture screws.
- A regular quality hammer and medium sized nails.
- Self-tapping screws and a screwdriver with a Phillips head or a screwdriver with an attachment for tightening them, suitable for the selected thickness of the laminated chipboard.
- A tape measure for marking the locations of euroscrews and self-tapping screws, a square for accurate measurements, a simple pencil for making marks and a level so that the cabinet does not turn out skewed.
- Metal hacksaw for corners.
- A special drill bit designed for cutting large holes on chipboard parts.
It is better to prepare all the tools listed above in advance, so that during the work you do not urgently look for a specific screwdriver or drill.
Cabinet front system
Here we should say simply: don’t fill your brains with unnecessary things!
If you decide to cut and install the sliding door system yourself, there are special instructions for masochists on the Internet. The assembly of wardrobes put into production, of course, involves the purchase of a solid profile (4,500 or 6,000 millimeters long) and a specially equipped vehicle for transporting frameless mirrors of the required size, but a single production will definitely be too expensive.
Most of the serious companies that produce and supply systems offer installation of sliding facades as a gift if you order the entire design kit from them. There they calculate the required sections of the profile, thin “plug-in” chipboard, the sizes of the mirror, rattan, glass or wicker, the prices of the rollers and install the doors themselves.
And transporting mirrors, the size of which is 2,300 × 800 × 5 millimeters, packed in durable aluminum frames, is much easier and safer than the same ones, but “without anything.”
In this case, you just need to give the receiver an order with approximately the following text: “Clean doorway - 2,317 millimeters in height and 2,367 millimeters in width. 3 doors, one of which is mirrored, and 2 more - wow, in that color. Complete system with stops, guides and seal.”
How to work with laminated chipboard - a popular material for cabinet furniture
Currently, laminated chipboard is mainly used in the production of furniture. This is the first principle. It is wood shavings of coarse dispersion. Using the hot pressing method, it is given the shape of a sheet. In the manufacture of slabs, formaldehyde resins are used; they are an additional component. The difference from simple chipboard is the coating with a film made of paper and melamine resin. In terms of environmental indicators, it is better to use materials of class E1. Laminated chipboard boards have good compaction, due to which furniture made from them is strong and has a long service life.
Fastening the rails to the cabinet door
If you think that this material has the same composition, then you are mistaken. Based on their coating, they are divided into veneered, rough and laminated. Based on their quality composition, they can be divided into three grades: first, they use first-class sawdust (usually wood of the same species). The surface is flawless, not a single chip. The plate is decorated, laminated with film or veneer. Second grade – you can already see small defects. There may or may not be cladding. Third, there are already noticeable defects here. Such slabs are not covered with anything.
Until the cabinet is fully assembled, make sure that the attached parts do not tilt, as the fasteners may break off.
In addition, laminated chipboards are moisture-resistant and fire-resistant (withstand high temperatures). They are mainly used to make furniture frames, but are also used in the production of partitions or used as interior decoration. It is worth mentioning that laminated chipboard, due to its composition, perfectly holds nails and screws.
In order to give rigidity to the wardrobe, it is necessary to secure the back wall.
The main “steps” for assembling sliding wardrobes with your own hands are indicated in the instructions.
Furniture made from these boards has many advantages compared to other materials.
- Acceptable price indicators.
- No difficulties in manufacturing.
- Good quality.
- Significant period of use.
- Variety of colors and decorations. This will help you choose the perfect furniture for your living room, kitchen or children's room.
- Blends perfectly with other materials.
Such furniture looks great in any interior.
Another important feature of laminated chipboard is that these boards have heat and sound insulation. Therefore, they can sheathe the walls of the room.
Make sure that the holes for the shelves and hanger rod mounts match the holes on the opposite rack.
Also, if you have started remodeling an apartment/house, knowing how to assemble a wardrobe yourself will help you easily and quickly resolve the issue of moving this furniture.
Installation of rods and fittings
At the penultimate stage, the assembled cabinet body is equipped with additional fittings and accessories. Depending on the design, these may be:
- rods;
- pantographs;
- trombones;
- baskets;
- trousers;
- tie makers, etc.
The rods on which clothes will be hung are usually placed in the center of the side walls or internal partitions, at a distance of 120-150mm from the bottom plane of the cabinet roof or top shelf. The mounts into which the rod is inserted are screwed with 3.5*15mm screws. In this case, its size should be several millimeters smaller than the internal dimensions of the section (depending on the thickness of the fastening itself).
Attaching the upper rod for clothesThe rod is securedAttaching the lower rodThe lower rod is installed
Other fittings and accessories are installed in accordance with the instructions supplied with them.
Installation of cabinet walls
Before installing the side walls, pins are attached to the upper surface of the base. The side walls are mounted on prepared pins.
The next step is to attach the internal walls and shelves in a perpendicular direction. At the same stage, it is necessary to drill holes and then tighten the confirmations.
Note!
- Computer desk: TOP-130 photos and videos of types of computer desks. Choice of shape, size and material of manufacture
Solid wood table: advantages of the material. Tips on choosing the type of wood and the shape of the countertop. Photo and video instructions for production
Corner sink in the bathroom: TOP-180 photos and videos of options for corner sinks. Pros and cons of small sinks. Types and shapes and materials
It is very important to monitor the force applied, because twisting too tightly can damage the material.
Varieties
Main types of structures:
- cabinet - manufacturing requires assembly of the case, high consumption of materials, often used to delimit individual zones of the room;
- built-in - converting an unnecessary niche into useful space in the corridor, bedroom and other rooms;
- radius - all elements of the façade are made in a curved shape; the complex geometry of the device requires special skills;
- direct - a universal design method with simple installation, suitable for classic and high-tech interiors;
- corner - a more complex installation technology of non-standard shape for effectively filling the corner space.
The type of construction is selected depending on the layout and design of the room. The production and installation of parts and workpieces in some modifications can be difficult for assemblers who do not have the necessary experience, so for reliable and high-quality assembly it is better to involve qualified specialists.
How to assemble wardrobe doors?
Before assembly, complete the following preparations:
- drawing up drawings;
- calculation of dimensions and number of parts;
- purchase of components.
Blueprints
Taking into account the dimensions of the doorway (the distance between the side walls, bottom and ceiling of the cabinet), draw up a diagram of the location of future doors, their number and dimensions
Expert opinion Alexander Didenko Furniture assembler at Mabax
The Swiss company sells doors for sliding wardrobes separately. You don’t have to do the manufacturing, but buy a ready-made kit. Take measurements of the wardrobe in the store, or look at the dimensions in the catalog on the seller’s website. It is better to take care of designing the cabinet taking into account the finished doors, so as not to subsequently adjust them to your wardrobe.
Calculation
Basic data - the height and width of the opening of the sliding wardrobe body. Take final measurements of the opening after installing the cabinet body in the design position. The distance between the sidewalls is important in determining the number of doors. The generally accepted number of canvases is from 2 to 3 pieces.
Standards and recommended door sizes for sliding wardrobes
Our guide with a calculator will help you correctly calculate wardrobe doors.
Purchase of components
After the doors have been calculated, make a list of the needs for materials and fittings. Include in the list:
- The number of vertical posts, upper, lower and middle profiles, their length.
- Material, dimensions and area of filling fragments.
- Number and sizes of self-tapping screws and set screws.
- Buffer tape length.
- Number of upper and lower rollers.
- Thickness and length of the sealing cord.
To enlarge the diagram, click on the image
Expert opinion Alexander Didenko Furniture assembler at Mabax
Versailles also sells ready-made sets of sliding systems. You can easily assemble the components, resulting in a design with high quality parts and good smoothness. These systems are in no way inferior to expensive kits from other companies. The doors can withstand up to 100,000 closing and opening cycles without breaking. The minimum trouble-free service life is 30 years.
Step-by-step instructions for assembling doors for a sliding wardrobe
| 1 | Check the geometric correctness of the wardrobe opening by equalizing the diagonals of opposite internal corners. |
| 2 | Control the horizontal of the lower and upper plates, and the vertical of the side walls with a plumb line and level. If deviations of the opening parameters from the norm are detected, eliminate them. |
| 3 | Drill mounting holes in the top and bottom guide tracks. |
| 4 | Using a screwdriver, fasten the guide strips with self-tapping screws to the top plate and the base of the sliding wardrobe. |
| 5 | Attach the roller assemblies to the upper ends of the door frame posts with set screws. |
| 6 | Insert the lower support rollers on both sides into the bottom bar of the frame. Fasten them with self-tapping screws. |
| 7 | Screw the top, middle (if there is a combined filling) and bottom bar to one of the racks. |
| 8 | To correct the thickness of the filling sheets, before installing them in the grooves of the profile, place a sealant. If it is glass or a mirror, the sealant is pulled onto the sheet. |
| 9 | Insert filling sheets made of glass, mirror or MDF, laminated chipboard into the slots of the profiles. |
| 10 | By installing the second frame post, you will receive a complete door assembly. |
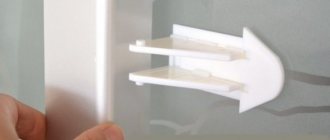
| 11 | Glue buffer tape into the outer grooves of the posts. Before installation, remove the protective film from the back of the self-adhesive tape. |
| 12 | Follow this example to assemble the rest of the doors. Begin installation in a cabinet by installing the lower rollers into the grooves of the guide track. While pressing the spring-loaded lower supports, insert the upper rollers into the guide rail. |
| 13 | To prevent accidental opening of doors, install additional spring stops and closers in the lower guides. |
For an alternative way to assemble a door with a 3-meter high mirror, see the video.
Preliminary stage
At this stage, the master faces several important tasks:
- Assessing the quality of parts and counting their quantity.
- Study the assembly instructions.
- Protection of surrounding furniture from dust and splinters that may appear during the assembly process (from drilling surfaces).
- Separately for drilling, you should prepare an old stool or a sheet of chipboard. All work will be carried out on this surface.
- Evaluation of components, fittings and rotating mechanisms (if they are provided in this cabinet model).
The preliminary stage allows you to prepare the basis for assembling the structure, and the master can study the sequence of work.