Vadim
2743 0 0
Vadim October 18, 2018
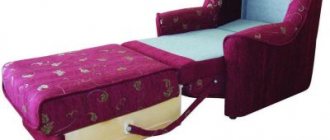
Prices for children's furniture are quite high, but a chair for a baby is not a bed or an office chair with mechanics, so you can make it yourself at home. I offer a step-by-step master class on how to independently assemble 2 versions of such furniture; all you have to do is choose the model you like.
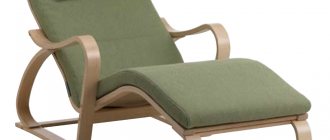
Upholstered children's furniture is highly expensive.
Kinds
Foam rubber children's furniture is divided into 2 large areas - these are rigid structures, upholstered with foam rubber and frameless chairs.
Upholstered
Upholstered chairs initially have a rigid frame made of wood, thick plywood or chipboard. Next, a layer of furniture foam rubber is glued or stuffed onto this frame, after which the entire structure is sheathed with some kind of furniture fabric.
If the structure is assembled and sheathed correctly, then such furniture will serve for decades. But at the same time, the frame chair turns out to be quite heavy and it is difficult for the baby to move or carry it. Plus, even despite the soft upholstery, a child can hit himself hard on such a chair while playing.
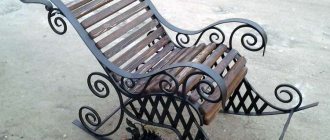
Frame furniture with upholstery is considered strong and durable.
Frameless
As the name implies, a rigid frame is not provided in these types of chairs; more precisely, the role of the frame is played by furniture foam rubber. In fact, the craftsman only needs to cut out the foam rubber and sew a cover for the structure.
Making a soft frameless chair yourself is much easier than assembling a frame structure. The only skill required to create a frameless foam chair is the ability to cut and sew. If you have the material and a sewing machine, such a chair can be created in 2 - 3 hours.
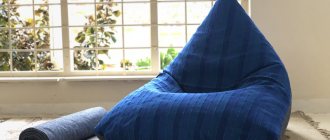
Frameless foam structures are absolutely safe for children.
Bean bag chair
The simplest option would be a pear chair or a bean bag chair.
The simplicity, perhaps, lies in the fact that this model is frameless. Some online training videos can be intimidating in their complexity. But no need to worry. Two pieces of fabric, a zipper, some straight stitching and you have an adorable bean bag chair.
- two pieces of fabric (fabric for upholstery is preferred - it is more durable);
- zipper 60 cm long;
- filler (the amount will depend on the type of material).
For seam allowances, leave 1.5-2 cm.
Progress:
- Cut two pieces of fabric 107 x 82 cm each. The cuts can be identical or in different colors.
- Fold the fabric right sides together. Sew the long raw edges using a zigzag stitch. This will prevent wear and tear. Then sew the same edges with a straight seam. It is advisable to use a short stitch length, which will also add density to the product.
- Fold the fabric in half (horizontally).
- Starting at the folded side, round the ends, cutting about 15 centimeters from the corner.
- Turn the fabric right side out. The result is a symmetrical rounded bend on one side. You've got a rough edge again. Finish it with a zigzag stitch and then straight stitch it.
- Open up the raw edge. Place right sides together, but now with the seam between the two pieces of fabric facing up.
- Sew the zipper into the hole created. You can use an invisible zipper, it will be almost invisible.
- Close the edge of the clasp with straight stitches on both sides.
- Turn the finished case right side out and fill it with filler.
Option number 1: child seat on a rigid frame
The reduced dimensions of the structure do not at all mean a lightweight assembly scheme. Children's furniture is created according to the same principles as chairs with standard dimensions, and since children are very mobile, the fastening of the units is carried out with a double margin of safety.
Materials and tools
As already mentioned, a rigid frame for a child seat can be assembled from plywood, chipboard, wood and MDF boards.
- Plywood is considered the most suitable material for such purposes; it is durable and relatively light. In theory, you can use any plywood, even thin three-layer plywood, for a child seat, but in practice it is better to take a sheet 6-8 mm thick;
For a child's chair, it is advisable to use plywood of the "FK" brand, the price for it is reasonable, plus there is complete order with environmental friendliness, as for the grade, the chair is in any case completely covered, so plywood of any grade, except 4, is suitable.
Formaldehyde is used in the production of FSF plywood, so it is prohibited to make household furniture from it.
- Chipboard - the only advantage of particle boards is that they are cheap. Chipboard material is heavy, plus under constant mechanical loads it can delaminate over time;
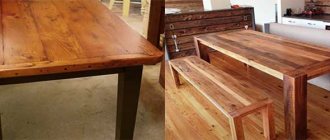
- Natural wood is a wonderful, environmentally friendly material. Working with wood is easy and convenient, but the frame of a small chair turns out to be too massive. The recommended thickness of the board is 20 mm, the timber is taken 30x40 mm, no matter how hard you try, the frame comes out voluminous;
- MDF - fiberboards are equal in weight to chipboard, but they are denser and do not delaminate. The material costs the same as plywood, but plywood has higher strength, so MDF is rarely used for such purposes.
The density of foam rubber for a child seat does not matter much, but according to the rules, it is advisable to use material with a density of 25 kg/m³ for heavily loaded upholstery.
Table of parameters of popular brands of furniture foam rubber.
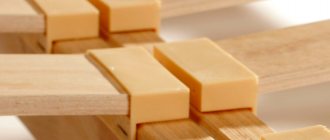
The frame will be assembled using wood screws; you shouldn’t take too long ones, 30-40 mm is enough. The structure is dry, with closed fasteners, so take ordinary steel screws, without anti-corrosion coating.
Tool set:
- Screwdriver;
- Wood hacksaw;
- Furniture stapler;
- Scissors;
- Knife;
- Roulette;
- Pencil.
To assemble the frame for a child seat, a standard set of household tools is enough.
Description of work
The whole complex of work is divided into 3 stages:
- Cutting out parts and assembling the chair frame using self-tapping screws;
- Cut the foam rubber and cover the frame with it;
- Cutting the furniture fabric and finishing the upholstery of the chair.
Work order
| Illustrations | Recommendations |
| Step 1. Sketch . For a small design, a hand-drawn sketch is enough, the main thing is that you understand how many parts there are in the chair and what size they are. | |
| Step 2. Cut out . The chair was made from scrap materials. The load-bearing sides were made of OSB, the seat was made of chipboard, and the back was made of plywood. | |
| Step 3. Screw the bars . First, wooden blocks were screwed to the bottom of the seat, at points bordering the sides and back. | |
| Step 4. Screw on the sides . The sides are cut out of OSB and are screwed to the side of the seat. Two self-tapping screws are driven into the end of the chipboard seat, and the other 2 self-tapping screws are driven into the support bars. | |
| Step 5. Assembling the back . The back consists of 3 plywood sections, they are screwed in the same way as the sides, with 4 screws each. | |
| Step 6. Fix the back. Small metal ties were used as additional fasteners, which were secured with small self-tapping screws. There were 2 ties for each joint, top and bottom. For the ties, we took a metal strip with holes; it can be easily cut with metal scissors or pliers. On the market, such tape is sold for reinforcing brickwork and other similar works. | |
| Step 7. Close the bottom . It was also decided to close the front part under the seat; for this, a piece of OSB was cut out and screwed on with self-tapping screws. | |
| Step 8. Upholster the seat . Furniture foam rubber 40 mm thick was used for upholstery. The foam rubber was attached around the perimeter using a furniture stapler. | |
| Step 9. Upholster the verticals. A single piece of foam rubber was used to upholster the backrest, and individual squares were cut out for the armrests.
| |
| Step 10. Upholstering the seat . It was not possible to cover everything entirely, so I had to unscrew the armrests and cover the seat and back separately, and the armrests separately. No complex patterns were made; basically, the material was wrapped and fixed with a stapler. | |
| Step 11. Assembly. The seat and back were completely covered, so that the frame was not visible anywhere. The armrests were covered with a soft part and a hard panel inside. Then we screwed the armrest to the chair and wrapped the outer part, securing it with a stapler from below, from the inside. This approach made it possible to hide the screws. |
Upholstery and armrests
The next step will be upholstering the seat. Take the soft lining and use construction adhesive to glue it down. Then hide the entire lining with textile covering. This can also be done using construction glue or a regular stapler.
To learn more about this work, use thematic sites and carefully study the pattern and upholstery of the chairs with your own hands.
Don’t forget about an important element, namely the armrests; making them won’t be difficult. Prepare 4 bars and connect them to the bottom of the chair using a drill.
Conclusion
Both instructions presented above are designed for the initial level of training of a master, in other words, for an amateur. The video in this article breaks down the process clearly. If after studying the material you still have questions, write in the comments, I will try to help.
Did you like the article? Subscribe to our Yandex.Zen channel
October 18, 2021
Children's design, Furniture
If you want to express gratitude, add a clarification or objection, or ask the author something, add a comment or say thank you!
Decorating the chair
Finally, we move on to the most creative part of the process—the decor. First we apply the first layer of furniture varnish. To avoid “multi-tones” along the edges of the edge, we try not to go beyond its line when we varnish the main planes of the parts, so that layers of coating do not overlap.
Table parts coated with varnish.
Sand again with 240 grit sandpaper.
If desired, you can apply a second layer of varnish.
This is such an original and high-quality set of furniture as a result of the work.
The color of the varnish can be like this.
You can cover the table and chair with colorless varnish and leave the natural tone of the wood if you use solid wood instead of plywood.
Wooden furniture set, varnished.
It is better to decorate plywood with a dark tone of varnish or paint, as, for example, in this photo below.
Here are some examples of such decor in the photo below.
Additional comfort and originality can be given to the chair by covering the seats and backs with textiles or oilcloth, and laying a layer of foam rubber inside. A furniture stapler can help with this.
A soft cushion will also add comfort to the baby chair. It is better that its color is in harmony with other elements of furniture design.
If necessary, you can make the table more convenient to use by making the tabletop inclined.
It’s easy to please your child by adding organizers to pieces of furniture.
For creative individuals who know how to draw well, decor is an excellent opportunity to show their imagination. You can depict any design on the furniture. Acrylic paints are best suited for this.
The addition of an end-to-end pattern with an ornament looks elegant.
An easier option is to make a print using a stencil, which you can buy or make yourself.
We looked at all sorts of design options for a children's furniture set. Which one you choose depends only on your preferences, availability of free time and skill level.
You can learn how to make another model of a wooden chair from the following video:
» alt=»»>
Inspire us - share the material with your friends on social networks: