How to choose legs for a kitchen set?
Any furniture is always installed on supports. And the kitchen set is no exception. Considering its dimensions and the amount of dishes it holds, you need to take the choice of legs quite seriously. After all, the foundation of the kitchen must be reliable in order to withstand heavy loads.
The second, no less important criterion for choosing furniture legs for a kitchen plinth is ease of installation and the ability to adjust. That is why height-adjustable structures are considered the most popular today.
Adjustable legs for kitchen set
They allow you to raise the base cabinet to a level that is comfortable for use or ideally match the level of the countertop with the image or with the line of the apron tiles.
If the leg is not covered by a base (as intended), then the external one is also important. Fortunately, there is quite a large selection of them on the market from different materials, different shapes and colors, so that there will be no problems with choosing the right style.
Standard height is 10 cm.
But if necessary, you can purchase legs for kitchen furniture 6, 12 or 15 cm long.
Adjustable ones can add 3-4 cm.
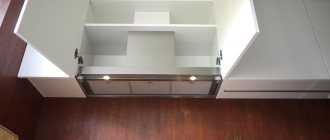
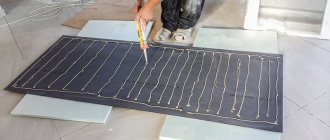
Features of installing a plinth made of chipboard
Once the legs are installed, you can begin installing the kitchen plinth. One more feature should be noted here: you should not attach the base to all the legs, two or three are quite enough. The plinth must be fixed on the outer legs and, optionally, on one intermediate one, in the case of a kitchen unit length of more than 1.5 - 2 m.
This is due to the fact that installing all the legs exactly in one straight line is very problematic. And if you fasten the base to all the legs at once, provided that the legs are slightly out of alignment, then a wave will go along the surface of the base, which will spoil the appearance of the base itself.
In order to install the plinth, the location of the legs is marked and fasteners are installed to the plinth using self-tapping screws.
Here it is advisable to use self-tapping screws with a small head. The fact is that the base mount, by its design, has the ability to be adjusted, which simplifies its installation. And if the screw heads are large, the fasteners may jam, which will make adjustment much more difficult.
The article fully covered the methods of attaching plinths, as well as the position of the plinth relative to the kitchen facade, which is very important for the ease of use of the kitchen. We noted the peculiarities of installing the plinth to the legs of the kitchen unit. This feature is important for the appearance of kitchen furniture.
If you are leaning towards a plastic base, do not forget to immediately purchase the necessary accessories for the base (corners, connectors, etc.). It is important to note that all elements should be purchased from the same manufacturer, for example, FIRMAX, so there will be no problems with different shades of elements.
If you choose a plinth made of laminated chipboard, then do not forget to make an edge to protect the plinth from moisture. In addition, chipboard plinth seals have worked well for this purpose.
How to install and adjust the height of the legs?
So, if you have already decided on the design, height and shape and have already purchased suitable legs for kitchen furniture, then the second stage will be their installation.
To install and adjust the legs, you will need the following tools:
- screwdriver with attachment for fasteners;
- 4 self-tapping screws for each support (length – no more than 2 cm, diameter – no more than 4 mm);
- construction level.
Usually they are mounted in each corner of the cabinet at a distance of 50 mm from the edge to the center of the support. But sometimes, in order to ensure a comfortable position for the legs of a standing person, this distance can be increased to 70 mm.
The number of legs can also be increased if it is necessary to increase the strength endurance of the support.
Adjustment is made only with the help of a building level. To do this, the cabinet needs to be turned over.
Watch how to install them correctly and adjust their height in the video:
Source
Features of the selection and installation of supports
In order for the furniture to stand securely, you need to choose good supports for it. We will look at what options there are so that you can choose a high-quality and durable product for your kitchen.
Types of products and their differences
Currently, the following legs for kitchen cabinets are most often found on sale:
| Illustration | Description |
| Standard round supports . The most common option, which is simple and reliable. Made of plastic, their main advantages are their low price, resistance to humidity and the ability to adjust the height over a fairly wide range, which allows them to adapt to any kitchen. | |
| Metal supports . This option is highly reliable and in many ways resembles the first type of product. Rubber spacers are placed on the supports so as not to damage the floor, and the structure is adjusted using a threaded rod. Corrosion protection - chrome or other coating. Over time, it will inevitably become damaged, so I do not recommend installing this option in the kitchen. | |
| Legs made of plastic and metal . This option combines the strength of metal and the resistance of plastic to moisture. The lower part is made of plastic, the upper part is made of steel, adjustment is made through the threaded joint of the elements. | |
| Non-adjustable metal elements . This option is used only where the floor is perfectly level, and only for furniture in which the supports will be visible. There are a lot of options - from straight, as in the photo, to curved, rectangular and even forged. It all depends on which style suits your kitchen best. | |
| Legs for a kitchen table. They are also worth mentioning, since they relate to the kitchen, although they have nothing to do with the cabinets. They can come in different shapes and sizes, with or without wheels. In the upper part there are always elements for fastening to the tabletop. |
The best option today is cheap plastic supports. In addition to their low price and ease of replacement, they are resistant to moisture, which is very important in the kitchen. And the unattractive appearance can be easily hidden with the help of a plinth panel, which is attached to special clips included in the package.
Special clips allow you to quickly and securely install and remove the plinth
Installation of legs
Let's figure out how to properly screw the supports with your own hands. The instructions for performing the work are simple:
Source: obustroeno.com
There are different options for installing adjustable supports.
Can be placed at a distance of 30 mm, or at a distance of 50 mm from the edge of the kitchen.
The deeper the base is, the more convenient it will be to approach the kitchen.
UNIQUE CUSTOM KITCHENS
You should also consider the location of built-in appliances in the kitchen. For example, the design of a dishwasher requires the installation of adjustable plastic supports to the depth of kitchen modules no more than a certain depth.
A dishwasher standing under the countertop will not allow the base to be buried to a greater depth than calculated by the manufacturer of household appliances. The example below shows that the depth of the base according to the example given is possible up to 100 mm. This parameter should be carefully checked for each project.
Articles on modern kitchens:
Why do you need adjustable legs in the kitchen?
The reason for purchasing adjustable legs for a set is most often uneven floors in the kitchen. A big advantage of the design is the ability to install the headset level and so that it does not wobble.
In second place, the reason for the purchase is the height of the lower cabinets that does not meet the requirements. In standard kitchen sets, the height of the floor cabinet is about 90 cm. The calculation includes the thickness of the kitchen countertop, the height of the body and legs. This size is designed for the average height of a woman (165 - 175 cm), in order to make her cooking activities as convenient as possible. These dimensions also correspond to household appliances, which are often built into kitchen cabinets.
Growth may exceed standard calculations. Being behind a low surface for a long time, as a result, the user will begin to experience constant back pain due to the load on the spine. Also, due to the discrepancy in size, your hands will also suffer from fatigue. Adjusting the legs helps avoid these problems by raising the cabinets higher.
| Tip: For people who are short, the lower limit of the cabinets should correspond to the height of the built-in appliances (dishwashers and washing machines). |
And, of course, modern design style also plays an important role in the use of adjustable legs. Many consumers really like it when the working surface of a kitchen set is divided into parts of different heights.
In the video, why do you need adjustable legs in the kitchen:
Adjustable feet - a similar opinion from another author
How to install kitchen legs
The number of legs for one kitchen module is calculated based on its size. For cabinets up to 800 mm wide, four supports are sufficient. For wider or corner cabinets, the number of supports increases. Modules with a width of 150/200 mm can be installed on two supports.
ATTENTION. We strongly recommend that you fasten the supports and level the modules before installing the facades and shelves.
1. Turn the bottom module upside down. 2. Make markings.
Please note that if you plan to cover the bottom of the kitchen unit with a plinth, then along the front edge to fix the legs, retreat 90 mm to the center of the plinth support. This is done so that your feet do not rest on the base when you stand at your desk.
The presence of built-in household appliances: a dishwasher or washing machine, also affects the installation of furniture supports. Recommended sizes are indicated in the instructions for household appliances. Decorative plastic or metal legs can be installed at a distance of 50 mm from the edge of the module.
Types of supports for kitchen furniture
Furniture legs must be of high quality, as they take on the entire load of the set.
The main purpose of the legs is to protect any furniture from penetration of moisture from the floor and, accordingly, its destruction. And the created air gap between the floor and the bottom of the furniture elements prevents this. For beauty, the resulting gap between the floor and the bottom of the furniture can be closed from the outside with a false panel in a color matched to the main color of the furniture. The legs play an important role, bearing virtually the entire load of the furniture structure.
Functions of furniture legs:
- Decorative. The entire set of furniture legs must match the overall design of the entire kitchen.
- Power. They are the support of the entire furniture structure. They support and balance the weight of furniture cabinets and items placed in them. And if you install them in a kitchen sofa, then so does the weight of the person sitting on them.
Furniture legs can be installed on any element of the kitchen set. They are produced in any shape, size, color range and in terms of design they are:
- wheeled;
- adjustable;
- furniture rollers;
- screw type;
- static.
Static type legs are used mainly in the production of upholstered furniture and economy class kitchen sets.
Roller feet can be used where only forward movement of the furniture is required.
Roller supports are used where only linear (not requiring the object to turn when moving) movement of furniture elements is necessary and are made in the form of a U-shaped frame with a wheel mounted on it on the transverse axis.
Conventional adjustable supports are a standard screw with a plastic knob mounted on it (so that when moving an object it does not damage the floor covering) and a counter part, which is a nut with eyes welded to it for fastening to the bottom of the cabinet. Height adjustment is made by screwing in a screw. The disadvantage of this design is the need to unload the cabinet before adjustment. When adjusting, you have to constantly raise its angle in order to set the correct height, and this can be physically difficult and requires two people to do it (one lifts, the other adjusts at the same time).
How to install kitchen legs
In most modern kitchen sets, the lower modules are installed on adjustable legs - supports and covered with a single tabletop.
Using adjustable legs, you can compensate for unevenness and slope of the floor, thereby leveling the overall tabletop covering the lower cabinets. Adjustable supports for kitchen units can withstand significant loads and can be made of plastic or metal, which also perform a decorative function. Plastic kitchen supports do not have an entirely attractive appearance, but a special clip is included with the leg, with which the kitchen plinth is attached to the support. The kitchen set, installed entirely on plastic legs, is closed at the bottom with a decorative plinth, which can be removed if necessary. If you want to leave the legs open, you should install decorative metal legs - supports - in visible areas.
For one lower module up to 800 mm wide, four kitchen supports are enough. Wider and corner cabinets require more furniture legs. Also, if there is a vertical partition in the lower module, it is also advisable to install supports under it.
Regardless of the material, the installation of adjustable feet is similar. The kitchen leg is attached to the chipboard using four 16 mm self-tapping screws and one central bolt. Before installing the kitchen legs, set all supports to the lowest position, that is, screw them completely.
kitchen with plinth and legs
Turn the bottom module over and start marking. Please note that if you plan to cover the bottom of the kitchen unit with a plinth, then step back 80 - 100 mm along the front edge to secure the legs. This is done for the purpose that when you stand at the desktop, your feet will not rest against the plinth. Where the legs will not be closed with a plinth, move 50 mm away from the edge.
To fix and install one kitchen leg, move 50 mm away from both sides, draw a cross and put a dot at the intersection. Place the kitchen leg on the bottom of the module so that the point is under one of the four holes. The other two holes should be above the lines of the drawn cross. Screw in three screws according to the markings, then screw in the fourth. Do the same with the remaining legs.
installing kitchen legs
Then, when you have installed all the legs on the kitchen unit, start leveling the lower cabinets on the countertop using a level and adjustable supports. Cover the lower modules with a tabletop. Achieve a horizontal position of the countertop by adjusting the outer legs of the kitchen set. Then unscrew the remaining supports so they sit firmly on the floor.
Installing legs on a kitchen set with your own hands is not difficult; it requires care and accuracy.
Source
Materials and design
The design of adjustable cabinet legs is a screw with a knob that protects the flooring from scratches when moving furniture. At the other end of the support there are special fasteners designed for the base of the cabinet. To adjust the height, you need to twist the screw present in the structure. Adjustment can occur within four centimeters.
Manufacturers offer supports from the following materials:
- Plastic. Such products are much cheaper than their metal counterparts, and the material is considered quite practical and resistant to various types of contamination. If the support breaks for any reason, it is easy to replace it with a new one. Most often, the legs are made in square or cylindrical shapes in different colors, but white and brown models are especially popular.
- Metal. The appearance of these products is much more presentable than that of plastic options. Metal supports are most often chrome plated, with a matte or glossy surface. They are easy to care for, reliable and wear-resistant, durable and can transform any kitchen set. Metal legs are available in three versions: tubular, stamped and cast. Tubular ones are the most budget-friendly and popular, stamped ones can be used for low cabinets, and cast ones are suitable for expensive custom-made sets.
There are also wood models, but they are rare in modern kitchens and are used mainly as decoration. The price of wooden decorative legs is quite high, but they are not durable, since if they are not used carefully, they can quickly lose their appearance, dry out and become deformed.
DIY kitchen assembly - step-by-step instructions
After renovating your kitchen, you will probably decide to update your old kitchen set. As a rule, most stores selling kitchens impose an assembly service, and many are not even manufacturers of this kitchen, but simply order it from the factory and act as intermediaries. In any case, we will pay, although assembling and designing a kitchen yourself is not so difficult at first glance. In this article we will tell you how to independently make a design with exact dimensions, non-standard elements and how to assemble a kitchen into a single composition.
Nuances of choice
When choosing supports, it is important to pay attention to the following points.
| Selection criterion | Characteristic |
| The presence of soft padding on furniture legs | Felt protective pads on furniture legs prevent the leg from damaging the bottom of the furniture. Felt is also used for their manufacture. Felt underlayment is very effective and affordable, and extends the life of the support. Therefore, you should not refuse to purchase such gaskets. Stickers for furniture legs can be picked up in the store. The choice of lining shapes is wide. |
| Material of manufacture | Metal models are more durable and practical to use, while wooden and plastic models are slightly less durable. However, when choosing a manufacturing material, a lot depends on the design features and its stylistic direction of decoration. For laconic high-tech only metal models are suitable, for country - wooden supports. |
| Design | The external aesthetics of the design must fully match the aesthetics of the headset, so when choosing such products, be sure to bring a photo of it to the store. This will allow you not to make a mistake in your choice and choose the most attractive supports. |
Tools
Before assembling the kitchen set, you need to assemble the tools for work. Simple tools are required, but they make the job much faster and easier.
- Screwdriver or set of screwdrivers.
- Drill with drills of different diameters.
- If the walls are concrete or brick, you need a hammer drill - drill holes for fastening the upper cabinets.
- A hacksaw or jigsaw may be required.
- Hex key - for fasteners (can be included in the kit).
- Hammer, ruler, square, bubble level.
DIY kitchen assembly can take a day or more
It's a good idea to have a plane builder or laser level. It makes arranging cabinets in one plane much easier.
Assembling a kitchen unit with your own hands - instructions for assembling lower and upper cabinets
In the previous articles “Do it yourself kitchen set” and “Designing a kitchen set” we examined in detail the features of the manufacture and design of kitchen furniture. Now it’s time to describe the process of assembling the kitchen set and its features.
So, we have furniture parts made according to our sketches. We have to connect them together. As a rule, there are no holes for fastening, which means you will have to make them yourself. In addition, the choice of furniture fasteners is also ours.
There are several types of furniture fasteners that can be used to assemble a kitchen set. When assembling, we will use a furniture screed called confirmat. This is a universal screed to use, which, firstly, is easy, and secondly, it suits us best.
Why? Because this is the simplest type of furniture screed and working with it is simple and quick. So in 99% of cases, when assembling a kitchen set, confirmat will be used. However, the confirmat has two big drawbacks: firstly, it is an open fastener, i.e. it is visible on the surface of the furniture, and secondly, it does not tolerate assembly and disassembly well. But these shortcomings should not frighten us. Firstly, because 95% of the fasteners in a kitchen set are not visible; they are covered either by the facade or by adjacent drawers. Secondly, given that the kitchen set is made according to the dimensions of the existing kitchen, the likelihood of having to disassemble it is reduced to zero, even when moving. Since it is unlikely to fit into a new kitchen with different sizes.
A few more words should be said about the confirmation. It comes in different sizes. It is advisable to purchase one with a diameter of 6 mm with a hex key head. This type has a smaller cap, and as a result, it is easier to recess it into the body of the part, and the likelihood of chipping is much less.
Now a few words about what tools are needed to assemble a kitchen set. We will need the following tool:
- Drill for drilling holes.
- A screwdriver for screwing the confirmat, since manually twisting such a quantity of fasteners is problematic.
- Square for checking the correctness of the connection, preferably metal.
- Hammer and nails 20 mm long , or a furniture stapler for fastening the back wall of the drawers. It should be noted that the stapler must be powerful enough, otherwise it may not penetrate the HDF, so just in case, have traditional nails and a hammer of the appropriate size on hand.
- A device for aligning parts, more about it later.
- A special drill for confirmation or two drills for wood with a diameter of 5 and 6 mm, respectively.
assembling the kitchen set by assembling the cabinets . It is advisable to start with the cabinets on the bottom row, as they can be installed directly into place, thereby providing free space for assembling the upper cabinets.
The main task when assembling cabinets is to assemble them evenly, especially the front part. Why am I focusing on this? Firstly, despite the fact that the parts are made to order, the dimensions may vary slightly within 1 mm, if you do not pay attention to this, it may not turn out exactly. Secondly, to ensure high-quality assembly of the kitchen set, it is necessary to assemble it on a level base.
Again, to ensure the evenness of the assembly of the front part of the cabinet, the parts are placed on a flat base with the front part. It is also convenient to use special tools for assembly. Making them yourself will take a little time. The use of these devices will speed up assembly while maintaining high quality.
This device ensures tight joining of parts and prevents them from moving apart during drilling.
So, we install the parts into the fixtures and drill a hole for the confirmation.
Pay attention to the laminated chipboard pads at the end of the cabinet, they are necessary to level the front part, and there is no distortion.
Assembly of kitchen cabinets
The disassembled kitchen set is a set of boards of different sizes, a certain amount of fittings and a set of fasteners. From all this you need to assemble cabinets. Usually there are wall-mounted and floor-mounted ones. How to assemble a kitchen set, in what order - the choice is yours. Some craftsmen find it more convenient to assemble them in pairs - the top one, then the bottom one, and install it that way. But there are two other ways: first collect all the top ones, hang them on the wall, then all the bottom ones. They do the opposite - assemble and install the lower ones, then the upper ones. In general, any method is correct, do what is convenient for you.
The correct installation of the confirmat is in the middle of the chipboard
Assembly of wall cabinets
In any case, let's start assembling the cabinets. A typical wall cabinet consists of two side panels, a top, a bottom, a back wall made of HDF and two doors - the facade. The assembly order is as follows:
Installing hinges
The facades (doors) are finally hung after everything is assembled and put in place, but the hinges are installed from the very beginning. They come in mortise (considered more reliable) and overhead.
Tabletop Installation Tools
Before you begin, make sure you have all the equipment necessary for installation. You will need:
Pencil, tape measure, level.
Silicone sealant and a gun for it.
Wood saw or jigsaw. The second option is preferable because the cut will be smooth and there is less risk of deforming the surface.
Fasteners to secure the tabletop to the cabinets.
Aluminum strips to give the kitchen a finished, neat look. They come in 3 types. End caps are used to decorate the raw edges of MDF or fiberboard boards. To connect table parts at an angle, use corner samples. If the tabletop consists of several parts arranged in one row, the joints are masked with connecting strips.
If you plan to cut the front part of the tabletop, the edge must be treated with adhesive tape. It is ordered together with the table from the manufacturer. We will describe the technology for gluing it below; this will require an iron and fine-grained sandpaper.
How to hang cabinets in the kitchen
Even before assembling the kitchen set, you need to purchase canopies and intersectional furniture ties for attaching wall cabinets. Let's start with awnings; they come in different types, so we'll talk about them.
You already know how to assemble a kitchen set, you need to figure out how to install it in place. Kitchen wall cabinets are mounted on the wall. They are secured using furniture canopies. They come in the form of metal plates with holes for fasteners, but there are also more complex designs. Cheaper ones are ordinary metal plates. They can be of different shapes, made of ordinary or galvanized steel.
Simple awnings
The most common option (top left) is a plate with two small holes for fasteners and one large one (a hook or a screw head installed in the wall is inserted into it). It is installed on the end of the sidewalls - on the right and left. Under heavy load, this type of canopy can break, since the fasteners are located at a short distance from each other and the chipboard can fall apart. The bottom option is more reliable - more fasteners, but there is still a risk.
Furniture canopies
The other two types of furniture canopies are more reliable, since one of the screws will also be installed in the cabinet lid, that is, the load will be distributed over a larger area.
The corners performed well. One edge of this canopy is attached through the lid. A through hole is made, a bolt with a washer is installed at the bottom, and a nut (also with a washer) is tightened at the top. They are installed at a distance of 5-10 cm from the edge; if a large load is expected, you can install three or four pieces, which is impossible with previous models.
Kitchen cabinets are hung on corners with pads - to compensate for the difference in the thickness of the backsplash
The common drawback of all these mounts is that they are not adjustable. As they hanged, so it will be. There is no way to move it away from the wall or towards the wall. If the kitchen apron protrudes above the surface. walls, you have to mount a plank on the wall or select a lining (a piece of plywood, a piece of wood, etc.) for each fastener. The second drawback is that a separate hook or dowel must be installed under each canopy. Not very comfortable.
More modern furniture awnings for kitchen cabinets
Adjustable
A more complex and expensive canopy consists of a plastic body, a metal canopy and an adjustment system that allows you to move it forward/backward and up/down. These canopies are attached to the side walls of the cabinet from the inside; a small hole is cut in the back wall. These canopies are paired with a mounting rail or strip. It is mounted on the wall, and the hooks of the awnings cling to its upper protrusion. It is very easy to install and remove wall cabinets with this mounting system, and they have a sufficient “load capacity” of 20-50 kg per canopy (depending on the model and manufacturer).
Installation
Component manufacturers offer adjustable supports with a height of 10, 12 and 15 centimeters. The adjustment is usually 3-4 centimeters. When installing the legs, you should use some recommendations:
- The support is screwed to the furniture using self-tapping screws that come with it.
- If the width of the cabinet exceeds 800 mm, then it is better to use not four, but more supports, for example, six. So, the furniture will be much more stable and reliable.
- When adjusting the height of the module, it is better to use a building level in the process. This will prevent the furniture from tilting and uneven installation.
- Installing the legs at a distance of 8-10 cm from the edge of the cabinet will make the furniture lighter and weightless.
For a kitchen set, there are also certain parameters for installing cabinets that will make kitchen work more comfortable. For example, it is more convenient to use a sink when it is located at a height of one meter from the floor. This will significantly reduce the load on the spine while washing dishes. For a hob, a height of 800 mm is preferable, and for a work surface – 900 mm.
The choice of kitchen legs for a set is very important, because the comfortable use of furniture and interior design as a whole depend on their quality, material and appearance. Kitchen supports do not require special care; it is enough to regularly wipe them with a damp cloth or napkin to remove dust and other contaminants.
How to install a kitchen unit
As already mentioned, the order in which the lockers are installed is arbitrary. You can hang the top ones first, then the bottom ones, or vice versa. It doesn't matter. The installation order is important: always start from the corner. How smooth this first cabinet will be will determine how easy the subsequent installation will be.
The installation height of wall cabinets depends on the height of the “users”, but not lower than 45 cm from the level of the countertop. When hanging cabinets on the wall, mark a horizontal line. It can be drawn using a bubble or water level, but the easiest way is to expand the plane to the required height using a level or plane builder. The upper edge of the mounting strip is installed along this line or the cabinets are aligned when installed on conventional canopies.
The task is both simple and difficult at the same time - to arrange the cabinets so that they are on the same level, and their walls are vertical and horizontal. In this case, there will be no problems during operation.
Furniture intersection ties
Since kitchen furniture consists of separate cabinets, they are fastened together. There are two options - install, then fasten, or first fasten, then hang. The second option is possible if you have helpers - hanging even two fastened cabinets alone is not an easy task.
The cabinets are fastened together using intersectional ties. They are of different diameters and different lengths - under laminated chipboards of different thicknesses. At least two ties are needed for one wall. They are placed in the area of the loops - a little lower or a little higher. Two cabinets are placed in the same plane, their walls are fastened with clamps, a through hole is made - along the diameter of the tie, into which the fasteners are installed, tightened with a screwdriver or screwdriver.
How is the plinth attached to the kitchen legs?
Fastening the plinth is most often trusted to professionals, but if you carefully study the instructions, you can carry out the installation yourself, saving the family budget. Before starting work you need to prepare:
- glue;
- screwdriver for mounting PVC panels;
- silicone sealant for aluminum or plastic base;
- self-tapping screws;
- any marker;
- ruler.
Installation work begins only after the kitchen furniture has been placed in the chosen location:
- The slats are attached to the cabinet legs with special fasteners that come with the furniture. On a plastic or chipboard strip you need to make marks corresponding to the distance between the cabinet legs. You can only attach the plinth to the outermost ones, and if its length is more than a meter, you still need to make a mark in the middle. If fastenings are made too often, the bar may bend, which will affect the appearance of the headset.
- On the inside, the plastic and aluminum boards have special gaps into which clips are inserted at the required distance. The fastenings are screwed to the chipboard base using self-tapping screws with small heads. When the clips are located at the desired distance, you just need to snap them behind the cabinet leg.
- Aluminum strips along the edge can be sealed with a transparent sealant to prevent the possibility of water getting under the set. And special silicone pads (base plates) are put on PVC strips, which ensure a tight fit to the floor.
- The depth of the base in front of the edge of the cabinet should be approximately 15 centimeters so that it is comfortable to stand while cooking. The side panels can be mounted at the same level as the furniture, but it is better to “sink” them at the same distance.
- Aluminum planks require the use of special plugs and corner structures, the assembly of which does not require much time and effort.
The color of the base may match the main shade of the kitchen unit or differ from it. Whether to use slats or leave the legs open is a purely personal matter. It depends on the taste of the housewife, the interior and style of the kitchen. According to design projects, the plinths can be used for retractable baskets, and lighting or LED strips of various colors can be built into them. But the main thing remains - they help to recreate a single image of the kitchen set and give the kitchen a unique look and special charm!
Varieties
The range of supports for kitchen units is very large. You can choose the right size, shape and color to suit any kitchen style. At the same time, kitchen legs can be distinguished according to several parameters.
Form
Modern designers offer an almost endless number of possible options: from the banal to the most non-standard. Conventional cylindrical supports are considered classics, but in addition to them there are:
When choosing the shape of the legs for the set, you need to take into account the supports of the rest of the kitchen furniture. Manufacturers often produce components for tables, chairs, sofas, etc. in one collection. A single style of supports will be very beneficial to unite all the elements of furniture, making the interior whole and complete.
Types of furniture legs are not limited to the above options, but other types are practically not used for kitchen sets. The same wheeled models often cannot withstand the load, so they are used only in isolated cases.
Material
Any of the forms can be embodied in various materials. The most common types:
Often, in order to reduce the cost of the headset, designer metal legs are installed only on the front (visible) part. Hidden supports are replaced with inexpensive plastic analogues. On a volumetric headset, using such a substitution you can save several thousand.
Dimensions. Adjustable and non-adjustable
Depending on the material and manufacturer, the supports are adjustable or non-adjustable. The latter are much more convenient; they allow you to change the height of furniture legs by a distance of 20 to 40 mm (depending on the manufacturer). This is very convenient if the floor covering has differences. With this adjustment, it is easy to level the countertop and cabinets, regardless of the slope of the floor.
Non-adjustable are available in three standard sizes:
If the floor is flat, then in most cases this set of values is sufficient. Plinth strips are produced to suit every standard height. But if there are unevenness and differences in the floor, it is better to give preference to adjustable kitchen supports.
Some models of plastic legs can be cut to the desired height. Theoretically, it is possible to trim supports made of solid wood or aluminum, but the final version in this case does not always look aesthetically pleasing.