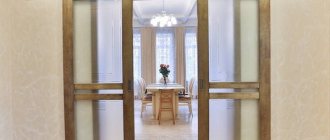
Sliding wardrobes are extremely popular among residents in big and small cities. Today, this design is a system that saves a significant amount of free space in the room. This system will fit perfectly into any room, regardless of style and design.
Advantages of a sliding wardrobe
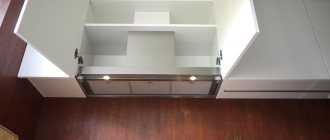
Freestanding wardrobe
A sliding wardrobe can be installed even in a small room. If you bought a cabinet and want to install the doors yourself or simply replace the old ones with new ones, follow the recommendations provided in the articles. The work will not be difficult, and the installation will be very fast, without taking away any strength. Previously, the installation of hinges on cabinet doors was considered the most problematic area. Now, this is a thing of the past, because few people are interested in simple wardrobes, but sliding wardrobes are purchased for every home.
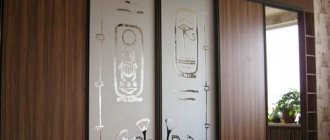
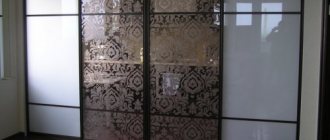
The sliding system of sliding wardrobes allows furniture to open 90 degrees, and in a straight line, due to this there is no need to leave space nearby. Things from such a cabinet can be easily obtained, and the façade can have a varied appearance, so even a person whose room is decorated in an unusual style can choose furniture. You can decorate the structure yourself with painting, placing a photograph or drawing an unusual landscape. In addition, molding or artificial aging will look good on such furniture.
Do-it-yourself installation of wardrobe doors
When undertaking a major renovation of an apartment, many also think about changing the furniture. Replacing an old cabinet with a new one is the desire of many. When doing this, most people prefer to buy sliding systems. They are comfortable, save space, and fit well into any interior. Such designs gained enormous popularity immediately after their appearance on the furniture market and continue to hold a leading position. You can entrust the assembly of the sliding wardrobe and its repair to a specialist or do it yourself.
Cabinet assembly
The cabinet is easy to assemble. The supplied package includes step-by-step instructions. Some difficulties may arise during the installation of the facade, because for their accurate and long-term operation it is necessary to install them exactly according to the diagram.
Required parts for assembly
For installation you will need: two guides for each door (for a two-door door - 4 pcs., for a three-door door - 6 pcs.). It is impossible to save on parts of this type, since they take on the entire weight of the sliding system. A stopper is also needed. It ensures smooth and reliable closing of doors.
Check parts for fit. Each should be equal to the width of the facade itself. An error of a few centimeters is insignificant. Let's move on to installing the door for the wardrobe with our own hands. We start by installing the guides. It is important to do everything step by step, according to the assembly diagram. You can see how to hang a door by watching the video material.
Preparing for work
First you need to completely assemble the wardrobe body. You need to make sure that it is perfectly level. If necessary, make the necessary manipulations to achieve the desired result. If this is not done, then there is no point in installing door panels, since the end result will not suit you. They will stand unevenly, on the sides, between the doors and the walls of the cabinet (in the closed position) there will be visible gaps that hurt the eyes. To fix this problem, you will need to dismantle the door panels yourself and do all the work from the very beginning.
To install cabinet doors with your own hands, you must have a set of tools, which includes:
- drill;
- a screwdriver with a set of bits, or a set of screwdrivers;
- metal drills;
- pliers;
- hammer;
- hacksaw for metal;
- building level, plumb line;
- tape measure, construction ruler or square;
- pencil;
- hexagon.
What components should be available:
- guide profiles designed for fastening to the ceiling and floor;
- door panels assembled with fittings;
- clamps (stoppers);
- buffer tape.
Stoppers
When both guides are installed, we proceed to installing the locking parts.
Stoppers for wardrobes
Locks are systems that allow you to tightly hold the door in the required position. Installation takes place in the lower parts, in the grooves of the lower direction rails. For one door, one stopper will be enough.
For a double-sided door, you need to insert one stopper into each groove, and screw the bottom guide. We insert the door and adjust the closing tightness using the installed system.
Important! To accurately install the system in the required location, it is necessary to close the door tightly and mark the middle of the roller on the line itself. We remove the door and place the stopper in the middle of the marked point. If necessary, it can be easily moved using a flat-head screwdriver.
Door adjustment
The lower wheels were designed so that with the help of an adjusting screw located on them, it was possible to adjust the uniformity of the door to the side panel at the top and bottom. To do this you will need a special 4 mm hex key.
If necessary, lower the right corner and adjust the right wheel. To do this, turn the adjusting screw counterclockwise and vice versa.
Buffer tape for doors
Attaching the Buffer Tape
This tape is required to protect the “inside” of things in the closet from dust. It is attached to the side of the facade itself and softens the impact of the doors on the side parts of the frame when closing. If you no longer need to adjust the mechanism, you can start gluing the buffer tape. With its help you will close all possible holes from the vertical end of the door itself.
Short and long pile tape is available for sale. The first type has a pile from 3 to 6 millimeters, the second - from 6 to 12 millimeters. Which tape to buy depends on your desire. Short pile is purchased more often due to its lower price, but its analogue copes with its task better. We select the shade of the device to match the color of the furniture itself. To glue, remove the protective part from the adhesive side and, starting from the top or bottom, smoothly press it towards the end.
Door repair
After a certain period of time after the start of use, sliding doors may begin to close poorly. This is often due to dust, lint and other debris getting into the working mechanism. Repair in this case consists of lifting the blade up as much as possible and assessing the condition of the roller that sets it in motion. The mechanism is cleaned of accumulated debris, and if necessary, the roller is replaced with a new one.
If the door jams in one of its positions, we can conclude that the profile is deformed. Repair in such a situation comes down to aligning the guides. If this is impossible to do for any reason, then it is replaced.
For more serious damage, such as a cracked mirror or bent frame, replacing the broken element of the system will help. Such repairs can be done with your own hands by purchasing all the necessary parts in advance. To do this, you need to remove the door and disassemble it, after which a replacement is made. After replacing the part with a new one, the door needs to be put back in place.
Step-by-step guide to calculating the assembly and installation of sliding wardrobe doors
Manufacturing swing doors is much easier than manufacturing and installing a sliding system. But, if you are not confident in your abilities, it is easier to purchase a ready-made “alliance” system or any other system that you like better. Then the work will move faster.
First, let's look at how to measure the required width of the door system so that you don't have to cut or change it later.
Let's start with the width
For example, the entire closet is 200 centimeters wide. Subtract the wall thickness on each side (1.5 centimeters). The resulting total width for the doors is 197 centimeters. Here it is assumed that two sashes will be installed; accordingly, it is necessary to take into account the distance that the sashes will overlap each other. Experts recommend leaving a margin of 2.5 centimeters. We add this figure to the total width and get 202 centimeters, divide the figure by two and get 101 centimeters for the width of each sash.
After this you can determine the height
We take the height of the structure (for example, 240 centimeters), also subtract the thickness (1.5 cm on each side), subtract the gap between the guides (1.5 cm) and get (240-3-3=234) the height of the door. It turns out that the dimensions of the facade are 101*234 centimeters.
Once all the dimensions are ready, you need to calculate the amount of material required and its accessories. Often necessary: 4 vertical handles, a profile for framing the lower and upper parts.
Top guide
The upper guide profile, when viewed from the end, is shaped like the letter “W”. Two of its grooves are designed for sliding wardrobe doors. Canvases are not hung on it. It serves to fix the sashes and prevent them from swinging from side to side and moving from the line of movement.
Wardrobe door assembly diagram
We prepare the profile for installation. To do this, you need to measure the width of the cabinet, namely the distance between the inner sides of its side walls. Subtract 1-2 mm from the obtained value and measure the profile of this length. Designate the cutting location with a pencil. For this we use a construction ruler or square. We cut the profile with a metal hacksaw. It will be easier to cut if you place a chair nearby and use it as a support.
In the workpiece, using a drill and a metal drill, we make holes in increments of 45-60 cm. It is important that the holes are in both grooves of the guide (each pair is on the same line). If this condition is not met, the rail may twist slightly, which will create additional difficulties. The quantity is determined by the length of the profile. We rub the holes with sandpaper to remove metal fragments that were formed as a result of drilling.
We place the upper guide flush with the ends of the side walls and fasten it to the ceiling using screws and a screwdriver.
Framing the façade
To build the frame you will need:
- 8 self-tapping screws for tightening the profiles together;
- 4 wheels for support;
- 4 bolts to secure the wheels;
- 4 positioned supports on the top direction rail.
Place a handle on the vertical profile and make it equal to the height of the door (no need to remove the protective film). The result should be parts. We cut off the top and bottom horizontally so that the previously made size corresponds to the width, and subtract 2.5 centimeters from each side.
Mark the locations for the holes. We measure 7.5 millimeters from the edge of the vertical and horizontal parts and drill at the point of contact. We make calculations from all sides and make holes at these points with a diameter of 0.5 centimeters.
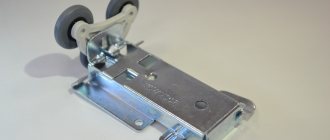
Types of rollers
The first type of rollers consists of 2 wheels with bearings. On the outside, their surface is rubberized. This allows you to achieve a reduction in noise when moving along the guides. Depending on the type of guide profile, closed or open, different rollers are used, both in design and size.
If the profile has an iron coating, 39 mm rollers are used, and if it is wood, then 37 mm.
The 2nd type of rollers is responsible for noiseless movement and the service life of the entire system. Higher quality rollers are equipped with pressed bearings. Another purpose of these rollers is to adjust the door leaf in space.
Rollers from different manufacturers have different service lives. When purchasing a sliding system, saving money can cause you a lot of inconvenience, ranging from unpleasant sounds when opening doors to their breakdown. It is better to purchase high-quality products that will save you time on frequent repairs. One of the main causes of roller wear is the accumulation of debris in the guides.
READ Put new doors in a new frame
In this regard, the wheel and the roller fixing mechanism fail. After which, the door leaf begins to move along the floor or inside the guide, and over time, it completely falls out. Properly, in order to extend the service life of the sliding system, you need to wipe the guides.
Installing the filling
Many people wonder how to glue a mirror to a cabinet door? So there is no need to glue anything. The main thing is to insert it correctly.
If you decide to install a mirror, we start by installing a rubber seal around the entire perimeter of the mirror part. After this, unscrew the frame a little (to do this quickly, remove the screws that were used to tighten the profiles). Then we insert the finished connection (mirror + seal). The main thing is to install it in the upper and lower parts; the sides will assemble on their own. Then, again, we tighten the structure together.
It is important to ensure a uniform connection, otherwise the mirror surface may crack. The same assembly principle is suitable for USB molded-in panels, plastic panels or other façade materials.
When the facade is inserted and securely fastened, it is possible to install sliding wardrobe doors. We do everything according to the instructions above. Place the door into the top track and push the bottom of the door into the bottom track. We check the ease of movement and the operation of the stoppers. And the sliding system is ready.
Installation instructions
The most important part of the work is installing the doors. They can only be put in place after the cabinet has been completely assembled. Its doors should be perfectly level. The entire performance of the structure depends on this. Therefore, before installing the sliding system with your own hands, level the floor surface and ceiling.
To install wardrobe doors, you need to perform a certain sequence of actions.
- Installing the top guide.
- Attaching the bottom guide.
- Installation of the clamp.
- Adjustment of canvases.
- Buffer tape sticker.
Installing the top guide yourself
The upper guide is a W-shaped metal profile. It is attached flush with self-tapping screws at a distance of 450-600 millimeters parallel to each other, that is, in each recess of the profile. If this is not done, the profile becomes slightly twisted, which affects the operation of the system. For fastening, first measure the width of the cabinet at the top, subtract 1-2 millimeters and cut off the guide. Using a drill and a drill bit, we make holes for the screws, which are then ground.
Attaching the bottom guide
To attach the bottom rail with your own hands, the width of the cabinet at the bottom is also measured, then holes are made on the profile. The installation has one peculiarity. The profile must be fixed with an offset inside the structure. The recess is 20 +/- 2 millimeters. The exact distance is determined as follows.
Simply place the guide in the cabinet. Then you need to install the sashes. You can't do this without an assistant. The rear panel is placed first, and then the front panel. One person will insert it into the upper profile, and the second into the lower one, while lifting the wheels. By moving the profile, align the door strictly vertically using a level. Having determined the ideal position of the canvases, we fix the guide.
Installing the retainer
The lock is necessary to ensure that the door leaf does not slide, but remains in the closed position, fitting tightly to the side wall of the cabinet. It must be inserted into the bottom groove of the profile before it is screwed to the bottom. The latch is adjusted using a flat screwdriver. It must be placed in such a position that the middle of the stopper is where the middle of the wheel is when the blade is closed. To do this, before installing the stopper, the blade is closed and the location of the middle of the wheel is marked on the profile.
Adjusting the blades
After installing the doors in place, you need to make adjustments so that the door fits evenly to the side and does not form gaps. For this purpose, the lower wheels have adjustment holes. The setting is made with a hex wrench. Turning clockwise raises the blade, counterclockwise lowers it.
Buffer tape sticker
The function of the buffer tape is to protect the contents of the cabinet from dust. Therefore, there is no way to do without it. In addition, it softens the impact of the canvas on the sidewall when opening, increasing the service life of the sliding system.
Buffer tape can have two pile lengths:
- 6 mm – short;
- 12 mm – long.
Long pile tape is not used often, but will provide more comfortable use of the cabinet. Its color matches the color of the entire system. It is easy to glue with your own hands. You need to remove the protective layer from the back side and attach it to the end of the door leaf.
How to calculate sizes correctly
Self-production involves two approaches. The first option comes down to measuring the opening, after which a decision is made on the number of sashes. After this, you should contact a company that practices manufacturing doors for sliding wardrobes, but first you need to make inquiries so that the company does not sell components taking into account their installation, which is quite rare. Company managers will be able to calculate exactly what components are needed and in what quantity. Even though everything is very simple, you should not count on managers to do it for free.
The second option is complete independence from various types of managers, since it involves an independent search for all the elements, especially since in construction stores everything can be found in a wide range. It may take a little longer, but it will be much cheaper.
Calculation of wardrobe doors. Details.
Doors
The width of the sashes is chosen so that access to the handle is free, while one sashes should not overlap the other sashes too much. If two doors are enough for a wardrobe, then the width of the sides is calculated as follows: take the width of the opening and add the width of the profile to it, after which the resulting dimensions are divided by 2.
For example, with an opening width of about 1500 mm, the profile width is added to this value, for example 26 mm, for a total of 1526. Then the resulting value is divided by 2 and the result is 763 mm. The width of the handle profile may differ, so the actual value of this parameter is substituted.
Profiles may be different, so they must be measured individually
If it is planned to install 3 sashes, then double the width of the handle profile is added to the calculations, which is expressed as 2000 + (23x2) for a total of 2046. Then this amount is divided by 3 - 2046/3 and the result is 682 mm.
The height of the sashes is determined as follows: take the actual height and subtract about 45 mm from this value to obtain the required height of the sashes. The side profiles are adjusted to this height. So, the dimensions of the valves are determined.
Filling
The filling (material) of the sashes is located in a frame assembled from profiles. To calculate the length and width of the filling material, proceed as follows: the width is determined using a simple arithmetic operation - the double value of the width of the side profiles, as well as the top and bottom, is subtracted from the total width and length when determining the length.
Measuring the width of profiles
If the filling material is thinner and a sealant has to be used, then this must also be taken into account.
In short, first of all, you need to carefully think through everything and purchase all the components of the future design, which may differ in size, shape, method of fastening, etc. This is the only way to correctly calculate and then install, securing all the elements.
Profiles
The side profiles must have a length corresponding to the overall height of the sash. Horizontal, that is, the upper and lower profiles are cut off, taking into account the width of the handle profile, multiplied by 2.
How to measure handle width
For example, the width of this profile is 23 mm, so the size of the horizontal profiles is as follows: 762-(23x2) for a total of 696 mm.
In the video below you can learn more about the assembly of the door frame.
Cutting profiles and assembling the frame of sliding wardrobe doors