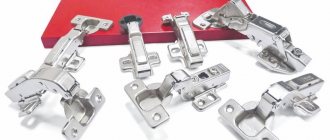
A situation often arises when it is necessary to install a furniture hinge into a chipboard board, for example, when installing a chipboard door. This task involves drilling a hole for a hinge in the chipboard. In this article we will look at what you can use to prepare such a hole and how to install a loop in it.
So, in our case, when making a cabinet from chipboard, a mistake was made - the groove for the hinge was drilled too low, as a result, after installing the hinge in the prepared place, the internal horizontal door cannot open completely. As a result, it is necessary to move the groove slightly upward to eliminate this drawback.
Error in choosing the location for the groove for the hinge
Return to content
Tools and materials
During the installation of furniture hinges for chipboard, we will need the following tools:
1. Forstner drill with a diameter corresponding to the loop (in our case 35 mm). The drill is a cutter for making a groove for hinges. These drills sometimes come with stops (designed for chipboard thicknesses of 16, 22, 25 mm), which allow you not to worry about how deep you should go;
2. drill;
3. screwdriver.
The materials we need are the hinge itself and the screws for fastening it.
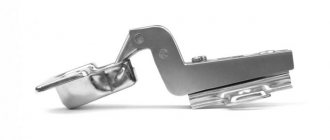
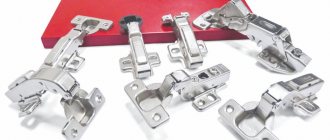
Internal furniture hinge for flush mounting, right angle
Screws
Return to content
Installation
At the first stage, it is necessary to carry out accurate markings. Using a pencil and tape measure, mark the upper and lower boundaries of the door hinges. Let us remind you that the upper and lower distances are 20-25 cm. Depending on the length and width of the loop, you need to mark the place for the recess. To do this, attach the loop to the box along the first marked line and outline its outline. Act with maximum precision, the lines must be strictly at right angles, use a level to check.
Be sure to take measurements before installing hinges
Do the same with the bottom loop, remembering that the line marked below is the bottom edge of the loop. If it is necessary to install a third loop, it must be placed exactly in the middle. Having calculated the distance, mark the boundaries of the third loop. Mark the locations and drill holes for the screws.
The second stage is cutting out the recesses for the hinges. The depth of the recess must exactly match the thickness of the loop. If the recess is larger, the door may become deformed during operation, which will lead to the need to replace the hinges and door. The chisel must be applied to the drawn line and carefully outline the contour, tapping the chisel with a hammer. Remove the first layer of wood. Then go over the outline again. In this way, remove several layers until the desired depth is formed.
The third stage is to similarly mark and make a recess for the hinges on the door.
Cutting a recess for hinges
At the fourth and final stage, you need to secure the hinges with self-tapping screws to the frame and door. It is difficult to install the door alone; ask for help to support the door.
If all the steps are done correctly, the installed door will last for many years, and the money saved on installation will be a pleasant reward for independent work. As you can see, installing mortise overhead hinges is not very difficult; every man who knows how to handle a simple plumbing tool can handle it. We wish you a successful renovation!
Subtleties of attaching a canopy to a box
There is an opinion that this is a difficult stage of installing hinges on an interior door with your own hands. Great precision is required here. If you make a mistake by a couple of millimeters and insert the hinge incorrectly, the work will be ruined. But there are two subtleties that will help you avoid mistakes at this stage.
It is not necessary to make a groove for the hinge card on the door frame element. Attaching the hinge without digging it into the jamb would be even more correct.
This will not only make the task easier, but will also provide an additional advantage.
The distance between the end of the canvas and the jamb should be 2-3 mm. If we do not prepare a seat on the box, then this distance will be equal to the thickness of the canopy card. That's what you need to achieve.
Marking
To mark the location for the hinge on the box, we will use a tape measure. On the side post of the assembled door frame, measure 203 mm from the top.
Marking the side post of the box. In the photo it is exactly 203 mm.
To attach the canopy to the canvas, we previously measured 200 mm. On the box we mark 3 mm more. This is the highest point for attaching the top hinge. Thanks to this, the side element will be 3 mm higher than the door leaf. Thus, we achieve a solution to the problem so that subsequently the distance between the canvas and the top of the box is also 3 mm. We simply screw the bottom loop on after the fact. There is no need to take any measurements.
Attaching the hinge to the box
We fasten it like on a door. We make marks for the screws, drill holes and fasten them. If you do not provide recesses for the screws, then when screwing them in, the element may burst.
These simple tips will help you cut hinges into an interior door yourself.
Related articles:
If you have never installed doors yourself, but repairs do not scare you, then here are a few basic points that you should know and which ones.
An example of how to quickly install a lightweight interior door with your own hands.
Let's look at and show you how to properly assemble an interior door frame with your own hands.
An example of self-assembly of doors for a wardrobe - photo instructions.
The kitchen is the most important place in the house. A pleasant environment allows you to create a cozy atmosphere and a favorable emotional background. Skillfully combining colors in.
We cut the hinges correctly
Milling
The first step is to prepare a small recess for the hinge overlay, which should be made manually using a chisel and hammer. The notch is knocked out by carefully tapping along the outer contour. The depth will depend on the thickness of the loop you need to measure.
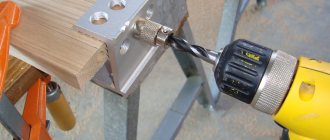
Next, special recesses are made to install hidden hinges. This operation is carried out using a drill and a special milling attachment. Before forming the recesses, carefully measure the height of the hinge without the lining - this is exactly the depth of the hole you will make in the box.
To do this, turn on the drill and, using gentle pressing movements, mill the end of the door strictly along the internal contour outlined in the previous step. After reaching the required depth, move on to the next contour and beyond.
Forming a recess for the overlay along the outer contour
Recesses must be made not only in the door leaf, but also in the frame, in a similar way. The entire operation, if performed carefully, will take you no more than one hour.
Screwing the hinges
After you have cut out the required number of recesses, clean their internal surfaces from knots so that they do not interfere with installation. Direct insertion of hidden loops is carried out as follows:
- Insert the loop into the resulting recess and seat it firmly in the socket.
- Use a screwdriver to drill holes for the screws.
- Insert the screws into the holes formed and carefully tighten them, at the same time making sure that there is no distortion - the hinge should be installed evenly.
- Repeat the above steps with all hidden hinges to be installed.
The installation of hinges on the door frame is carried out after the door leaf has been placed and firmly secured in the opening of the frame using wooden wedges. The process of attaching the hinges is no different from the above.
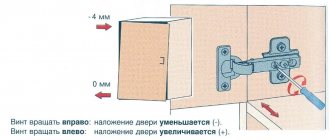
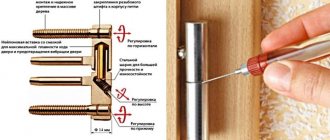
After installation is complete, proper adjustment of the hidden hinges is necessary. So let's figure out how to do it.
How to cut a recess for door hinges?
Do-it-yourself repair is a very labor-intensive process. For a successful result, patience, accuracy and attentiveness are required. Self-installation of an entrance or interior door involves several steps, one of which is cutting out a recess for door hinges. Door hinges hold the door together and their correct installation determines how it will open and close.
- Preparation for installation
- Selection of door hinges
- Installation
- Installing hinges: video
- How to install hinges in a door: photo
Leveling and Adjustment
Furniture fastenings need adjustment. To do this, during the installation process, their fixation in depth and distance is checked. This can be done with horizontal or vertical position of the cabinet parts. After assembling the furniture, all preliminary calculations will turn into results, so it is important to spend more time on marking and connection parameters in advance.
When choosing, you must first of all pay attention to the strength of the product; it should serve throughout the entire life of the furniture.
After installing the fasteners on the cabinet doors, you must carefully try the doors against the sides so that they match exactly. Mark the joints with a pencil. Fix the door and do fastening work on both sides. It is important that the accuracy of all cabinet parts is one hundred percent. Finish assembly and check operation.
When opening and closing for the first time, the doors may move somewhat stiffly if the hinges are not yet lubricated and developed.
After attaching the hinges to the cabinet is completed, it is recommended to drop a little machine oil inside the mechanism. Then you need to wipe the surface with an absorbent cloth.
Check that all elements are working properly.
For a cabinet made of chipboard, it is better to take wide hinges, since the base material can crumble.
The better quality all the elements of the assembled furniture are, the more reliable their operation will be.
When installing hinges on cabinet doors, do not forget that after a while the doors may sag under their own weight, especially if they are often left open. Therefore, it is necessary to periodically strengthen the hinges by tightening the screws. In modern fasteners this is easy to do - there is an additional recess in the oval part.
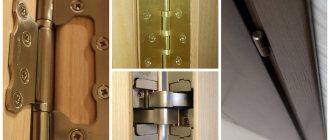
Types of loops
Before buying hinges, you need to understand their features and the designs on the market. This will allow you to choose the right model for your particular case.
First of all, it matters which way your wooden doors open. So, there are loops:
If you have not yet fully clarified this point for yourself, take universal ones.
To determine the type, you need to stand on the side in which the canvas should swing open, and see where its movement will be directed (to the right or left) - the hinges are selected accordingly.
They also differ in material:
- brass (they are flexible and therefore not suitable for heavy sashes);
- alloy (also not very strong);
- steel (the most reliable and durable).
- the most popular type of hinges is card hinges, with fastening plates on the sides;
- corner ones are used for pendulum-type doors;
- screw-in (screw-in) plates do not have, but are equipped with threaded pins (suitable for lightweight MDF panels);
- secret – used on entrance doors and not visible from the outside;
- Italian ones are very reminiscent of the furniture we are used to.
They are also distinguished by the type of installation:
- invoices are mounted directly on the surface of the canvas and box;
- mortise ones require flush installation in special recesses;
- screw-in ones only need holes in both the frame and the sash itself.
Characteristic
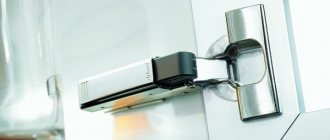
Furniture hinges differ in cup size. The fitting size of 26 mm is called mini. This option is used for lightweight doors. The sheer part of the fasteners is made of plastic. It is inserted into a hole whose size is 26 mm. The cup is secured with a plug on two screws.
You can additionally purchase decorative overlays for the loop. They have different shapes. Overlays perform an aesthetic function. They cover the protruding parts of the fittings, and the door has a finished look. In order for the hinges to last a long time, it is important to ensure high-quality installation with careful drilling.
Step-by-step installation of door hinges with your own hands
It should be noted that inserting door hinges is, in principle, a simple job, but it requires precision and accuracy. You will also need a rather limited set of tools for this. How to do everything correctly is described in this article.
Typically, assembled doors do not require the installation of locks and hinges - everything is already done at the factory. Even if a disassembled block is purchased, it is not difficult to order such a service in the carpentry shop of a construction supermarket.
There, the craftsmen use a special machine and do the work as carefully as possible, and for a relatively low fee. Thus, when there is no self-confidence, we advise you to choose the option mentioned above - inept actions often lead to damage to both the doors and the frame.
Sequential stages and sizes for additive
The additive scheme consists of several successive stages. First you need to do some preparation. The working surface must be flat and free of dirt. You can place a rubber sheet, stretch film, or polyethylene foam under the door. To prevent the facade from changing position, you can use clamps. Before applying the additive, you should take care of safety precautions. It is important to wear protective gloves and goggles.
Marking
Next comes the marking. This is an important event that determines the accuracy of installation and functionality of the door. You can take a ready-made drawing of the door for the hinges or independently calculate the position of the fittings.
If you calculate the dimensions for the additive yourself, you need to rely on several rules. So you need to retreat 1.1-1.2 cm from the edge. This is an important accuracy criterion that must be observed. The first and last fasteners should be located at a distance of 7-15 cm from the sides of the doors. The number of hinges is determined by the dimensions of the facade.
Installation
After marking is completed, they proceed to drilling. It is prohibited to use high speeds when performing manipulations. The optimal amount is 1500 rpm. Otherwise, the material will begin to burn and the cutter will become dull. If a hand drill is used, the movements should be smooth and of small amplitude. This will help improve sampling efficiency.
The depth of the hole can only be controlled manually. For this reason, you need to periodically stop the drilling process to measure the depth. The optimal depth is on average 1.2 cm.
Then they move on to the simplest stage - fixing the loops. The fastener is inserted into the prepared hole. Then the bowl is leveled using a square. Places for fastening are marked with a marker. Fixation is carried out with two self-tapping screws. It is necessary to perform core punching first.
If there are minor inaccuracies, you should not pay attention to them. The permissible error is up to 1 mm.
If you have experience with additives, you can screw on the fasteners without preliminary marking. An experienced craftsman can use a square for work.
This primitive, simple additive can be done with your own hands in a quiet home environment. Mechanized work requires special equipment and skills to work with professional tools. You can make a special machine for additives yourself or purchase a cheap vertical type option. Working with such equipment will reduce time and labor costs. It will be possible to perform the additive faster and better.
Loop selection
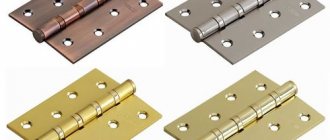
Brass hinges
Before purchasing hinges, you need to decide which ones will suit your door; they are divided into three types.
- Brass. Such hinges are widely used because brass, due to its ductility, is easily processed: coated with chrome or polished.
- Brass plated. As a rule, such hinges are made of various alloys and coated with brass plating, as well as other compounds that imitate by similarity: chrome, bronze or gold.
- Steel. These are the most reliable and high-quality hinges, because unlike brass, the hinges of which wear off over time, steel hinges are not subject to this process, and therefore they can be considered eternal.
Steel door hinges
When choosing loops, you need to take into account some factors that determine the duration of their operation.
Firstly, the weight of the door. Usually, two hinges are enough for one door, but if the door is made of solid wood, then it is correspondingly heavier, which means it is better to install three hinges.
Secondly, the bearings are in the hinges. This hinge design will not creak after long-term use.
Secondly, depending on the side of the door opening, the hinges can be left-handed and vice versa.
How is it safe to add an additive to 16mm laminated chipboard for 35mm hinge cups?
vlad-mal wrote: Otherwise!
If only there were hinges, I might not have bothered. In addition to the hinges, we have to make several hundred holes for Rafix-20 type ties:
However, it’s not easy with the hinges either: I bought 35 mm (“frog”) hinges from Hafele, and their fit is as much as 13.5 mm. With a machine it is more difficult to ruin a part, IMHO.
I wanted to buy just a stand for a drill, but the Encore store only had Sparky-43, for as much as 2,700 rubles. And then - I paid a little extra - and here is the finished device.
When I finish the furniture, I’ll sell it to someone else at half price. Or I'll give it to someone. Or I’ll put it on a shelf in a cabinet. You never know.
On the way from home to the indicated store, I stopped at a couple of shops selling tools (including OBI): everywhere the same, only even worse than the Encore Corvette: plastic pulleys (this one has luminaire), without a magnetic starter, without a vice. Well, it’s 1000 - 1500 rubles more expensive than this one.
The machine, by the way, works much quieter than a drill. I set it to minimum speed - wow...like a Forstner entering the stove...beautiful...
Damn... I put it on my leg poorly when I carried it into the apartment: it still hurts, even though it’s only 20 kg. In general, everything is fine.
Today I quickly decided to drill a couple of 35mm holes in the Egger chipboard. For heating pipes (pass through the cabinet). “Quickly” means without a machine, with a drill. After working in the previous room, the machine is temporarily standing in the corridor; I was too lazy to drag it into the room: it’s already five meters... I used carbide “Fostners” with a short nose produced by Anchor, which I wrote about earlier. I wish I hadn't done this. Firstly, due to the short nose, the drill must be held strictly perpendicular to the surface being processed, otherwise it will easily go to the side: Egger chipboard has a very hard surface, like marble, or harder. I ruined the surface near one hole, it’s good that the part will be in an inconspicuous place, I coated it with sealant to match the color. Secondly, the minimum speed of the drill is many times higher than the recommended 450 rpm, which is also bad. Drills overheat.
I first slightly drilled the second hole with a “regular” (not carbide) forstner, with a long nose, and then with a carbide one. It worked, although it took a long time and careful drilling. But the drill was very dull (the one that is not carbide).
It would be better if I wasn’t lazy and did everything with a machine.
But once upon a time I used these drills to drill IKEA kitchen laminated chipboard without any problems... it was definitely not an Egger.
Colleagues, for work I recommend using only carbide drills and even the cheapest Chinese ones (like mine), but drilling machines: they work quietly, accurately, and are extremely convenient. Once, when testing the machine, I managed to slightly drill such a carbide drill into the cast iron work table of the drilling machine - and nothing, the cast iron crumbled, and the drill drilled perfectly into the chipboard further. You don’t need to do this, of course, but it’s worth keeping in mind that the carbide soldering is of normal quality.
